

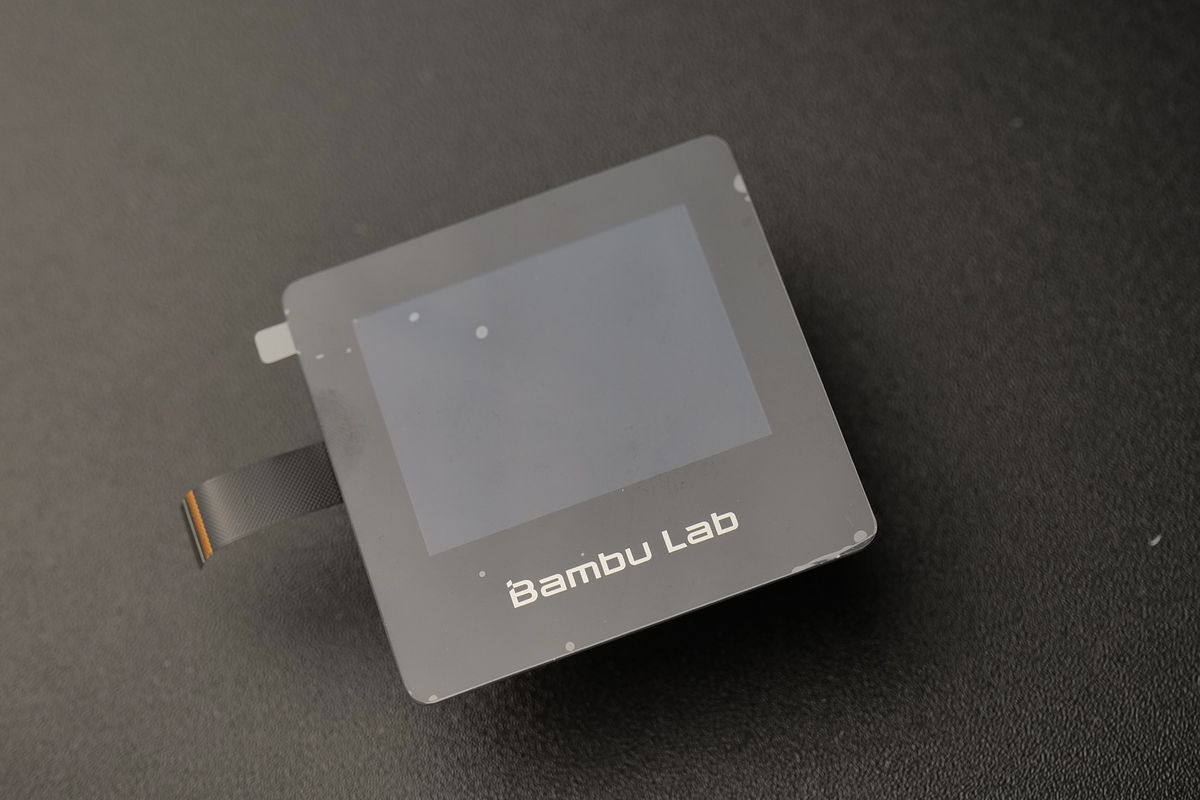
Touch Screen for Bambu Lab-A1 mini
No se pudo cargar la disponibilidad para recoger
Utilice este texto para fomentar la comunicación o promover el intercambio en las redes sociales.
Application: Designed for A1 Mini printers, suitable for replacing worn or damaged touch screens, supporting printer control, menu navigation, and routine maintenance applications.
Material & Structure: Built with a durable display panel and precision-matched connectors, featuring a compact 2.4-inch design that fits securely into the printer for stable operation.
Performance: Provides responsive touch input with clear screen visibility, enabling smooth parameter adjustment, status monitoring, and efficient interaction throughout the printing process.
Installation & Maintenance: Designed for direct replacement with matching mounting points and interface connections, allowing convenient installation, quick removal, and simplified maintenance procedures.
Extended Use: Suitable for display replacement, printer upgrades, preventive maintenance, and long-term equipment servicing, helping maintain reliable operation of compatible A1 Mini printing systems.
2.4-inch IPS capacitive touchscreen which connects to the Mainboard. Users can control the printer through the touch screen interface.
Compatibility
A1 mini
Touchscreen Replacement Guide - A1 mini
This guide shows how to replace the Touchscreen on the A1 mini
In this guide we will show the process of replacing the Touchscreen on the A1 mini
When to use?
This guide should be used if the Touchscreen of the A1 mini is faulty, and needs to be replaced.
Common issues that are caused by the A1 mini Touchscreen are:
Printer screen is not turning on.
Touches are not registered on the screen.
Recommended by Bambu Lab Customer Support.
Tools and materials needed
H2.0 hex wrench
H1.5 hex wrench
20 minutes of your time
Safety Warning
IMPORTANT!
It's crucial to power off the printer before performing any maintenance work on the printer and its electronics, including tool head wires, because leaving the printer on while conducting such tasks can cause a short circuit, which can lead to additional electronic damage and safety hazards.
When you perform maintenane or troubleshooting on the printer, you may be required to disassemble some parts, including the hotend. This process can expose wires and electrical components that could potentially short circuit if they come into contact with each other or with other metal or electronic components while the printer is still on. This can damage the electronics of the printer and cause further damage.
Therefore, it's essential to switch off the printer and disconnect it from the power source before doing any maintenance work. This will prevent any short circuits or damage to the printer's electronics. By doing so, you can avoid potential damage to the printer's electronic components and ensure that the maintenance work is performed safely and effectively.
Steps to remove the old Touchscreen
1. Remove the printer's bottom housing cover
Place the printer on its side, with the Z axis pillar facing the table.
Then, remove the 16 screws holding the bottom cover in place, to access the MC board fan.
Please note that screws 15 and 16 are different, so keep track of them for when you will re-assemble the bottom cover.
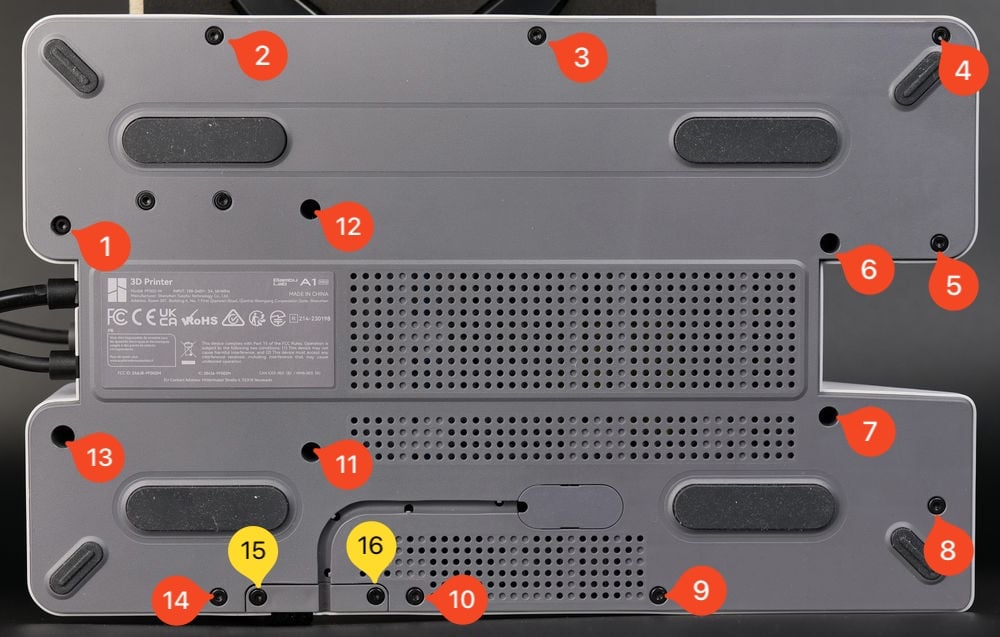
After removing the screws, gently pry out the plastic bottom cover.
You can start from the top right side, and gently work your way around the printer until the cover gets loose.
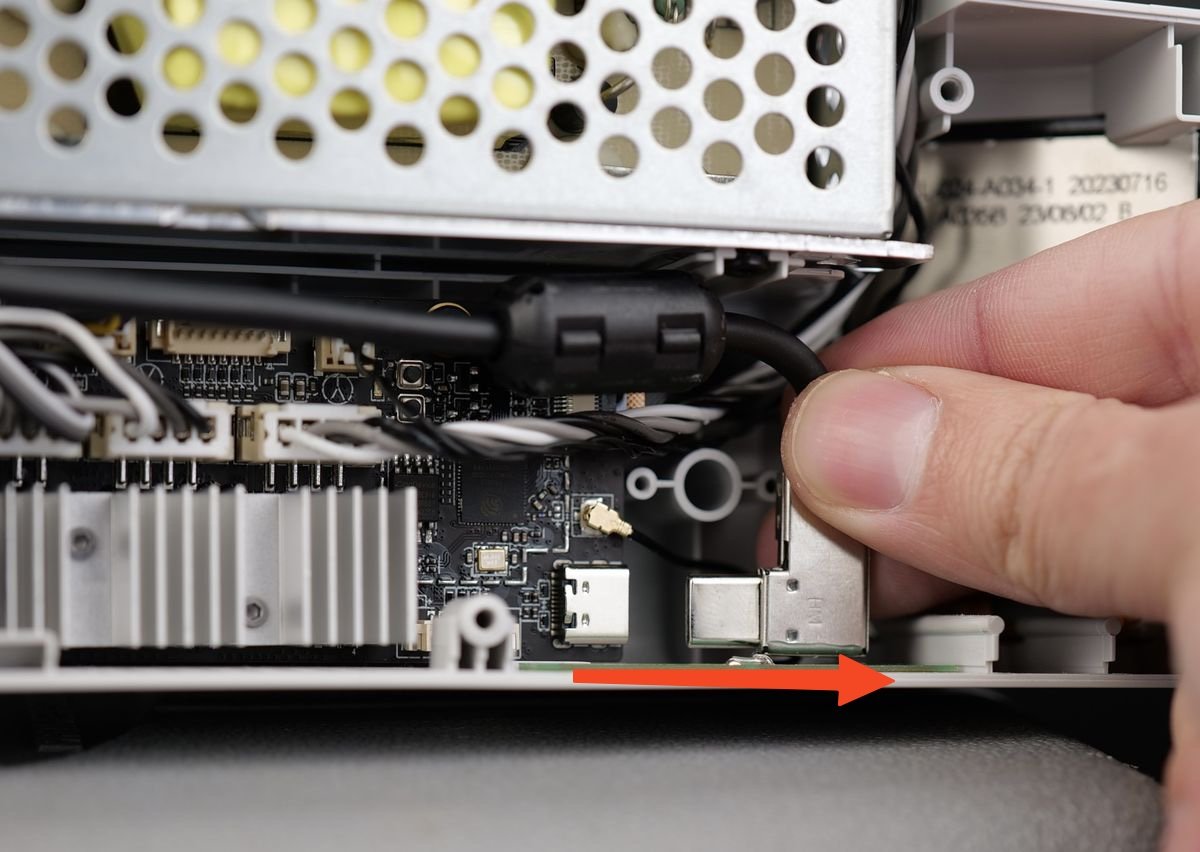
2. Remove the USB C cable bracket and disconnect it
With the cover removed, we can proceed in removing the USB C cable bracket as shown in the image below.
This is used to hold the USB cable securely attached to the main board.
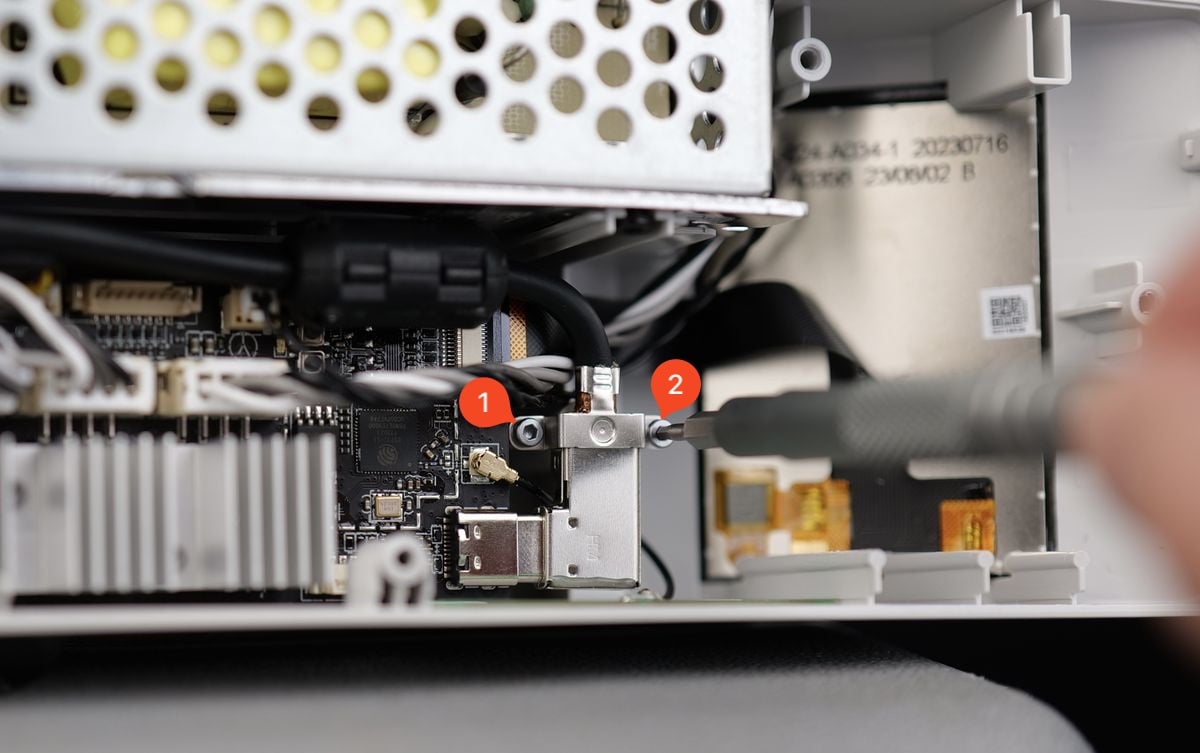 With the screws removed, you can gently disconnect it. Please make sure to pull towards the right, and not bend the cable as there is a small risk of damaging the USB connector on the board.
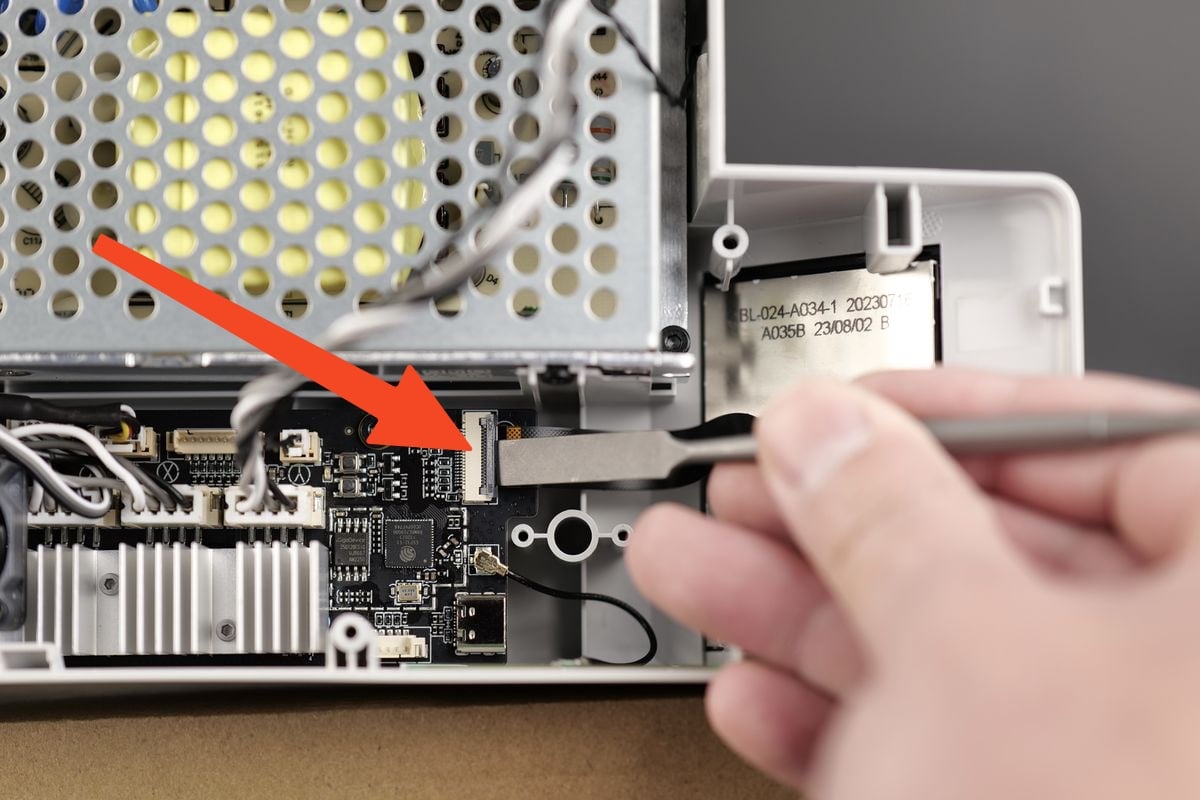
3. Disconnect the ribbon cable of the Touchscreen
In the next step, gently pull the plastic clip holding the ribbon cable towards you. It will release the ribbon cable.
Take extra care at this step. The clip can be easily damaged.
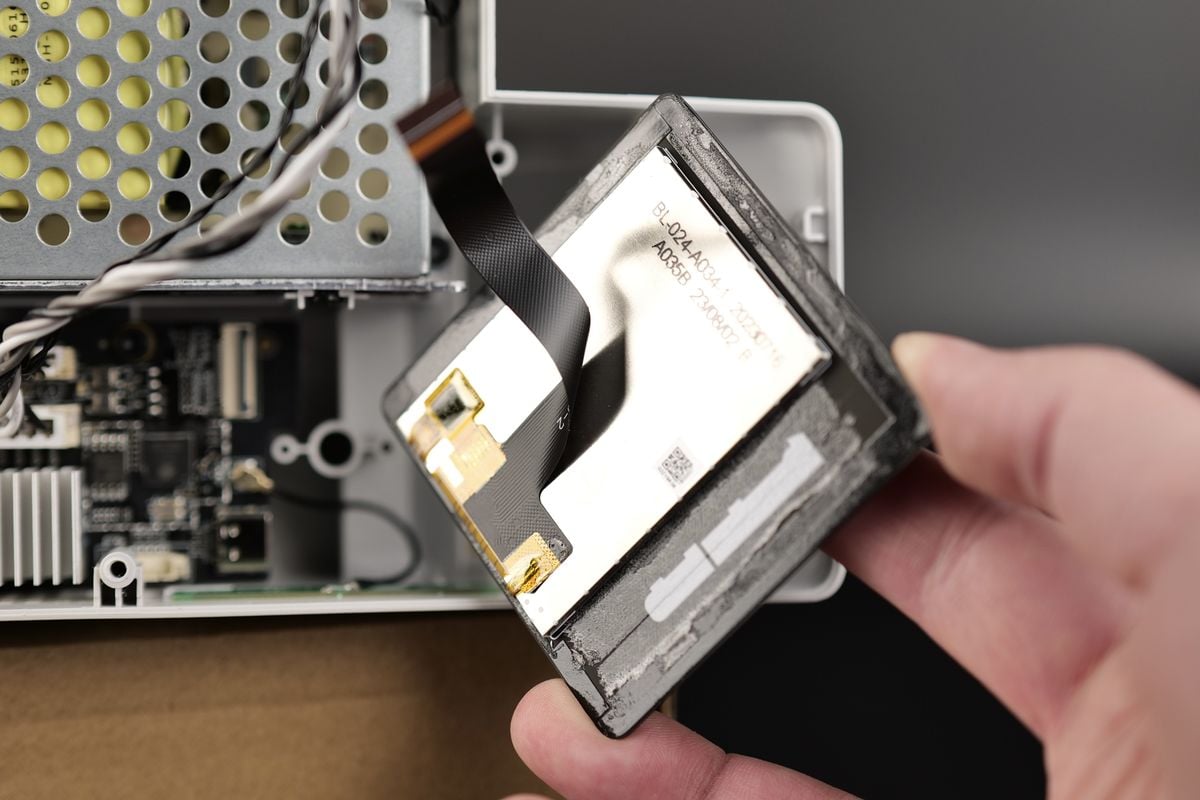
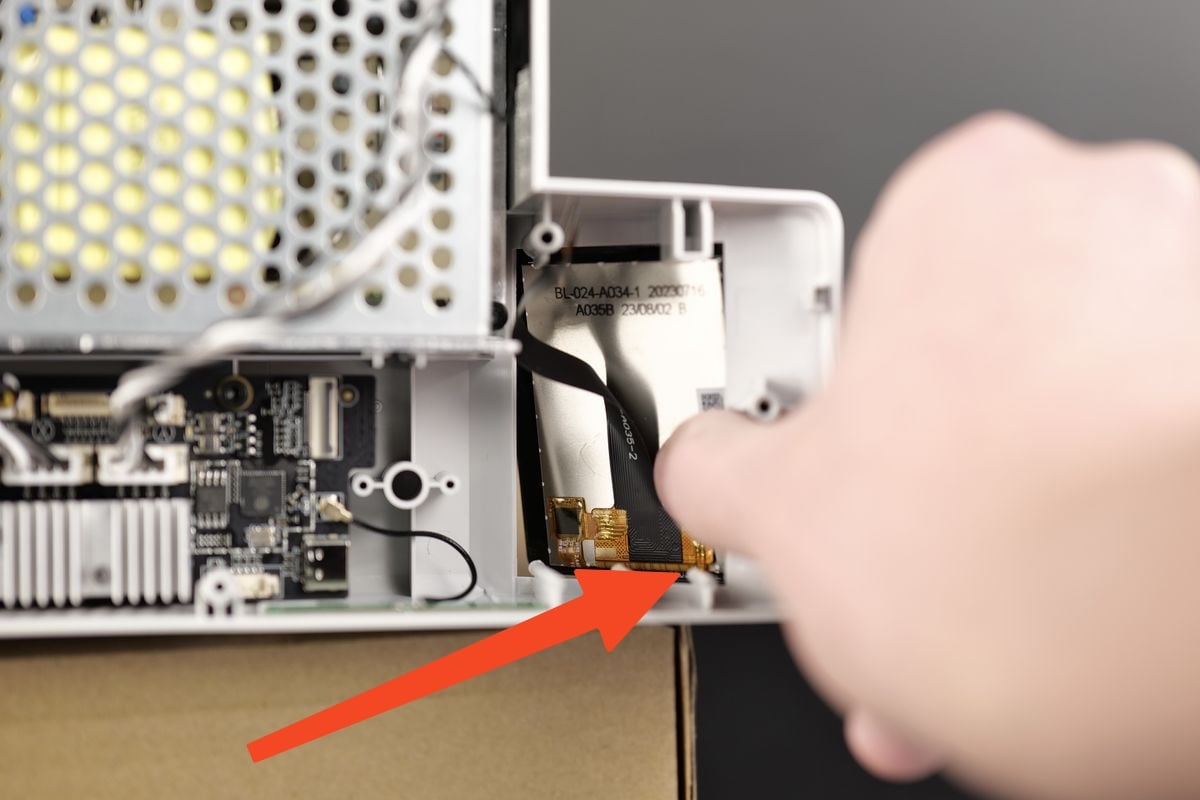
4. Push the screen out
The A1 mini touchscreen is held in place by double-sided tape. Gently push the screen away from the printer.
The best way to do it is to push in the bottom right corner as shown in the image below.
 The screen is now removed