


i7 Toolhead Filament Cutter for Creality
No se pudo cargar la disponibilidad para recoger
Utilice este texto para fomentar la comunicación o promover el intercambio en las redes sociales.
Official Original Accessories: This cutter kit is an original accessory specially designed for Creality SPARKX i7 3D printer. The precise dimensions ensure a perfect fit without loose gaps or installation difficulties, guaranteeing stable and accurate cutting every time.
Tool‑Free Quick Replacement: The cutter assembly adopts a tool‑free design. You can replace the cutter with your bare hands without any tools, completing the full maintenance process within seconds.
Perfect Compatibility: Perfectly compatible with the 3D printer Creality SPARKX i7, ensuring smooth filament replacement during multi-color printing and effectively improving overall printing efficiency.
Durable And Reliable: SPARKX i7 filament cutters are made of high-quality hardened alloy, which is super durable and can remain extremely sharp even after thousands of clean and precise cuts, wear-resistant and not easy to curl.
Precise Cutting: SPARKX i7 filament cutter responds accurately to printing instructions, completing the cut at the exact moment of color switching; This avoids filament residue or premature cutting that could cause printing interruptions, ensuring smooth multi-color transitions.
Easy to Install and Replace: The filament cutter can be replaced in just a few simple steps; Simply push the cutter lever switch to replace the cutter and then close the cutter lever.
i7 Series Toolhead Filament Cutter Replacement
Guide
i7 Toolhead Filament Cutter
The filament cutter is installed on the left side of the Extrusion Assembly. When the Toolhead moves to the far left, the Cutter Arm is actuated by a lever mechanism, driving the internal cutter blade to cut the Filament. After cutting, the cutter automatically returns to its original position under the magnetic force of the built-in magnet.
This guide explains how to replace the i7 Series Toolhead Filament Cutter.
When to Replace
The cutter is damaged or becomes dull;
Abnormal filament cutting occurs (it is recommended to run Cutter Detection first);
Replacement is recommended after more than six months of use.
Required Tools
New i7 Toolhead Filament Cutter (purchase link);
Tweezers or any Hex Wrench.
Safety Preparation
Power off the printer and unplug the Power Cable;
Before operation, make sure the Hotend and Heated Bed have cooled down to avoid accidental contact with hot components.
Replacement Steps
Remove the Old Cutter
Remove the Toolhead Front Cover to expose the Toolhead Assembly;
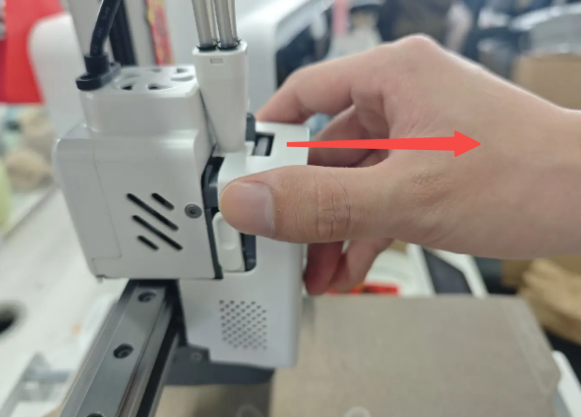
Locate the latch in front of the Cutter Arm on the left side. Push the latch upward; the cutter arm will automatically spring open;

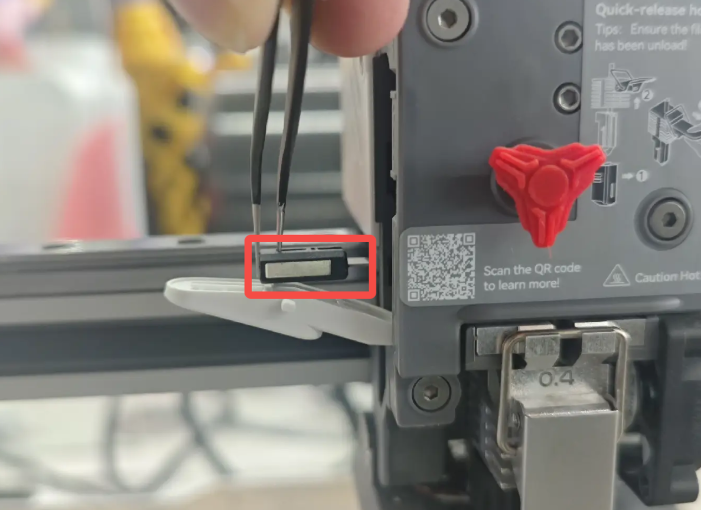
Using tweezers or a hex wrench, slide the cutter out from the rear toward the left side; Warning: The blade is sharp. Handle with care to avoid injury.

Install the New Cutter
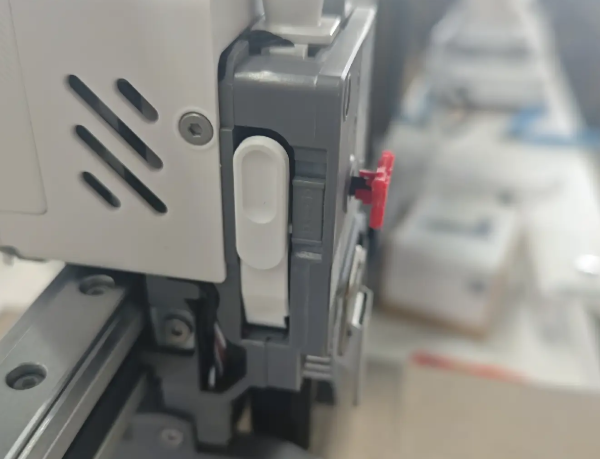
Prepare the new cutter and make sure the magnet side faces forward;
Insert the cutter into its original position. The cutter will be pulled into place by magnetic force;

Push the cutter arm latch upward, swing the Cutter Arm back into position, then release the latch to ensure it is securely locked;
It is recommended to run Cutter Detection to ensure the cutter is in the optimal position.
