H2D/H2C Toolhead Enhanced Cooling Fan for Bambu Lab
No se pudo cargar la disponibilidad para recoger
Utilice este texto para fomentar la comunicación o promover el intercambio en las redes sociales.
[Eliminates Heat Creep & Clogging] Engineered for Bambu Lab H2D and H2C, this enhanced toolhead cooling fan directs targeted airflow to the hotend heatsink and extruder assembly, effectively eliminating heat creep and significantly reducing clogs and extrusion failures during high-temperature printing with ABS, PC, and nylon.
[Raises Ambient Temp Tolerance to 33°C] Unlike standard hotend fans, this upgraded extruder cooling fan increases the maximum recommended operating ambient temperature from 30°C to 33°C, ensuring reliable performance inside enclosed printer chambers or heated workshops while preventing overheating-related print failures.
[Smart Temperature Control] This intelligent toolhead fan automatically adjusts its speed based on real-time thermal conditions, ramping up when the hotend or extruder reaches critical temperatures to maintain precise thermal regulation and quieting down during normal operation to extend component lifespan.
[Essential for Engineering-Grade Filaments] When frequently printing high-temp engineering-grade filaments, this high-speed hotend cooling fan is a must-have upgrade—actively preventing extruder overheating and ensuring consistent melt flow and layer adhesion to push your H2 series printer to higher performance levels.
[Plug-and-Play Drop-in Replacement] Designed as a direct plug-and-play upgrade, this extruder and hotend cooling fan fits seamlessly into the existing toolhead assembly with no soldering or case modifications, offering full compatibility with Bambu Lab H2D (including Pro models) and H2C as an easy maintenance or performance-boosting replacement.
Replace H2D & H2C Toolhead Enhanced Cooling Fan
This page introduces how to replace H2D Pro Toolhead Enhanced Cooling Fan
Toolhead Enhanced Cooling Fan
The toolhead enhanced cooling fan can remove the heat from the extruder and hotend heat sink. Through intelligent temperature control, it can improve the clogging and extrusion blockage that may be caused by harsh working conditions, and increase the recommended working environment temperature of the printer by 3°C.
Applicable models of printers
H2D Pro, H2D,H2C
When to use
Install a toolhead enhanced cooling fan for H2D
H2D Pro toolhead enhanced cooling fan failure
Safety Warning
IMPORTANT!
It's crucial to power off the printer before conducting any maintenance work, including work on the printer's electronics and tool head wires. Performing tasks with the printer on can result in a short circuit, leading to electronic damage and safety hazards.
During maintenance or troubleshooting, you may need to disassemble parts, including the hotend. This exposes wires and electrical components that could short circuit if they contact each other, other metal, or electronic components while the printer is still on. This can result in damage to the printer's electronics and additional issues.
Therefore, it's crucial to turn off the printer and disconnect it from the power source before conducting any maintenance. This prevents short circuits or damage to the printer's electronics, ensuring safe and effective maintenance. For any concerns or questions about following this guide, we recommend submitting a technical ticket regarding your issue and we will do our best to respond promptly and provide the assistance you need.
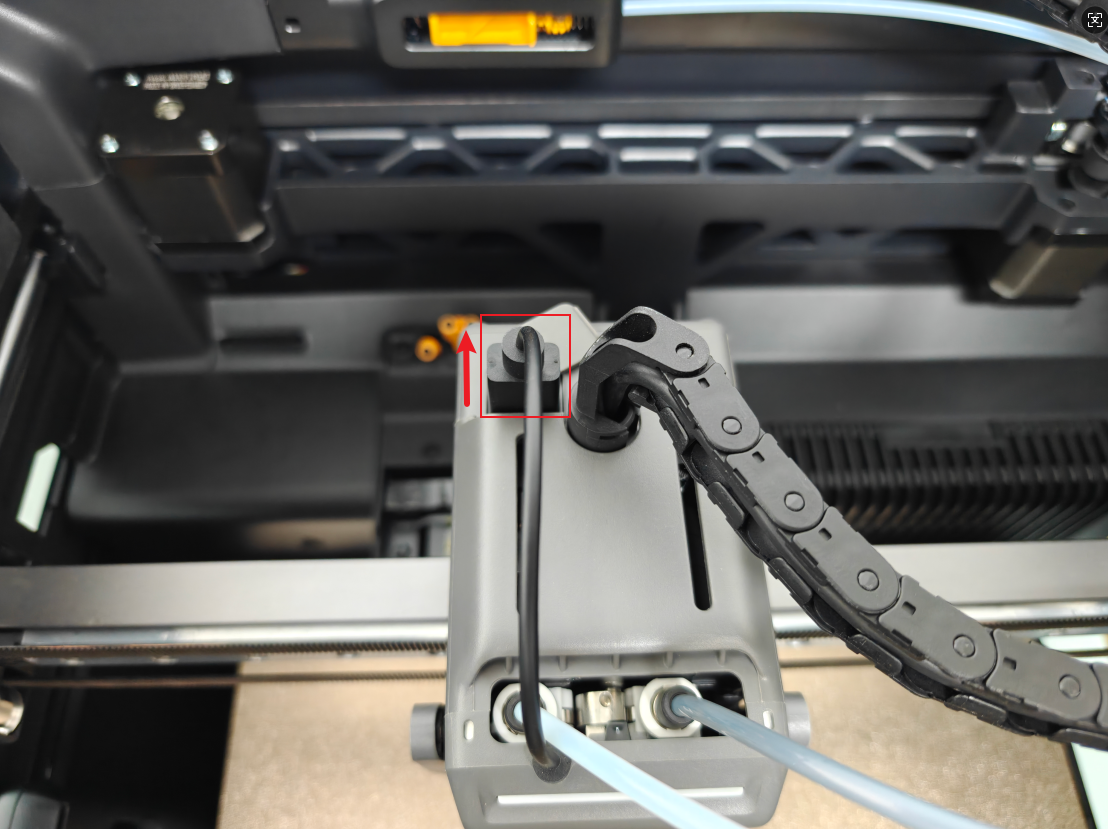
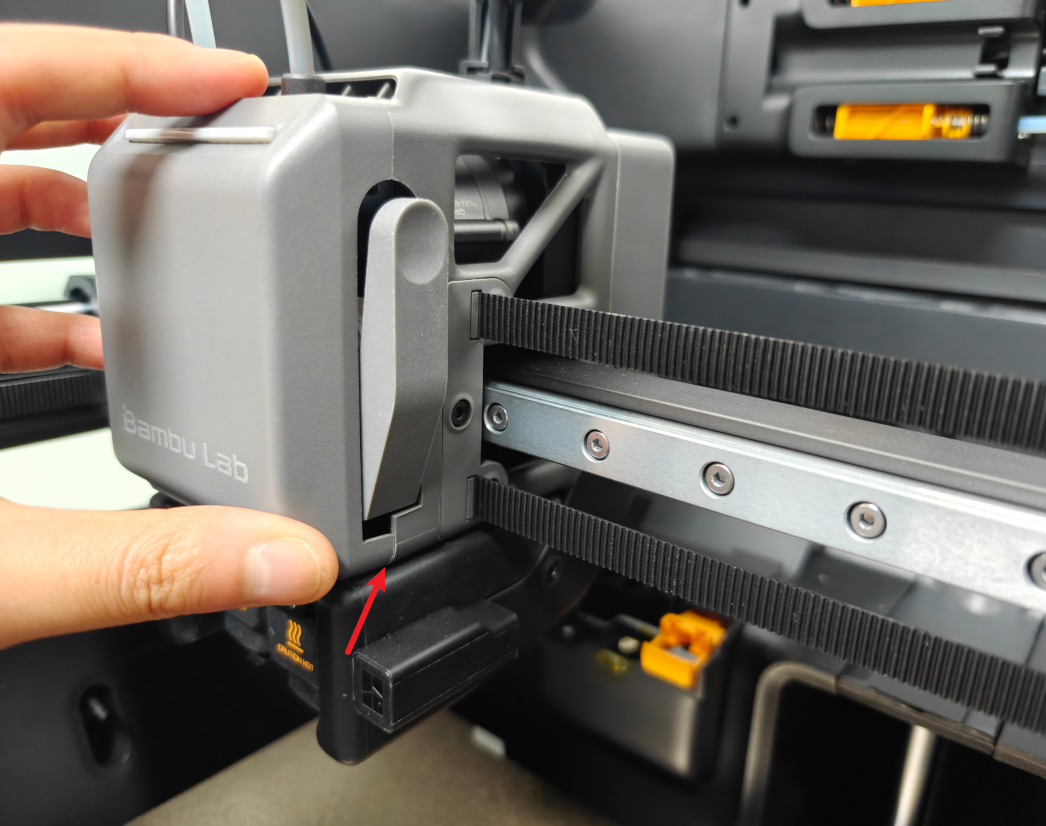
Remove Toolhead Enhanced Cooling Fan
Pull up the fan connector to disconnect it;
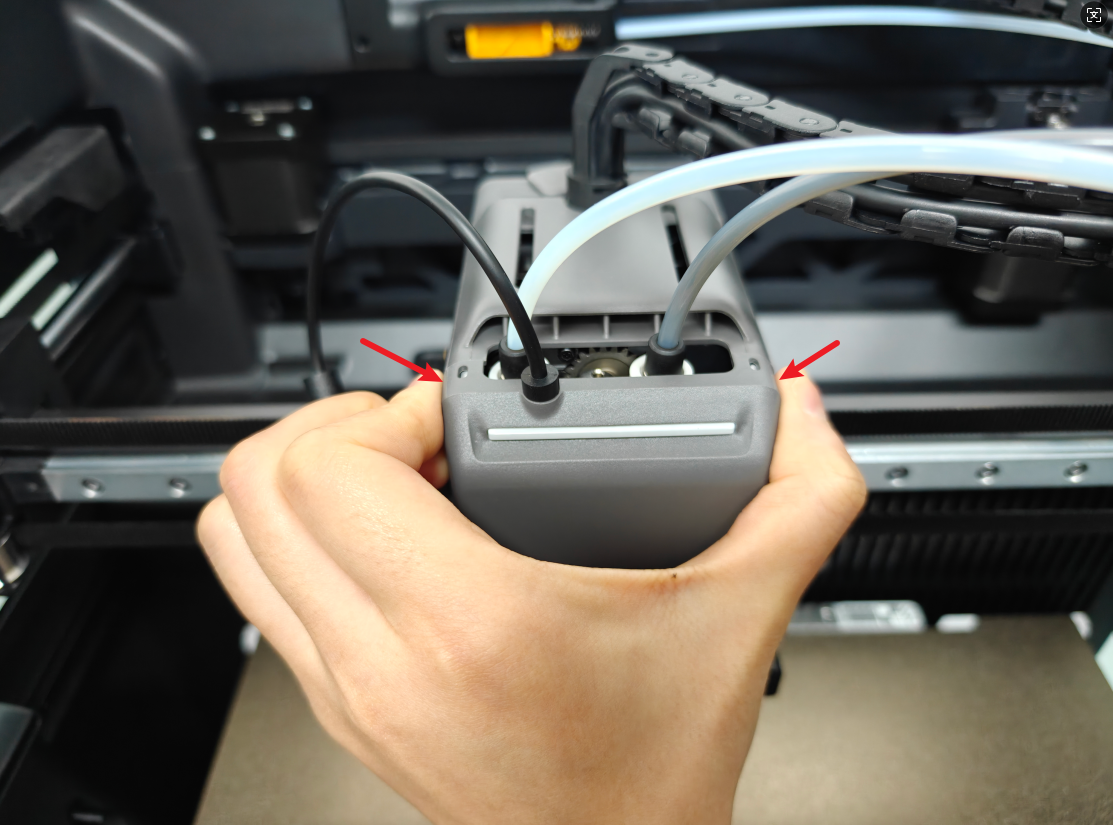
Grasp the top of the toolhead enhanced cooling fan; lift upward to remove it.
 Note: If the socket on the toolhead is not used for a long time, it is recommended to cover it with a cover to prevent dust.

Install Toolhead Enhanced Cooling Fan
Align the two vacant holes of the fan with the two positioning buckles on the left and right above the extruder, and snap the fan in place;
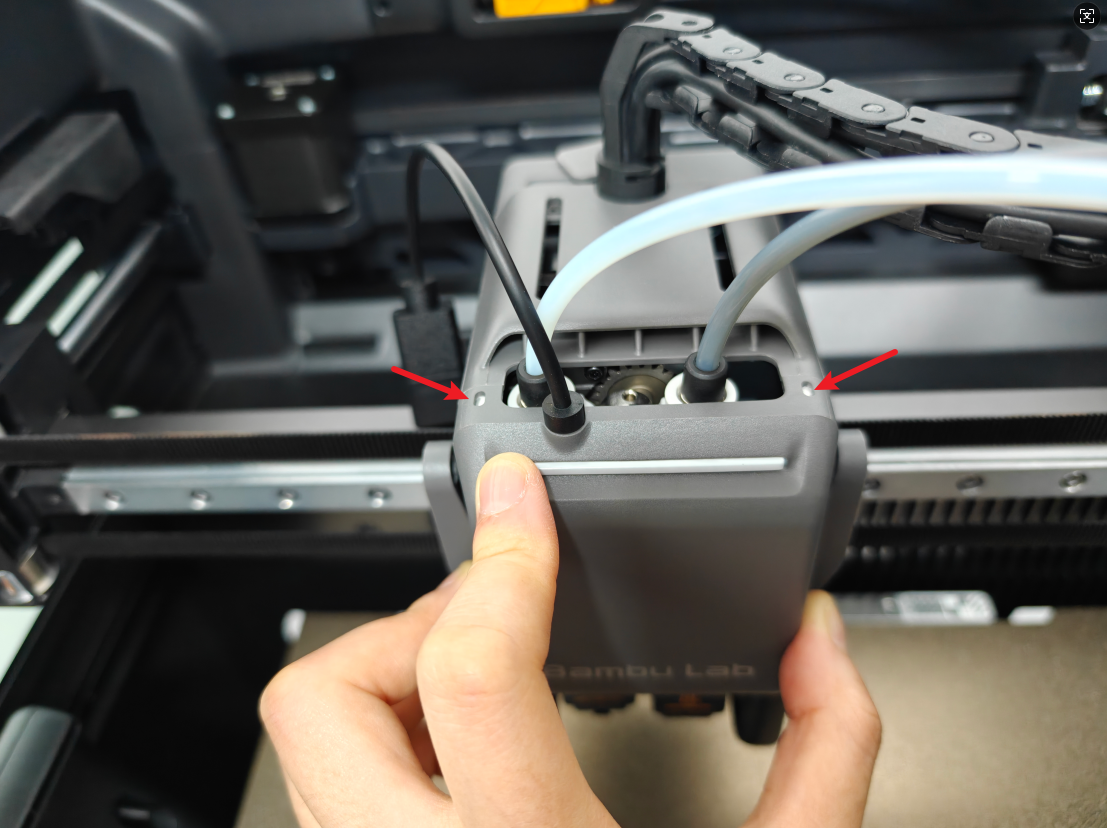 Hold the lower part of the fan and push it back to install the fan in place, so that there is no gap between the fan and the front cover of the extruder.
 When inserting the fan plug, please note that the fan plug is directional and the direction of the plug and the socket must be aligned according to the pinhole before insertion.
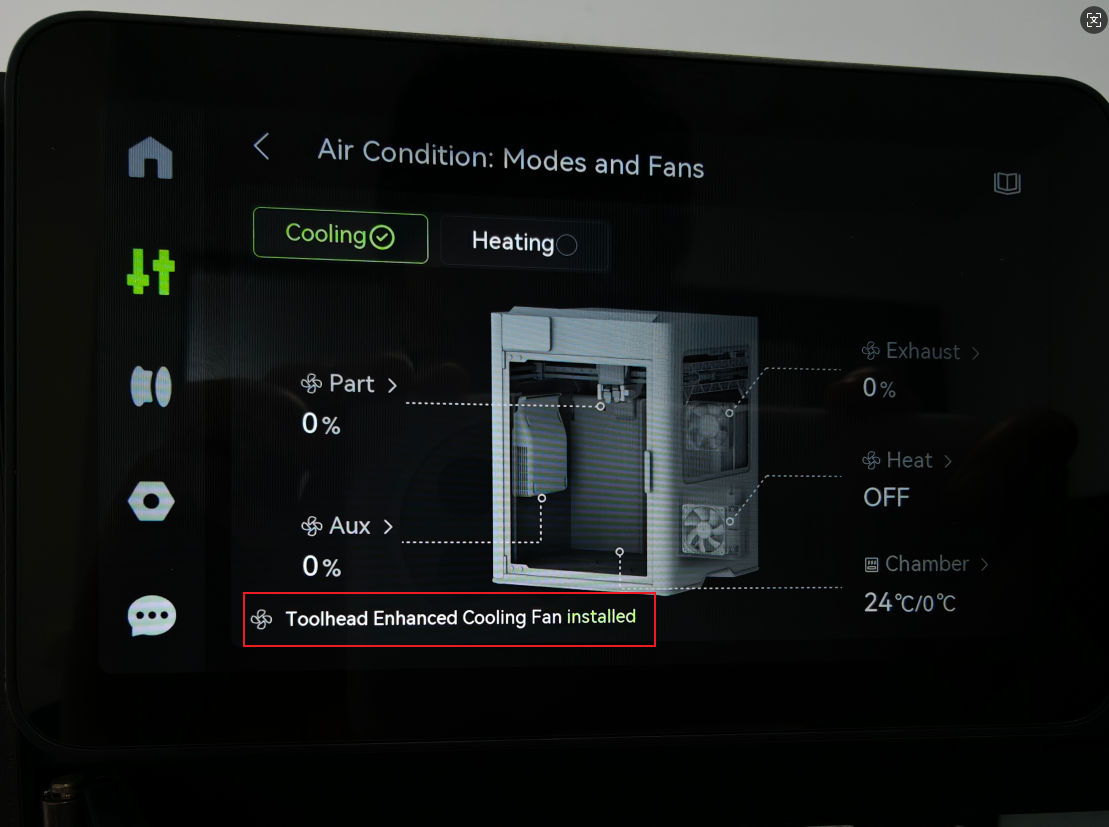
 Verify the Functionality
Connect the power supply and turn on the printer, and check if this page indicates that the toolhead enhanced cooling fan is installed.