


for Bambu Purge Wiper Assembly -P2S
No se pudo cargar la disponibilidad para recoger
Utilice este texto para fomentar la comunicación o promover el intercambio en las redes sociales.
The purge wiper assembly is installed above the printer’s inner frame and is used to eject the purged filament generated during filament changes.
[Precise Printer Compatibility] Engineered to fit specific 3D printer series, ensuring seamless installation and alignment with the printer’s purge system without modifications.
[Effective Residue Removal] Wipes away excess filament residue from the nozzle during purging, preventing stringing and ensuring clean prints.
[Durable Wear-Resistant Material] Crafted with robust materials to withstand repeated wiping cycles, maintaining performance for long-term use in frequent printing.
[Easy Direct Replacement] Aligns with mounting points, allowing quick and hassle-free replacement of worn wipers without specialized tools or technical skills.
[Protects Nozzle & Prints] Prevents filament buildup on the nozzle that can cause defects, safeguarding both the printer component and the quality of your projects.
Purge Wiper Assembly Replacement Guide for the P2S
Required Tools and Materials
New purge wiper assembly
H2.0 hex wrench
Safety Warning
IMPORTANT!
Always power off and disconnect power on the printer before performing maintenance work. Not doing so means there is a risk of electric shock, short circuit, and damage to the printer or surrounding area.
When a maintenance task necessitates the printer being powered on, use insulated gloves for safety and pay special care not to pinch, damage, or put pressure on any exposed wires, connectors, or circuit boards. Additionally, the nozzle can be extremely hot so never touch it with exposed skin.
Removing the Purge Wiper
Step 1: Remove the Rear Panel
Refer to this guide to remove the PTFE tube bracket, buffer, and rear panel: Replacement of P2S Rear Panel
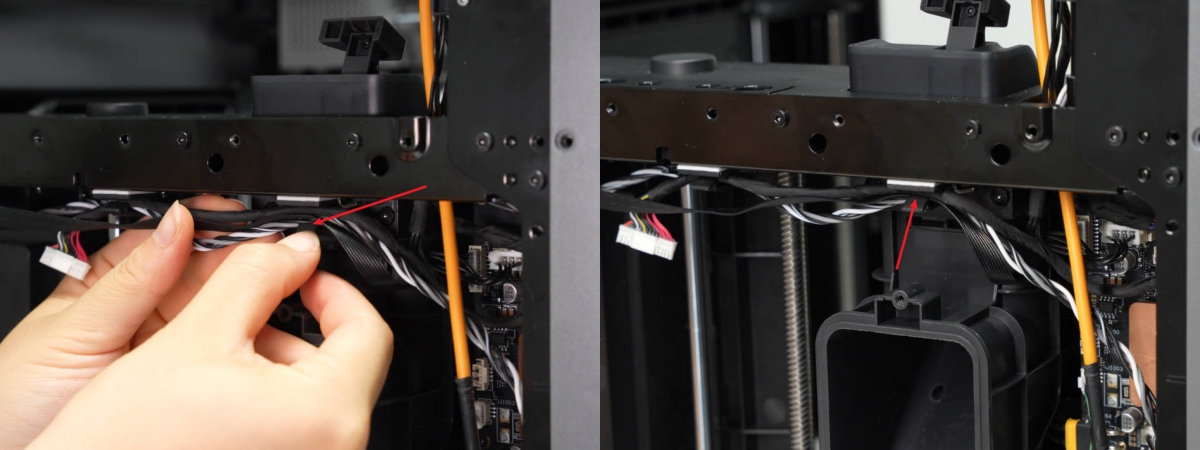
Step 2: Release Cables
Release the cable clips and remove the cables to expose the two screws securing the purge wiper assembly.

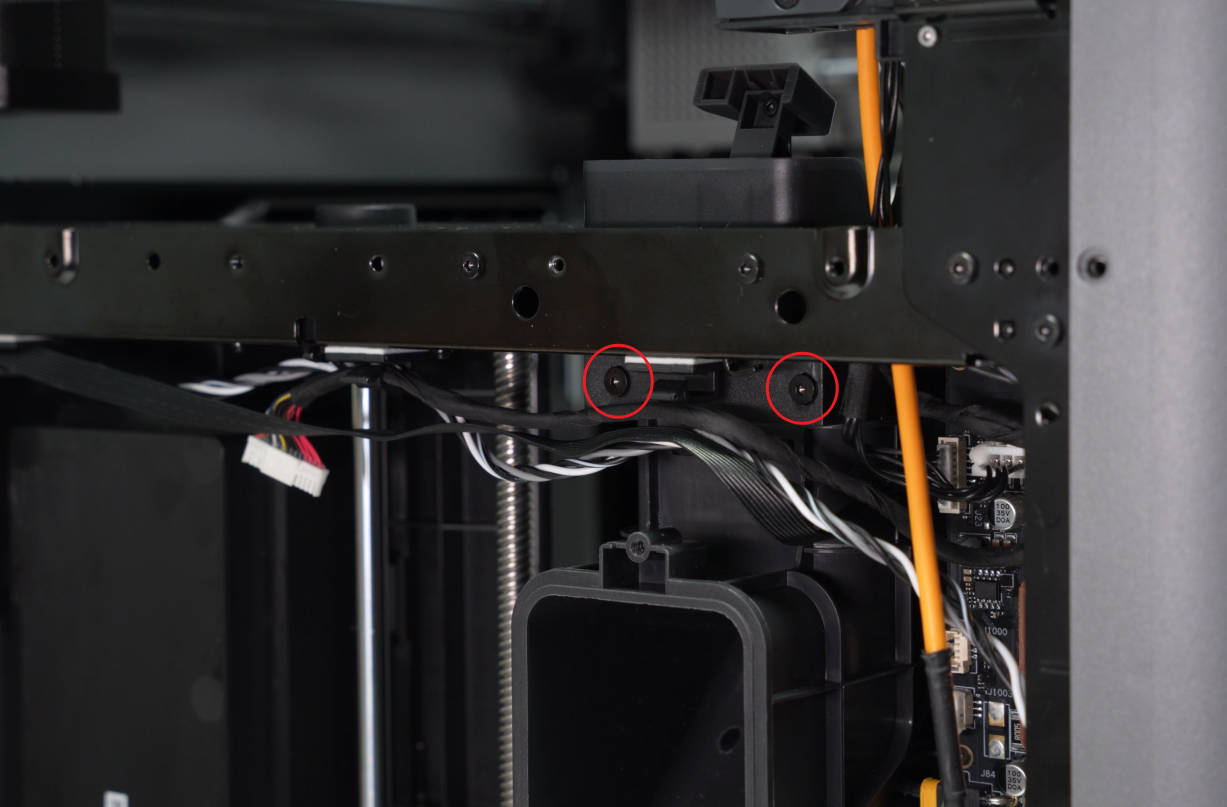
Step 3: Remove the Purge Wiper Assembly
Use an H2.0 hex wrench to remove the two screws securing the purge wiper assembly, then take the assembly out from inside the printer.
Installing the Purge Wiper Assembly
Step 1: Position the Purge Wiper Assembly
Install the purge wiper assembly onto the printer’s inner frame, holding it by hand to ensure its top surface is flush with the inner frame’s top surface.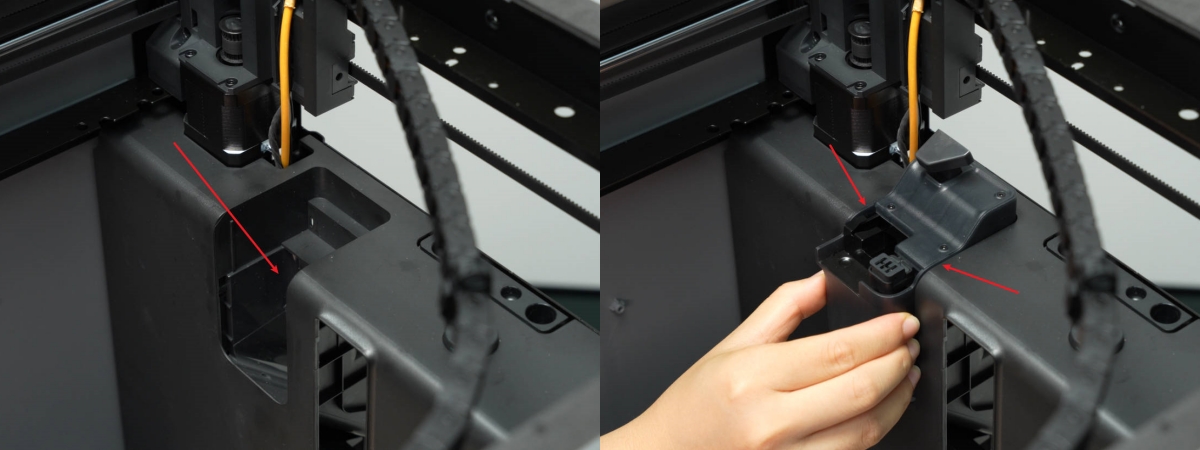
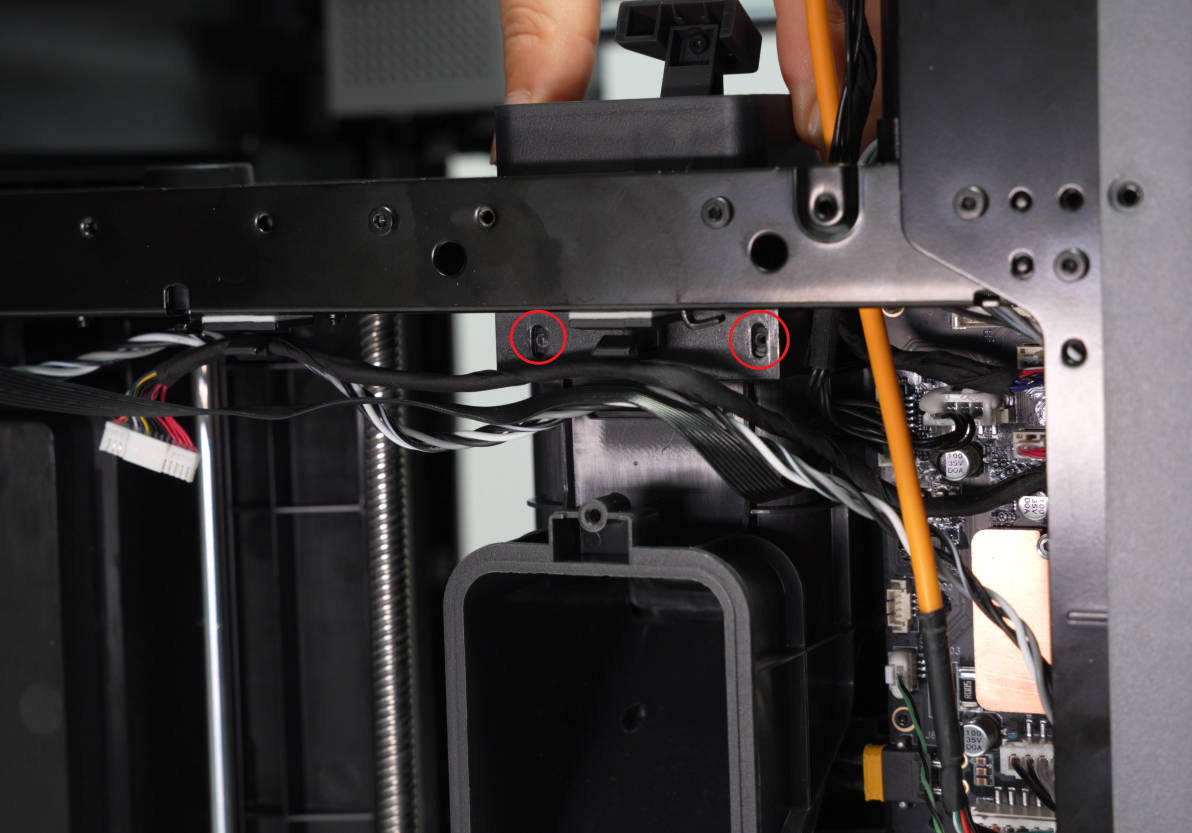
Step 2: Install the Purge Wiper Assembly
From the back of the printer, install the two screws securing the purge wiper assembly. Keep holding the assembly with your hand to ensure it remains flush with the printer’s inner frame.
 Step 3: Install the Cables
Secure the cables into the cable clips.
 Step 4: Install the Back Panel
Refer to this Wiki to reinstall the rear panel, buffer and PTFE tube bracket: Replacement of P2S Rear Panel
Verifying Success
Connect the printer to power, turn it on, and run a filament change or loading operation to confirm it completes successfully.