


i7 Extrusion Assembly for Creality
No se pudo cargar la disponibilidad para recoger
Utilice este texto para fomentar la comunicación o promover el intercambio en las redes sociales.
【Official Creality Original Quality】- 100% genuine Creality part, exclusively designed for Creality SPARKX i7 3D printer, original international version for direct replacement, seamless fit and full functionality.
【High-Torque Direct Drive for Stable Feeding】- Equipped with high-torque stepper motor, delivers consistent extrusion for 500mm/s high-speed printing, prevents under-extrusion and print failures.
【Dual Gear Feeding】- High-hardness, wear-resistant dual gears ensure durability against repeated feeding and retraction, as well as the abrasive nature of fiber-reinforced filaments, significantly extending the lifespan.
【Built-in Filament Break Sensor】- The built- in "zero-distance" filament break detection mechanism in the SPARKX i7 extruder accurately identifies feeding interruptions and promptly alerts the user, shorter distance detection reduces waste of filaments.
【Friendly Manual Tension Adjustment】- Features a manual tension knob for easy filament pressure adjustment, compatible with various 1.75mm filaments, ensures smooth feeding and reliable performance.
SPARKX i7 Extruder: The Creality SPARKX i7 original extruder assembly features a dual-gear system for reliable and smooth feeding; The extruder includes a 4-in-1 PTFE adapter, quick-swap extruder lever, filament cutter, and more, enabling multi-color printing.
4-in-1 Toolhead Manifold: The SPARKX i7 extruder comes with a 4-in-1 PTFE adapter, allowing simultaneous connection of 4 PTFE tubes; It connects 4 filaments from the CFS to the printer, enabling 4-color printing.
Quick-Swap Extruder Lever: Equipped with a quick-swap extruder lever; Its simple design allows for quick extruder maintenance, such as filament replacement.
Built-in Filament Cutter: A filament cutter integrated into the SPARKX i7 extruder enables precise filament change; The filament cutter is made of wear-resistant materials, which have a longer lifespan and simpler maintenance.
Dual Gear Feeding: The high-hardness, wear-resistant dual-gear structure provides excellent extrusion force, ensuring durability during repeated feeding and retraction.
Replace i7 Extrusion Assembly
Extrusion Assembly
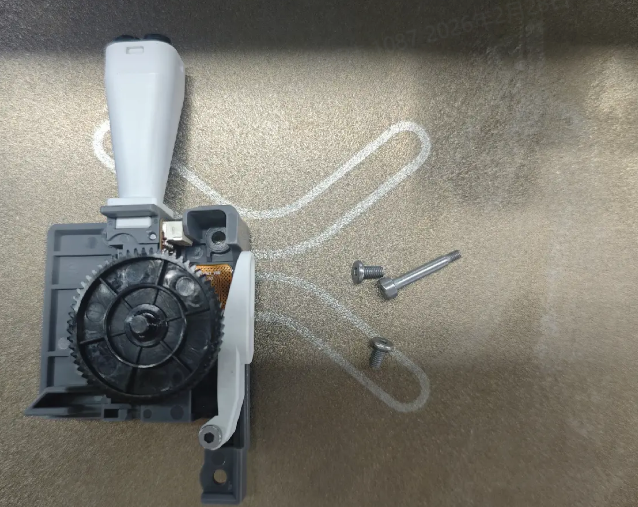
The Extrusion Assembly controls filament extrusion and retraction. It consists of the Extruder Front Cover, Extruder Gear Assembly (active gear), Extruder Lever (idler lever), Toolhead Filament Cutter, and other related components.
This guide explains how to replace the Extrusion Assembly on i7 series printers.
Replacement Timing
The Extrusion Assembly is damaged;
Replacement recommended by the Creality after-sales team.
Required Tools
H2.0 Hex Wrench
Tweezers
Safety Preparation
Turn off the printer and unplug the power cable.
Before starting, check the temperature of the Hotend and Heated Bed. Avoid operating while hot to prevent accidental contact with high-temperature components.
Pre-Operation Step
Perform a filament retraction procedure in advance to ensure the Extruder is free of filament, making disassembly easier.
Remove the Old Extrusion Assembly
Remove the PTFE Tube from the Toolhead Manifold by pressing down the fitting and gently pulling out the tube.
Remove the Toolhead Front Cover to expose the main Toolhead Assembly, then remove the Toolhead Rotating Ornament.
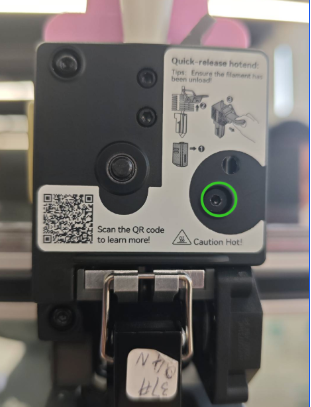
Use tweezers to disconnect the top terminal that connects to the Filament Sensor.

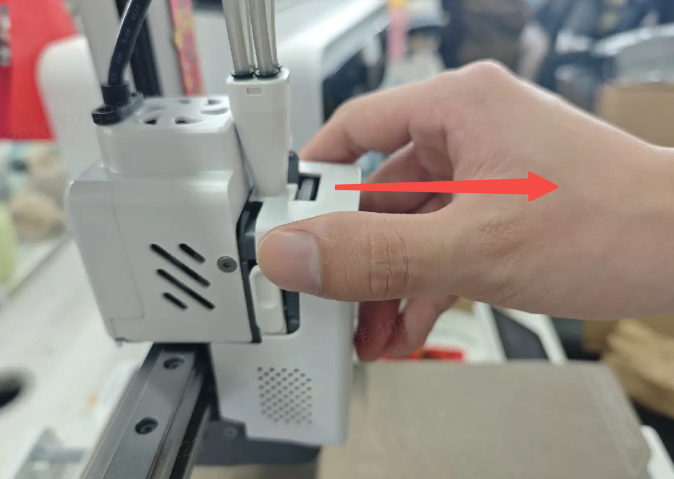
Open the Extruder Lever, then use the H2.0 Hex Wrench to remove the screws shown in the diagram, and take off the Extruder Lever.
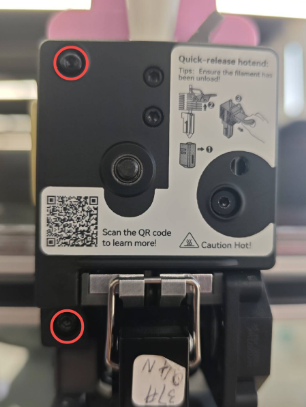
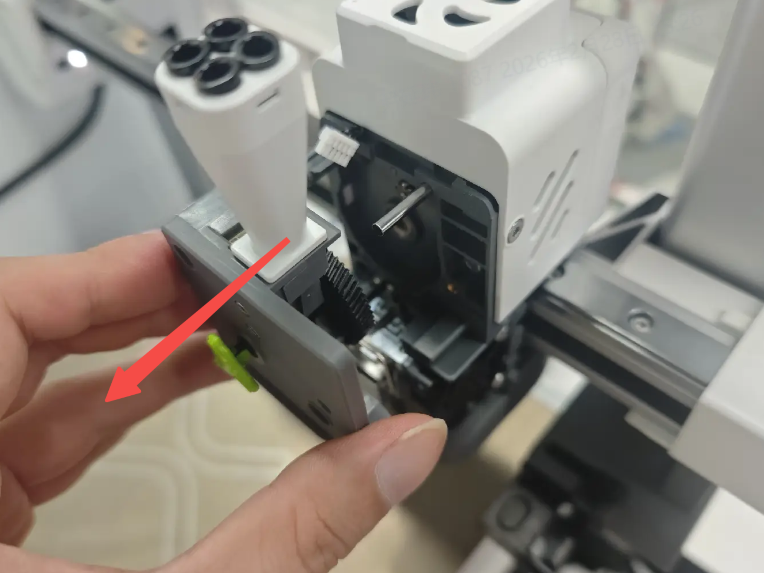
Continue using the H2.0 Hex Wrench to remove the screws securing the Extruder Front Cover. Once removed, the internal Extruder Gear Assembly (black gear) will be exposed and can be taken out together.
Install the New Extrusion Assembly
Prepare the new Extrusion Assembly. Take care not to lose small components.
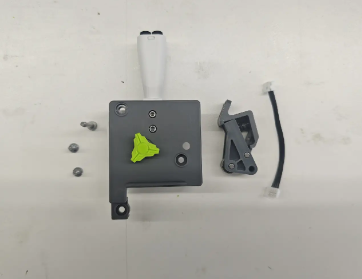
Reinstall the new extruder front housing and the driven pulley wrench to their original positions.Ensure that the gear shaft is aligned with the screw holes. A long screw can be used to assist with positioning and alignment.

Tighten the three screws to secure the assembly.

Close the Extruder Lever and reconnect the top terminal.
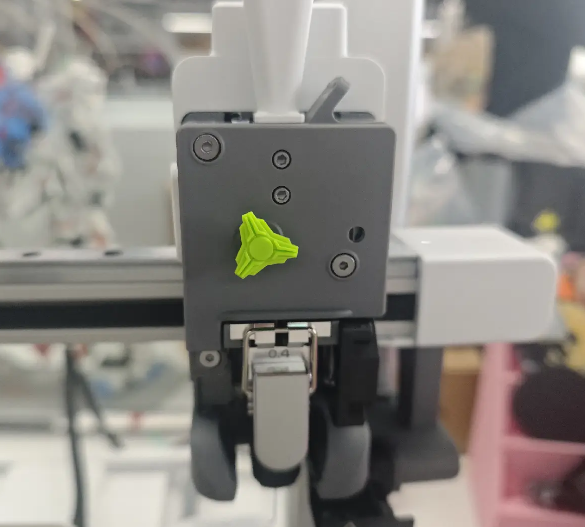
Reinstall the Toolhead Rotating Ornament and Toolhead Front Cover. After reinserting the PTFE Tube, the Extrusion Assembly is ready for use.