

i7 Extruder Motor Cooling Fan Assembly for Creality
No se pudo cargar la disponibilidad para recoger
Utilice este texto para fomentar la comunicación o promover el intercambio en las redes sociales.
Active Cooling to Prevent Heat Creep — Sparkx i7 extruder stepper motor generates significant heat during high-intensity 3D printing. This cooling fan assembly actively dissipates motor heat, eliminating heat creep.
Eliminate Filament Jamming & Pre-Softening — Soft filament at the extrusion gear leads to inconsistent feeding, clogs, and failed prints. This dedicated cooling solution maintains an optimal motor temperature.
Specifically for Creality SparkX i7 — Designed as an official original accessory, this fan assembly is perfectly compatible with the SparkX i7 3D printer. No modifications or third-party adapters are needed.
Quiet Yet Powerful Cooling – Designed to operate quietly while maintaining strong airflow, so you get efficient heat dissipation without intrusive fan noise.
Simple Installation — Comes as a direct drop‑in replacement for the stock fan on the Sparkx i7 toolhead and your printer is back to peak cooling performance in minutes.
i7 Series Extruder Motor Cooling Fan Replacement Guide
i7 Extruder Motor Cooling Fan Assembly
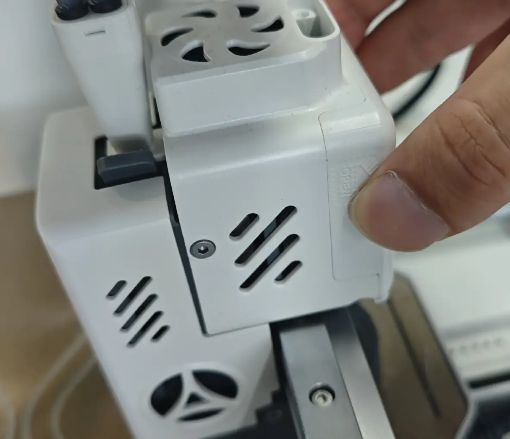
The Extruder Motor Cooling Fan Assembly is the fan module located above the extruder. It actively cools the extruder motor to prevent heat generated during operation from transferring to the extruder, which could otherwise cause filament softening or other printing issues.
Required Tools
H2.0 Hex Wrench
Procedure
Safety Preparation
For your personal safety and to avoid machine damage, please power off the printer and unplug the power cable before starting the replacement procedure. Do not operate while powered on.
Before proceeding, ensure that the heated bed and hotend have completely cooled down to avoid burns.
Remove the Old Extruder Motor Cooling Fan
Use the H2.0 hex wrench to remove the two fixing screws securing the toolhead data cable, then disconnect the toolhead data cable.
 Remove the toolhead rear cover to expose the toolhead mainboard, then unplug the connector corresponding to the extruder motor cooling fan.

Remove the two fixing screws on the side of the toolhead, then lift upward and remove the extruder motor cooling fan.

Install the New Extruder Motor Cooling Fan
Prepare the new extruder motor cooling fan and install it onto the toolhead. Make sure it is properly seated, then connect the cable to the corresponding port.

Use the hex wrench to tighten the two side screws.

Reconnect the toolhead data cable and tighten the two fixing screws.

Reinstall the extruder rear cover.