


for Bambu Lab P2S X3508 Extruder Servo Motor
No se pudo cargar la disponibilidad para recoger
Utilice este texto para fomentar la comunicación o promover el intercambio en las redes sociales.
X3508 Extruder Servo Motor Replacement Guide for the P2S
[Model-Specific Compatibility] Fits specified 3D printer models, enabling direct extruder servo motor replacement to restore precise filament feeding functionality.
[High-Precision Positioning] Servo motor technology delivers accurate control over extrusion movements, ensuring consistent filament flow for detailed print results.
[Stable Power Output] Reliable motor performance maintains steady torque during operation, reducing jams and ensuring smooth extrusion even with various materials.
[Straightforward Installation] Exact match with extruder specifications, allowing easy assembly without complex tools or professional technical assistance.
[Durable Wear-Resistant Build] Resilient components withstand continuous mechanical operation, preserving performance and extending service life over extended use.
[Reliable Operational Performance] Designed for continuous use, maintaining stable functionality even during long printing sessions without disruptions.
[Essential Printer Restoration] Ideal for replacing faulty or worn extruder motors, reviving the printer’s ability to deliver consistent and precise prints.
This guide shows how to remove and install the extruder motor of P2S.
The X3508 extruder servo motor used in the P2S is a high-precision servo motor developed by Bambu Lab. It accurately controls filament feeding, stopping, and retraction, making it a key component for ensuring print quality and success. The accessory package includes the extruder motor and mounting screws.
X3508 Extruder servo motor* 1
M2.5x5 screw* 2
When to Use This Guide
The extruder servo motor is damaged and is unable to function.
Required Tools and Materials
- New X3508 extruder servo motor
- M2.5x5 screw* 2
- H2.0 Allen key
- H1.5 Allen key
Safety Warning
IMPORTANT!
Always power off and disconnect power on the printer before performing maintenance work. Not doing so means there is a risk of electric shock, short circuit, and damage to the printer or surrounding area.
When a maintenance task necessitates the printer being powered on, use insulated gloves for safety and pay special care not to pinch, damage, or put pressure on any exposed wires, connectors, or circuit boards. Additionally, the nozzle can be extremely hot so never touch it with exposed skin.
Remove the Extruder Servo Motor
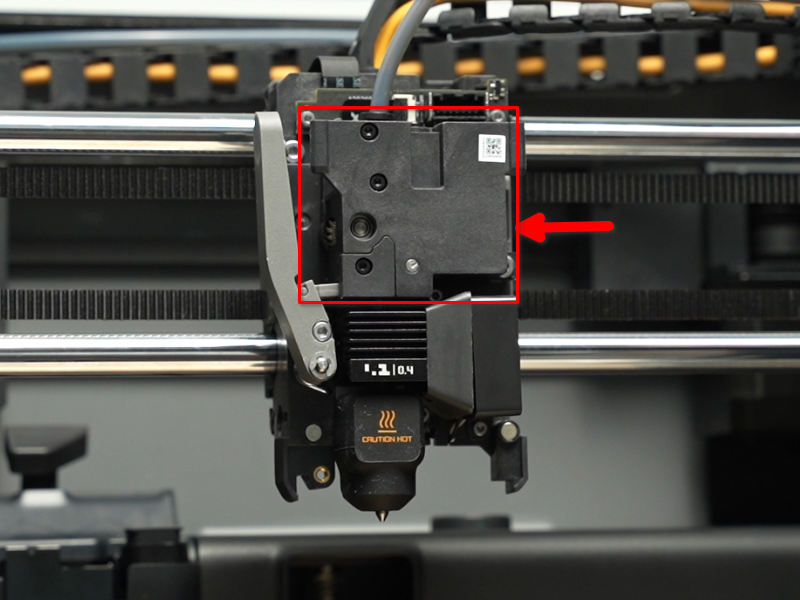
Step 1: Remove the Toolhead Housing
 Step 2: Remove the Extruder
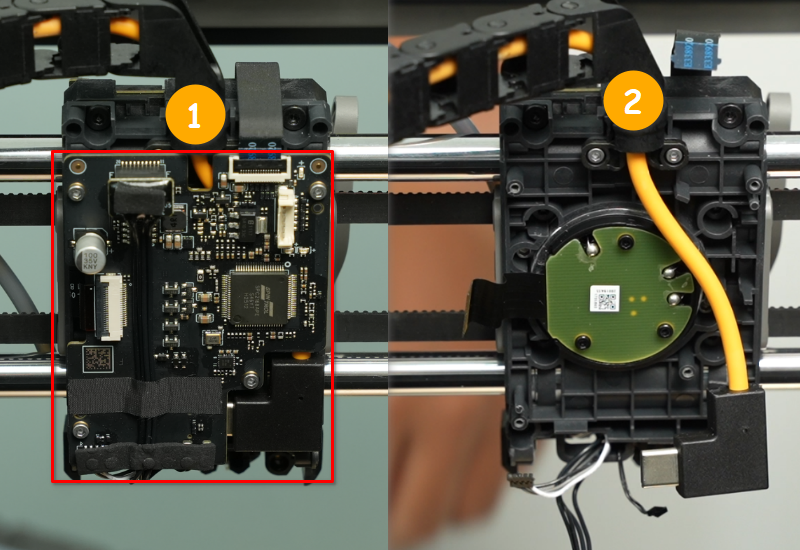
 Step 3: Remove the TH board
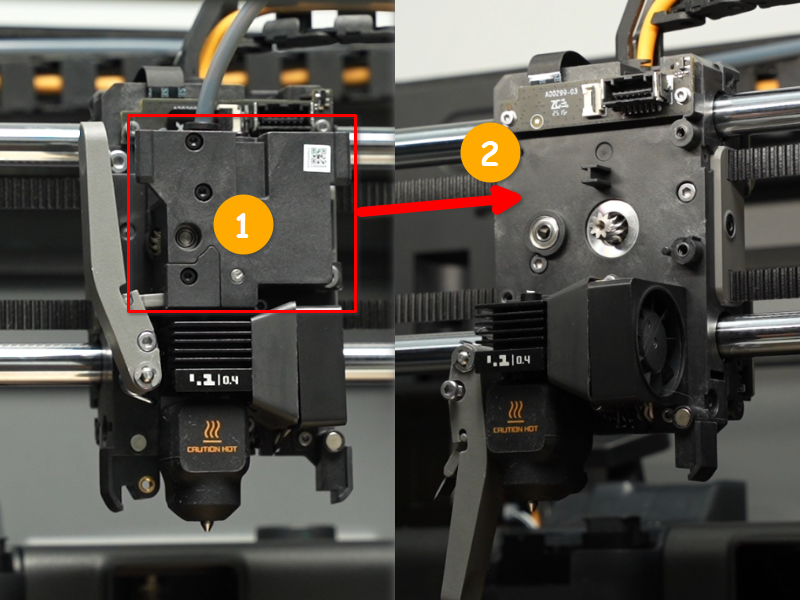
 Step 4: Remove the Extruder Servo Motor
Use an H2.0 Allen key to remove the two extruder servo motor fixing screws (M2.5x5), and then remove the 3508 extruder servo motor from the toolhead.
 Install the Extruder Servo Motor
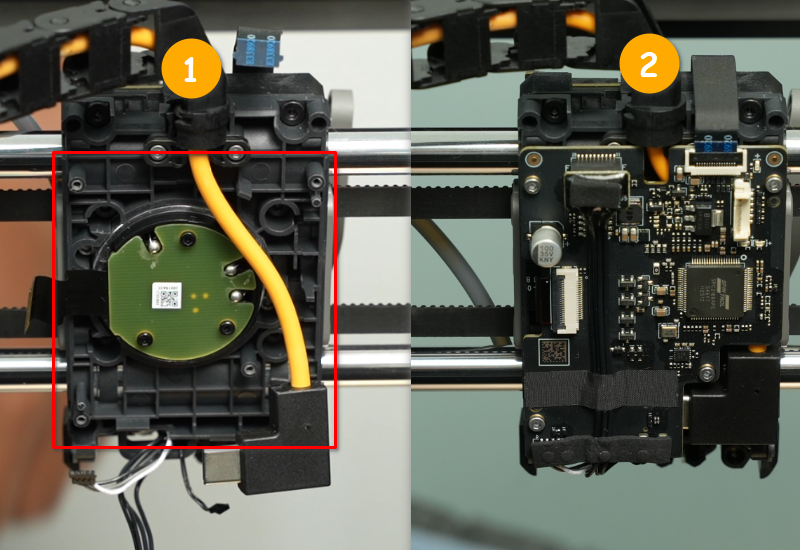
Step 1: Install the Extruder Motor
Refer to the installation orientation in the figure below (with the extruder servo motor cable facing left), and install the extruder servo motor onto the toolhead. Then, use an H2.0 Allen key to tighten the two M2.5×5 mounting screws.
Note: Please hold the extruder servo motor with your hand to prevent it from falling. Step 2: Install the TH board
 Step 3: Install the Extruder
 Step 4: Install the Toolhead Housing
 Verifying Functionality
Connect the power supply, turn on the printer, and check if the extruder can extrude filament normally.
If you encounter any problems, retrace your steps and ensure that all connections are secure before trying again. If the problem persists, contact the Bambu Lab technical support for further assistance.