


Filament Sensor Unit for Bambu A2L
No se pudo cargar la disponibilidad para recoger
Utilice este texto para fomentar la comunicación o promover el intercambio en las redes sociales.
【Official Original Filament Sensor Unit for Bambu Lab A2L】This is the official Bambu Lab A2L Filament Sensor Unit , It directly replaces a worn or damaged filament sensor board to restore accurate filament detection and printing reliability
【Real-Time Filament Detection & Multi-Material Switching】The filament sensor continuously monitors filament feeding status. When using multiple materials with AMS lite, it recognizes filament input and output to enable seamless multi-material switching. It also detects clogs and instantly reports jams to the printer, helping prevent failed prints.
【Integrated Buffer & Filament Tangle Detection】Integrated with the filament hub, this Hall sensor board works with a spring and magnet slider to detect abnormal feeding resistance. When filament tangles or jams occur on external spools or AMS, the system triggers an alarm and pauses printing – giving you peace of mind during unattended prints.
【When to Replace – Restore Accurate Detection】Replace your A2L filament sensor if you experience: printer cannot detect filament loading in the extruder, false reports of cutting module not installed or filament cutter jammed, false reports of extruder environment temperature too high, damaged sensor cable, or after Bambu Lab technical support recommends replacement.
The Filament Sensor is used to detect the filament feeding status to help prevent print failures and improve overall printing efficiency. When printing with multiple filaments, the filament sensor can recognize the input and output of filaments and transmit the information to the AMS unit for filament switching. It can also detect filament jamming situations and transmit the information to the printer immediately.
In the Box
- Filament Hall Sensor Board Assembly *1
- Spring *1
- BT2.6x6 Screw *2
- Cable Harness *1
- 3g Lubricant *1
Compatibility
A2L
Filament Sensor Unit Replacement Guide for the A2L

The filament sensor kit includes the filament
sensor board and the connecting cable. Please replace the appropriate parts as needed.
Applicable Printer Model
Bambu Lab A2L
When to Replace
The printer cannot accurately detect whether the extruder is loading filament internally.
The printer falsely reports that the cutting module is not properly installed.
The printer falsely reports that the filament cutter is jammed.
The printer falsely reports that the extruder
temperature is too high.
The filament sensor cable is damaged.
Replacement recommended after Bambu Lab technical support.
Required Tools and Materials
A2L Filament Sensor
H 2.0 allen key
H 1.5 allen key
Tweezers
Safety Warning
⚠️ IMPORTANT!
It's crucial to power off the printer before conducting any maintenance work, including work on the printer's electronics and tool head wires. Performing tasks with the printer on can result in a short circuit, leading to electronic damage and safety hazards.
During maintenance or troubleshooting, you may need to disassemble parts, including the hotend. This exposes wires and electrical components that could short circuit if they contact each other, other metal, or electronic components while the printer is still on. This can result in damage to the printer's electronics and additional issues.
Therefore, it's crucial to turn off the printer and disconnect it from the power source before conducting any maintenance. This prevents short circuits or damage to the printer's electronics, ensuring safe and effective maintenance.
Remove the Old Filament Sensor
Step 1. Remove the TH board
Step 2. Remove the Cutting Module Adapter Board
Use an H1.5 allen key to remove the two fixing screws and take off the cutting module adapter board.


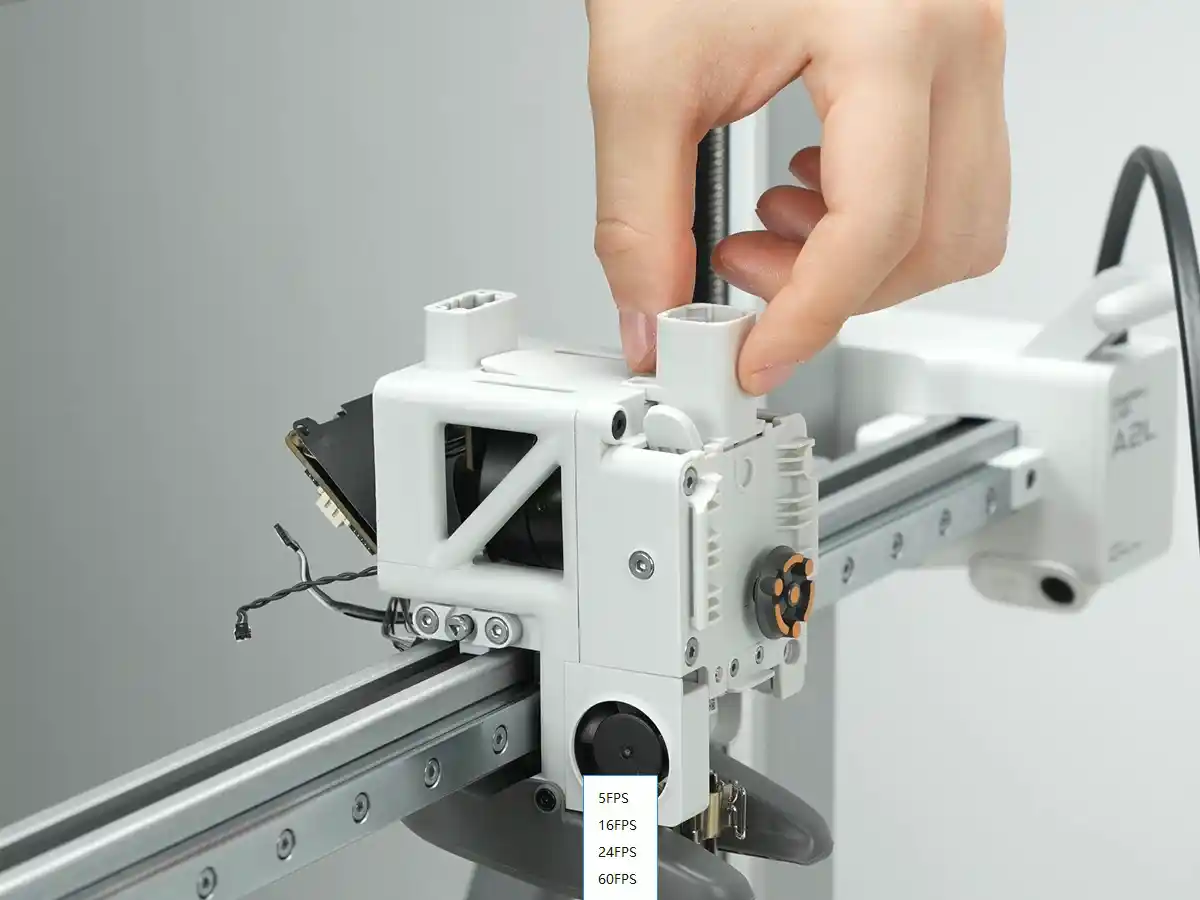
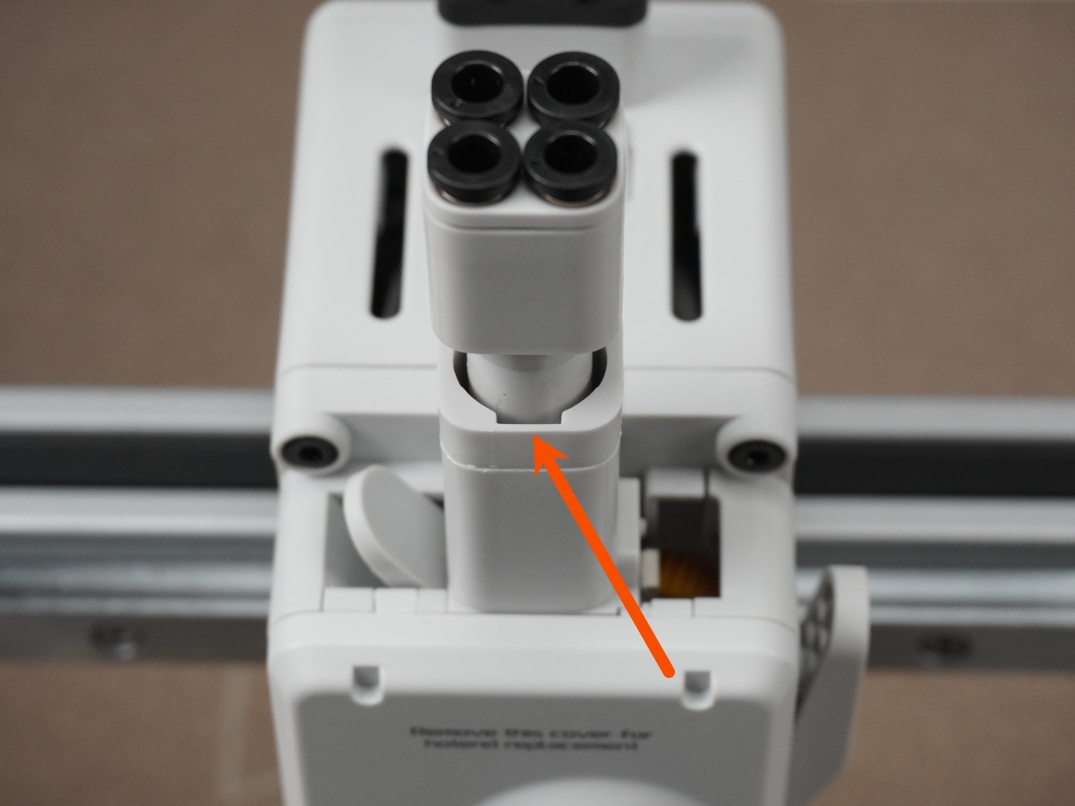
Step 3. Remove the Filament Hub Assembly
Use a scraper, tweezers, or similar tools to gently pry open the locking tabs securing the filament hub, then remove the hub and take out the internal spring.
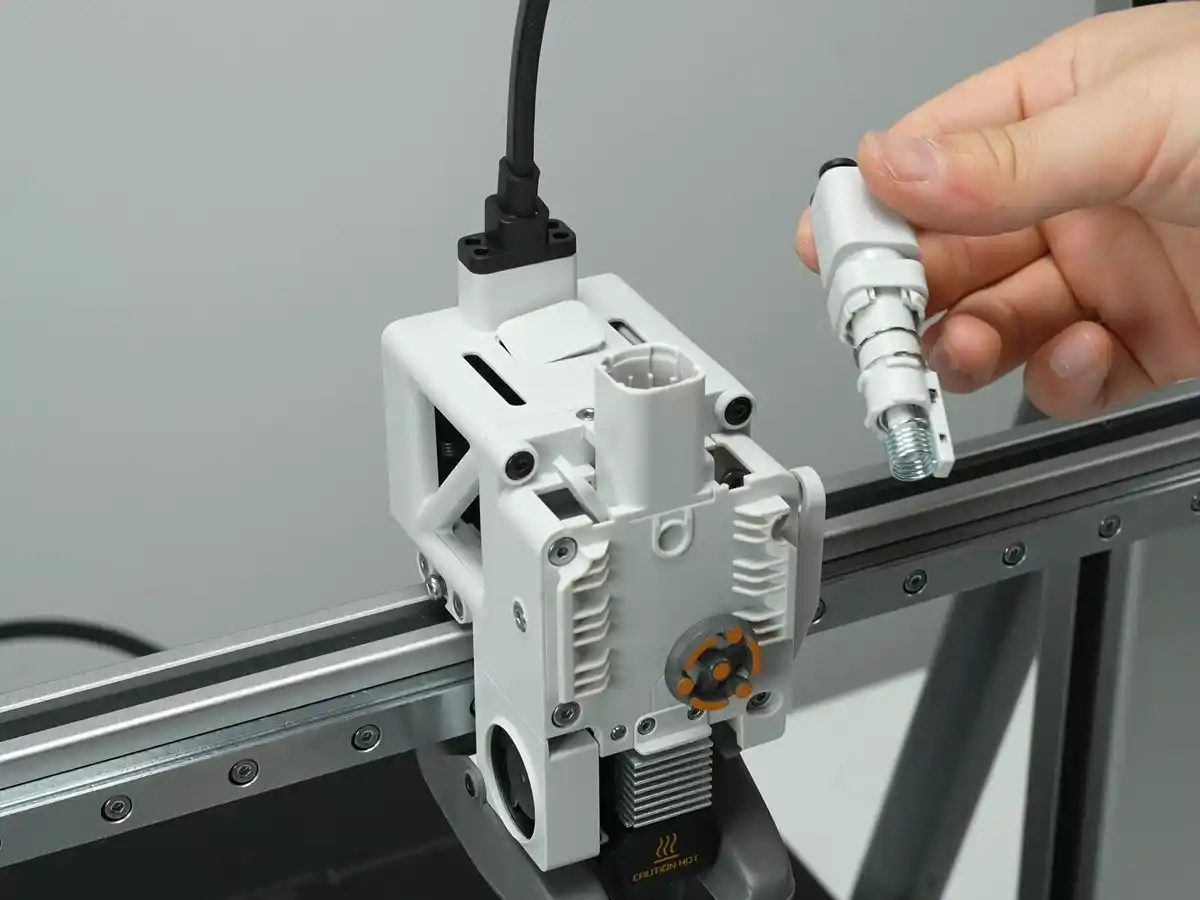
Step 4. Remove the Filament Hub Base Housing
Use an H2.0 allen key to remove the two fixing screws, then gently pull the filament hub Base Housing straight up.
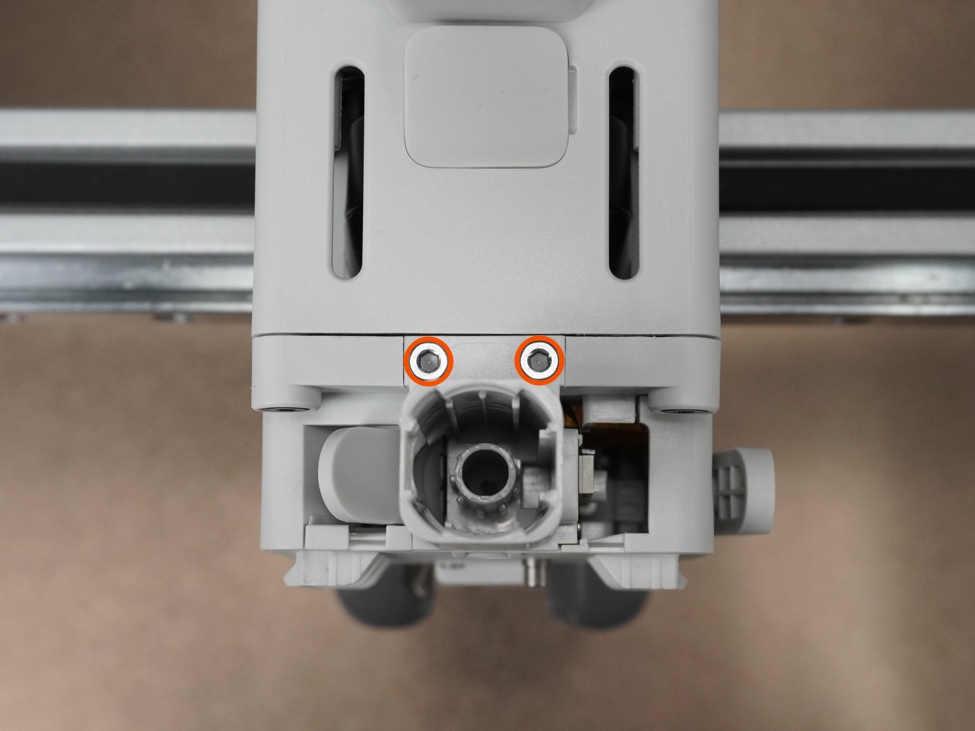
Note: Please handle carefully when pulling out the Base Housing to avoid pulling or damaging the connecting cable.
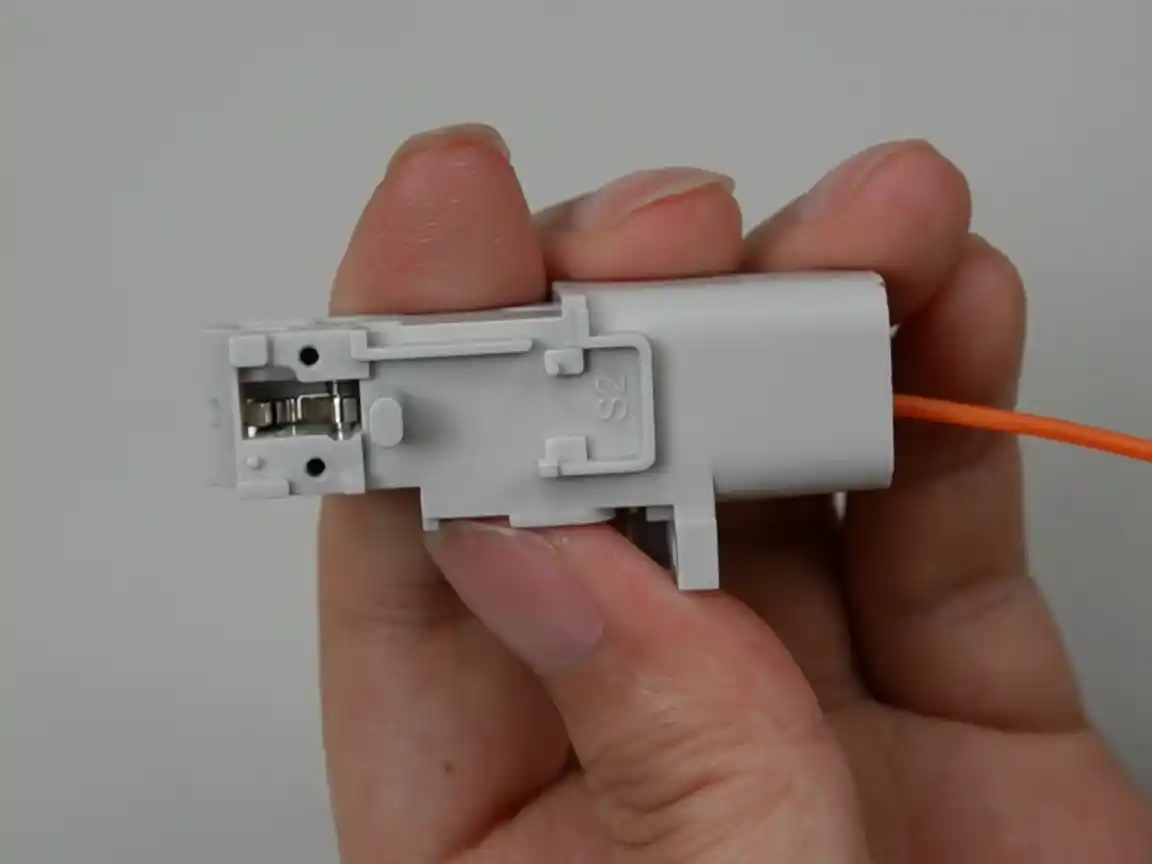
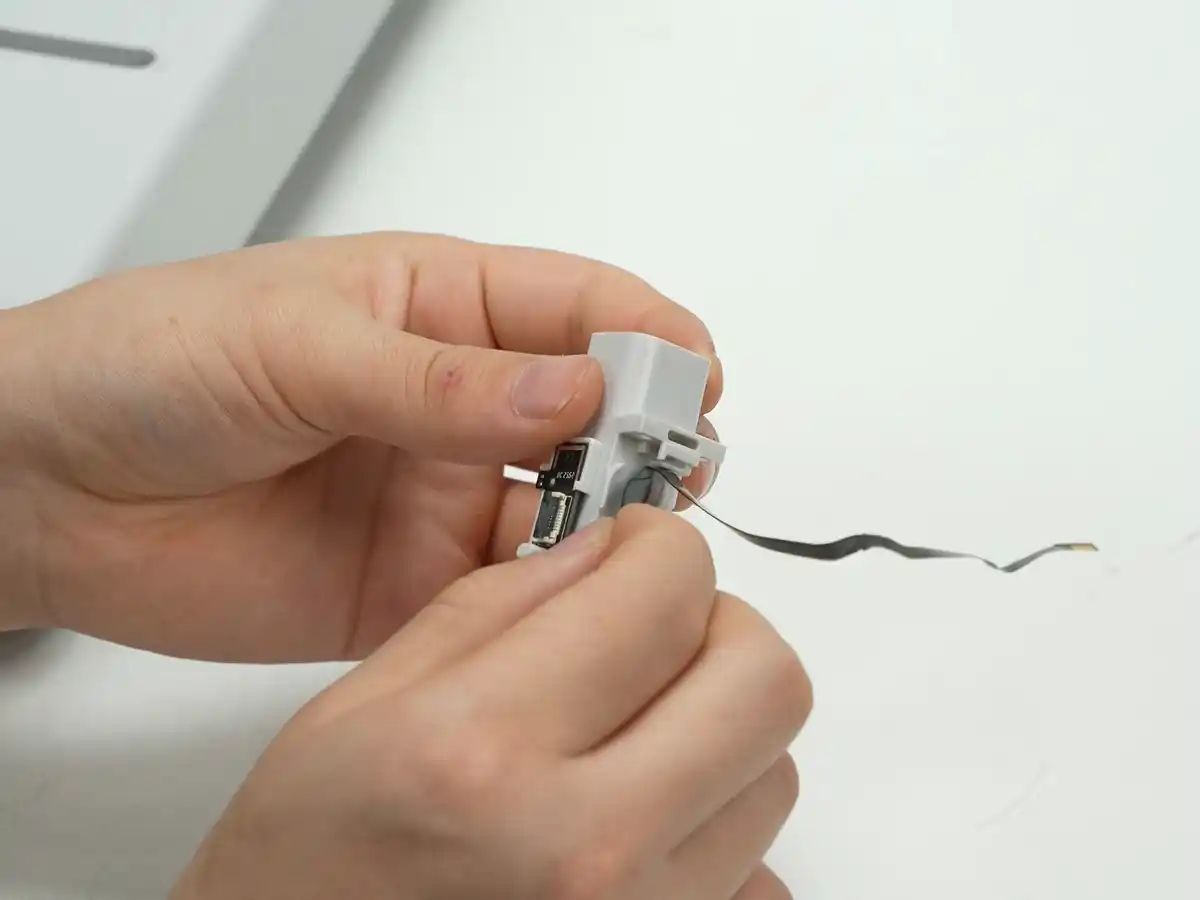
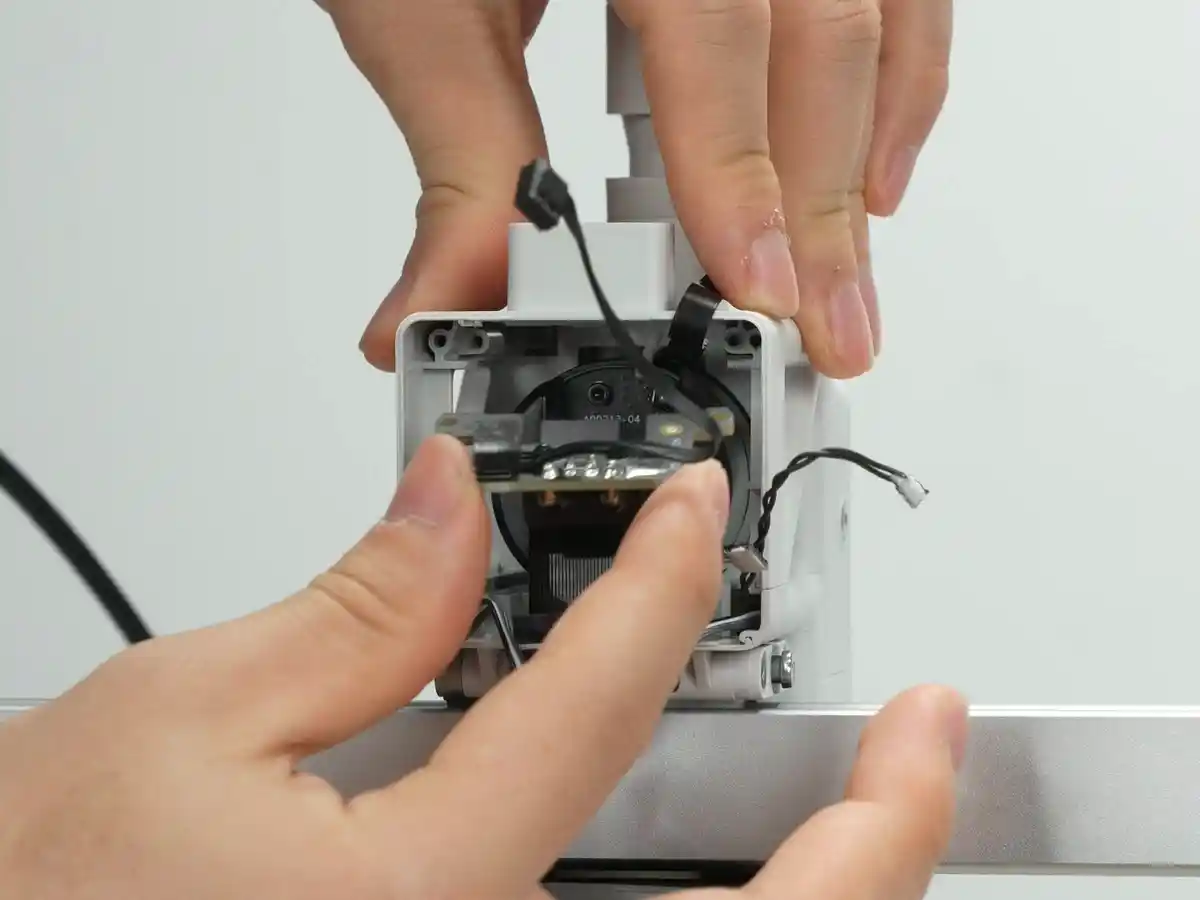
Step 5. Remove the Filament Sensor Board Connecting Cable
Lift the black locking tab on the filament sensor board upward to easily remove the cable.
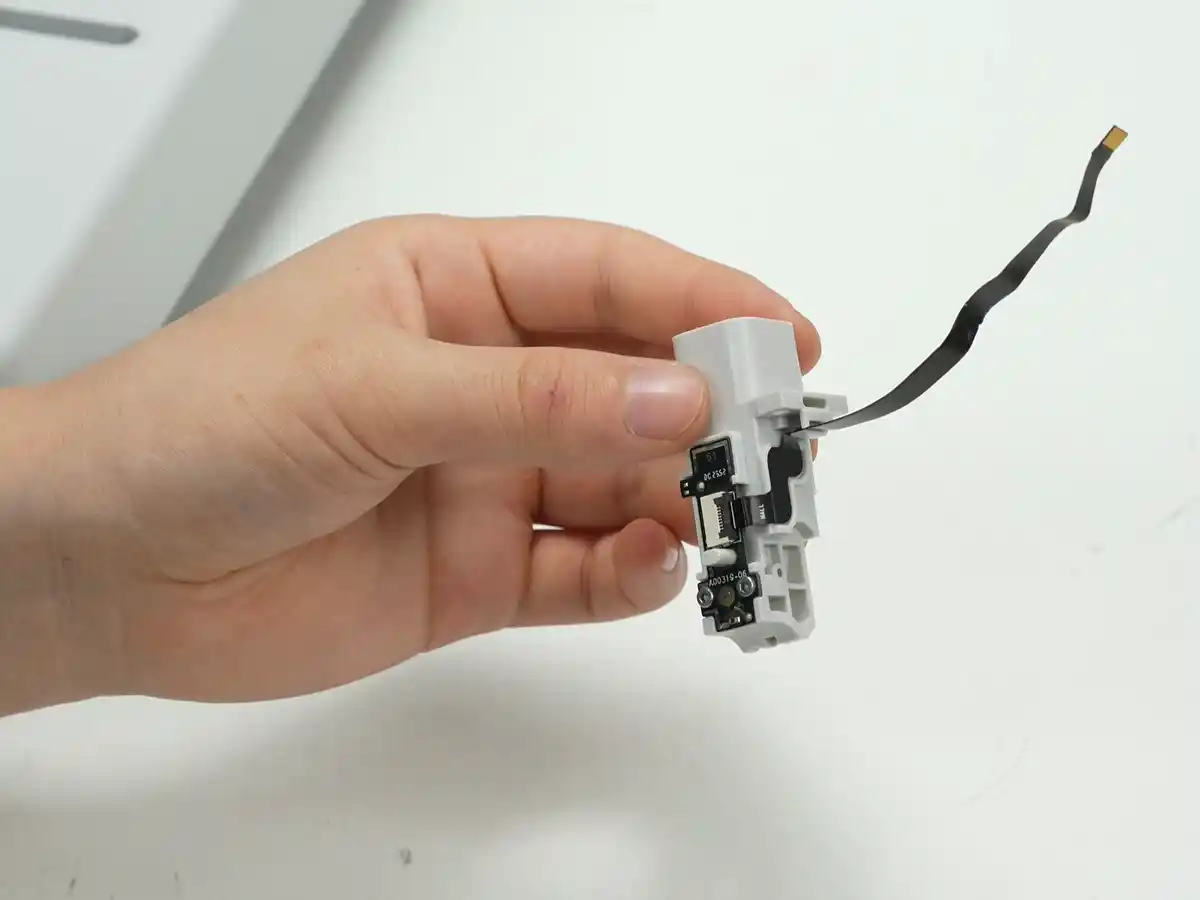
If your spare parts already come with the Base Housing and filament sensor board pre-installed, you can skip the subsequent disassembly steps.
Step 6. Remove the Filament Sensor Board
Use an H1.5 allen key to remove the two fixing screws and take off the filament sensor board.At this time, you can check whether the square detection magnet inside the filament hub Base Housing rebounds properly.

Install the New Filament Sensor
Step 1. Install the Filament Sensor Board
Place the new filament sensor board into the locating slot and use an H1.5 allen key to tighten the two fixing screws.
Step 2. Install the Filament Sensor Board Connecting Cable
Install the connecting cable as shown in the illustration. Insert the cable accurately into the filament sensor board socket and press down the black locking tab to secure it.
Step 3. Install the Filament Hub Base Housing
Pass the connecting cable through the toolhead, align the position, place it into the filament hub Base Housing, and use an H2.0 allen key to tighten the two fixing screws.
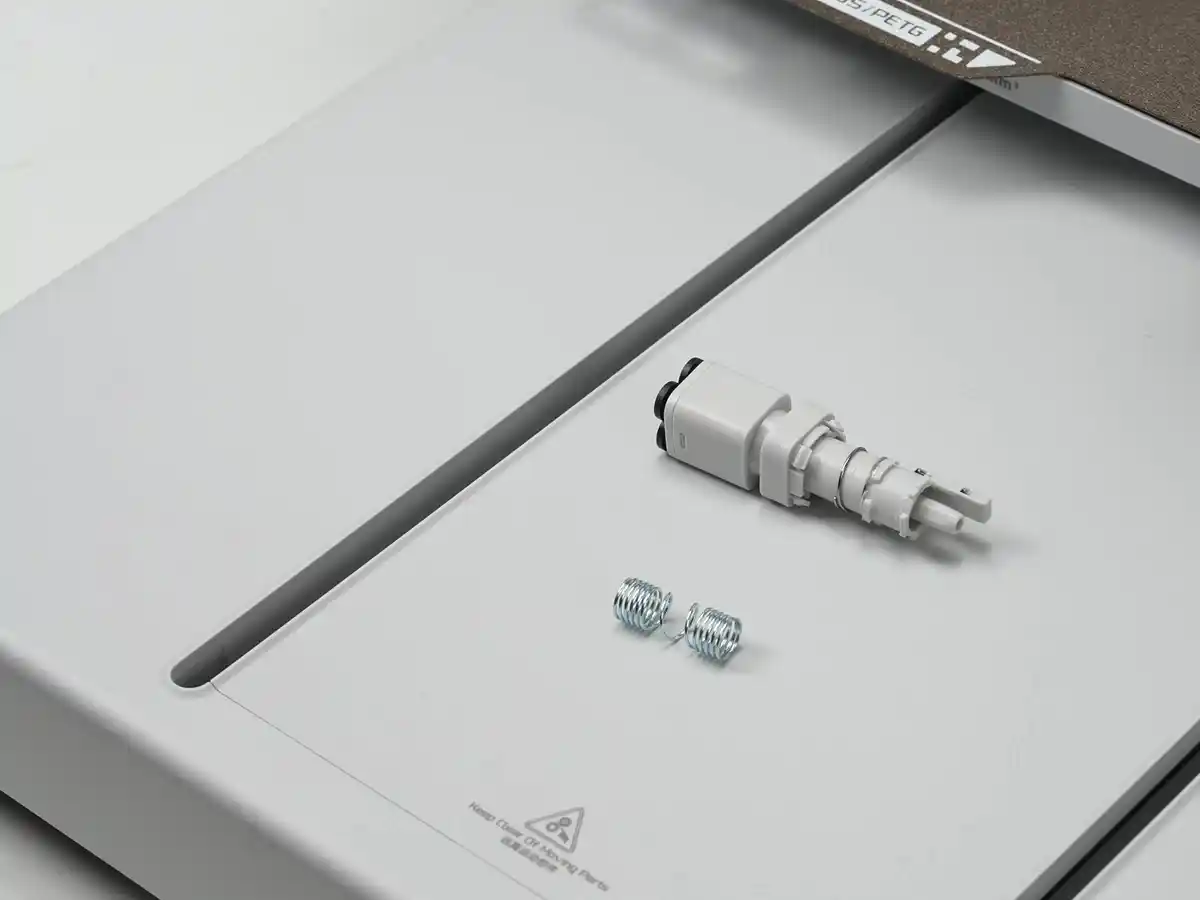
Step 4. Install the Filament Hub
Install the spring onto the filament hub assembly
Place the filament hub assembly into the base housing, making sure the magnets and locking ring orientation on the assembly match the illustrations exactly.
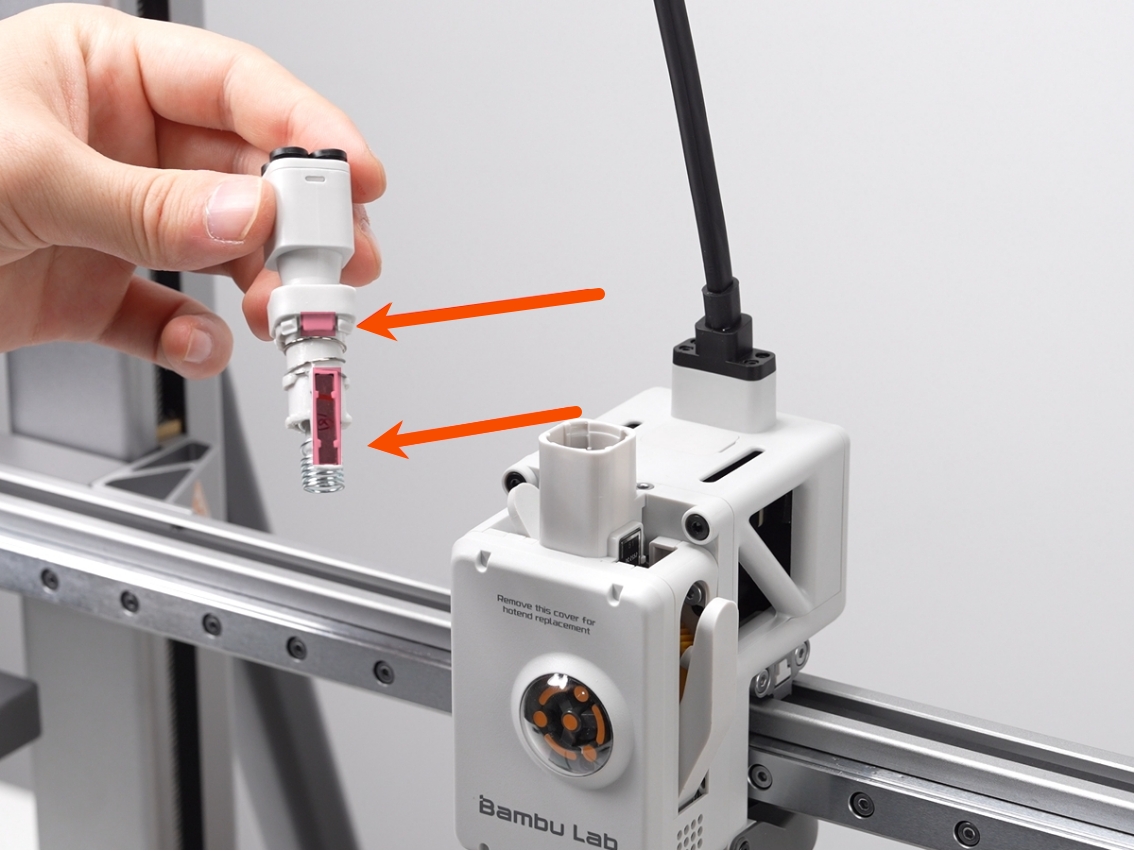
The locking ring has a positioning notch.During installation, the notch should face either directly forward or directly backward; do not orient it in any other direction.
Align the locking ring with the locking tabs on the filament hub base housing and press down evenly and firmly until the assembly is fully snapped into place.
Step 5. Install the Cutting Module Adapter Board
Gently lift the filament sensor board connecting cable, place the cutting module adapter board into the toolhead bracket, align the screw holes, and tighten the two fixing screws.
ℹ️ Note: Before tightening the screws, please ensure the filament sensor board connecting cable is properly routed and not pinched to avoid damaging the cable.
Step 6. Install the TH board
Verifying Success
✅ Turn on the printer power, operate the printer to load and unload filament. If the entire process is smooth without error messages, the replacement is successful.