


Filament Buffer - X2D for Bambu Lab
No se pudo cargar la disponibilidad para recoger
Utilice este texto para fomentar la comunicación o promover el intercambio en las redes sociales.
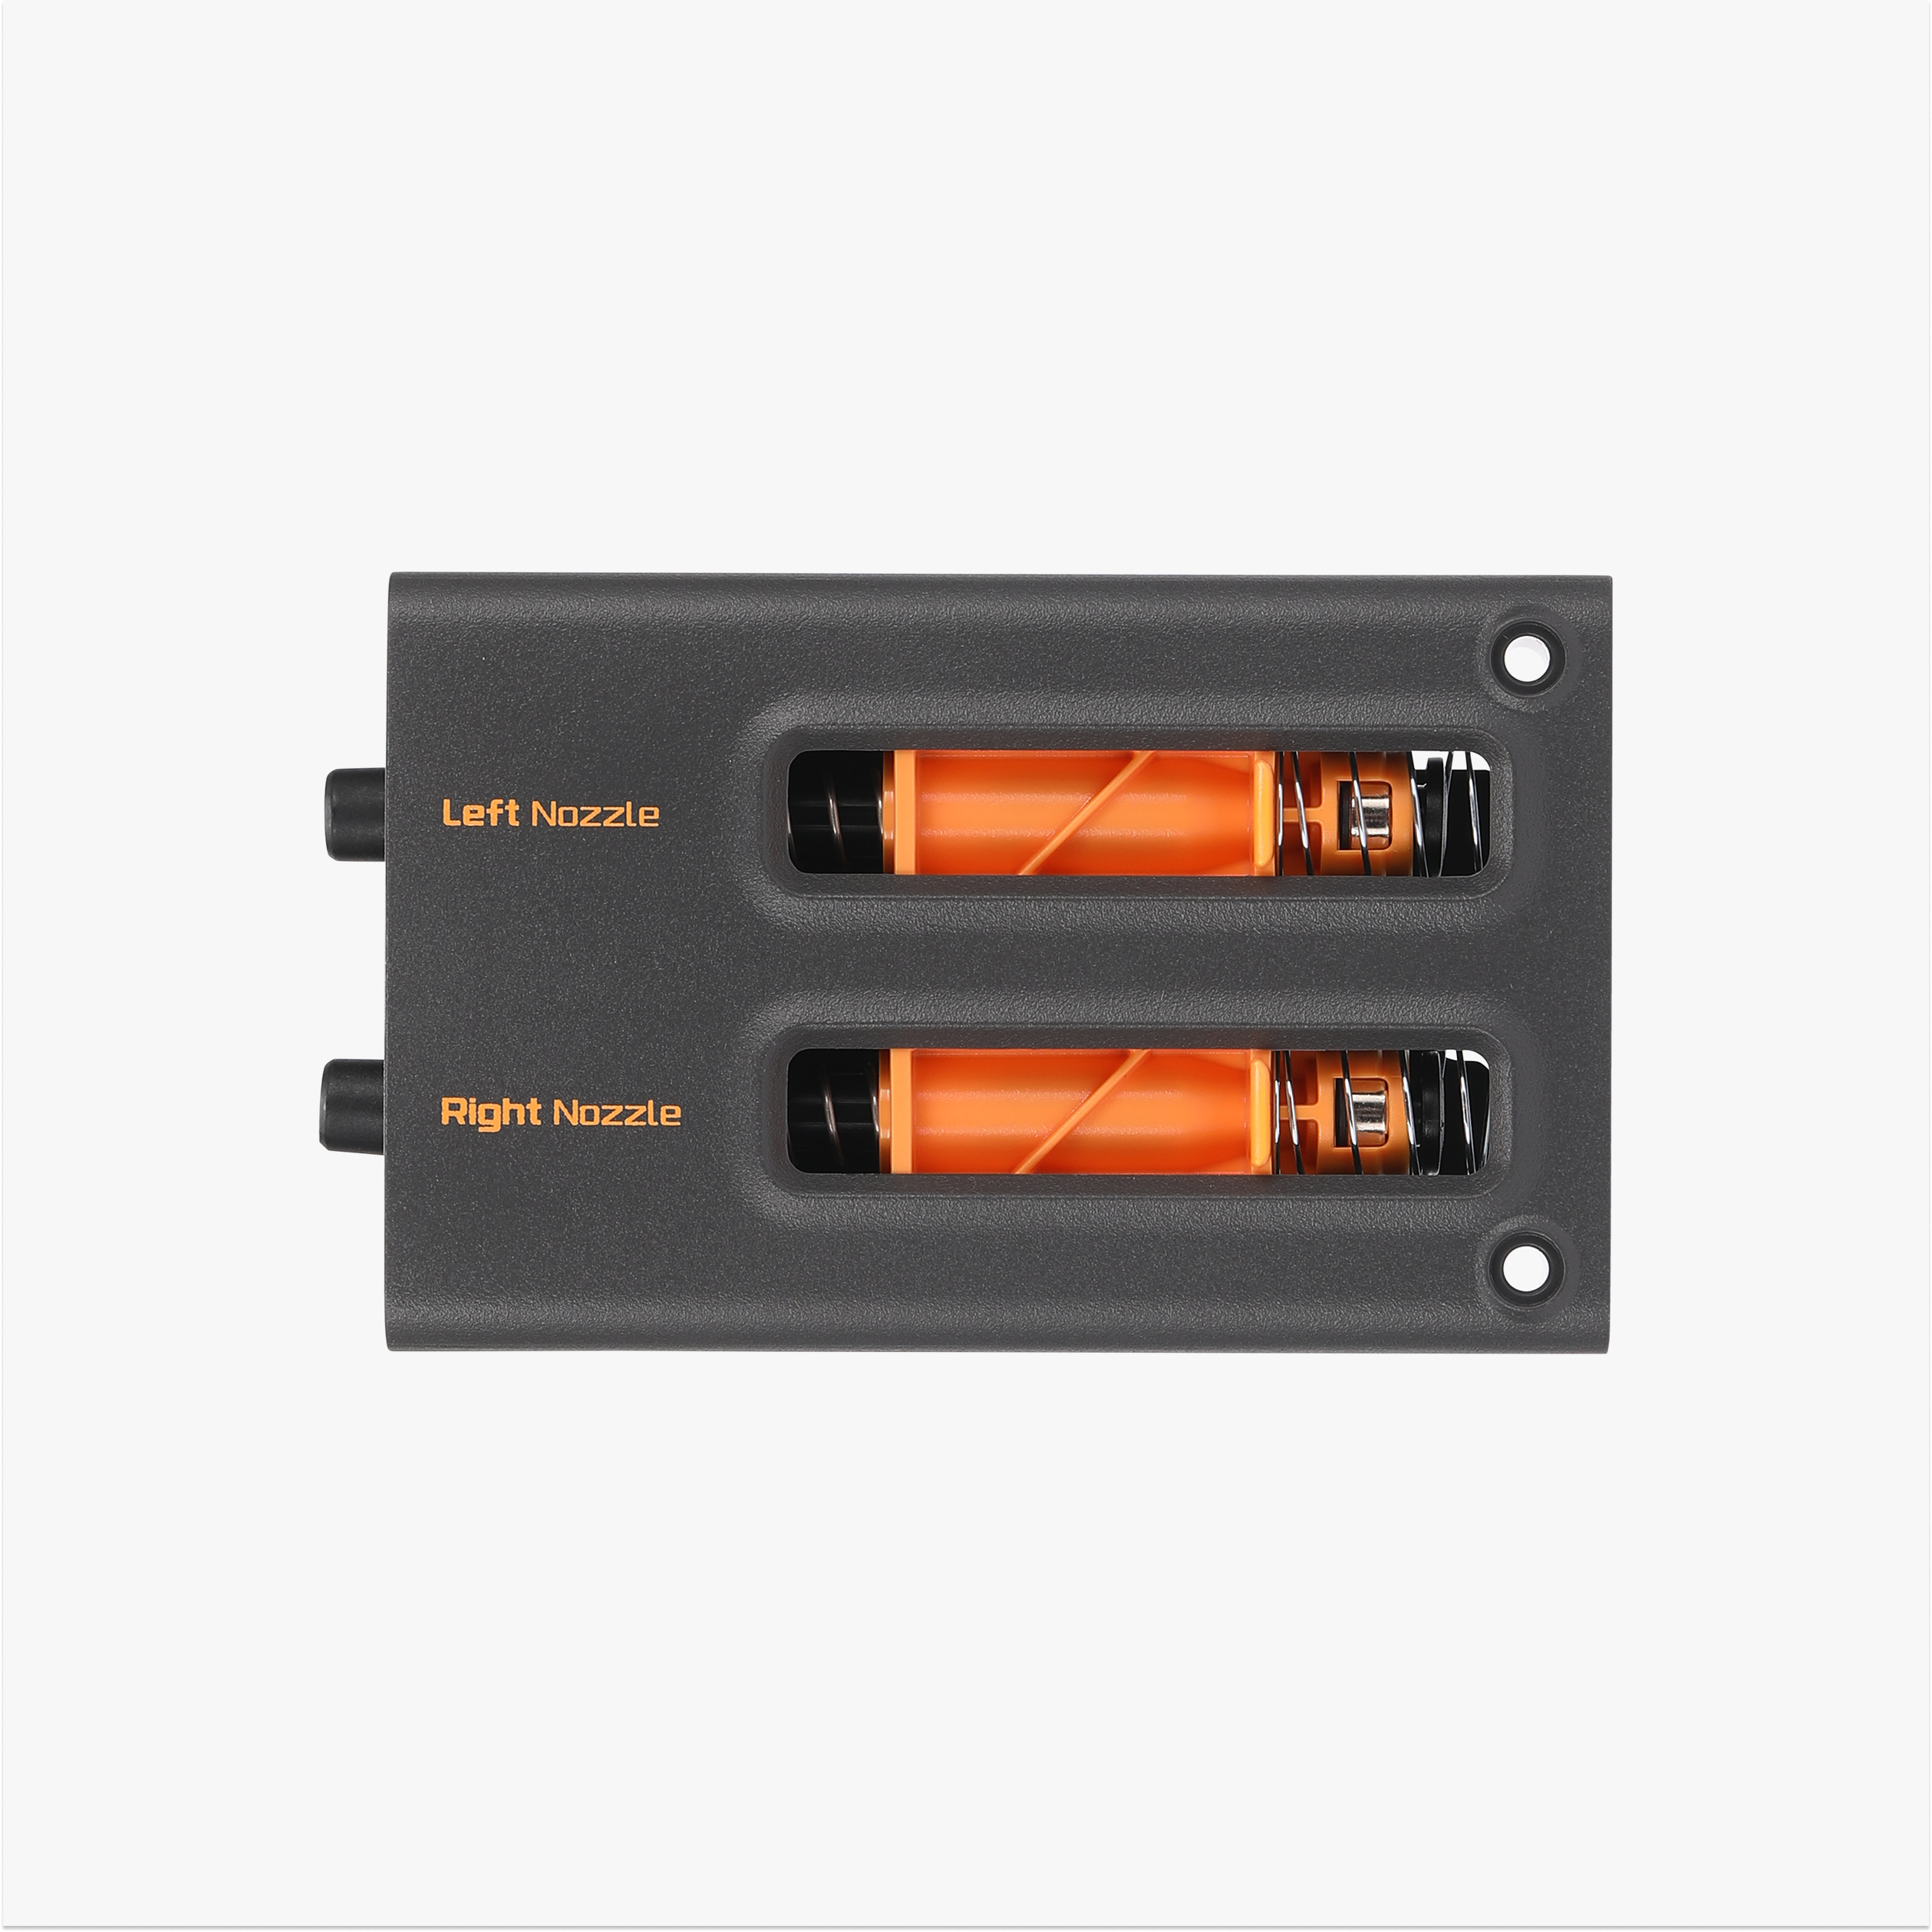
The filament buffer is a dedicated accessory installed on the back of the printer to monitor filament tension variations during the loading process, ensuring smooth filament feeding.
In the Box
- Filament Buffer *1;
- ST3x23 Shoulder Screw *2
Compatibility
X2D
Filament buffer Replacement Guide for the X2D
This article describes how to replace the X2D Filament Buffer
Filament buffer
🔎 Find the X2D Filament buffer in the Bambu Lab store.
The filament buffer is a dedicated accessory installed on the back of the printer to monitor tension variations during the loading process, ensuring smooth filament feeding.
The filament buffer package includes:
1.Filament buffer ( x1 )
2.Fixing Screws ( x2 )
![]() Applicable printer model
Applicable printer model
Bambu Lab X2D
When to Replace
1.The printer shows abnormal filament loading and unloading, caused by filament buffer failure.
2.Physical damage or breakage occurred.
Required Tools and Materials
New filament buffer
H2.0 allen key
Safety Warning
⚠️ IMPORTANT!
It's crucial to power off the printer before conducting any maintenance work, including work on the printer's electronics and tool head wires. Performing tasks with the printer on can result in a short circuit, leading to electronic damage and safety hazards.
During maintenance or troubleshooting, you may need to disassemble parts, including the hotend. This exposes wires and electrical components that could short circuit if they contact each other, other metal, or electronic components while the printer is still on. This can result in damage to the printer's electronics and additional issues.
Therefore, it's crucial to turn off the printer and disconnect it from the power source before conducting any maintenance. This prevents short circuits or damage to the printer's electronics, ensuring safe and effective maintenance. For any concerns or questions about following this guide, we recommend submitting a technical ticket regarding your issue and we will do our best to respond promptly and provide the assistance you need.
Remove the filament buffer
Step 1. Remove the PTFE tubes
Press the left filament tube connector and remove the loading PTFE tube.
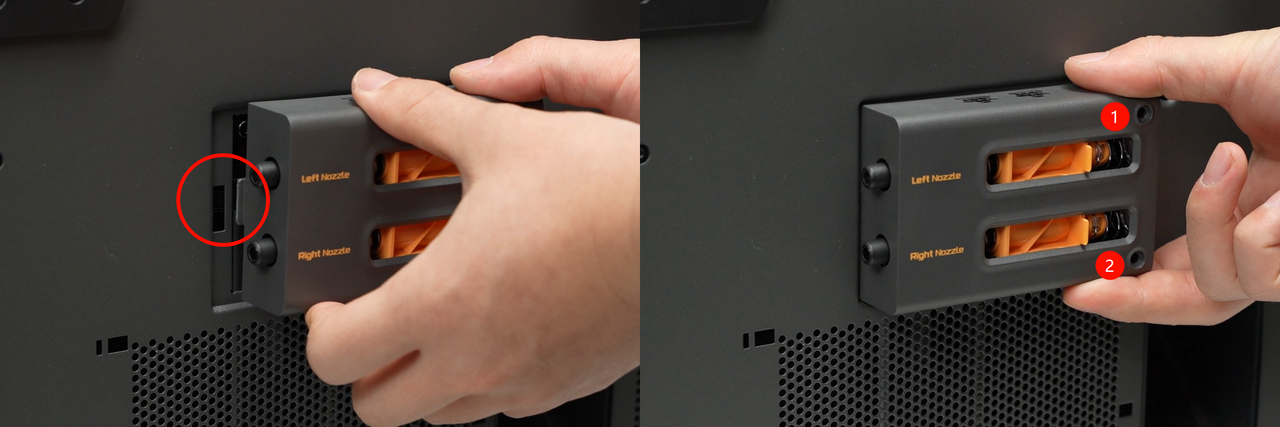
Push the buffer slider towards the filament outlet direction to expose the tube connector, press the connector, and remove the filament outlet PTFE tube.
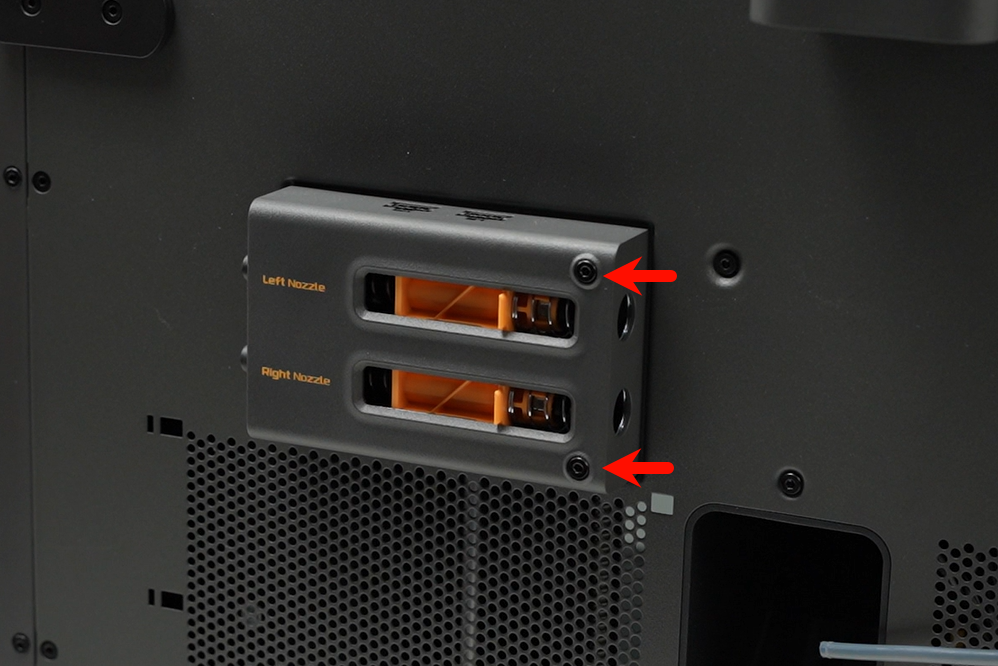
Step 2. Remove the filament buffer
Use an H2.0 allen key to remove the 2 fixing screws.
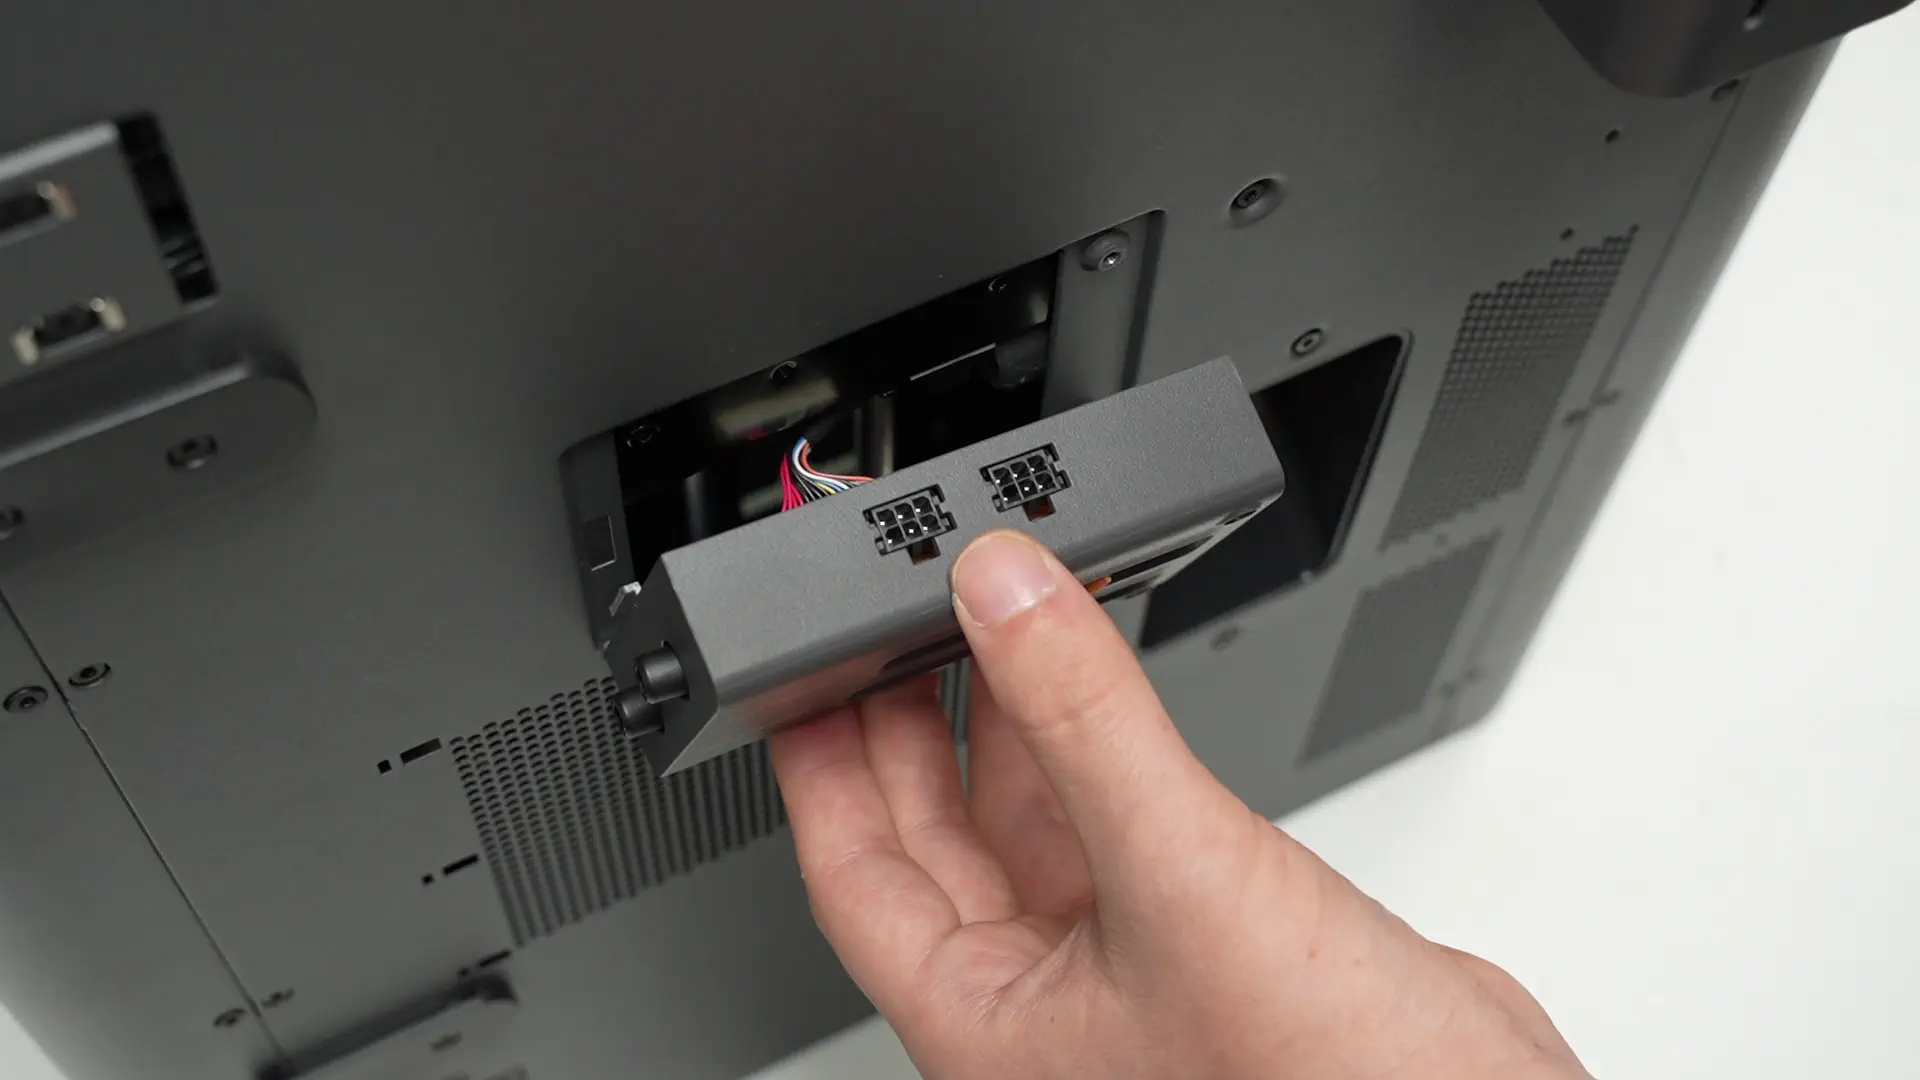
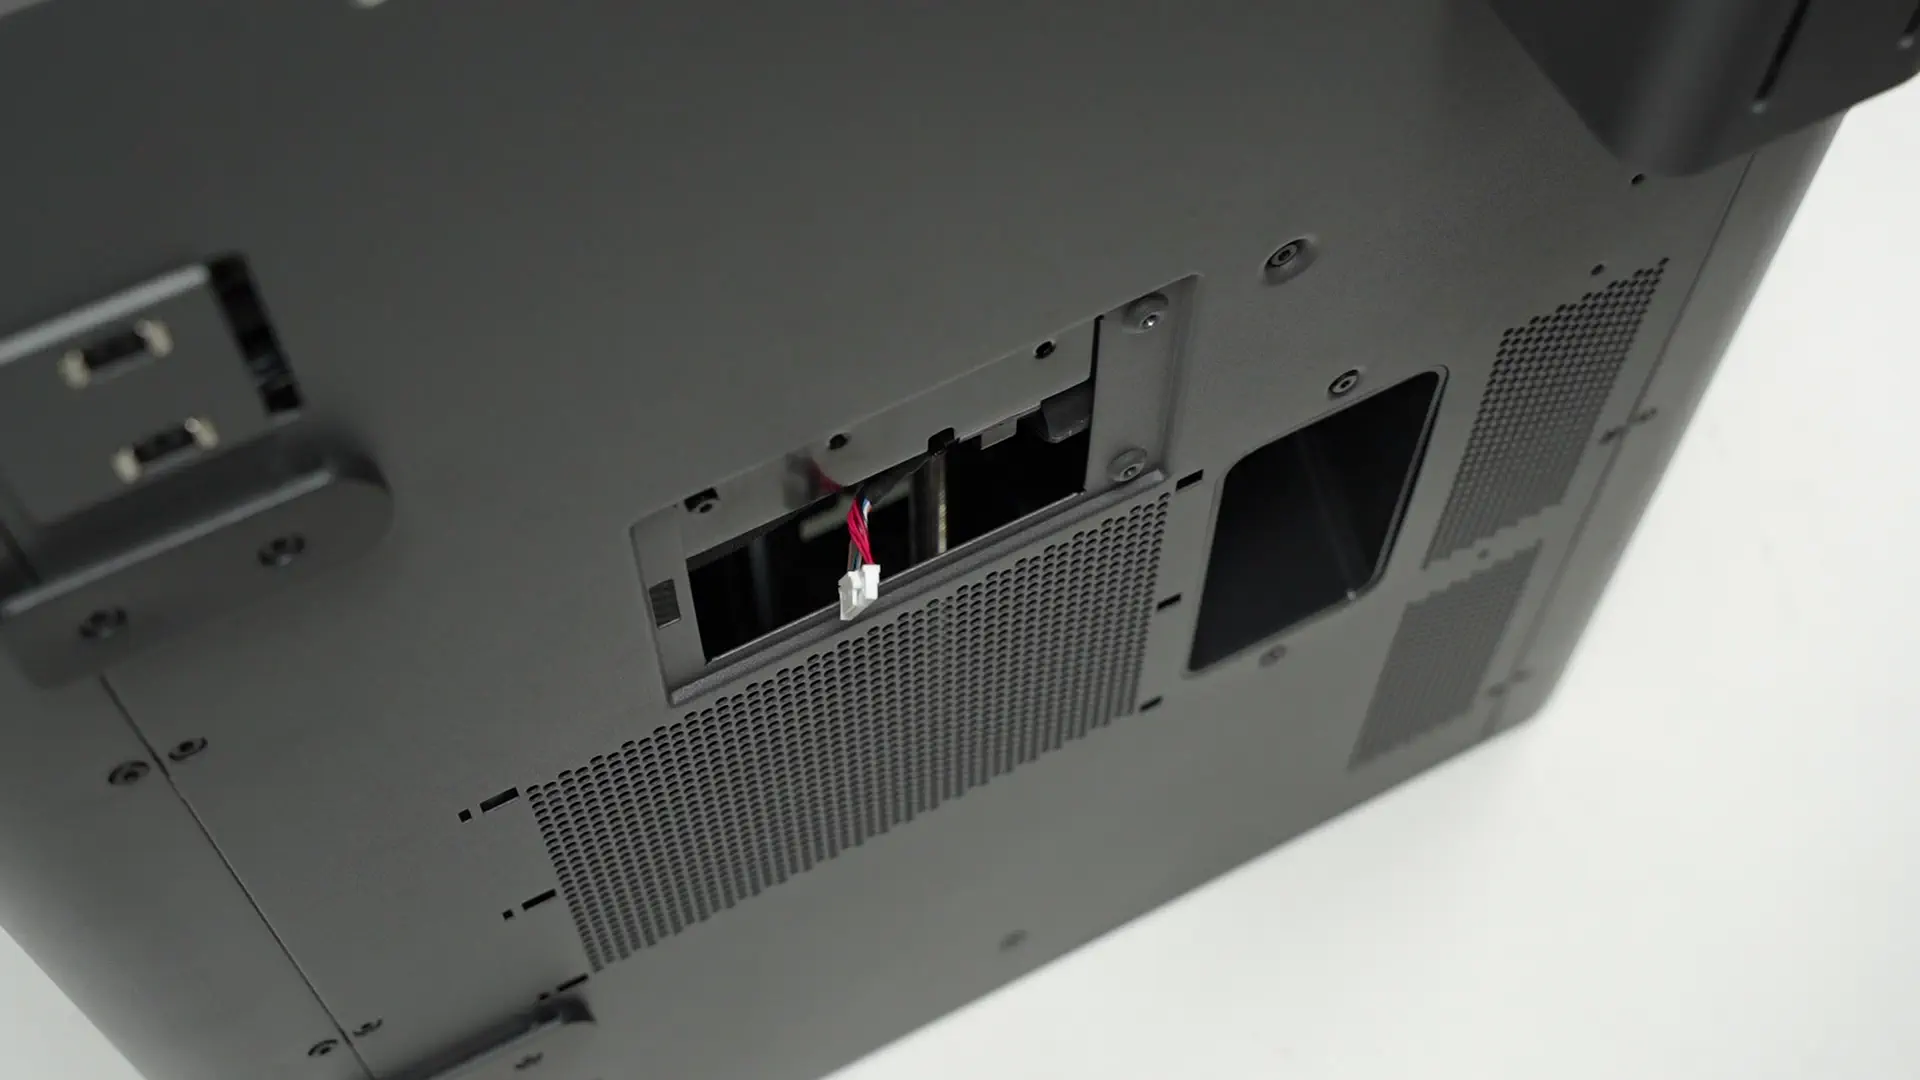
Flip the filament buffer over to expose the connector wire, press the connector latch by hand, unplug the cable, and remove the filament buffer.
Install the filament buffer
Step 1. Install the filament buffer
Connect the cable to the filament buffer’s connector; ensure the latch orientation is correct.
Clip the filament buffer onto the mounting holes on the backplate and secure it with 2 screws using an H2.0 allen key.
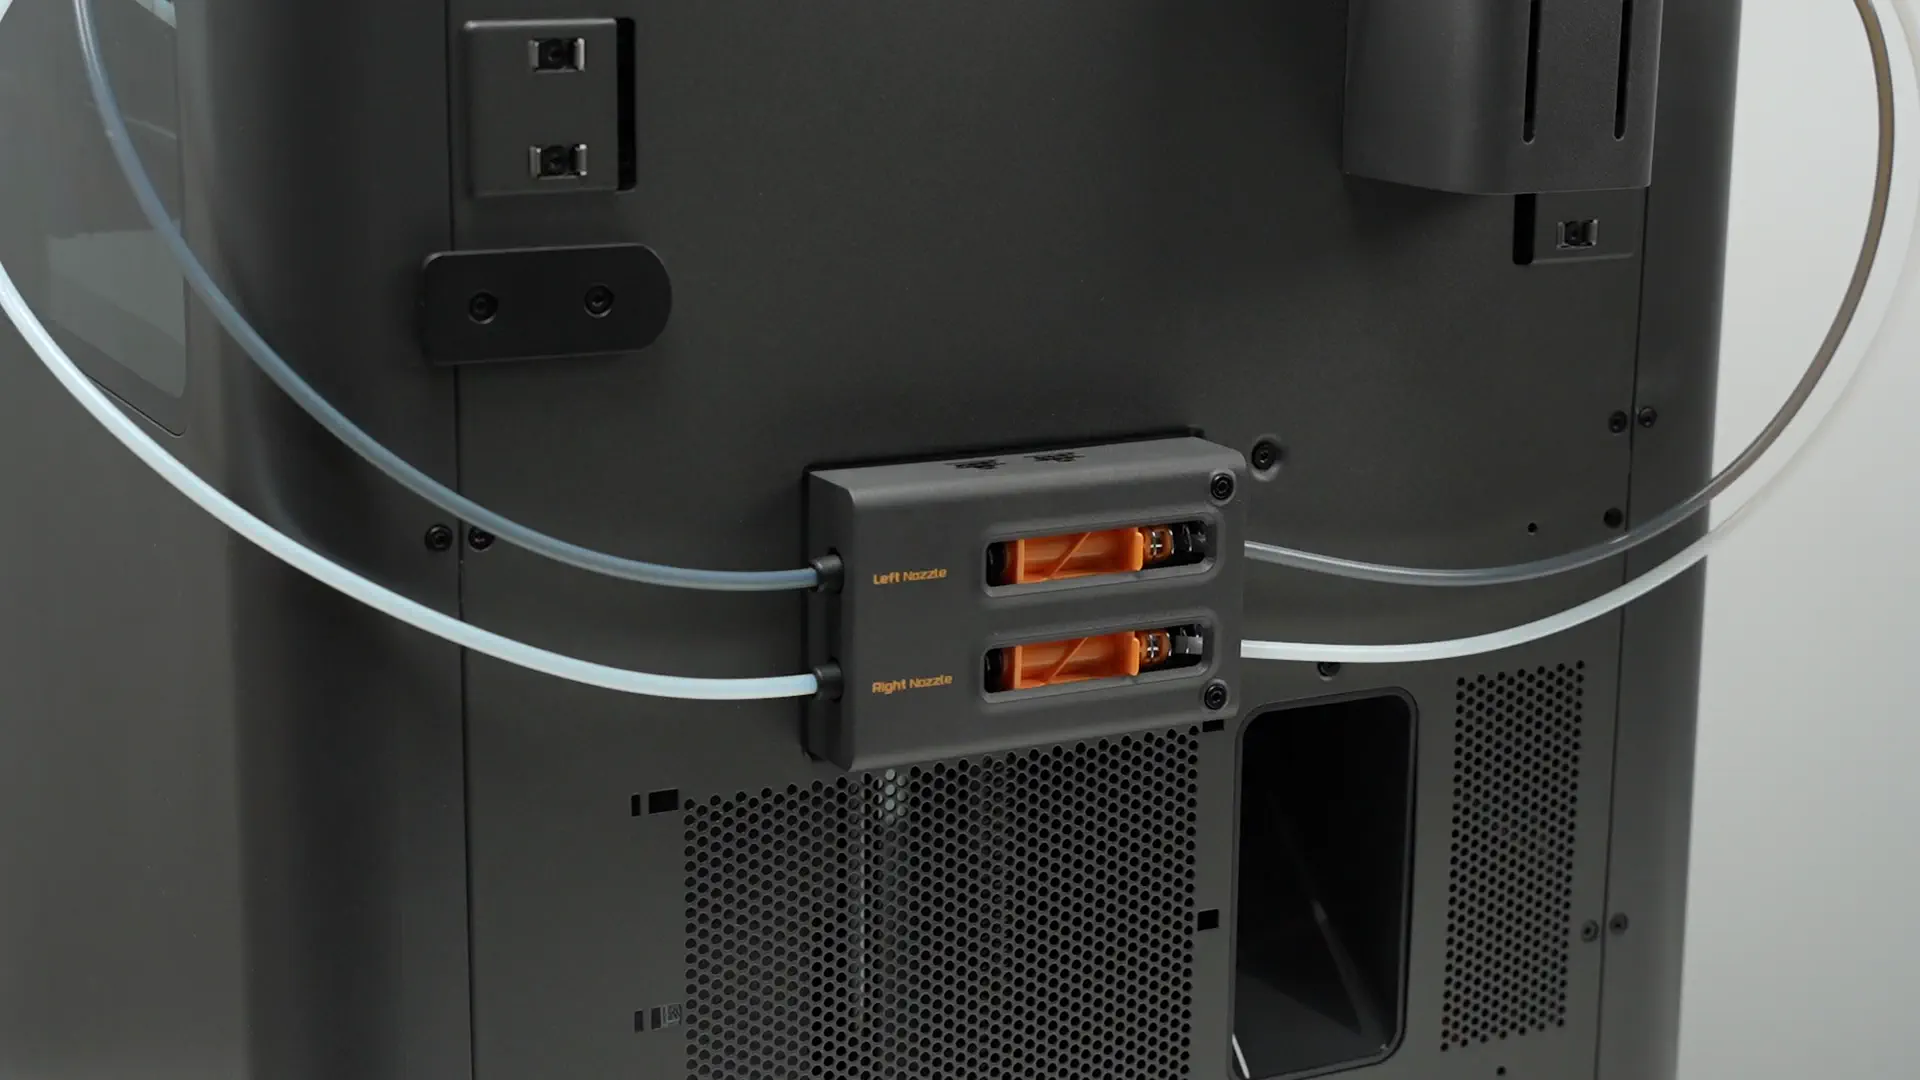
Step 2. Connect the PTFE tubes
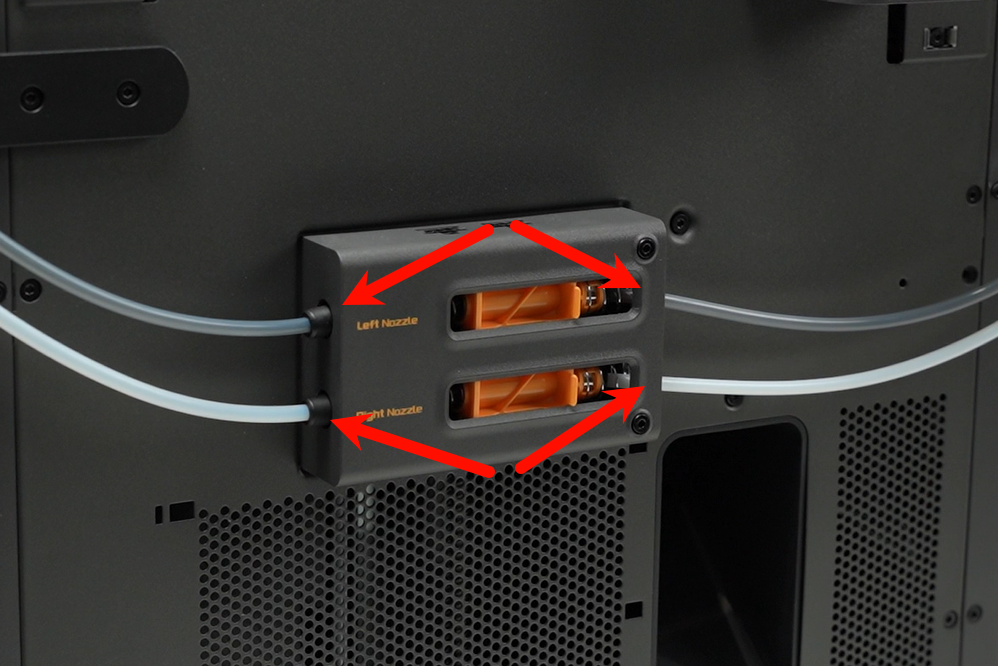
Reconnect the PTFE tubes on both sides of the filament buffer. When connecting, ensure the gray PTFE tube connects to the filament buffer’s inlet port (labeled “left nozzle” in the figure) and the main extruder’s inlet port, while the white tube connects to the filament buffer’s lower inlet port (“right nozzle”) and the auxiliary extruder’s inlet port.
Verifying Success
✅ Start the printer and initiate a filament loading operation via AMS. If the loading process completes successfully, the replacement is successful.
Otherwise, please check whether the filament buffer’s connectors and PTFE tubes are correctly connected, then retry.
If you encounter any issues, please retrace your steps and check all connections before trying again.