


Eddy Sensor -Right /Left for Bambu X2D
No se pudo cargar la disponibilidad para recoger
Utilice este texto para fomentar la comunicación o promover el intercambio en las redes sociales.
Eddy Sensor -Right - X2D
The eddy sensor - right is installed between the right hotend and the extruder and serves is used for actively calibrating filament flow.
Right Eddy Sensor replacement kit includes:
1. Right Eddy Sensor
2. Fixing Screws ( x2 )
In the Box
- Right Eddy Current Coil *1
Compatibility
X2D

Eddy Sensor - Left - X2D
The eddy sensor - left is installed between the left hotend and the extruder and serves is used for actively calibrating filament flow.
Left Eddy Sensor replacement kit includes:
1. Left Eddy Sensor
2. Fixing Screws ( x2 )
In the Box
- Left Eddy Current Coil *1
Compatibility
X2D

Eddy Sensor Replacement Guide For the X2D
【Original Left Eddy Current Coil for X2D】 This genuine left eddy current coil is an original Bambu Lab part designed exclusively for X2D left side. Installs between left hotend and extruder. Used for active filament flow calibration. Includes two fixing screws.
【Supports Filament Flow Calibration】 The eddy current coil enables active calibration of filament flow during printing. Helps maintain consistent extrusion for better print quality on the left hotend.
【Assists Z Axis Calibration and Bed Leveling】 When Z axis homing or bed leveling fails due to eddy sensor issues, replace with this OEM coil. Supports accurate bed leveling for reliable first layer on left side.
【Direct Drop In Replacement for X2D Left】 Replace when eddy current coil is physically damaged. Installation follows official Bambu Lab Wiki guide using H1.5 Allen key. Connector must be lifted perpendicular to the board when disconnecting.
【Restores Factory Calibration Performance】 Faulty eddy coil causes calibration failures and poor flow control. This genuine X2D left eddy current coil restores accurate filament flow calibration for your left hotend.
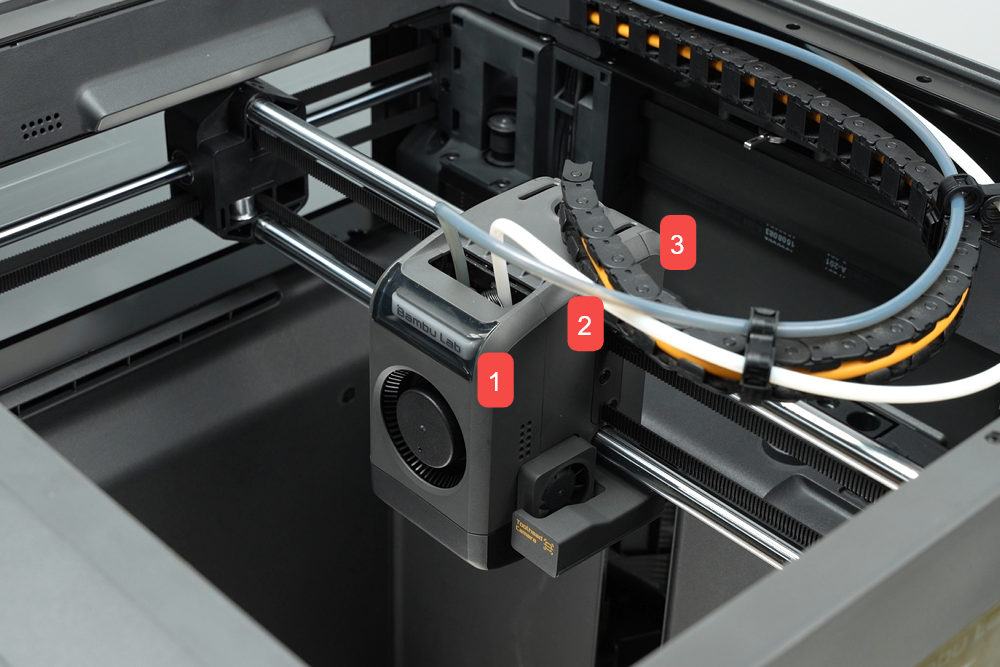
This article introduces how to replace the X2D Eddy Sensor.
The Eddy Sensor are installed between the hotend and the extruder and serve as components for actively calibrating filament flow.
The X2D has two Eddy Sensor, located above the left hotend and the right auxiliary hotend respectively.
Applicable printer model
Bambu Lab X2D
When to Replace
Physical damage to the Eddy Sensor can be identified;
Z-axis homing or heatbed leveling failed, caused by the Eddy Sensor malfunction.
Required tools and materials
New Eddy Sensor
H1.5 allen key
Safety Warning
⚠️ IMPORTANT!
It's crucial to power off the printer before conducting any maintenance work, including work on the printer's electronics and tool head wires. Performing tasks with the printer on can result in a short circuit, leading to electronic damage and safety hazards.
During maintenance or troubleshooting, you may need to disassemble parts, including the hotend. This exposes wires and electrical components that could short circuit if they contact each other, other metal, or electronic components while the printer is still on. This can result in damage to the printer's electronics and additional issues.
Therefore, it's crucial to turn off the printer and disconnect it from the power source before conducting any maintenance. This prevents short circuits or damage to the printer's electronics, ensuring safe and effective maintenance.
Remove the Eddy Sensor
Step 1. Remove the toolhead housing
Step 2. Remove the hotends
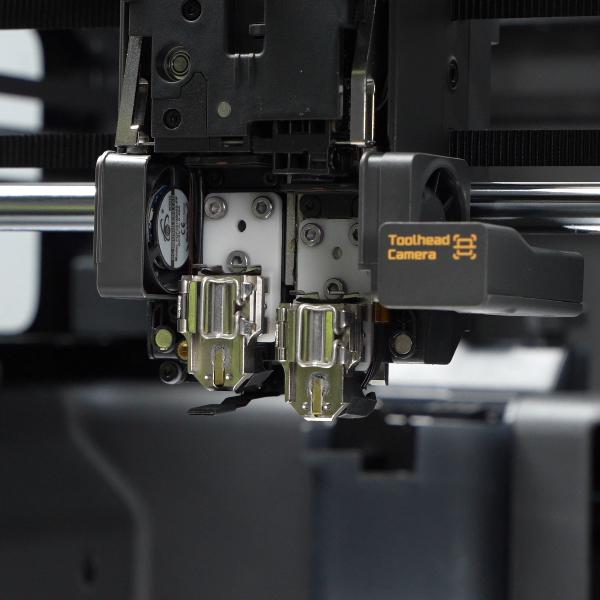
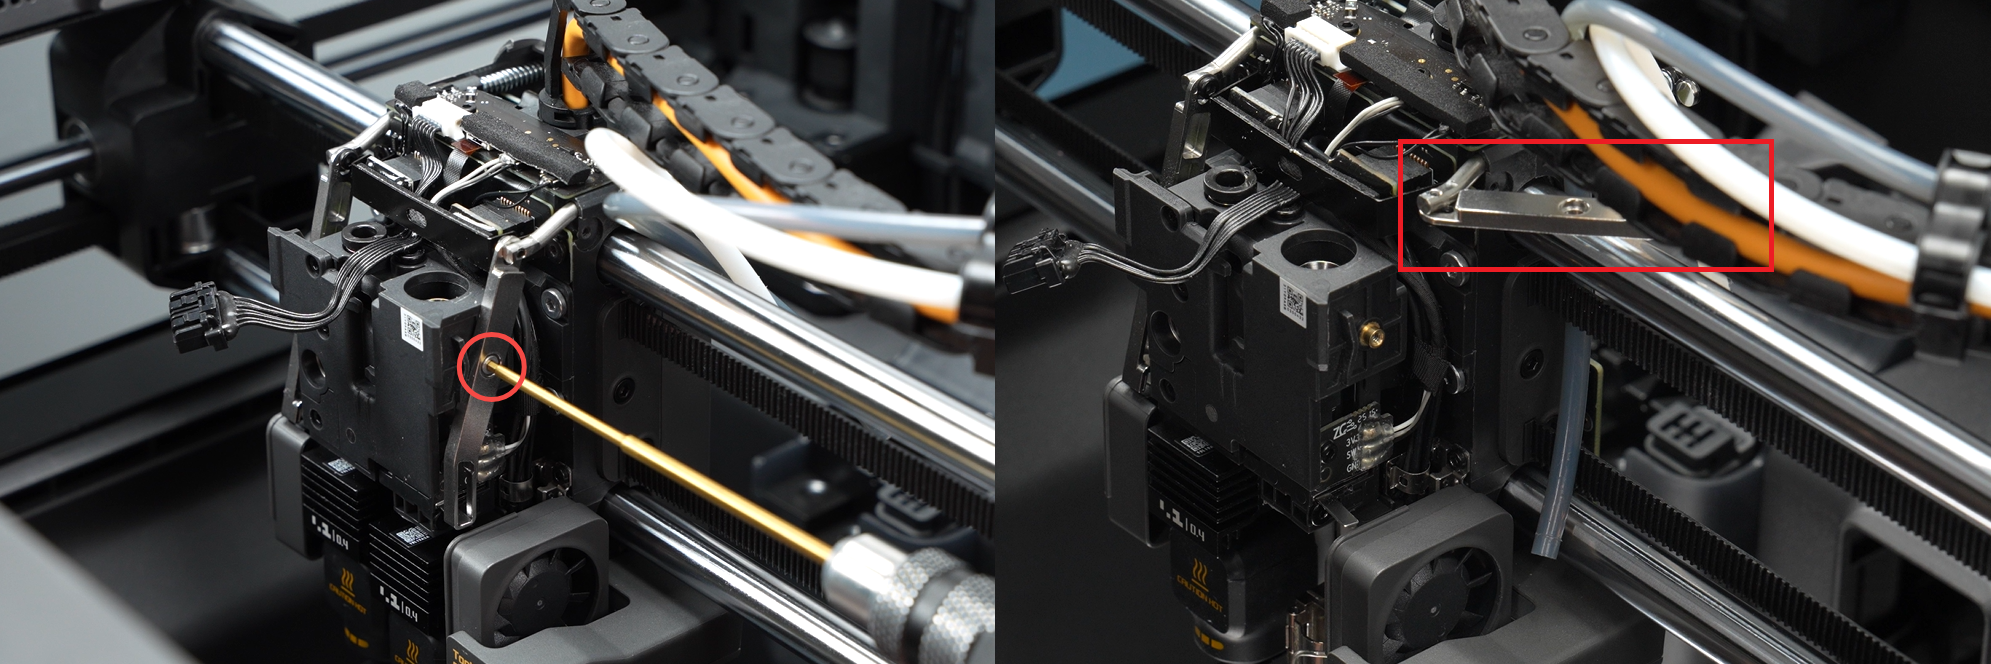
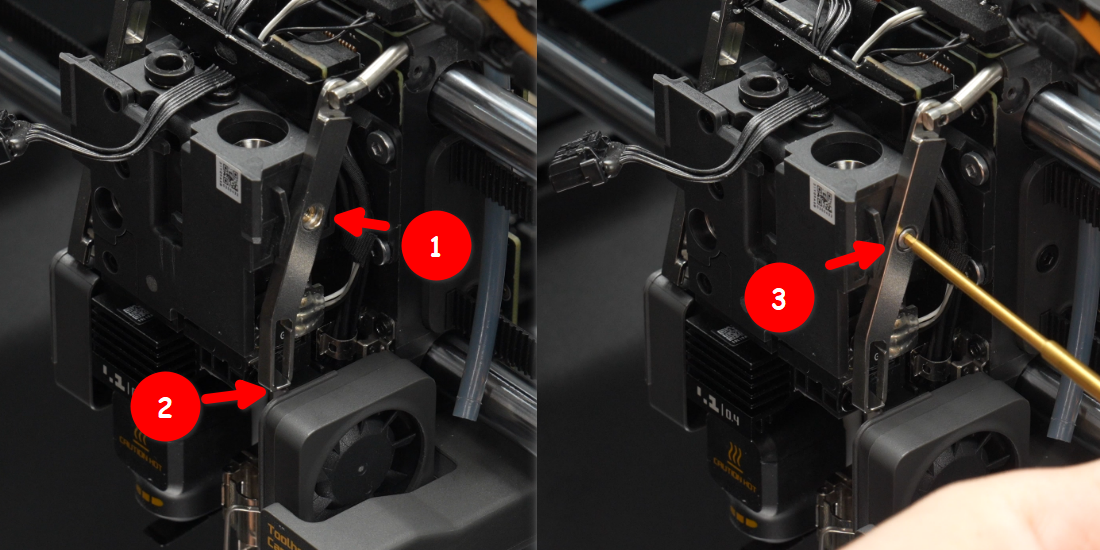
Step 3. Remove the Left Eddy Sensor
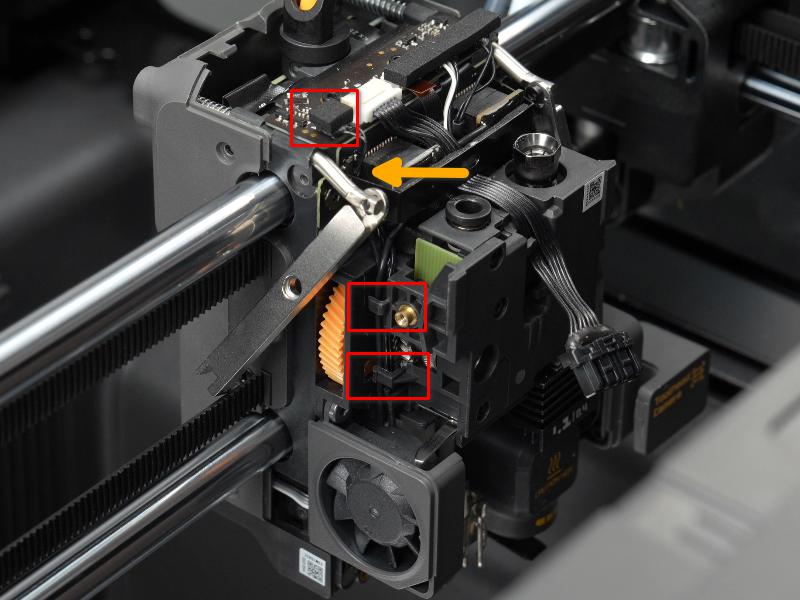
Use an H1.5 allen key to remove the single screw of the left filament cutter lever to separate the lever from the filament cutter assembly.

Use an H2.0 and H1.5 allen keys to remove the two screws fixing the left hotend fan (marked with red 1, 2),
Then use an H1.5 allen key to remove the two screws fixing the left Eddy Sensor bracket (marked with yellow 3, 4),

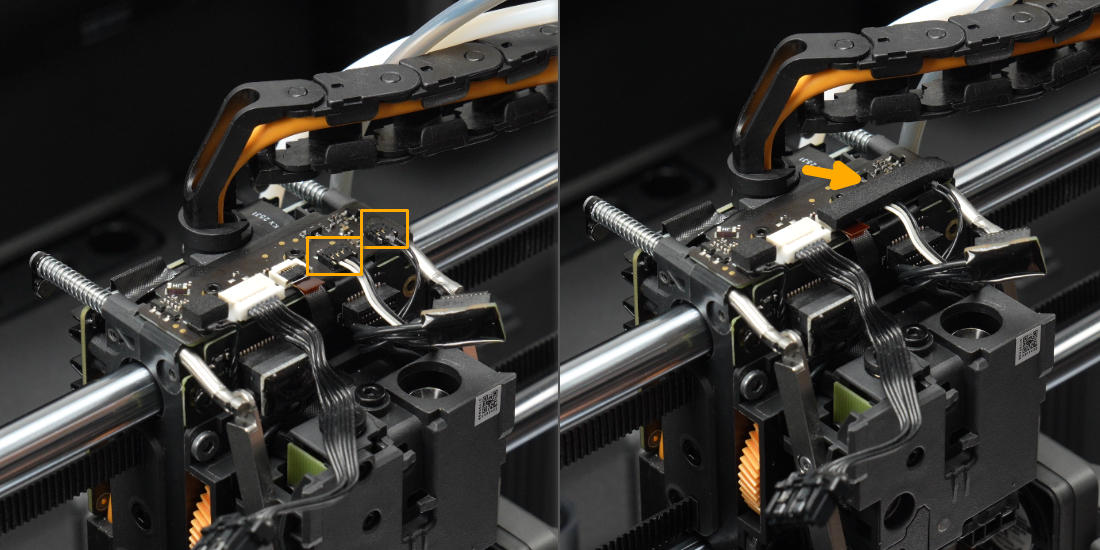
Step 3.1 Remove the Left Eddy Coil Cable
Peel off the foam on the toolhead interface board and disconnect the left Eddy Sensor connector by pulling perpendicular to the connector direction.
You can use a small H1.5 allen key to help disconnect the coonnector.

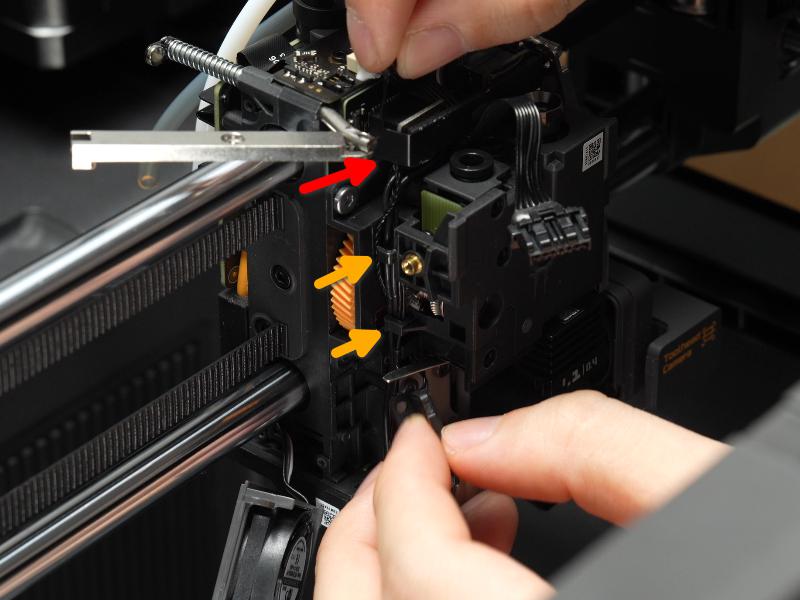
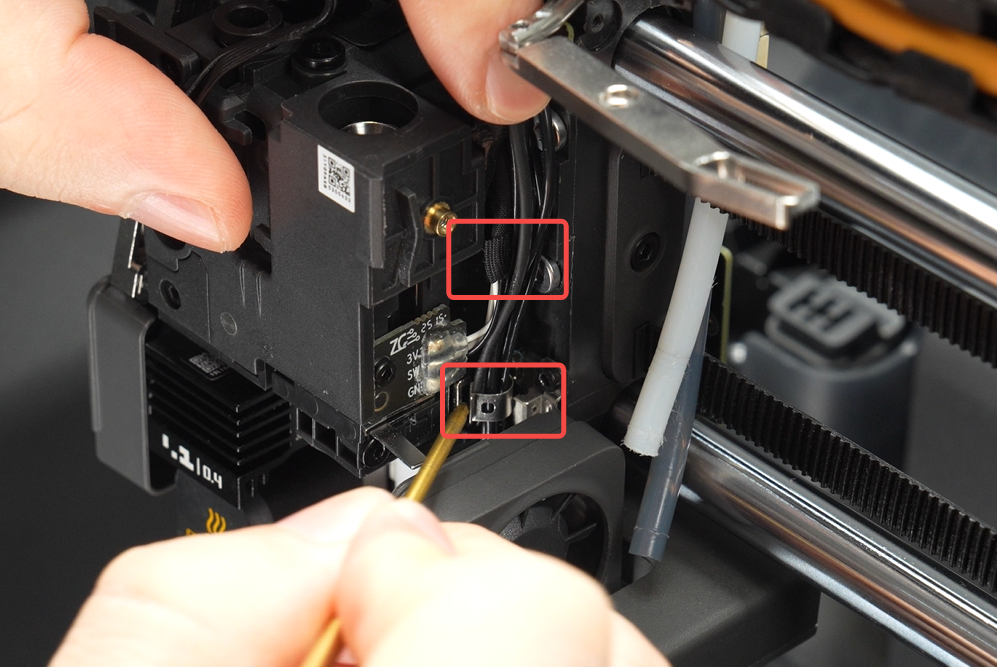
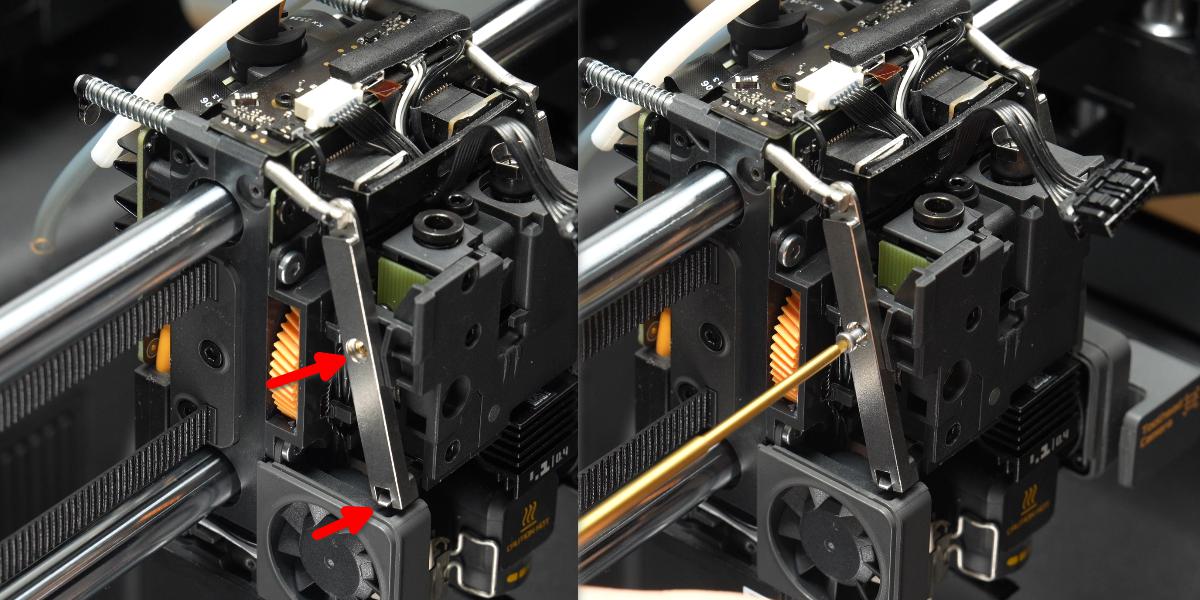
Detach the Eddy Sensor cable from the bracket (red arrow) and two locking tabs (yellow arrow), and remove the left Eddy Sensor.
Step 4. Remove the Right Eddy Sensor
Step 4.1 Remove the Metal Pressing Bracket
Use an H2.0 allen key to remove the two screws and take off the metal pressing plate bracket.
Use an H1.5 allen key to remove one screw of the right filament cutter lever and separate the lever from the filament cutter assembly.
Step 4.2 Remove the Right Eddy Coil Cable
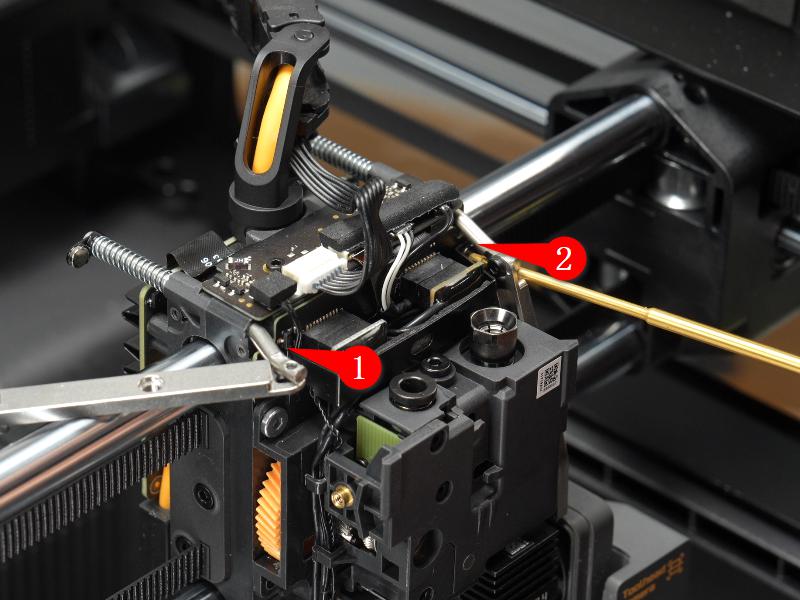
Peel off the foam on the toolhead interface board, disconnect the right Eddy Sensor connector and the right filament sensor assembly connector by pulling perpendicular to the connector direction.
 Remove the cable fixing tape and loosen the cable from the metal locking tab.

Step 4.3 Remove the Right Eddy Sensor

Use an H1.5 allen key to remove the two fixing screws and gently pull out the right Eddy Sensor.
Install the Eddy Sensor
Step 1. Install the Right Eddy Sensor
Step 1.1 Secure the Right Eddy Sensor
Install the right Eddy Sensor above the right hotend heating assembly and secure it by fastening two screws.
Step 1.2 Connect the Right Eddy Sensor Cable
Connect the right Eddy Sensor cable and the right filament sensor assembly to the toolhead interface board, then reapply the foam.
Step 1.3 Route the Right Eddy Sensor Cable
Insert the Eddy Sensor cable into the metal locking tab, then rewrap the cable with tape.
Step 1.4 Install the Metal Pressing Bracket
Install the metal pressing plate bracket and use an H2.0 allen key to fasten the two screws to secure it.
Install the right filament cutter lever and secure it with one screw.
Step 2. Install the Left Eddy Sensor
Step 2.1 Secure the Left Eddy Sensor
Install the left Eddy Sensor above the left hotend heating assembly, securing it with two screws; then install the left hotend fan, fixing it with two screws.

Step 2.2 Connect the Left Eddy Sensor Cable
Route the Eddy Sensor cable beneath the hotend heating assembly interface board bracket, connect it to the interface board, then organize the cable into the two locking tabs,
Step 2.3 Install the Left filament cutter lever
Install the left filament cutter lever, ensuring the cutter assembly’s shaft is locked into the lever’s notch, then secure the lever with one screw.
Step 3. Install the Hotend

Step 4. Install the Toolhead Housing
Verifying Success
✅ After replacing the Eddy Sensor, perform a heatbed calibration. It should complete without any errors.
If any anomalies occur during calibration, please refer to Eddy Sensor Adjustment Guide for the X2D for further tuning.
If you encounter any issues, please retrace your steps and check all connections before trying again.