


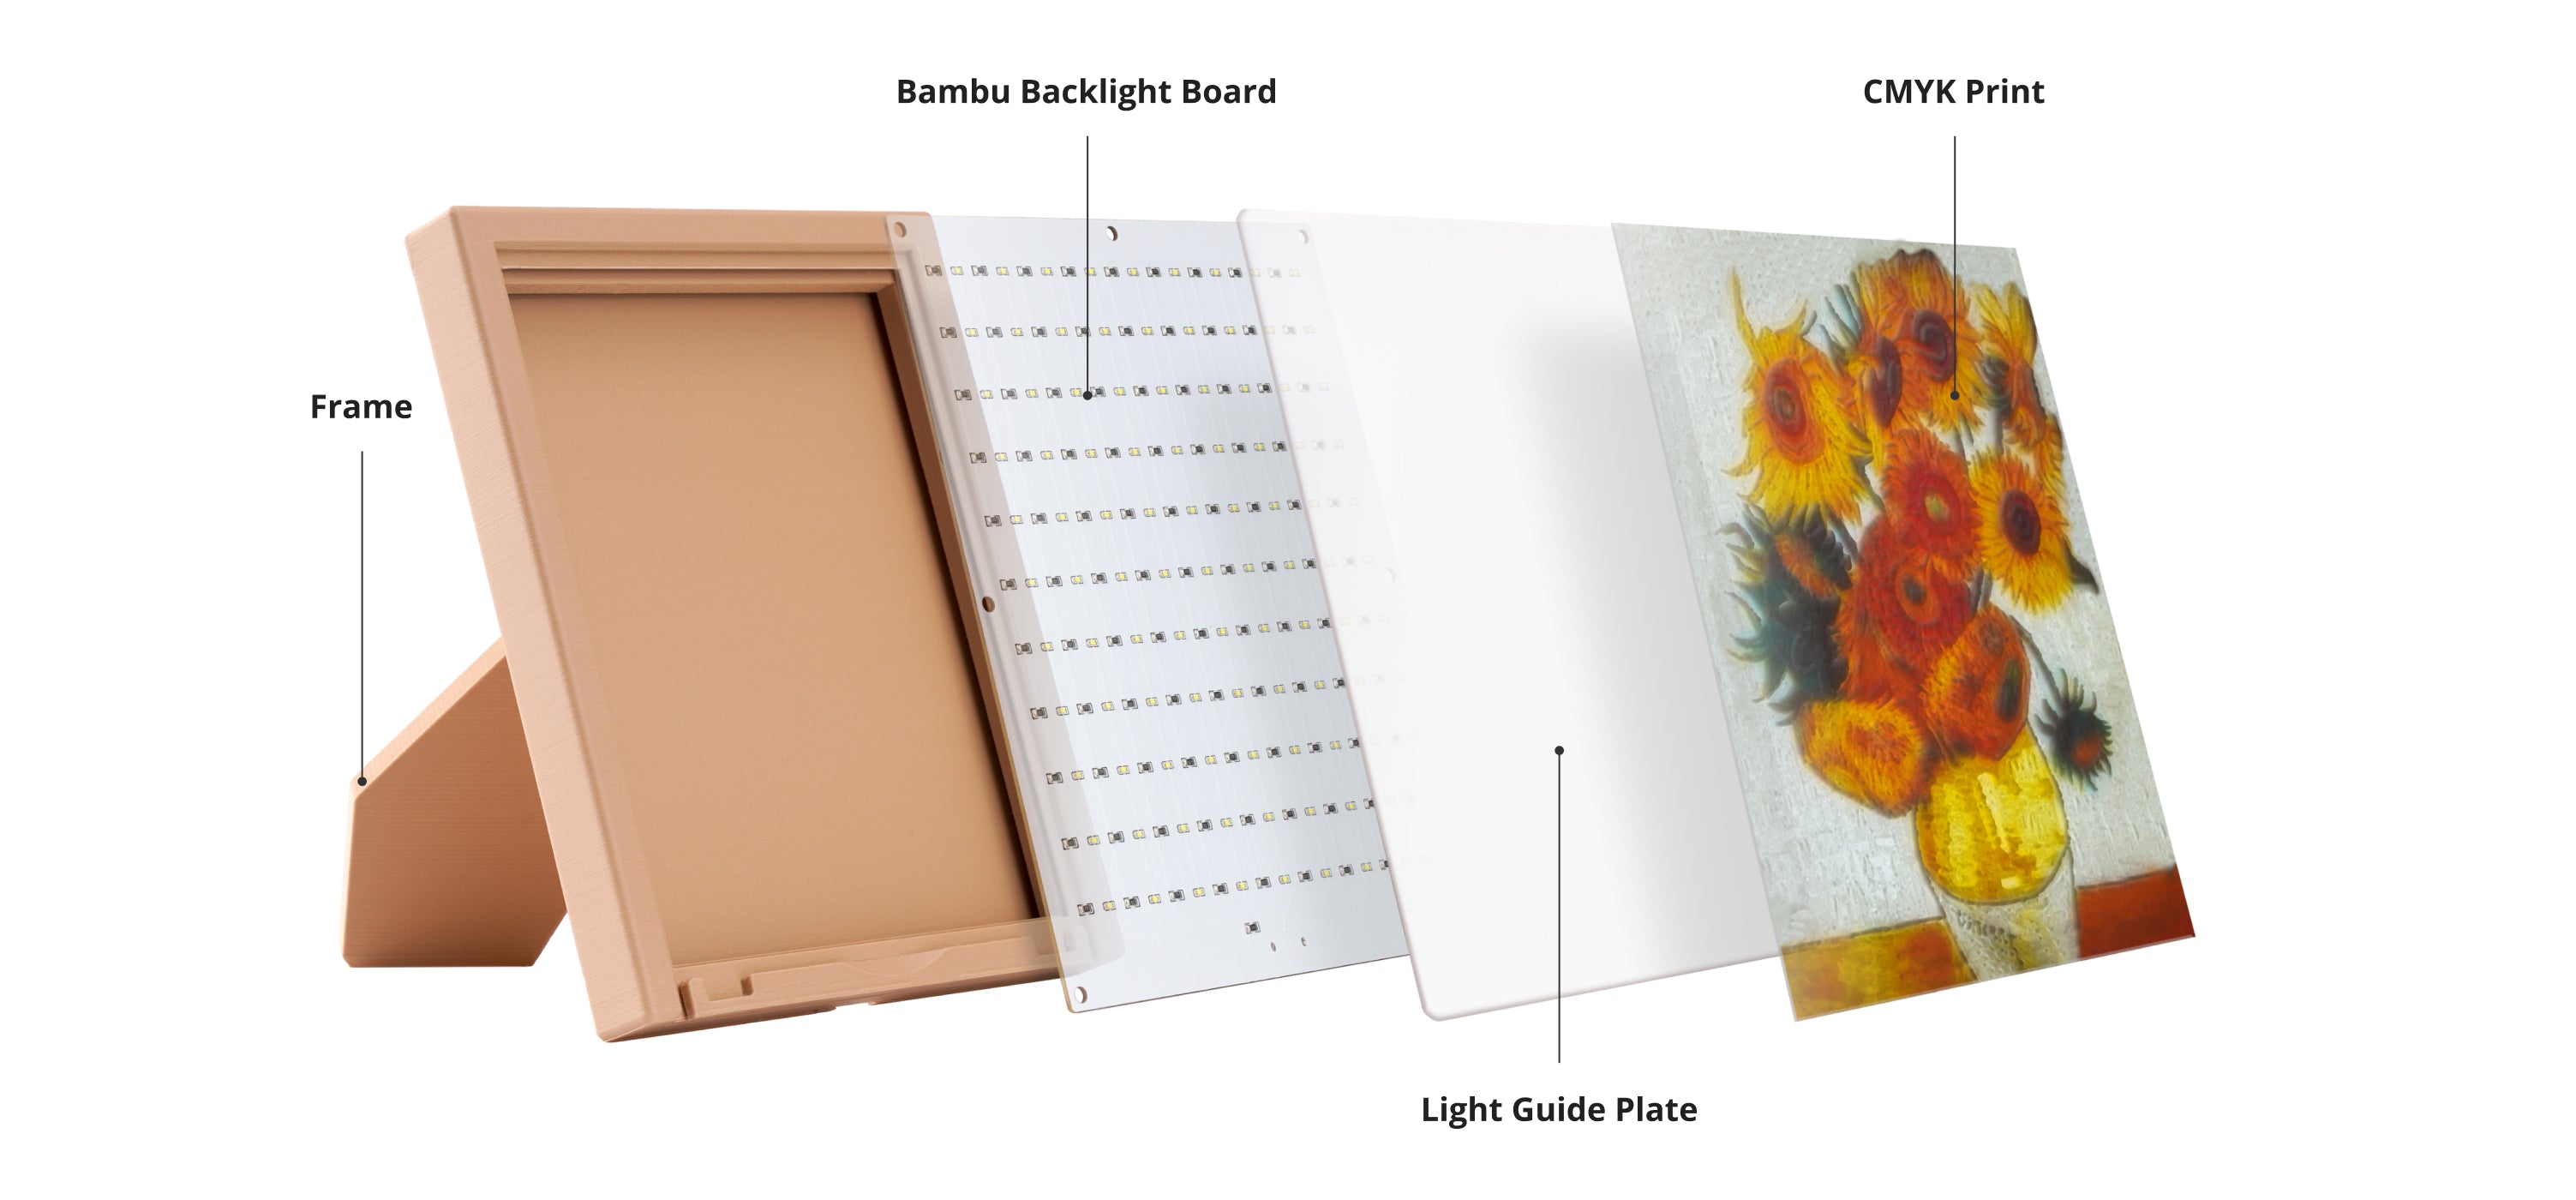
for Bambu CMYK LED Backlight Board
No se pudo cargar la disponibilidad para recoger
Use this text to encourage communication or promote sharing on social networks.
Cautions for Optimal Use
- Do not contact the board surface with metal when plugging in to prevent short-circuits.
- Avoid pressure on the light beads to prevent damage.
- Charging interface: USB-C (please use USB-A adapter)
Product Information
|
Size |
156 mm*120 mm |
|---|---|
| 144 mm*108 mm (Light Bead Aera) | |
| Light Type | LED |
| Power Source | Corded Electric |
| Power Port Type | USB-C |
| Light Color | White |
| Bead Count | 99 |
| Wattage | 5W |
| Temperature during Operation | 70 ℃ |
| Weight | 59g |
CMYK Lithophane Printing Guide
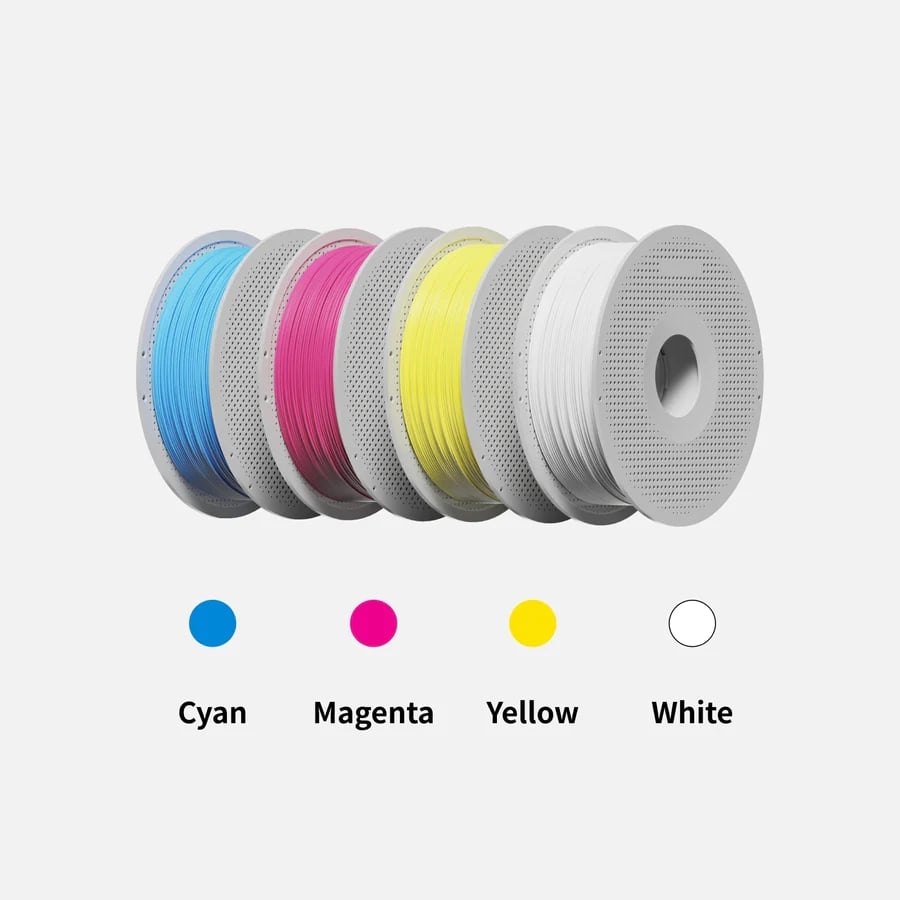
CMYK Lithophane Filament Bundle
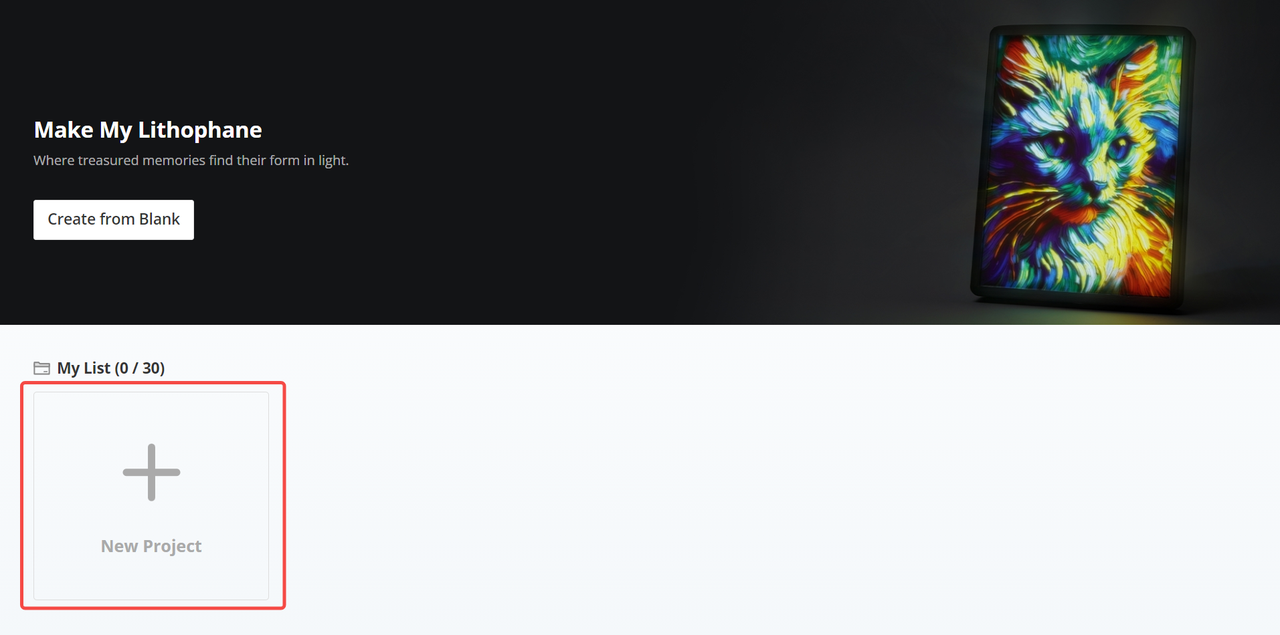
Make My Lithophane
Make My Lithophane is a software to create monochrome or colorful lithophanes developed by Bambu Lab. It is optimized to be compatible with Bambu Lab's CMYK filaments.
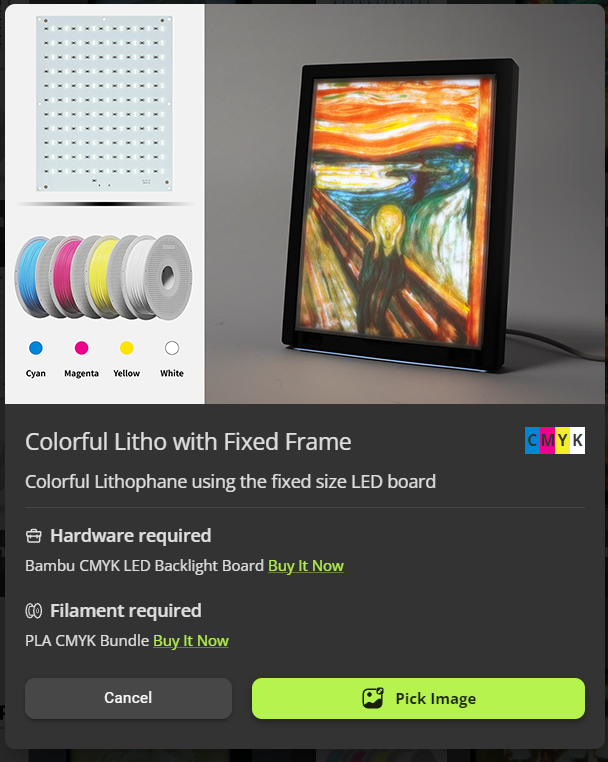
Select the lithophane types that compatible with Bambu CMYK LED Backlight Board: Mono Litho with Fixed Frame or Colorful Litho with Fixed Frame.
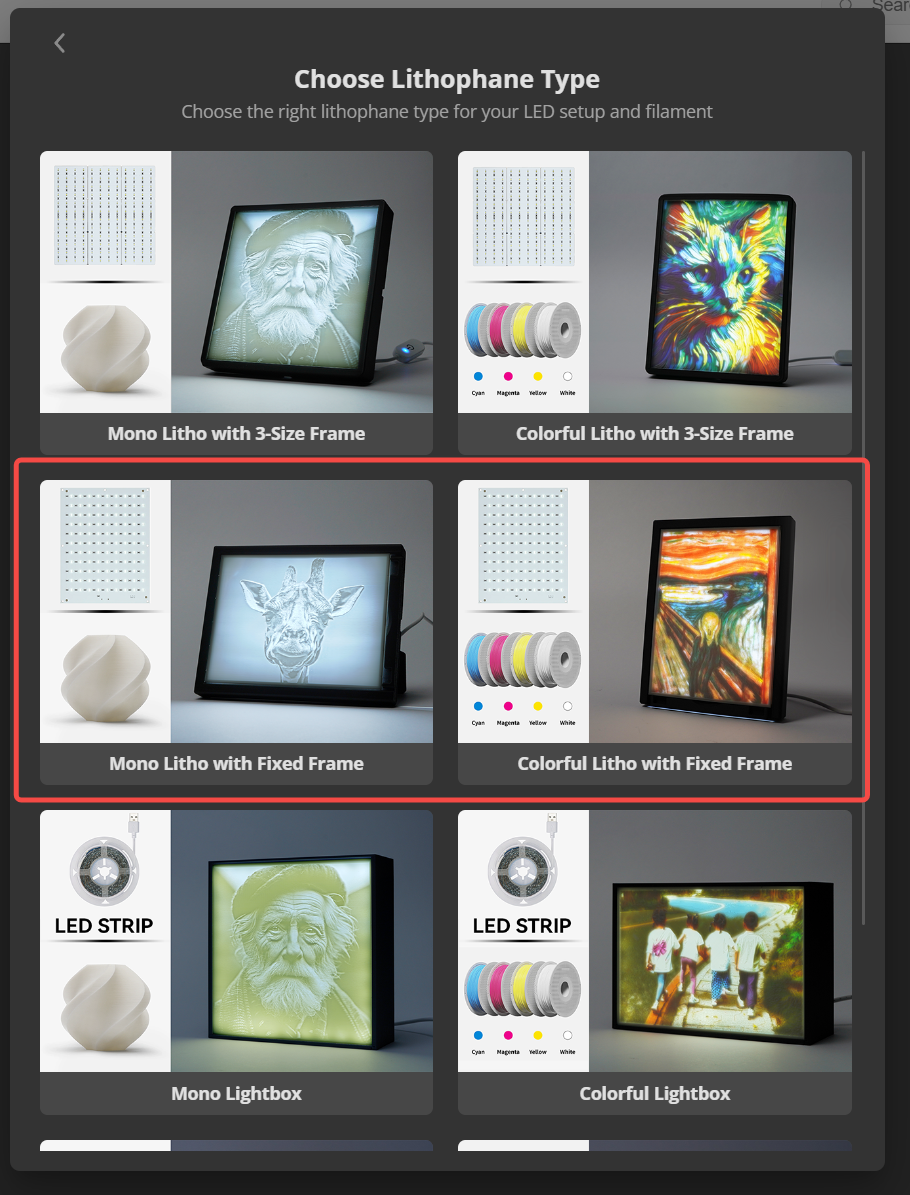
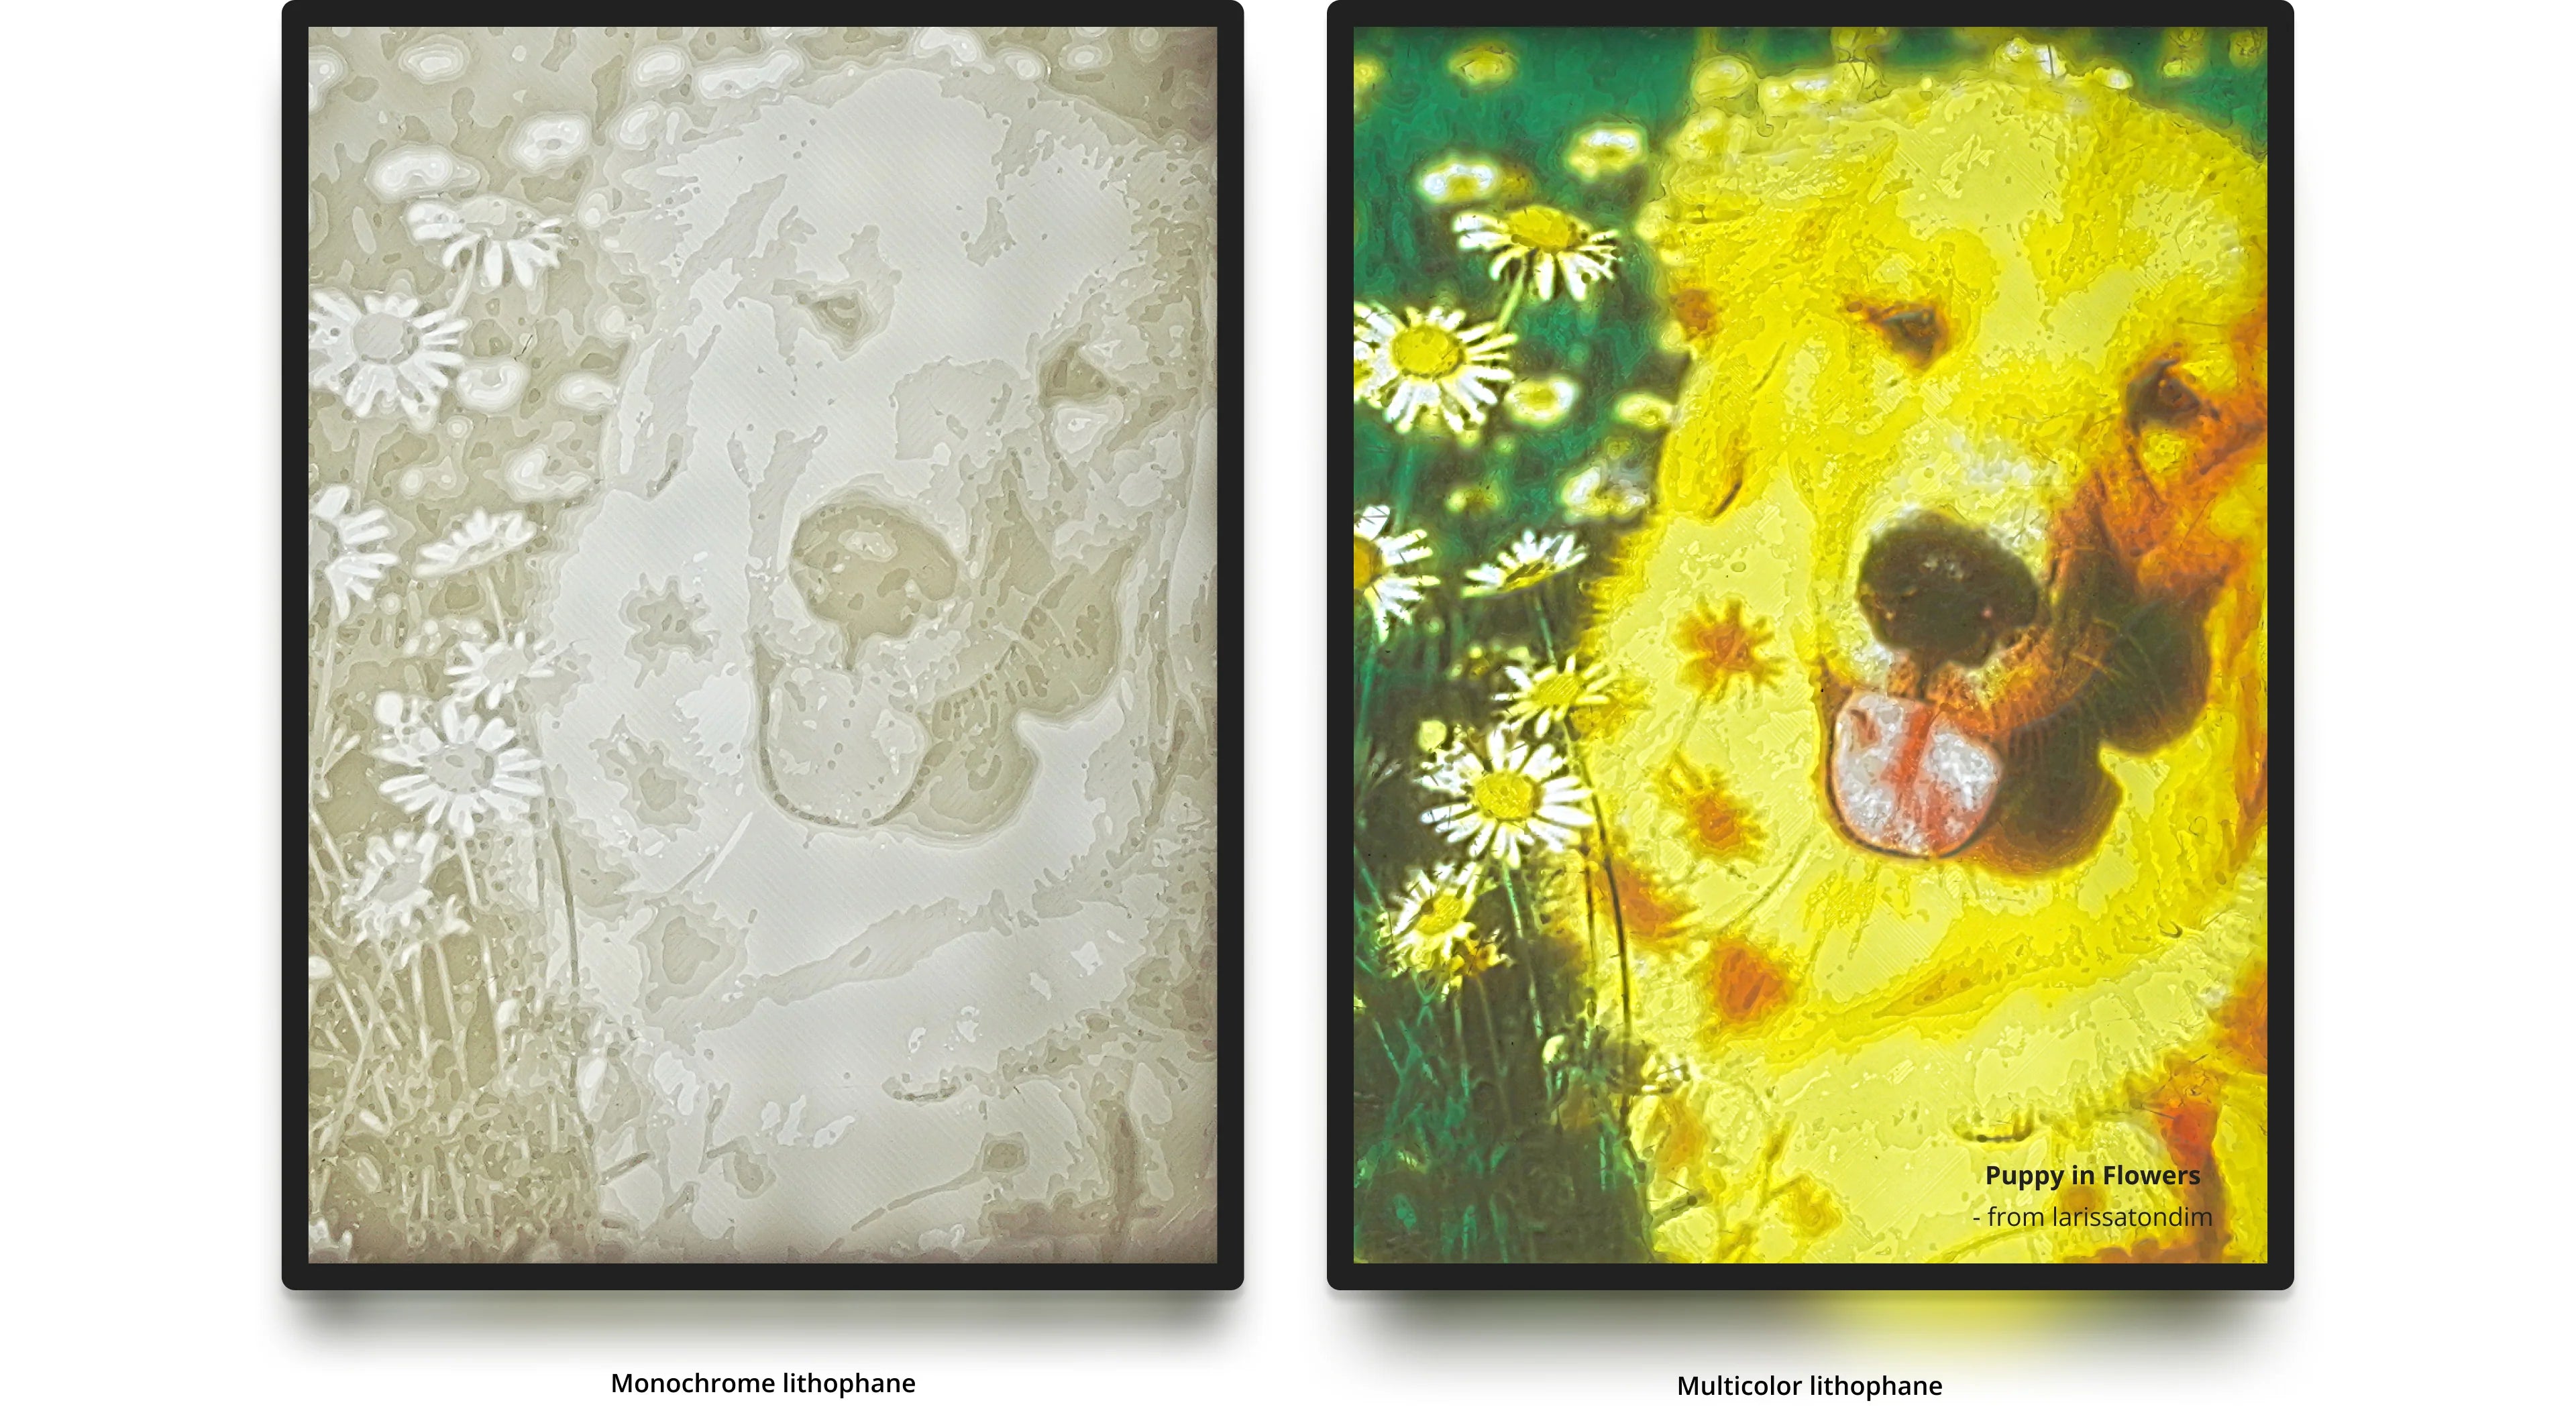
Mono Litho with Fixed Frame is used to create monochrome lithophanes that only requires PLA Basic - Jade White.
Colorful Litho with Fixed Frame is used to create colorful lithophanes that require the PLA CMYK Bundle. This article will use this type as an example. Click "Pick Image" to import your favorite image.
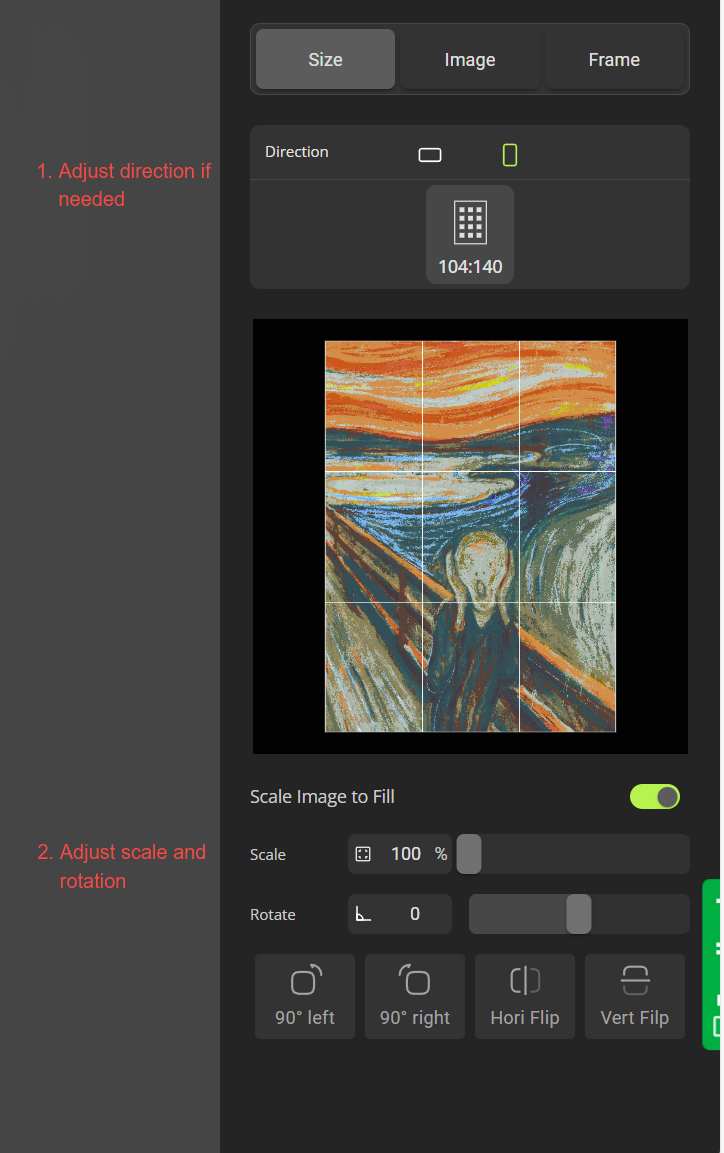
Adjust the image direction, scale and rotation if needed.
Adjust the image's color and light to optimize the result. You can preview the result inside Make My Lithophane.
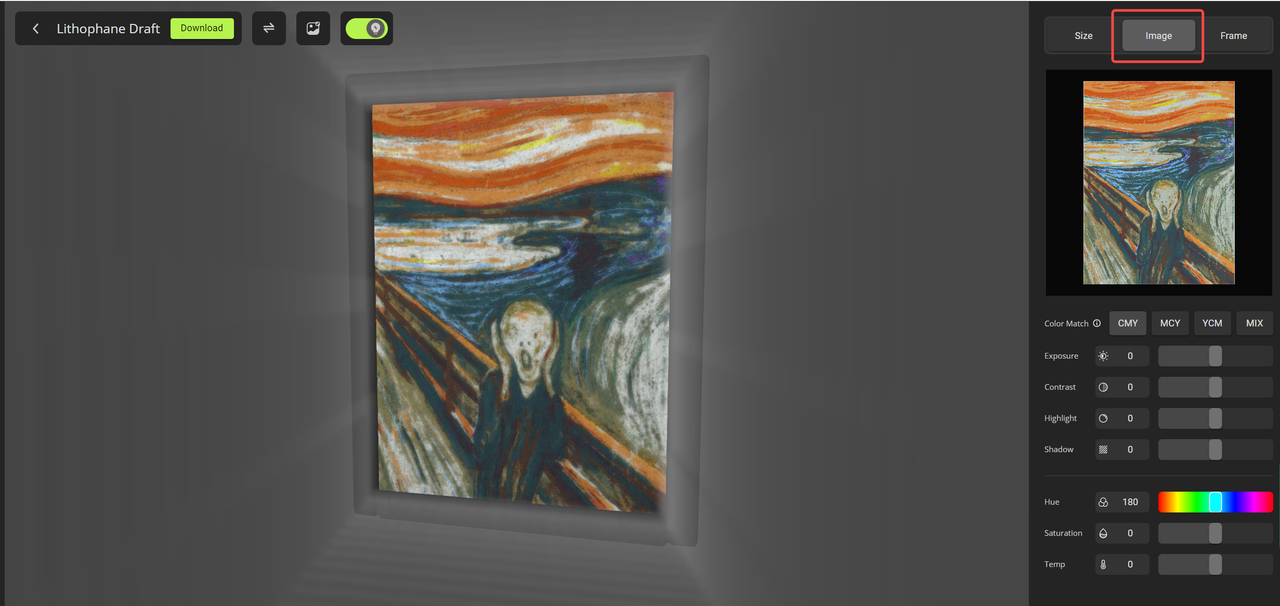
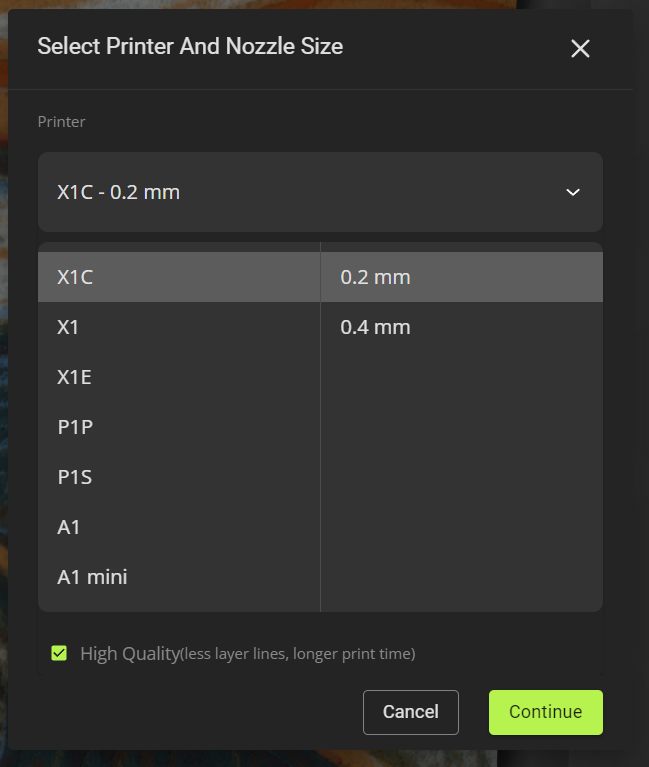
Export the 3MF file by clicking "Download" button on the top left corner. Select the Printer and Nozzle size. 0.2 mm is recommended to have better result. It takes minutes to generate the 3MF file. The generated 3MF file is ready for printing. No further configuration is required.
\
Make My Litophane on mobile
Make My Lithophane is also available on mobile. You can access it at the latest Bambu Handy from the MakerLab Icon.

3rd-Party Software
Step 1 - Generate STL files
1. Visit the Lithophane tool Lithophane Makers and upload one of your favorite JPG format photos.
Select the 'Crop' checkbox to adjust the STL width and length.
The recommended first layer height is 0.15mm.
Adjusting the size 144(W)*108(H) to** fit Bambu Lab Frames & Backlight Board**.
Modify the X Shift and Y Shift to change the spacing of both sides.
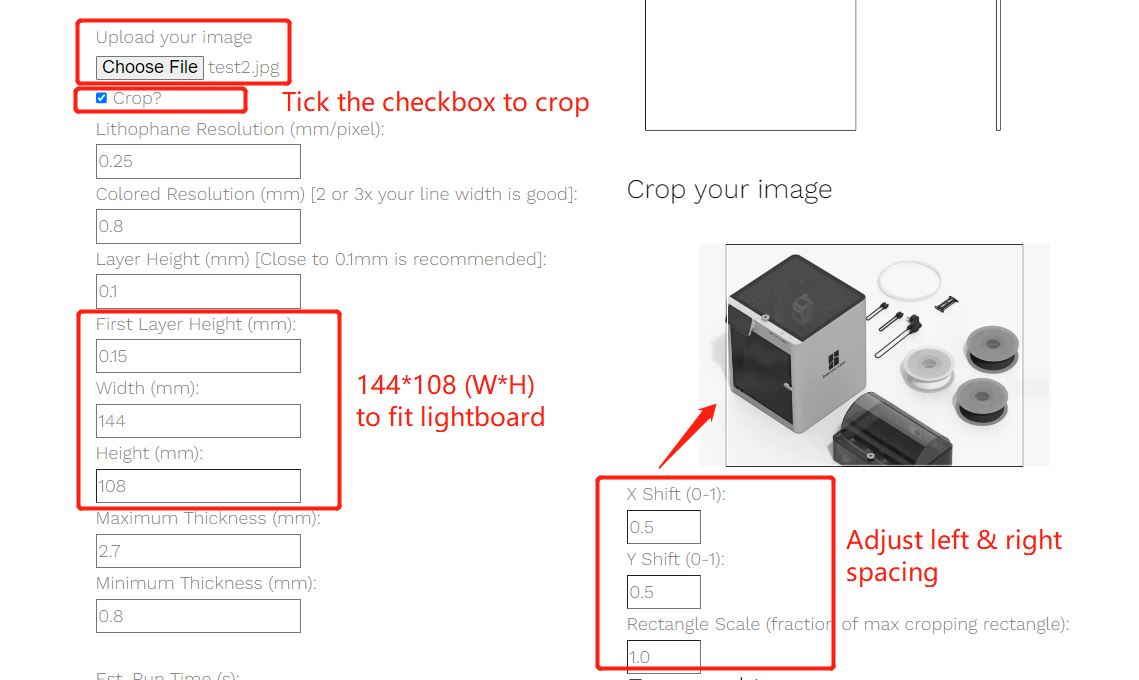
Use the default ‘Palette’

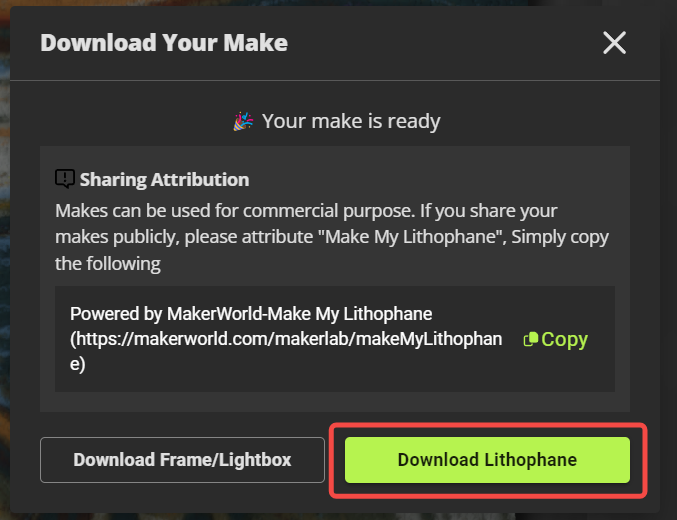
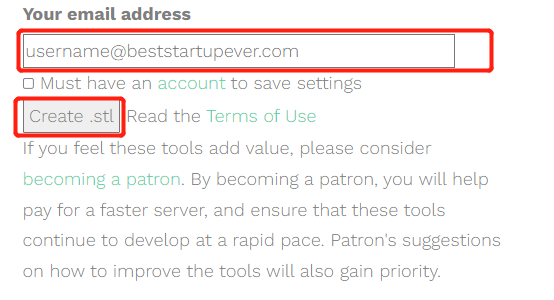
2. Enter your personal email address and click 'Create .stl' to download the generated STL zip file.
3. Preview function
After all the above information is filled in, you can use the website's preview function to preview the printing effect.
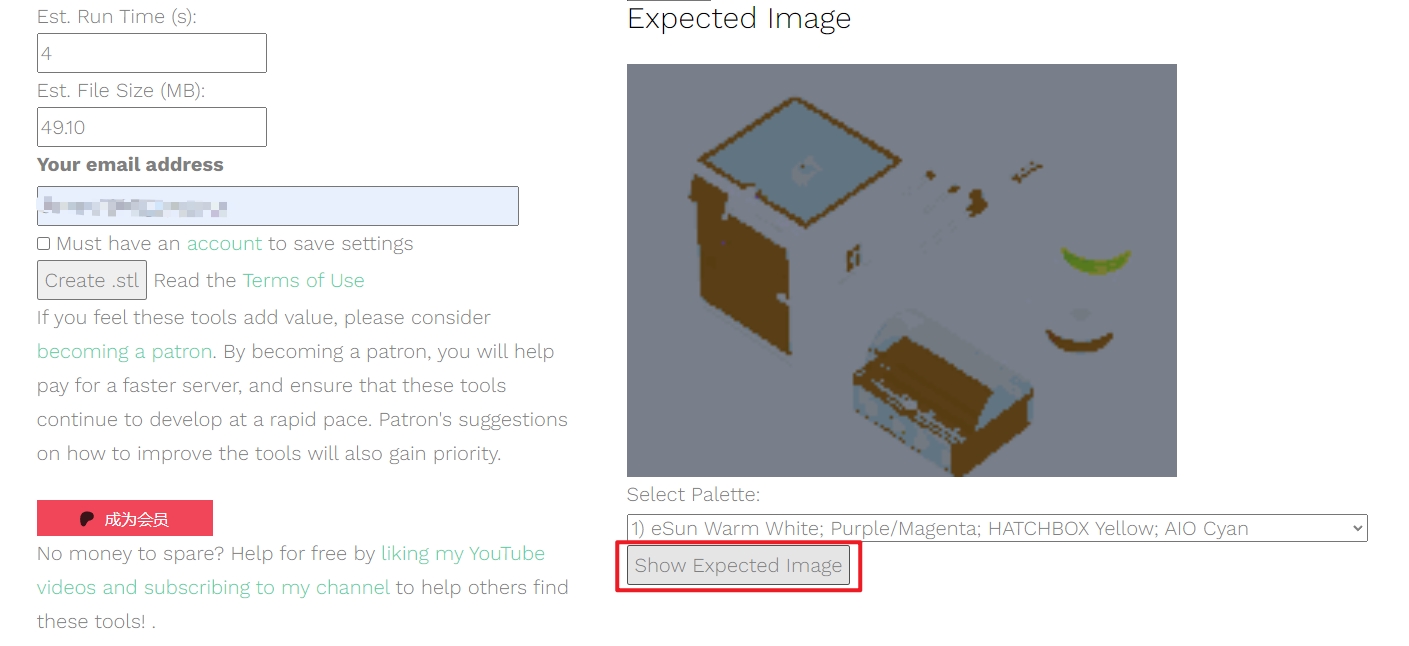
Note: Due to website display reasons, the preview function is only for previewing the printing effect.
Step 2 - Configure and slice
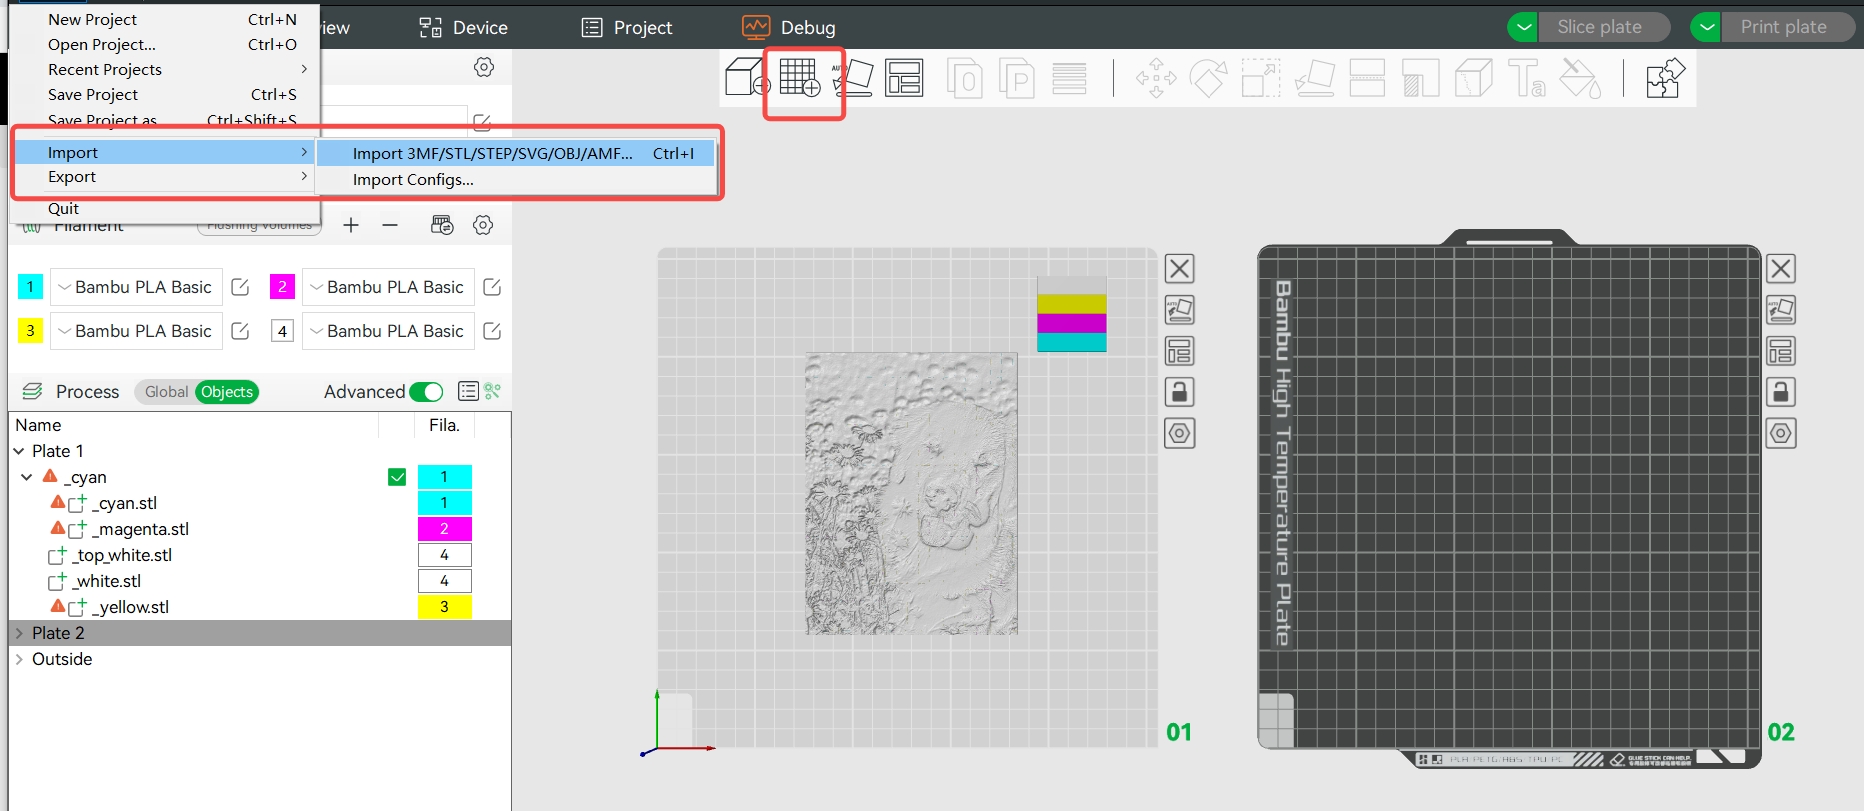
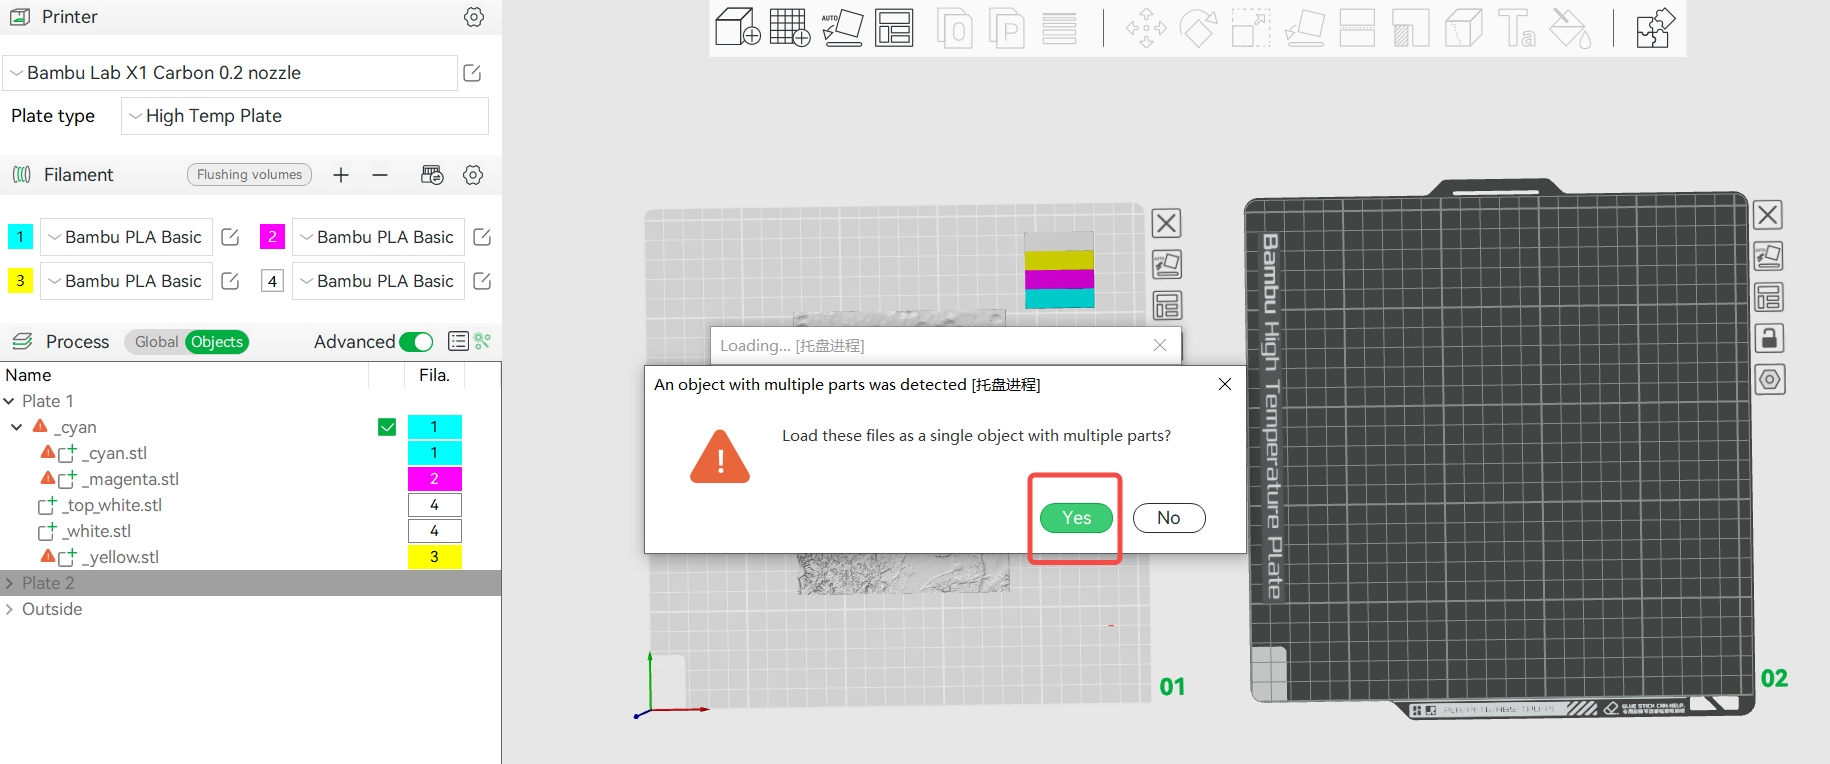
1. Unzip the folder and drag the five generated STL files into Bambu Studio. Select 'Yes' to load these files as a single object with multiple parts.

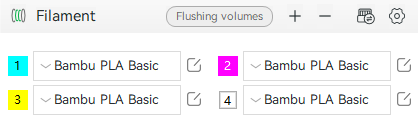
2. Add four colors – PLA Basic Cyan (#0086D6), PLA Basic Magenta (#EC008C), PLA Basic Yellow (#F4EE2A), and PLA Basic White (#FFFFFF) – corresponding to filaments loaded in AMS slots.
3. Setting adjustments:
Choose '0.2mm nozzle' (recommended);
Change the first layer height to 0.15mm;
Set the Top & Bottom Shell Layers to 3;
Modify infill to '100% Rectilinear;

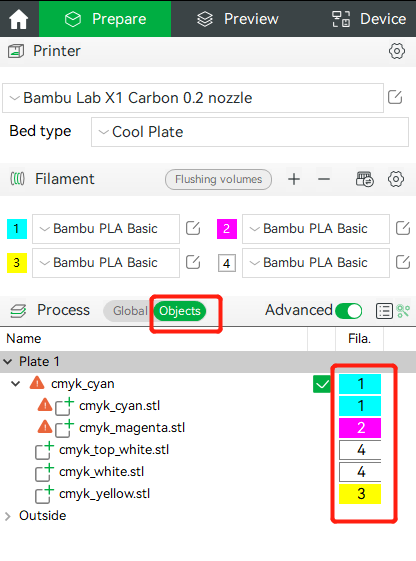
4. In the 'Objects' panel, assign the corresponding colors based on the file names.
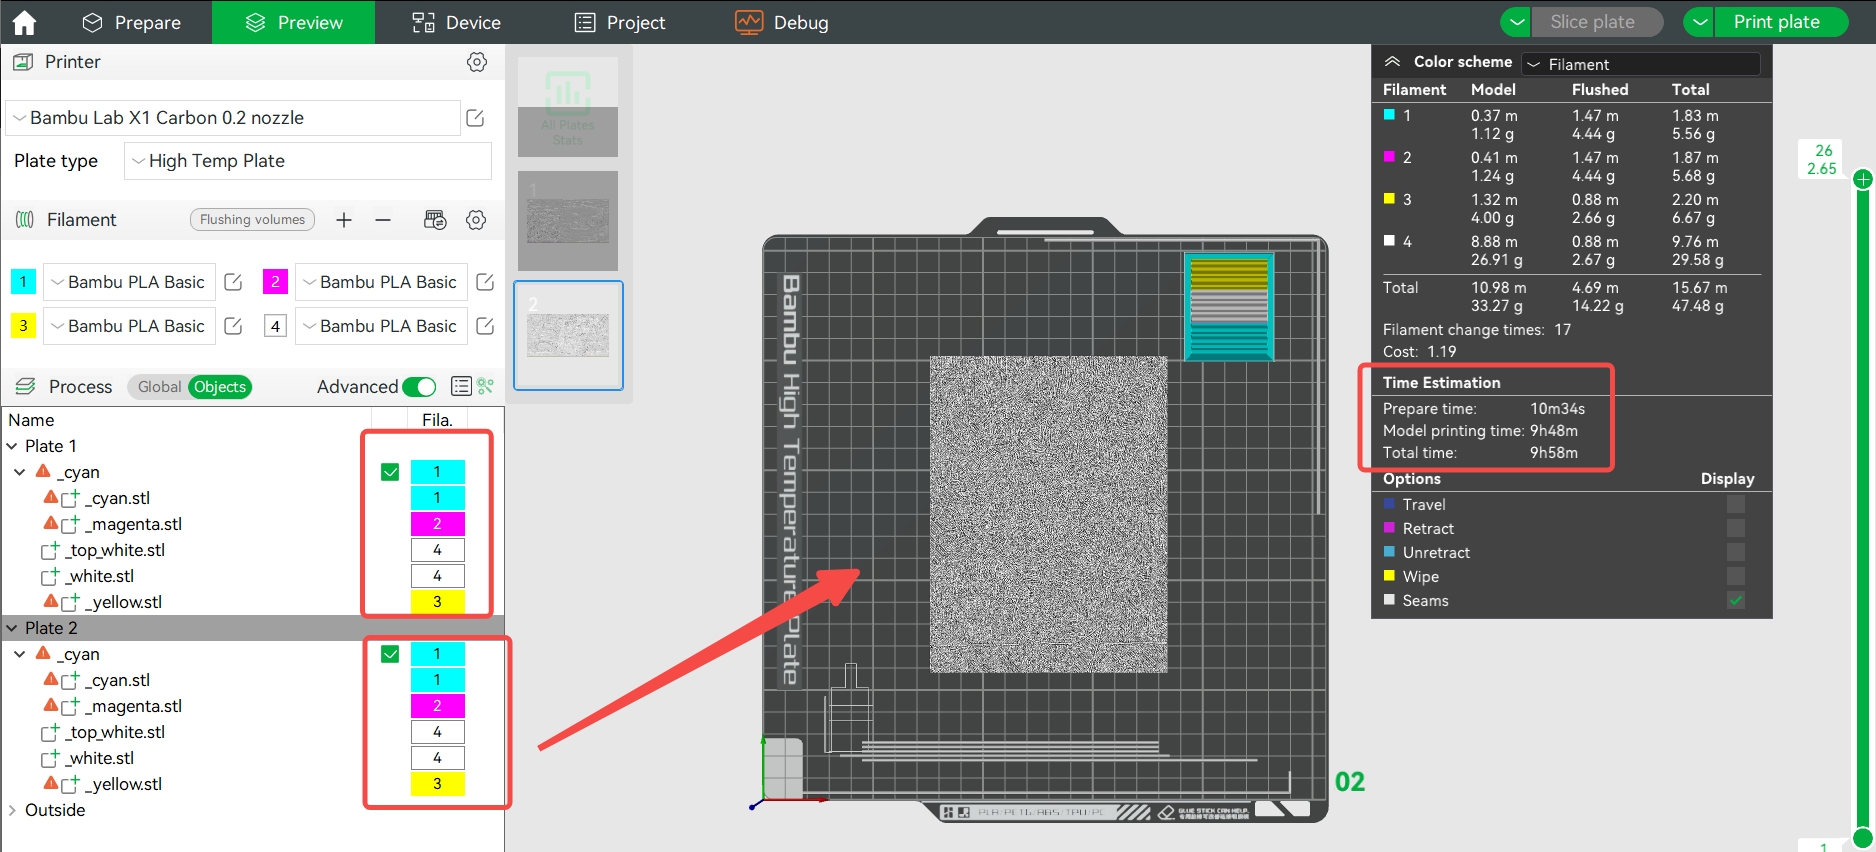
Start slicing!
*Note: lithophane slicing could take longer; please be patient.
Alternative - Configure and Slice guide
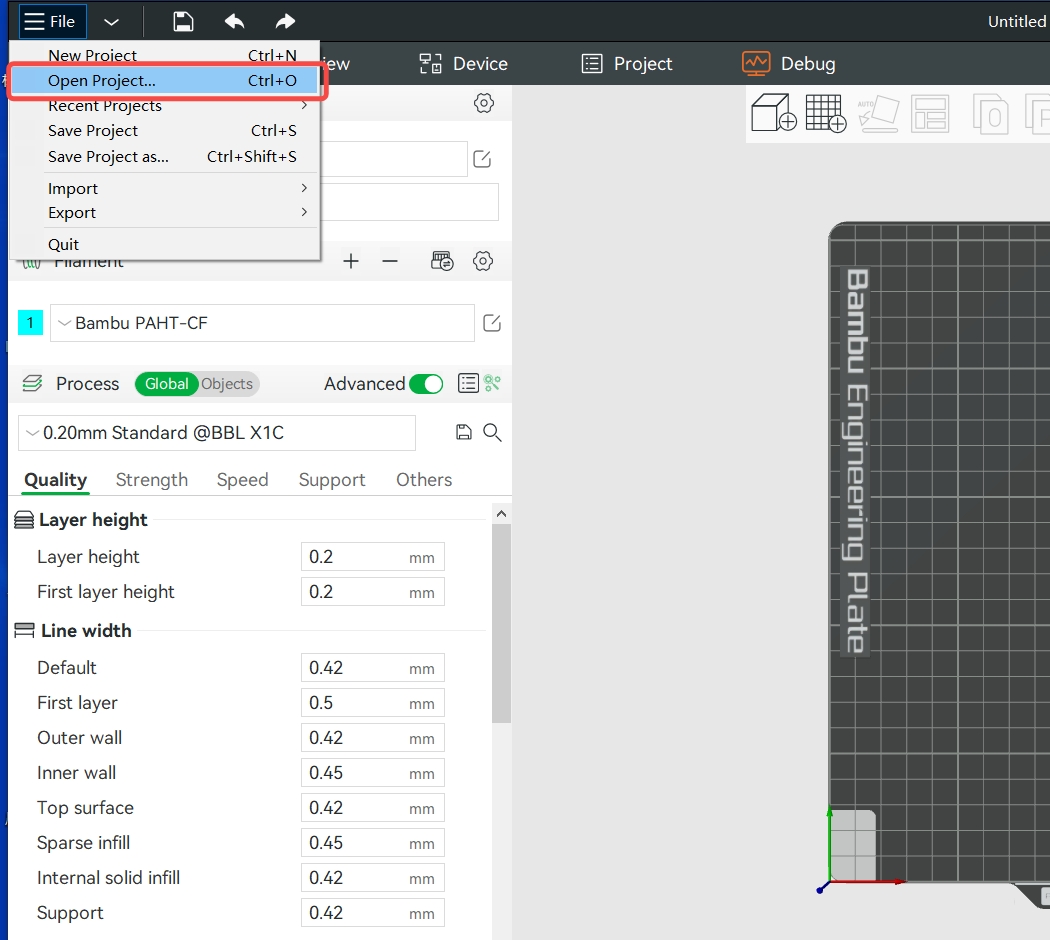
1. Download the demo and open it in Bambu Studio.
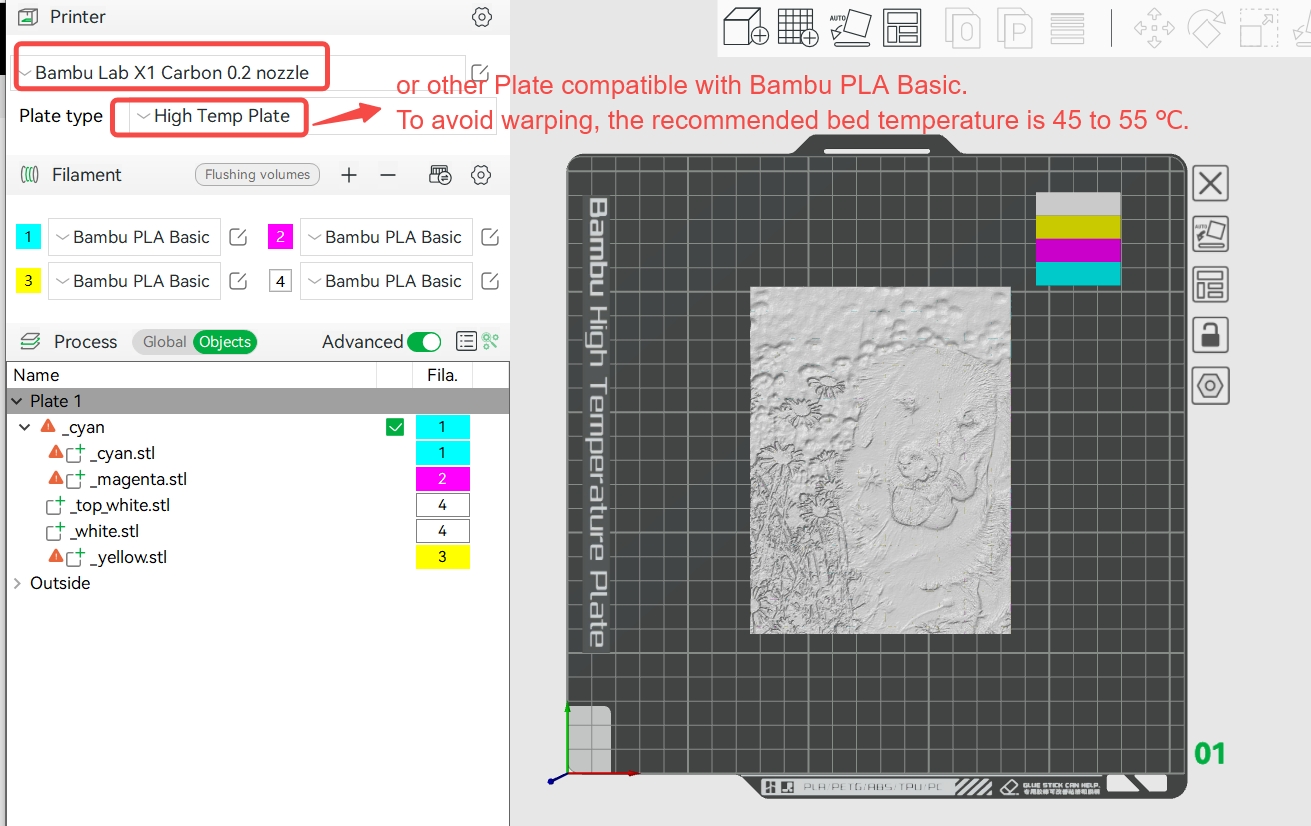
2. Adjust the printer settings according to your needs (it needs to be compatible with Bambu PLA Basic, and the recommended bed temperature is 45 to 55 ℃).
3.Add another plate and import the picture you want to print.
4. Set the colors to be the same as the previous 3MF file.
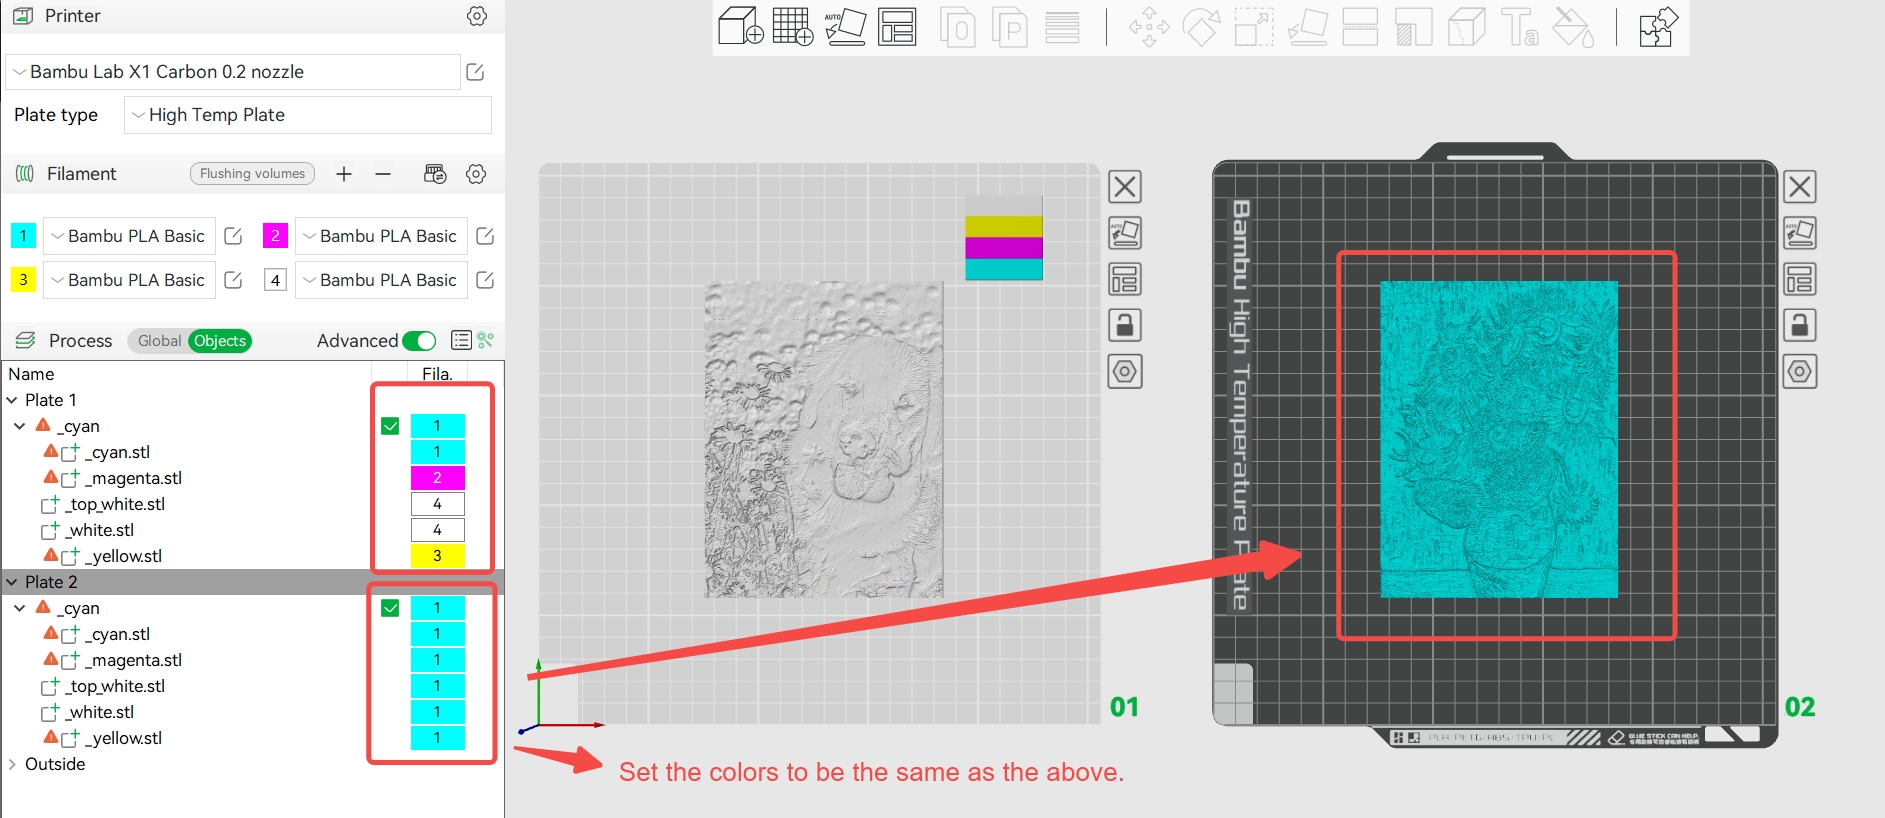
5. Slice your plate and wait till it is done.
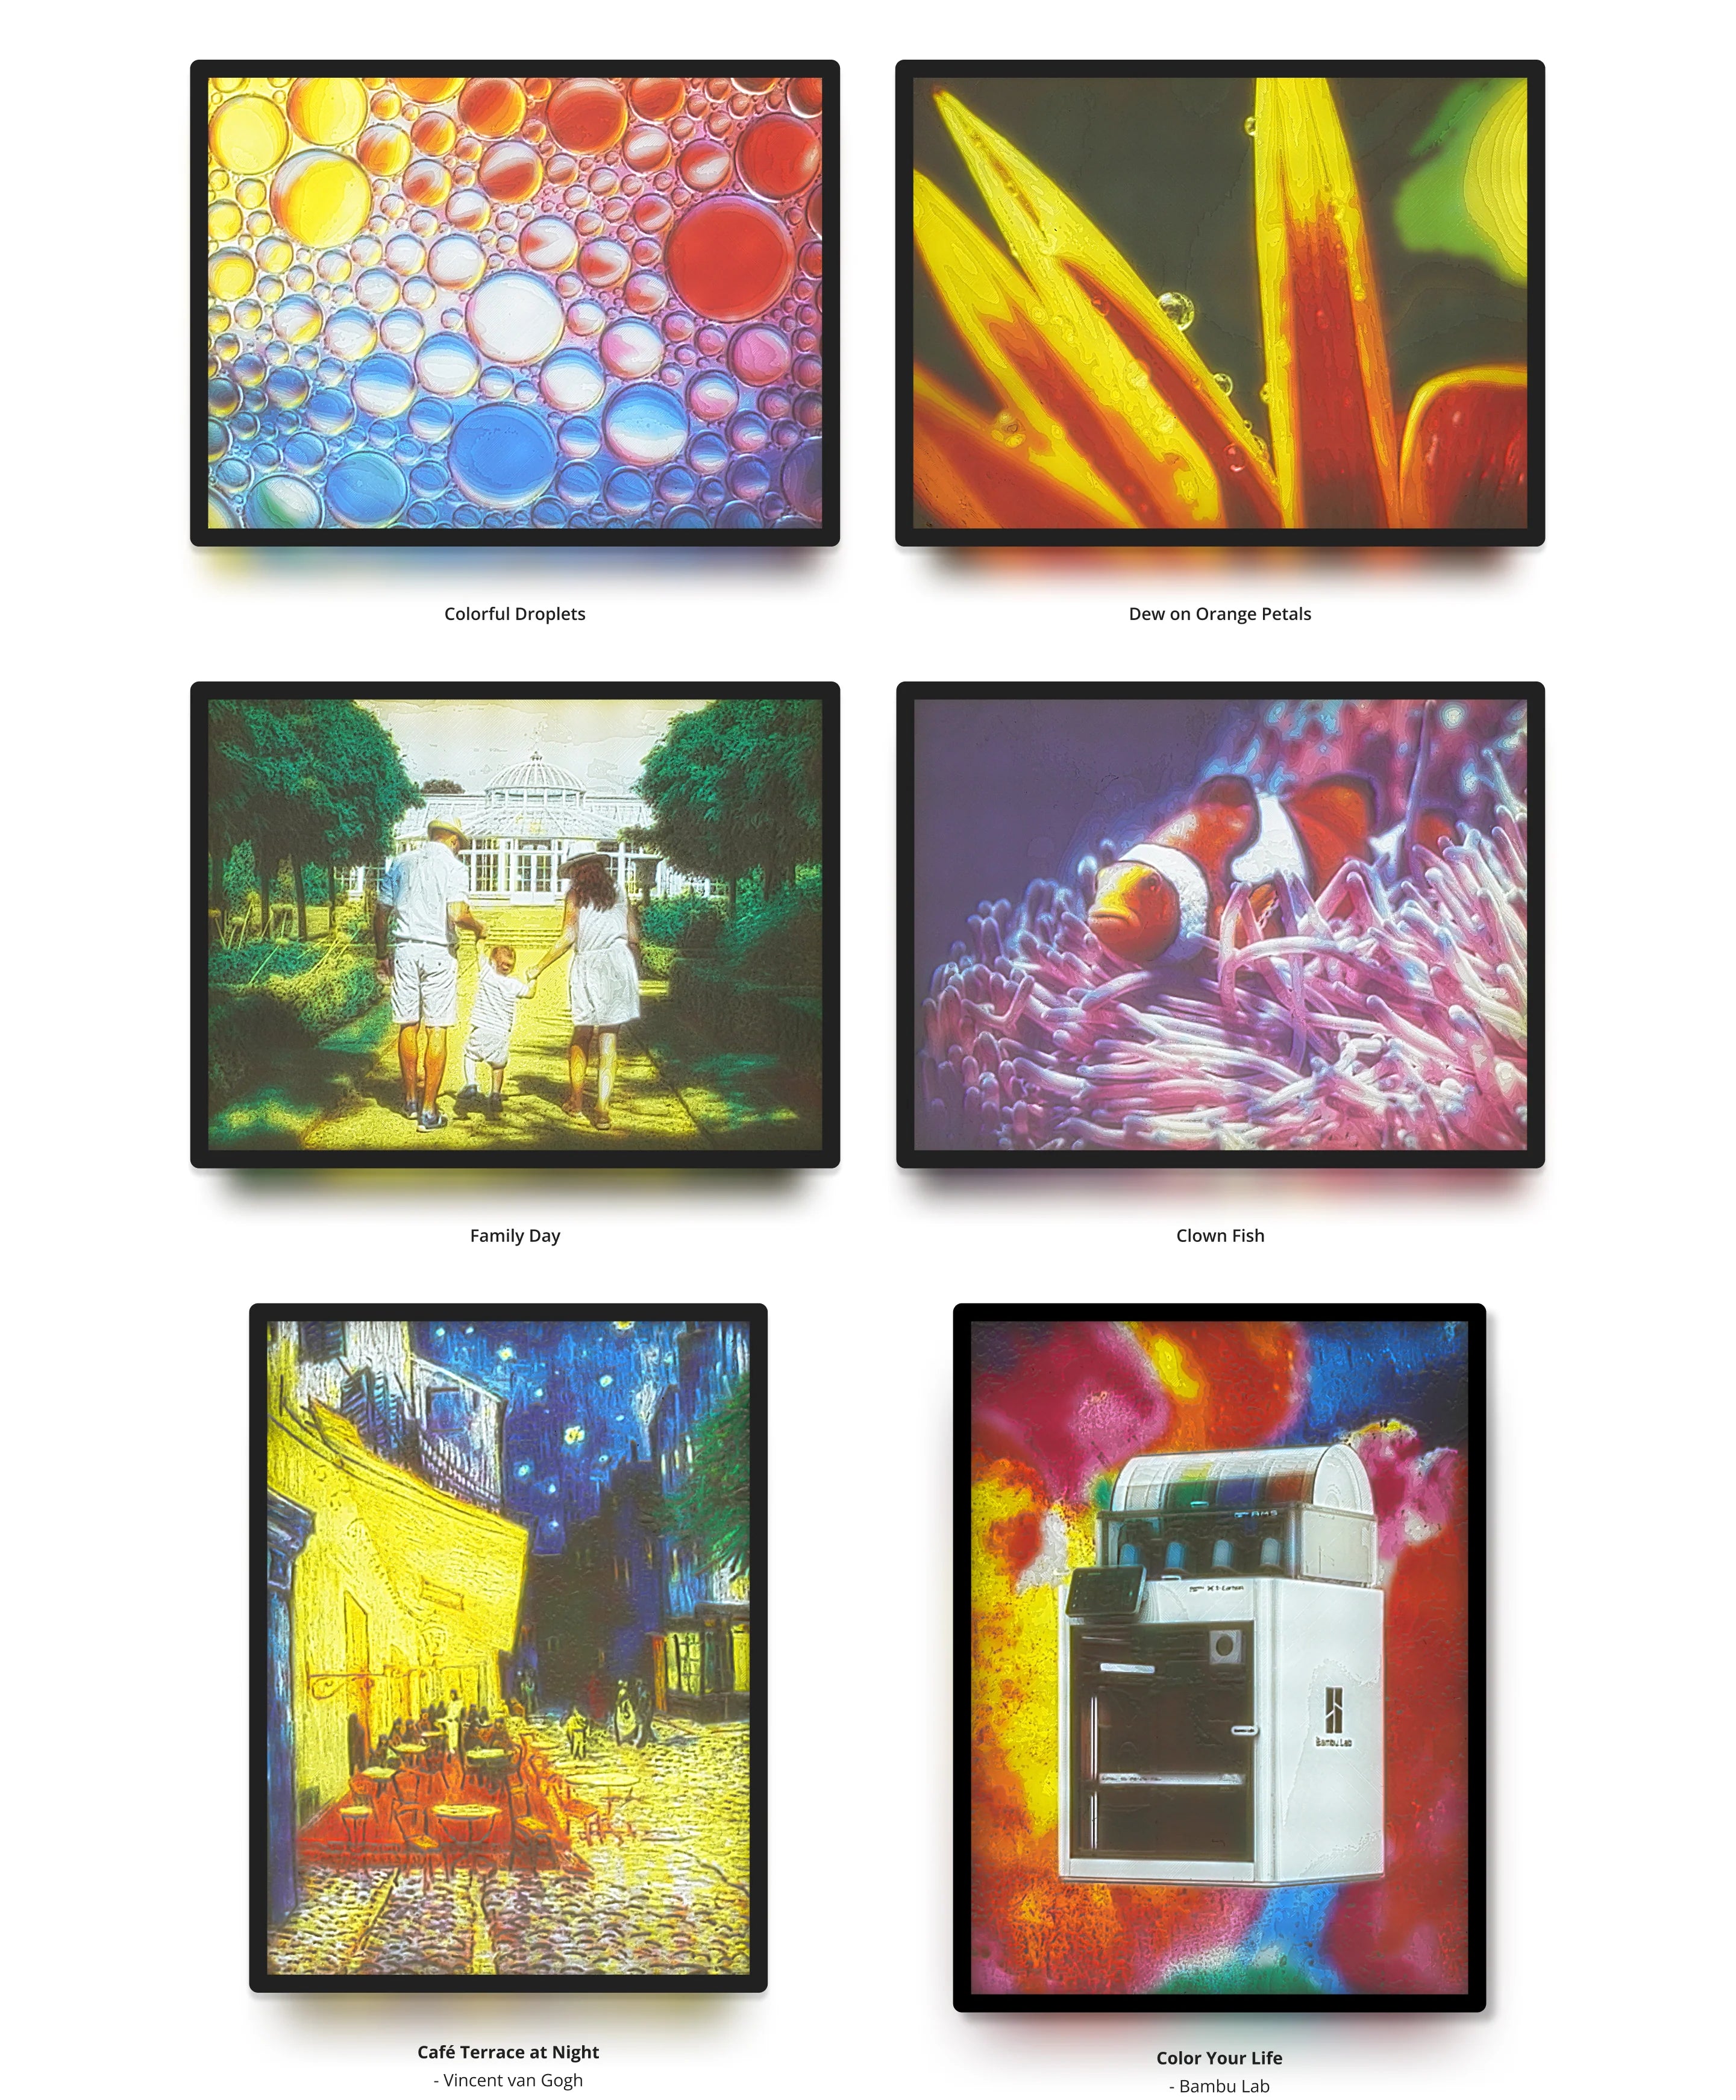
* Attribution: Puppy in the Flowers - from @larissatondim; Sunflowers - from Vincent van Gogh.
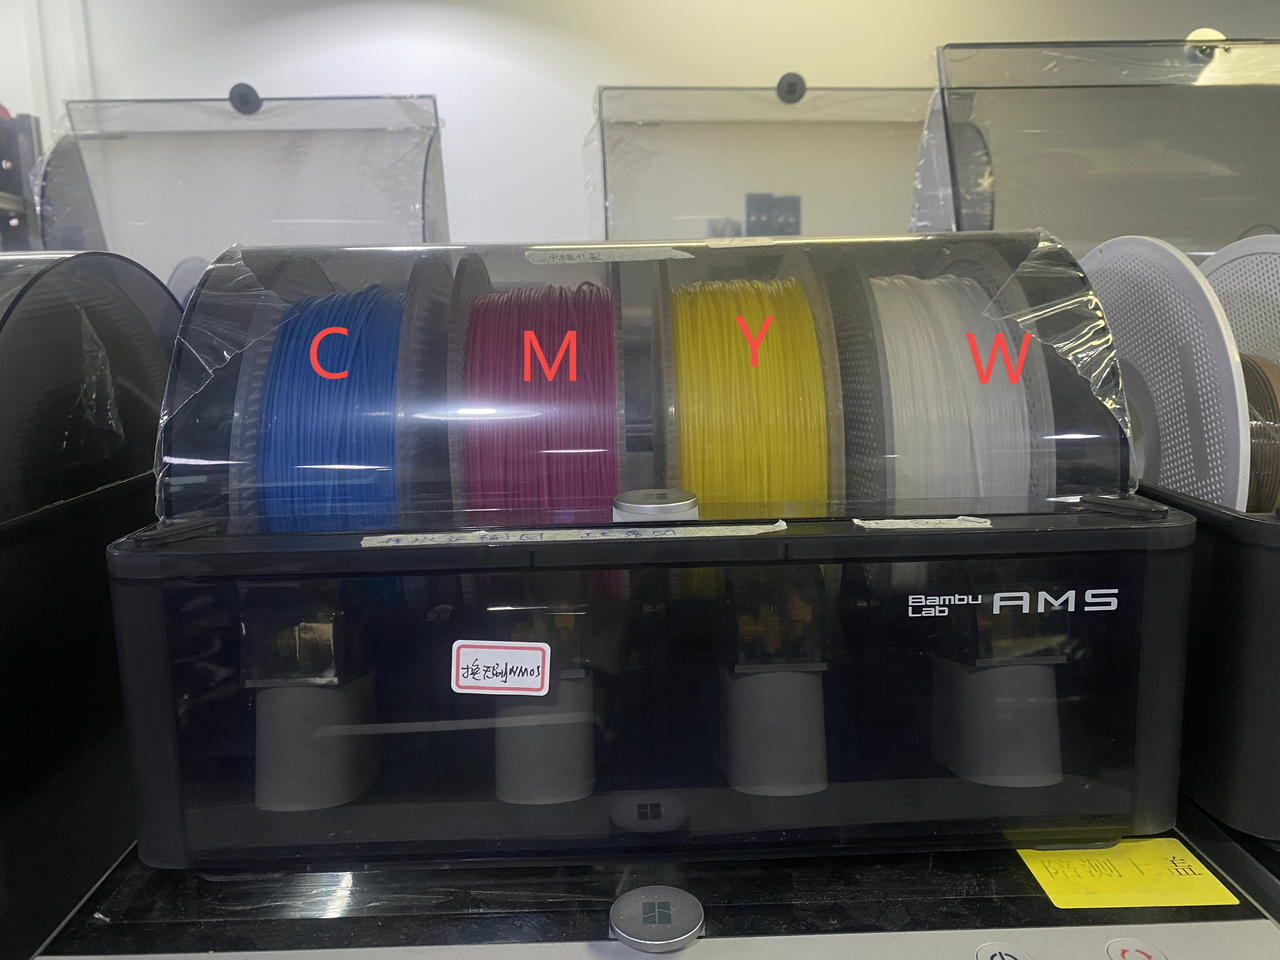
Load filaments and print
Make sure the CMYK filament placement order in AMS matches the settings order in the Studio. Otherwise, the prints' colors may be incorrect.
Frame and light guide plate printing
For Make My Lithophane
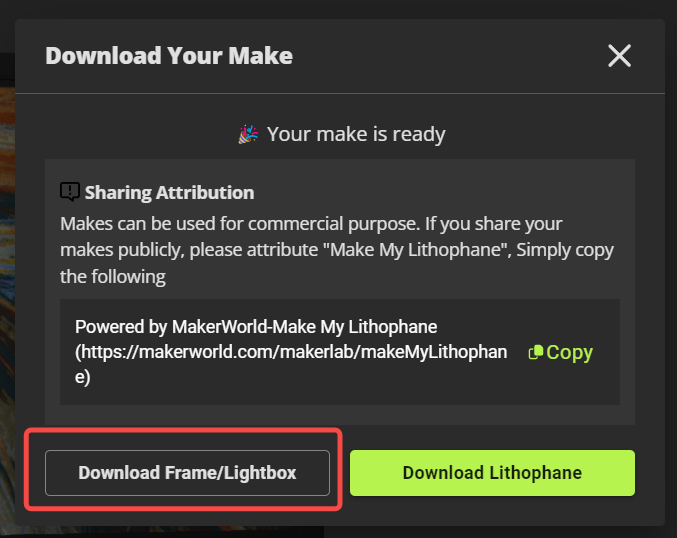
If your lithophane is generated from Make My Lithophane, the frame file and the light guide plate are already included in the generated 3MF file. The models are well configured and ready for printing.

If you choose 0.2a a mm nozzle size, you can also download the frame and the light guide plate in a separate file with 0.4mm profile.
Regular Frame
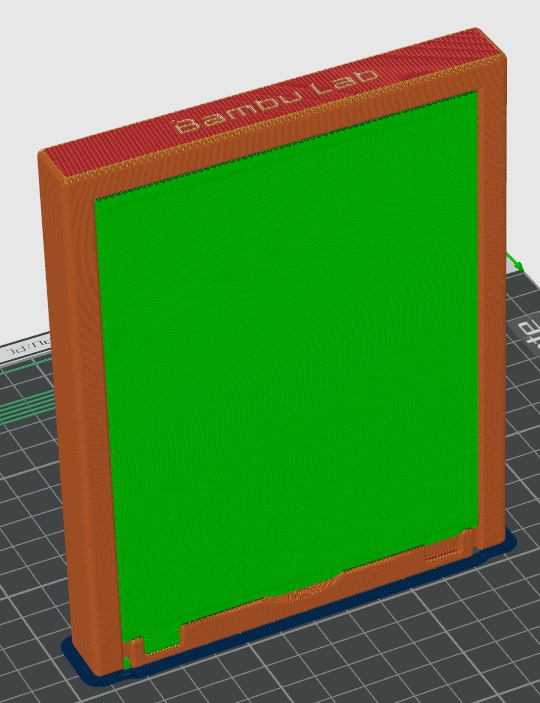
Print Settings
Filament type: Most kinds of PLA (Dark colors are recommended)
Wall loops: 5
Top shell layers: 5
Bottom shell layers: 3
Sparse infill density: 50%
Support: tree (auto)
Print time:5 hrs 35 min
**Filament usage:**240 g
Light Guide Plate
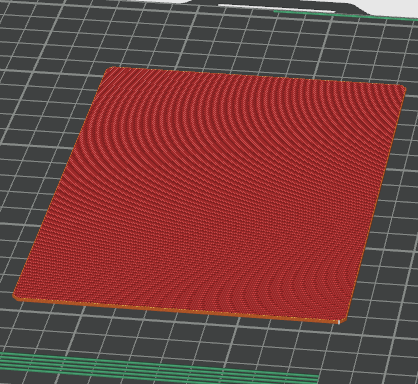
Print Settings
Filament type: PLA Basic - Jade White
Wall loops: 5
Top shell layers: 5
Bottom shell layers: 5
Print time: 35 min
Filament usage: 30 g
Assembly
Acknowledgement
We would like to send our sincere thanks to Lithophane Maker, who made great contributions to the lithophane printing groups. It has never been easier to create stunning color lithophanes that will leave a lasting impression with their amazing image-to-stl generator.
Bring colors to your lithophane
Quick Walkthrough
Get your printer ready
| Printer with AMS | Bambu Lab Printers |
|---|---|
| AMS (Automatic Material System) | |
| Filaments (Hexcode#) | PLA Basic Cyan #0086D6 |
| PLA Basic Magenta #EC008C | |
| PLA Basic Yellow #F4EE2A | |
| PLA Basic Jade White #FFFFFF | |
| Nozzle | 0.2 mm (Recommended) |
| or 0.4 mm | |
| Build Plate | Bambu Cool Plate |
| Bambu High Temperature Plate (PEI) | |
| Bambu Dual-Sided Textured PEI Plate |
How to Create Colorful Lithophanes
Using the Bambu Lab printer and its AMS (Automatic Material System), you can transform a simple image into a beautiful color lithophane with ease.
Step 1: Preparing Your Image
First, head over to lithophanemakers.com. This site allows you to create various types of lithophanes including color lithophanes.
Upload Your Image
Click on the button to upload the picture you want to turn into a lithophane.
Size Your Image
Adjust the size to fit the Bambu Lab frame, which is available for free online. Set the width to 144mm and the height to 108mm.
Crop Your Image
Check the crop box in the top left corner, and use the X and Y shift adjustments to focus on the part of the picture you want.
Set Layer Height
Set the first layer height to 0.15mm.
Step 2: Preparing for Printing
Once the zip file downloads, extract it. You should find five STL files and one text file. Open your Bambu slicer or Orca slicer and drag these five color STL files into the slicer. When prompted, choose to import them as one object.
Step 3: Loading Filaments
Make sure all four CMYK colors are loaded in the AMS of your Bambu Lab printer. You can verify this in the device tab of your slicer software. Ensure each color is in the correct slot, and if needed, resync the AMS colors with the slicer.
For a step-by-step guide, check out the CMYK Lithophane Printing Guide.
Step 4: Slicing and Get the Lithophane Printed
• Nozzle Size: Use a 0.2mm nozzle for best results, although a 0.4mm nozzle with a 0.08mm layer height can also work. Smaller nozzle sizes and lower layer heights are essential to achieve better printing results.
• Layer Settings: Set the first layer height to 0.15mm and ensure the top and bottom layers are set to three each.
• Infill: Set the infill to 100%. Ignore the warning about going direct to linear.
• Select Your Plate: Choose your preferred build plate. To prevent warping, the recommended heated bed temperature is between 45-50℃.
In the objects tab, assign the correct color to each part. Use the keypad numbers 1 through 4 to match the AMS slots for each color. Once everything is set, hit the slice button and then send the file to your printer.
Step 5: The Finished Product
After printing, your lithophane might look like an ordinary one until you place it in front of a light source. The colors will illuminate beautifully, bringing your image to life. You can also print a frame, available for free from Bambu Lab, to hold your lithophane.
Download Frame and Light Guide Plate.
Step 6: Using the LED Light Panel
· Assemble the Frame: Slide the LED panel into the back of the frame, ensuring the USB-C port sticks out.
· Add the Diffuser: Print and insert the white diffuser into the frame.
· Insert the Lithophane: Place your lithophane in the front of the frame.
Connect the USB-C cable to a power source, and watch your lithophane light up in vibrant colors. You can easily swap out lithophanes to display different images.
