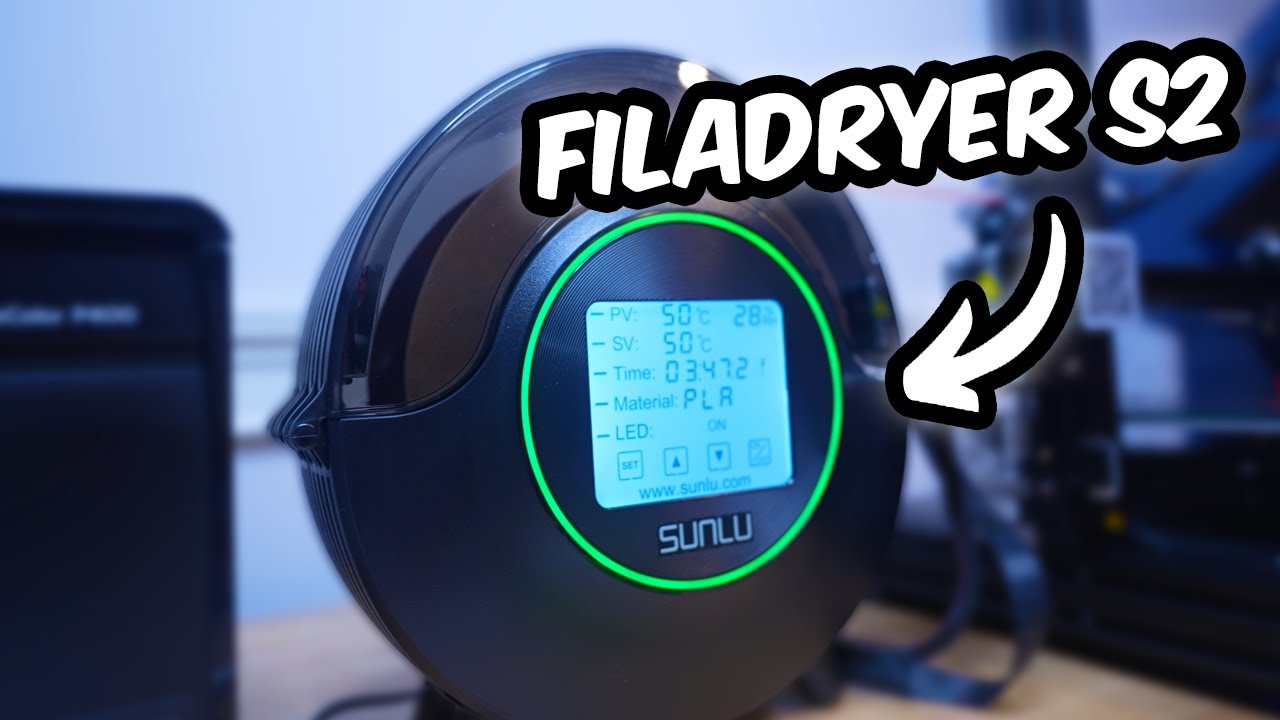
SUNLU
FilaDryer S2
Sunlu S2 Manual
Drying while printing to improve your 3D model.
EN/DE/FR/IT/ES/JP
Zhuhai Sunlu Industrial Co.,Ltd.
Note:Read this document before using the filament dryer
·Do not place the product where children can reach.
·Pay attention to electrical safety during operation.Do not use this product near water,such as in the bathroom,bathtub,wash basin and
other places where water is easily accessible.
·Only use the original power adapter or a fully certified 24V/2A power adapter.
·Switch off the power supply when not using this product to avoid sudden fire.
·Place the two rollers in the box before operating the dryer.
·Confirm filament tightly wound to the roll before using this product to prevent it from falling onto the heat sink,resulting in high temperature deformation of the filament.
·When drying filament,do not place the products on temperature sensitive objects.
·Do not touch the heaters in the oven when drying filament to avoid burns.
·The upper lid of the drying oven should be covered when drying consumables to avoid heat loss.
·In order to ensure the drying effect,do not open the drying box at will during operation.
·If there is a fault with the product,disconnect the power adapter from the filament dryer and the electrical socket then contact the after-sales support team.
Product specifications:
| Product size | 265(L)X274(W)X118(H)mm |
|---|---|
| Maximum capacity | 中210*85(H)mm |
| Net weight | 1190g(including power adapter) |
| Working environment | a)Environment temperature:20C*35 b|Relative humidity:≤90% |
| Temperature setting range | 35℃~70℃ |
| Power adapter specifications | a)input specifications:AC 10W~240W,50/60Hz bj Output specffcatians:DC:24V±12V.2A |
| Standby powe | 0.05W |
| Maximum working current | 1.9A |
| Maximum working power | 48W |
| CD display screen | 4.6-inch LCD display |
| Suitable for filament diameters | 1.75mm/2.85mm |
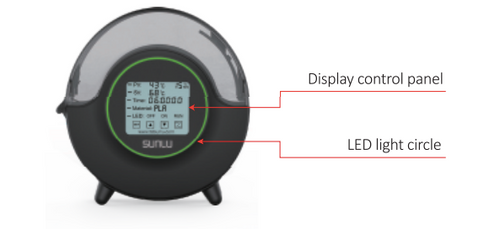
Product function diagram:

Schematic Diagram of the Content Displayed on the LCD:

Operation Guide:
1. Power On
Plug the power adapter attached to this product into the power supply,
and then connect the power cord to the DC power socket of the dryer.
The dryer is in standby without heating state by default after the power
s connected, and the screen displays“ON/OFF”.
2. Filament Loading
Place the filament in the dryer,pull the thread out of the outlet and close
the lid tightly. (Note: Please make sure that the consumables are in a
tightly wound state).
3. Turn On the Dryer
Double-click the“ON/OFF”.the dryer will work according to the default
settings (Temperature: 50°C, drying time: 6 hours, material: PLA, LED:
OFF).
4.Personalized Settings
A.This product can change the temperature unit.
Click the"SET",when the cursor on the left side of the PV flashes, click
“▲”or"▼”,you can switch between Fahrenheit and Temperature
Celsius.
B.This product can increase or decrease the temperature according to
personal settings (temperature setting range:35 C~70C). Cick the"SET" when the cursor on the left side of the 5V flashes, click “▲"or"▼”,the temperature can be increased or decreased. After 3 seconds of stopping the operation, the dryer willautomatically save the
set temperature.
In addition, you can click"▲"or "▼"directly without the cursor flashing.
C.This product can be set to dry for a fixed time (the default continuous
drying time is 6 hours when the dryer is turned on).
Click the"SET", when the cursor on the left side of the Time flashes, click
“▲” or“▼” can increase/decrease the drying time. When the set drying time is completed, the dryer stops working and enters the standby state.
Turn off the countdown function: Adjust"Time" to "99:00" press“▲”
and the screen shows "CLOSE;Or adjust"Time" to “00:00”,press"
▼",and it shows "CLOSE"
D.This product has preset the best drying temperature and time for a
variety of commonly used filament.
Click the "SET",when the cursor on the left side of the material, click “▲”or“▼” can switch between different filament. When the flament are changed, the drying temperature corresponding to the consumables will be changed as well.

E.Setting of LED Light ring working mode
click the“SET”,when the cursor on the left side of the LED flashes, click “▲”or”▼" can change the working mode of LED light ring.
·When in the "OFF" state, the LED light ring does not light up.
·When in the “ON” state, the LED light ring presents an upward
accumulation lighting effect.When there is a big difference between the measured temperature and the set temperature, the LED light ring's
accumulation speed is fast; when the temperature difference gradually
decreases, the accumulation speed gradually slows down; when the
measured temperature is greater than or equal to the set temperature, the LED ring is always on.
·When in "RUN" mode, the LED light ring will always be on.
5 .Turn Off the Drver
Double-click"ON/OFF" the to enter the shutdown state.After restarting, the
drying temperature, filament selection, and LED mode will retain the
settings before the shutdown; the drying time will be restored to the
default 6 hours.
6.Tips for the best results
·For best results dry your filament before and during printing. For long
print operations drying during the printing process will produce more
consistent print results.
·When the ambient temperature is low the dryer will take longer to reach the set temperature, extend the drying time by 1 hour.
·Drying time and temperature for common materlal refer to the following table:
Materfal PLA/
PLA+ wooo PETG ABS/
ABS+ HIP5 P
| Material | PLA/ PLA+ |
WOOD | PETG | PVB | ABS ABS+ |
HIPS | PVA | ASA | TPU | PMMA | PA/PC |
|---|---|---|---|---|---|---|---|---|---|---|---|
| Baking Temp | 45-50℃ | 50-55℃ | 60-70℃ | ||||||||
| TIME | 3-6h | ||||||||||
· lt's necessary to wind the filament tightly instead of a loose state, as shown in the picture below

7.Troubleshooting
·If you encounter the fallowing issues during use, please try the troubleshooting method in the table below. If the fault still cannot be
eliminated, please contact the place of purchase for troubleshooting.
| Other Filament | Cause of issue | Troubleshooting method |
|---|---|---|
| LCD screen does not display normally | Power adapter failure | Replace the power adapter |
| The temperature does not rise | Power adapter power is below specification | Replace the power adapter(24V 2A) |
| The lid of the dryer enclosure is not closed | Close the top cover of the filamet dryer | |
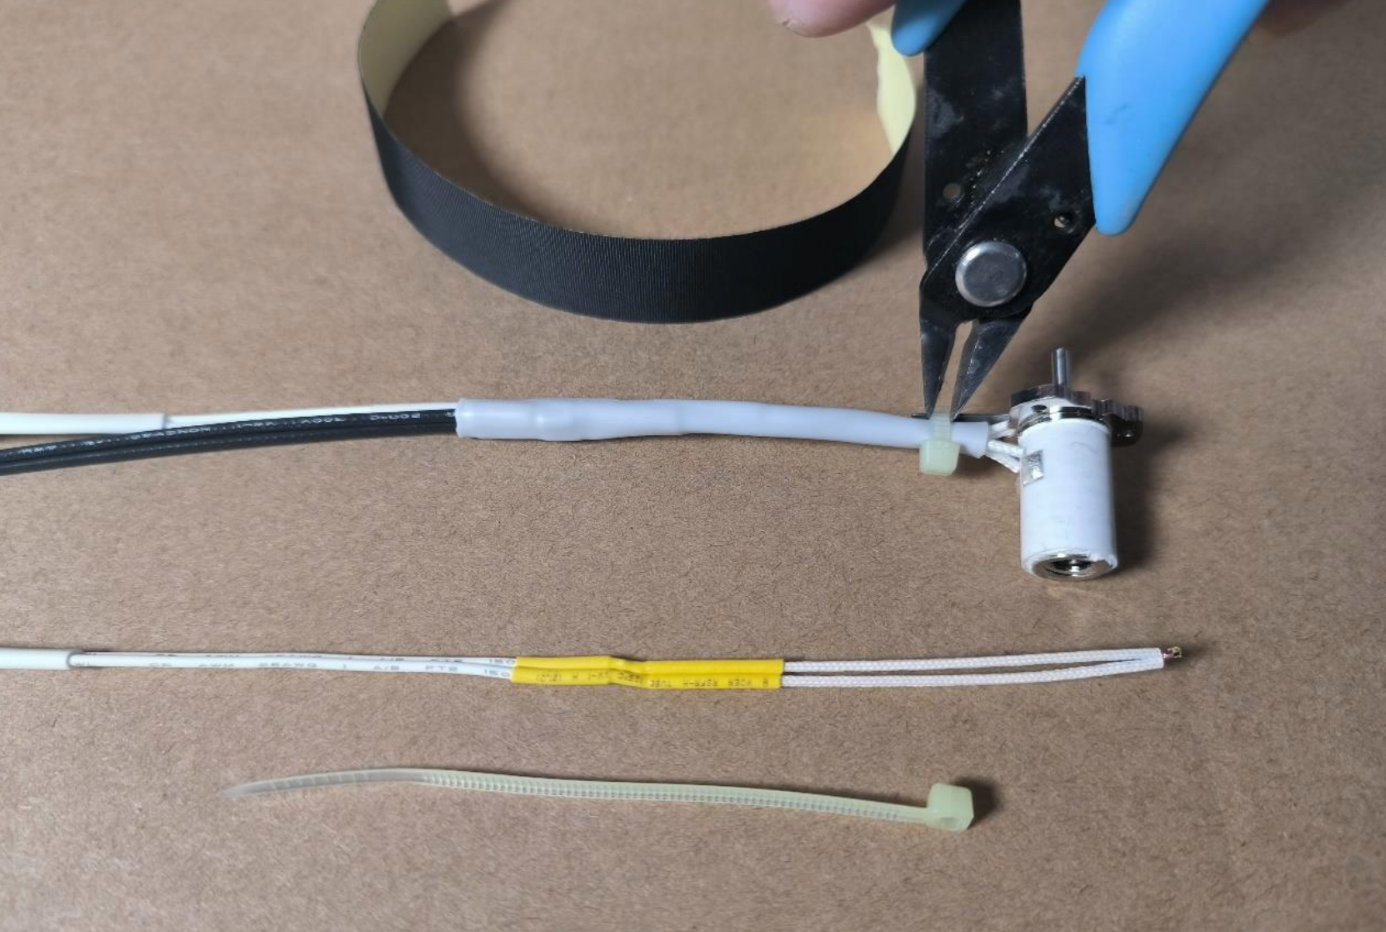
| Fault code ER1 | Poor temperature probe contact | Reconnect the heating element temperature probe(right 2) |
| Fault code ER2 | Poor contact of cabinet temperature probe | Reconnect the enclosure temperature probe(right 1) |
·After-Sales Servies
1.Limited warranty for one year where the product has failed under
normal operation as shown in this manual.
2.Warranty service will not be provided if the machine is damaged within
the warranty period due to the use of a different specification power
adapter or if the machine is not operated correctly according to the
instruction manual.