Upgraded Purge Wiper A1/A1 Mini for Bambu
Couldn't load pickup availability
Use this text to encourage communication or promote sharing on social networks.
Optimized for Bambu Lab A1 mini:Specially crafted for the Bambu Lab A1 mini 3D printer, the purge wiper enhances the printer's performance and reliability.
Seamless Integration:The Purge Wiper A1 series is designed to fit the A1 mini 3D printer, offering a seamless installation without hassle.
Efficient Waste Management:The Bambu Lab A1 mini Purge Wiper ensures timely disposal of waste generated during 3D printing, optimizing the cleaning process.
Compact and Easy to Install:The Purge Wiper A1 is a compact accessory that can be swiftly installed, allowing for quick resumption of 3D printing tasks.
High-Temperature Resistant Material:Made with durable components, the purge wiper withstands up to 105℃, making it suitable for high-temperature 3D printing environments.
Durable Construction:Built to last, the wiper withstands frequent use, maintaining its functionality over time.
Bambu Lab A1 Mini Purge Wiper|Bambi Lab A1 Mini Wiper|Compatibility:Designed for Bambu Lab A1 Mini and A1 series, ensuring a perfect fit for your 3D printer.
The Bambu Lab A1 Mini Purge Wiper&Dispenser is a must-have accessory for 3D printing enthusiasts. It automates the cleanup process by efficiently collecting and dispensing waste materials during nozzle purging,ensuring your printer stays clean and performs optimally.
Why Choose Our Purge Wiper?
1.Plug-and-Play: No modifications are required.It can be directly installed into the existing components of the Bambu Lab A1/A1 Mini.
2.Enhanced Print Quality-Prevents residual filament from interfering with prints.
3.Low Maintenance-Easy to detach and clean,reusable for hundreds of cycles.
Package Includes:
1× Purge Wiper Dispenser
This Purge Wiper is designed to efficiently remove waste filament generated by the printer's hotend. It gathers and dislodges waste filament during different stages, including printer setup, pause and resume operations, and filament changes for multi-color printing. Its purpose is to ensure the proper management and disposal of waste materials for seamless printing processes.
Compatibility
A1 Series
In the Box
Purge Wiper *1
Replace the Purge Wiper - A1 Series
This guide shows how to replace the purge wiper for the A1 Series
When to use?
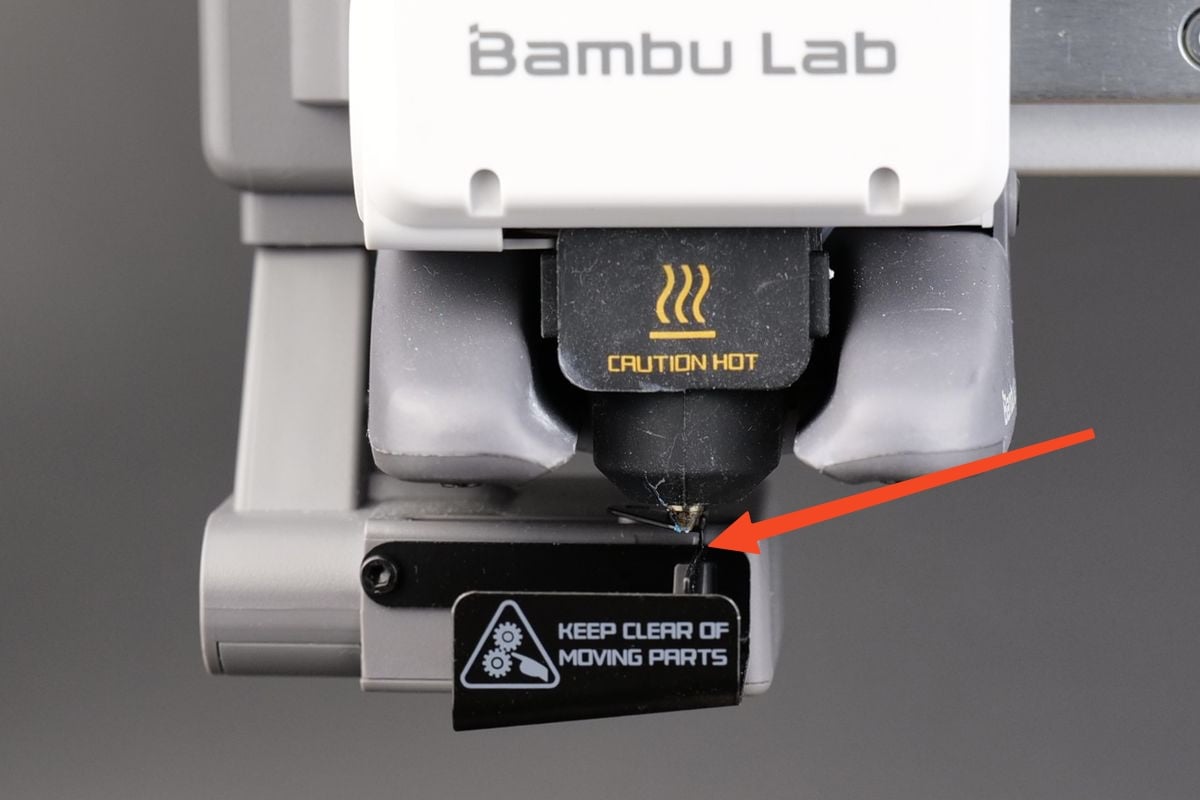
This guide is intended for use if there is visible damage to the filament purge wiper. Over time, the purge wiper can become damaged, and the metallic flap of the wiper may wear out or become bent.
Common issues that may indicate the need for replacement of the A1 purge wiper include:
Inadequate cleaning of the nozzle during the pre-print preparation step.
Filament adhering to the purge wiper flap.
Visible damage or wear on the purge wiper.
Recommended by Bambu Lab Technical Support.
Tools and materials needed
H2.0 Allen key.
5 minutes of your time.
Safety Warning
IMPORTANT!
It's crucial to power off the printer before conducting any maintenance work, including work on the printer's electronics and tool head wires. Performing tasks with the printer on can result in a short circuit, leading to electronic damage and safety hazards.
During maintenance or troubleshooting, you may need to disassemble parts, including the hotend. This exposes wires and electrical components that could short circuit if they contact each other, other metal, or electronic components while the printer is still on. This can result in damage to the printer's electronics and additional issues.
Therefore, it's crucial to turn off the printer and disconnect it from the power source before conducting any maintenance. This prevents short circuits or damage to the printer's electronics, ensuring safe and effective maintenance.
Steps to replace the Purge Wiper
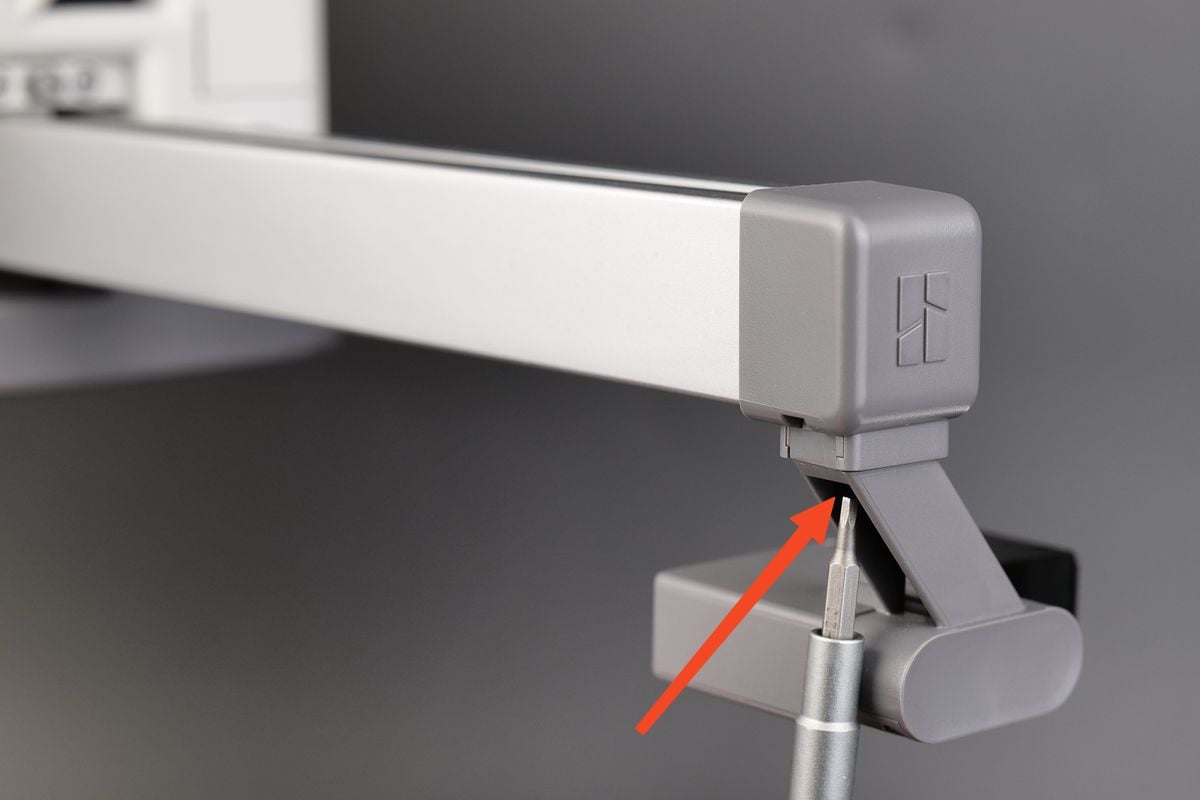
1. Remove the screw holding the purge wiper
The first step is to remove the screw holding the purge wiper in place. It is located underneath the purge wiper.
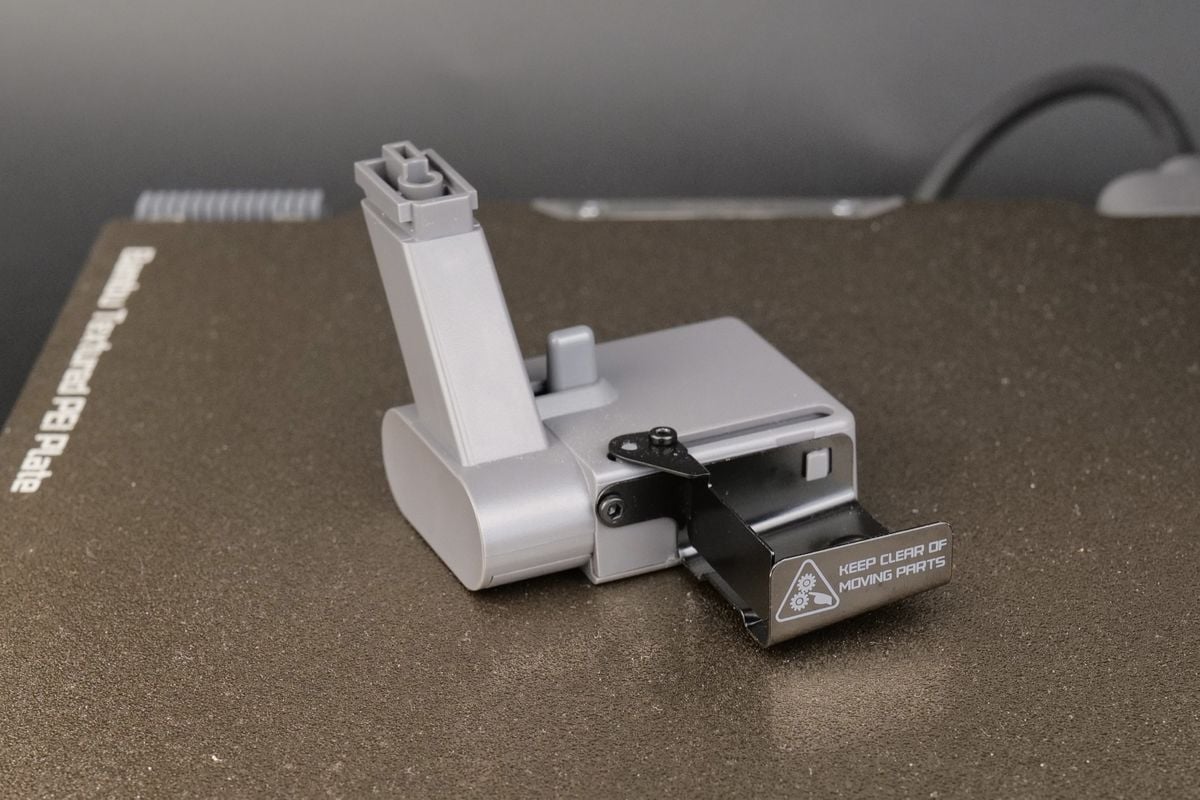
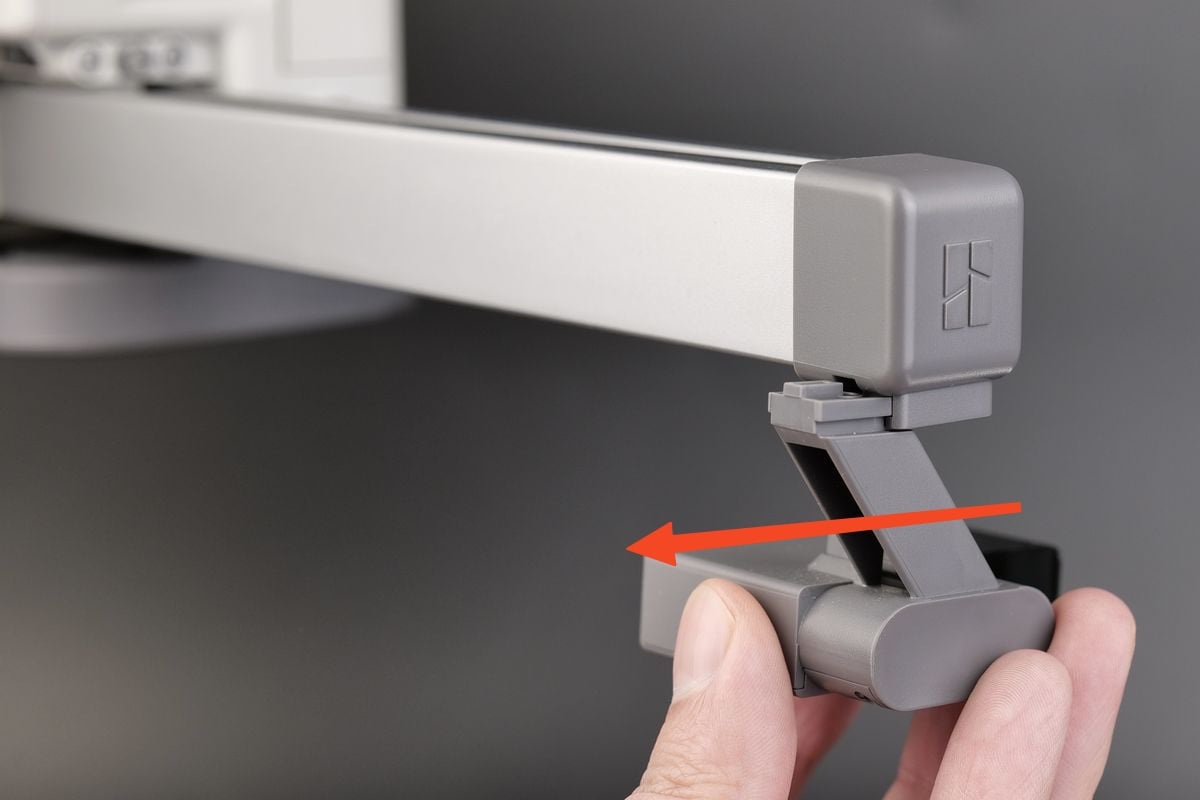
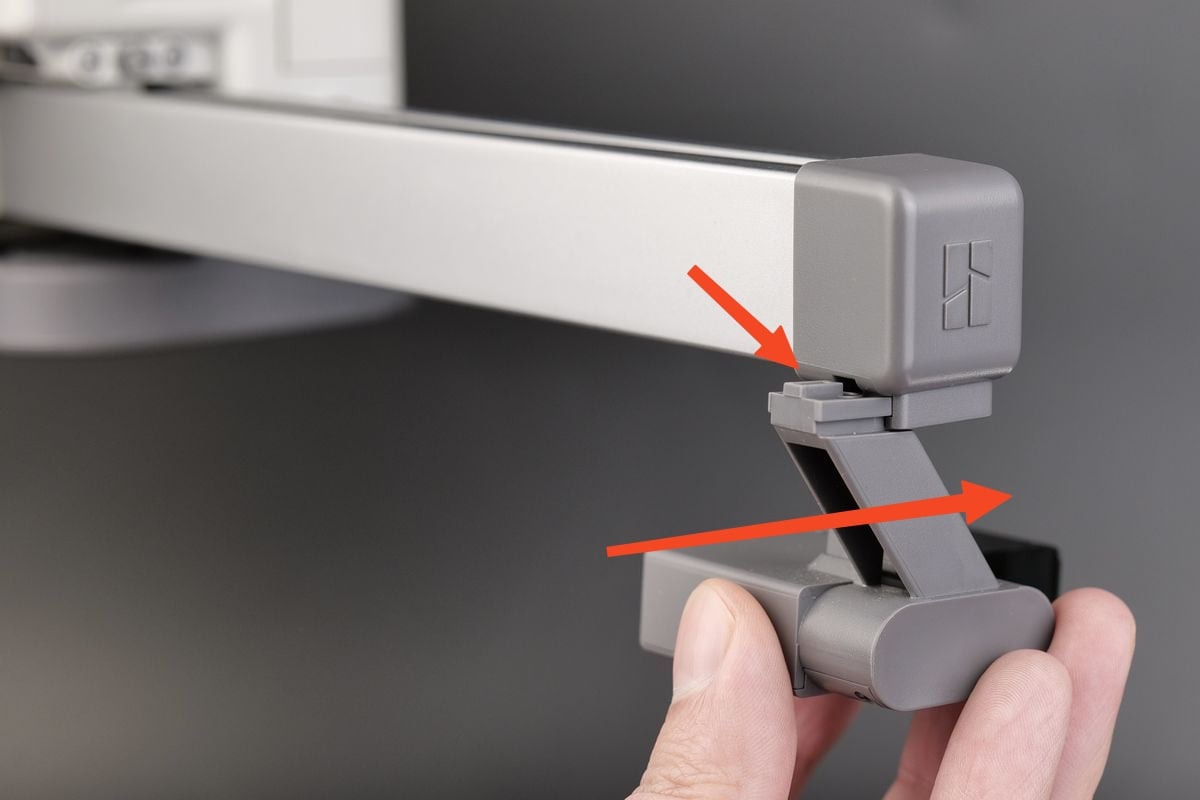
2. Slide the purge wiper out
After removing the screw, you can remove the purge wiper by sliding it out of the plastic holder
3. Install the new purge wiper
To install the new purge wiper, simply align the slots of the wiper to the plastic holder, then slide it in until the surface is flush
4. Tighten the screw
Simple re-insert the screw back in its original position, then re-tighten it.
Important! Do not overtighten the screw to avoid any potential damage or stripping.
5. Align the purge wiper
With the new purge wiper installed, the last thing remaining is to ensure the wiper flap is not touching the nozzle. There should be about 3 mm of clearance from the tip of the nozzle to the wiper.