


Filament Cutter / Lever for Bambu- P2S
Couldn't load pickup availability
Use this text to encourage communication or promote sharing on social networks.
Filament Cutter

Cutter Lever

The filament can be cut to prevent the supplies from clogging. When used with AMS, it assists with multi-material switching.
Compatibility
P2S
Filament Cutter Lever Replacement Guide for the P2S
This page introduces how to replace P2S Filament Cutter Lever
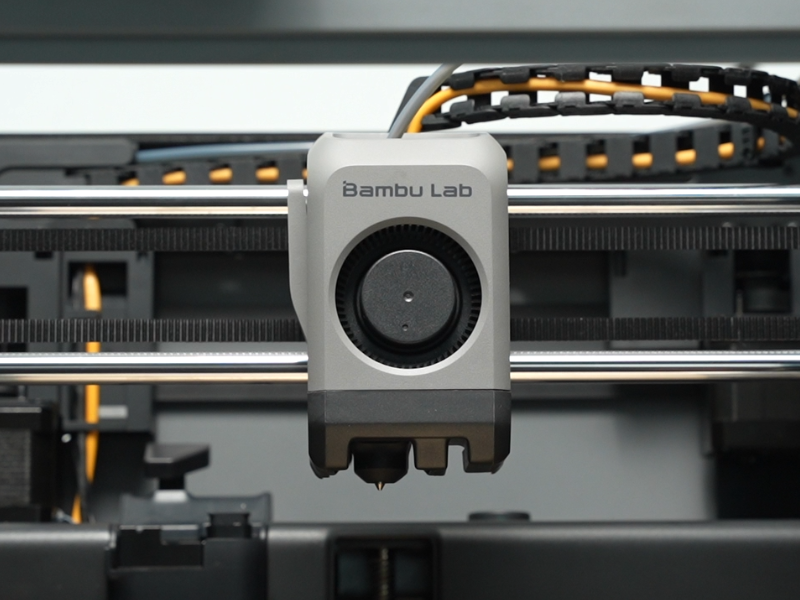
Filament Cutter and Filament Cutter Lever
The filament cutter lever is a lever or handle on the toolhead with a blade mounted to it which is used to cut the loaded filament just above the hotend in order to retract old filament and feed in new filament.

When to Use This Guide
The cutter lever itself is physically damaged
Required Tools and Materials
Filament cutter lever
H2.0 Allen key
Tweezers
Safety Warning
IMPORTANT!
Always power off and disconnect power on the printer before performing maintenance work. Not doing so means there is a risk of electric shock, short circuit, and damage to the printer or surrounding area.
When a maintenance task necessitates the printer being powered on, use insulated gloves for safety and pay special care not to pinch, damage, or put pressure on any exposed wires, connectors, or circuit boards. Additionally, the nozzle can be extremely hot so never touch it with exposed skin.
Caution!
The blade attached to the filament cutter lever is very sharp. Pay attention to its position and be careful not to touch it while handling the lever.
Removing the Cutter Lever
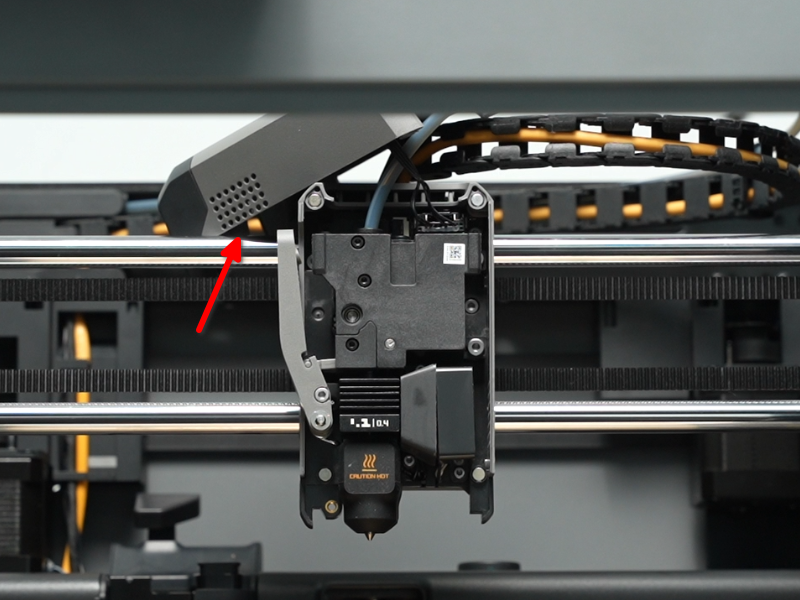
Step 1: Open the Toolhead Front Cover
Open the toolhead cover by pinching it from the sides near the bottom and pulling. Place the filament cover on top of the toolhead and out of the way, being careful not to pull on the wires still attached.
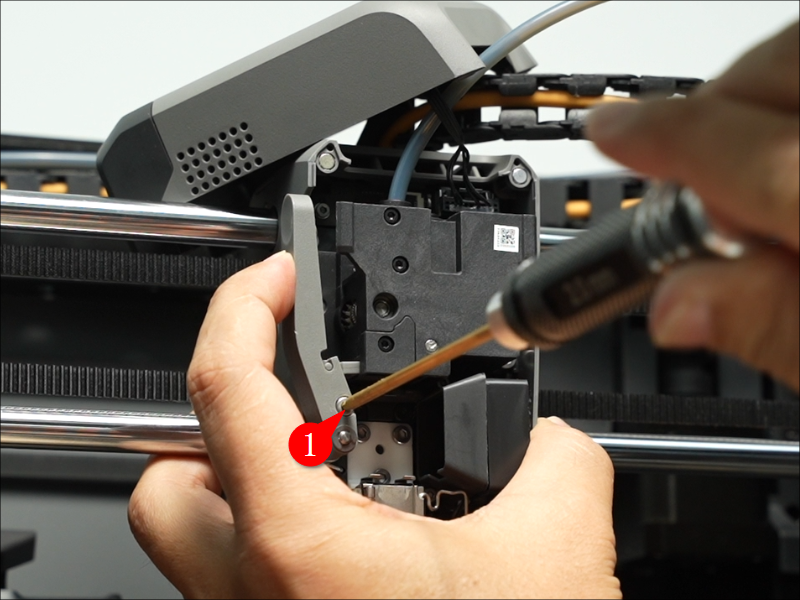
Step 2: Release the Cutter Lever
Slightly depress the filament cutter lever with one hand wile unscrewing the locking screw with the H2.0 Allen key.
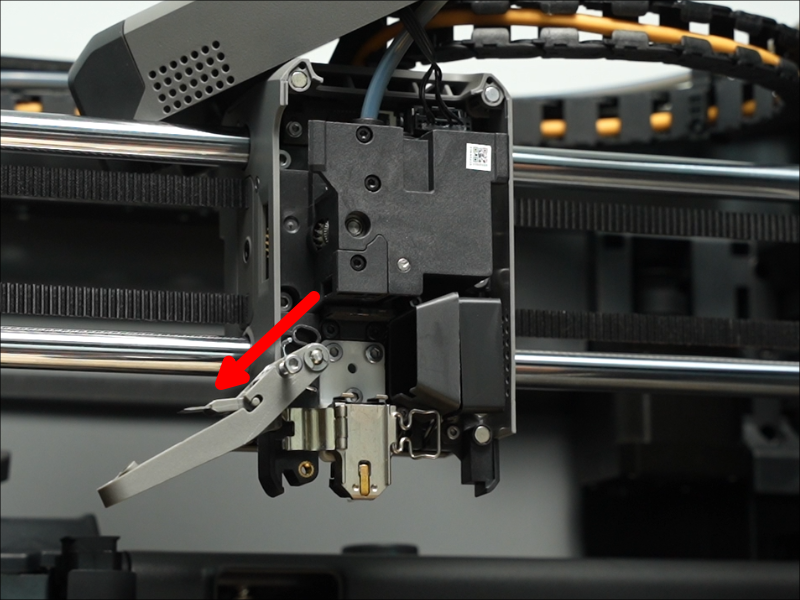
Once the screw is loosened enough, rotate the filament cutter away from the toolhead completely.
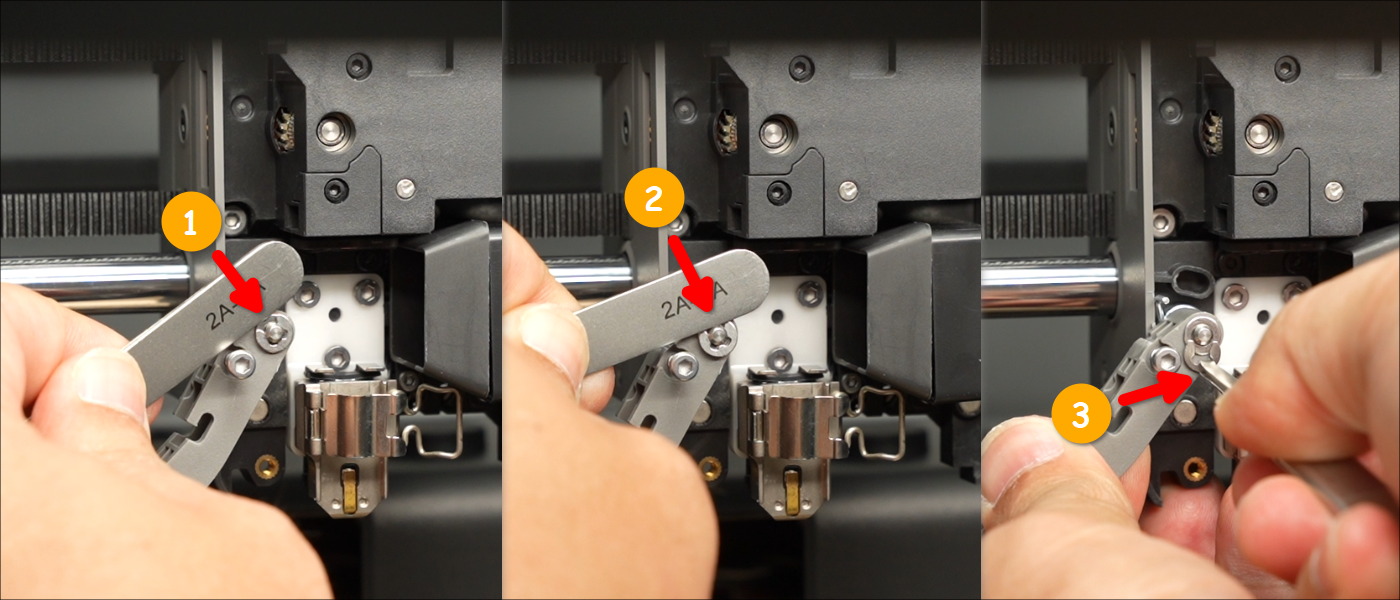
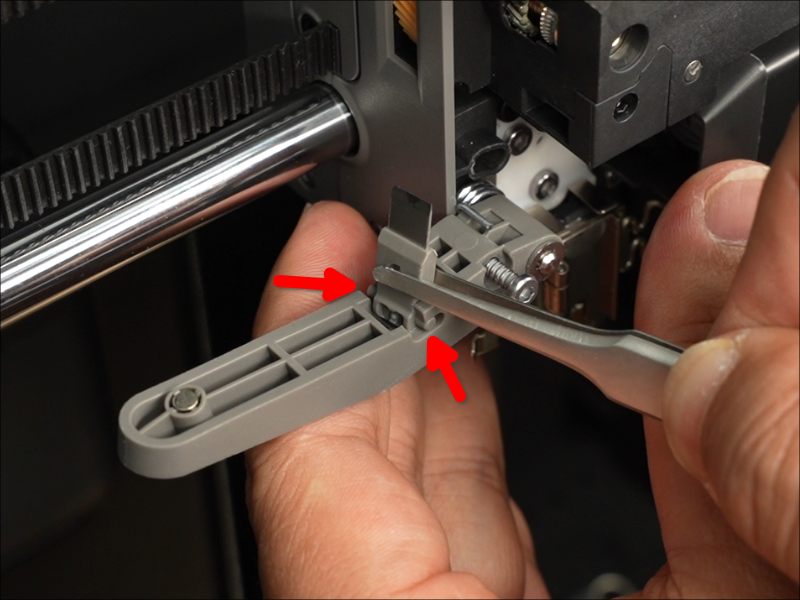
Step 3: Remove the Cutter Blade
Remove the cutter from the lever with tweezers, being very careful not to touch the sharp cutter blade. The cutter should be moved to the left so its pins slide out the open side of their slots to release it.
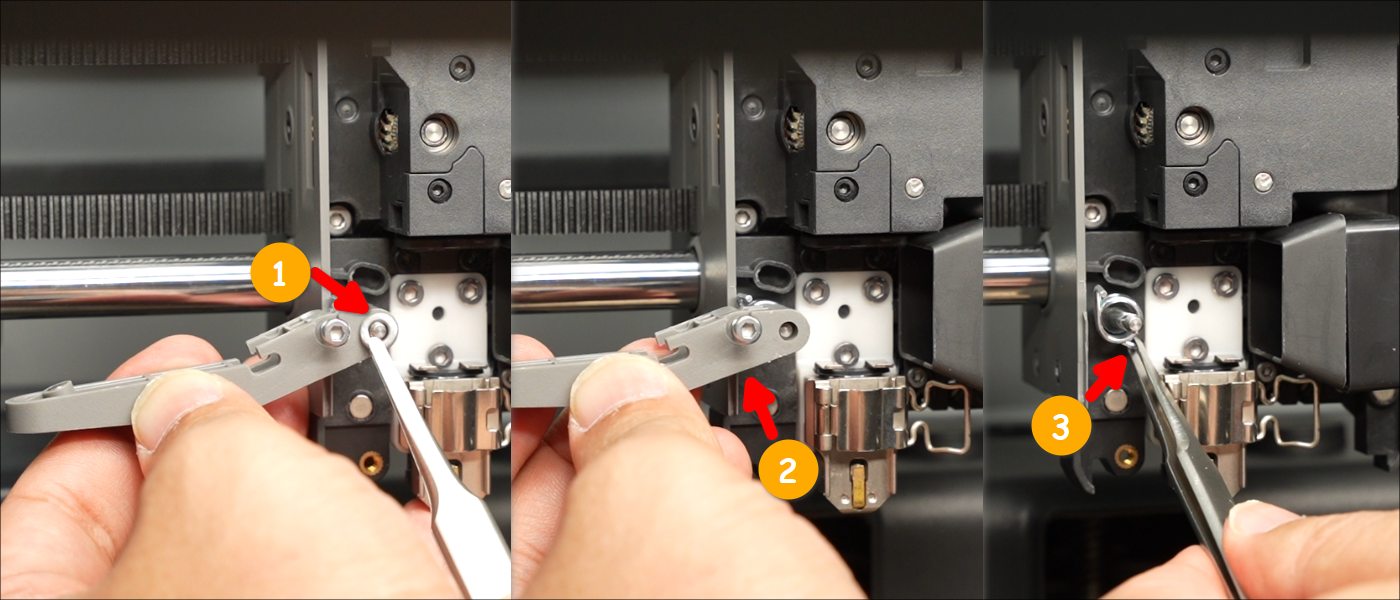
Step 4: Remove the Cutter Lever
The circular locking clip can suddenly pop out during removal, so be prepared for the clip's release.
Use a tool to carefully push the circular locking clip off of the filament lever pin. Be sure to have a firm grip on the clip with either your hand or the tweezers and pull it the rest of the way off.
Remove the washer and pull the filament cutter lever off of its pin. Remove or otherwise keep track of the radial spring which remains on the filament lever pin.
Installing the Cutter Lever
Step 1: Install the Cutter Lever and Clip
Place the radial spring onto the filament cutter pin in the orientation shown in the first panel of the below image. Place the replacement cutter lever over the pin, then the washer, then replace the clip over the pin to hold everything in place.
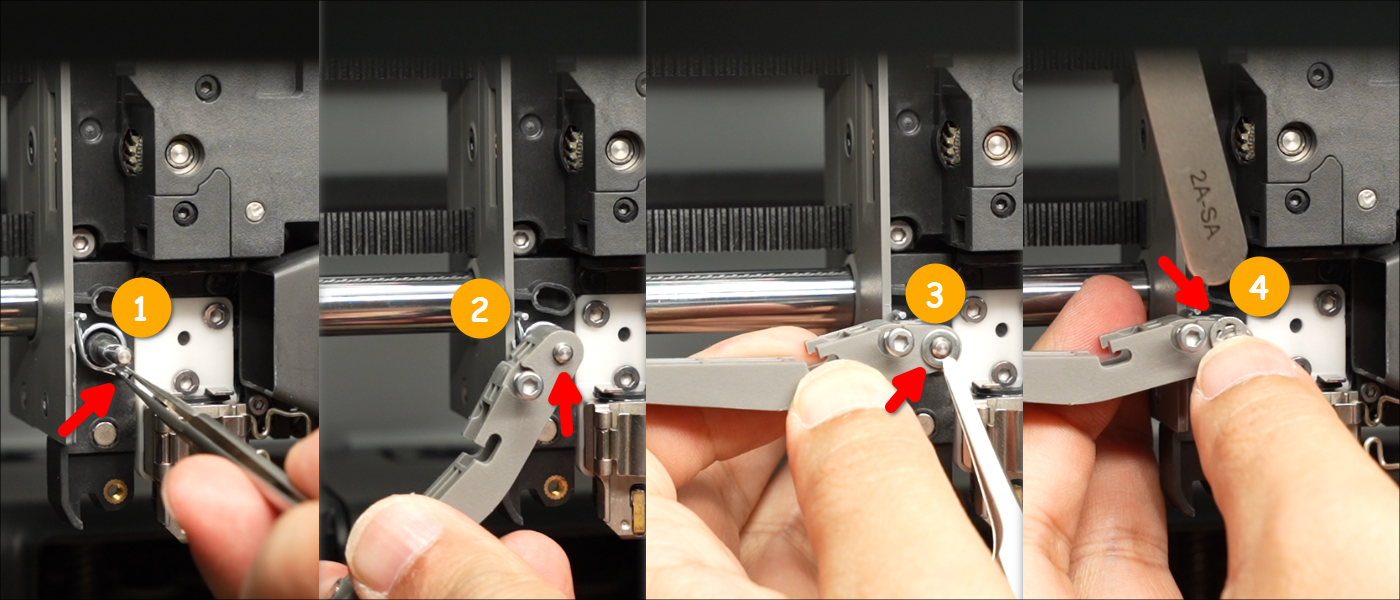
Step 2: Install the Cutter Blade
Holding the cutter lever with one hand, place the cutter blade in place with a pair of tweezers by placing its pins into the open end of the slots on the lever.
Rotate the filament cutter lever (with its locking screw loosened and out of the way) up into place, ensuring the cutter blade is inserted into its slot.
Tighten the screw on the cutter lever with the H2.0 Allen key.
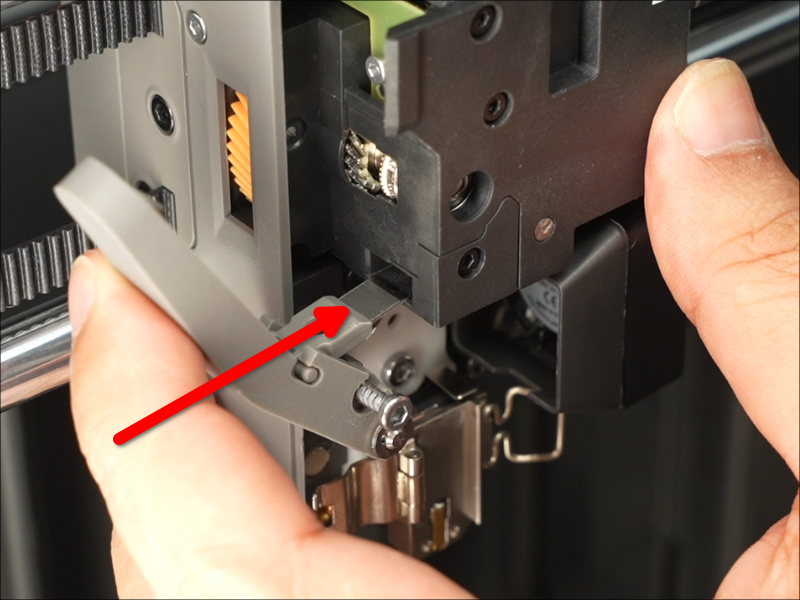
Step 3: Close the Toolhead Front Cover
Place the toolhead front cover back onto the toolhead, allowing its magnets to pull it into its correct position.
Verifying Functionality
Ensure that the filament cutter lever can be fully depressed toward the filament path and releases fully on its own.