

Snapmaker U1 Left Print Head Toolhead No.1 Replacement Part
Couldn't load pickup availability
Use this text to encourage communication or promote sharing on social networks.
Perfect Compatibility & 5‑Second Quick Swap: Exclusively fits the No.1 print head position of Snapmaker U1, supports SnapSwap system for rapid hot‑swap within 5 seconds, greatly improving printing efficiency.
Premium Stainless Steel Nozzle for Wide Filament Compatibility: Features a 0.4mm stainless steel nozzle with a maximum temperature of 300°C, compatible with PLA, ABS, PETG, TPU and more common 3D printing materials.
Smart Sensor Design for Stable Printing: Built‑in embedded inductive sensors support automatic bed leveling and real‑time runout detection, avoiding printing errors and reducing filament waste.
Efficient Heat Dissipation & High‑Quality Build: Integrated cooling fan quickly cools the hot end for steady temperature control; constructed from sturdy plastic and metal,
lightweight at only 299g with reliable long‑term performance.
Complete Replacement Part & Easy Installation: Comes with 1 full print head unit, direct plug‑and‑play replacement, no complicated modification required for quick setup and use.
• Equipped with a stainless steel nozzle, supporting multiple printing materials including PLA, PETG, TPU, PVA, etc.
• Features a rock-solid structure with 1,000,000 tested toolhead swaps across 4-toolhead combinations.
• Built-in inductive sensor enables smart calibration.
• Integrated filament runout detection monitors material status in real time, preventing printing failures and material waste.
• Built-in cooling fan allows rapid hot-end cooling to enhance printing quality.
Compatibility
Snapmaker U1
U1 toolhead replacement guide
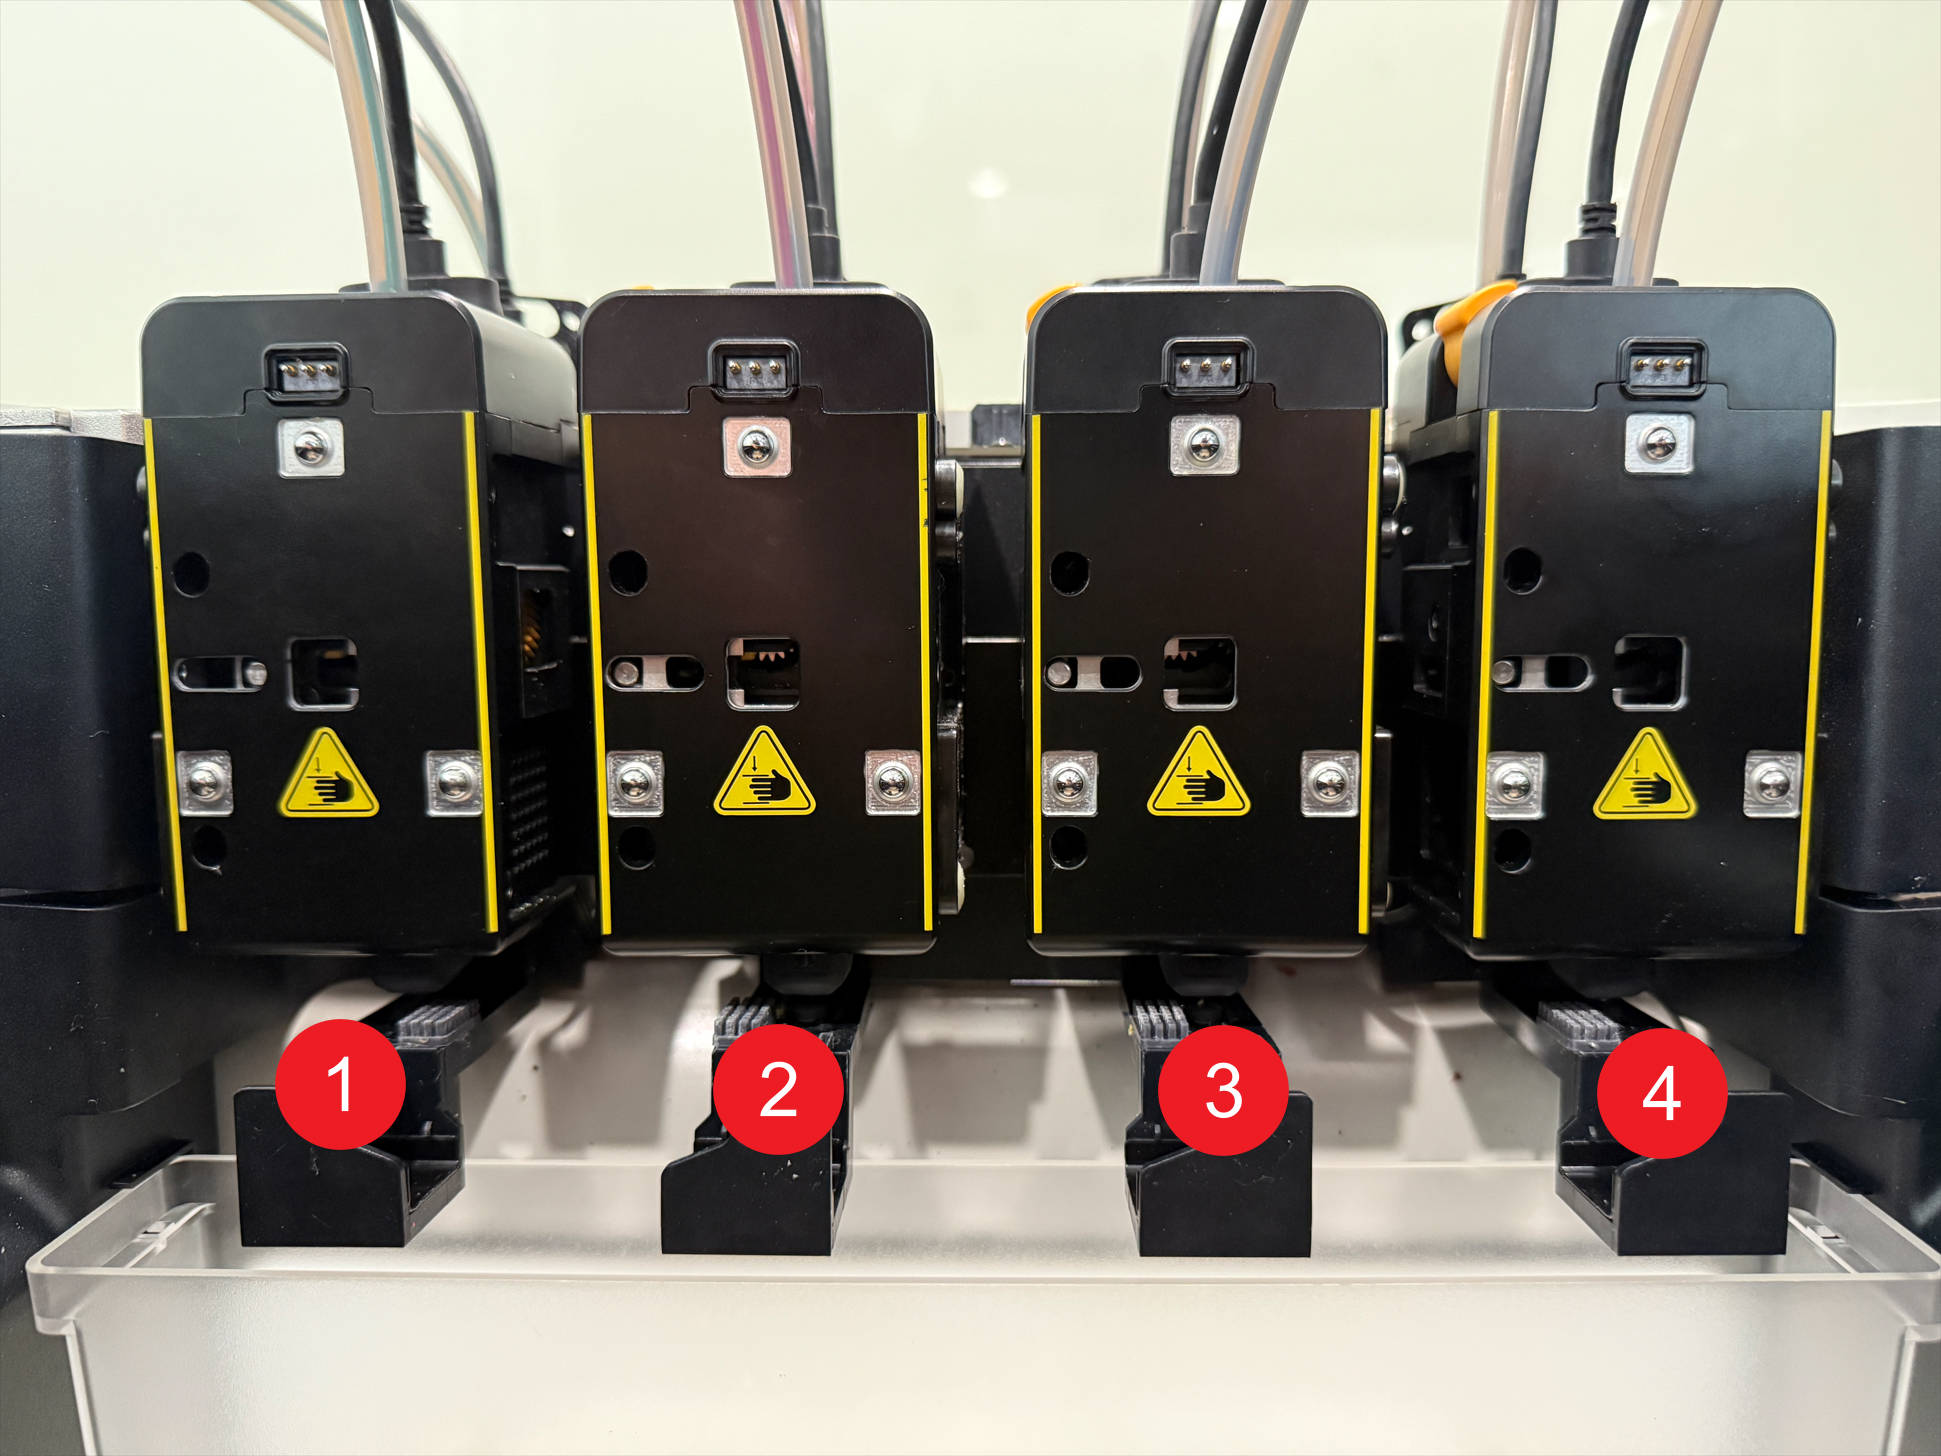
The toolheads are mounted on the toolhead docking bracket assembly, arranged from left to right as Toolhead 1, 2, 3, and 4.
Terminology
Different from our official term toolhead, some people may use the following terms to describe this component:
(1) Toolhead assembly
(2) Tool head
(3) Print head
Complexity
Difficulty:★☆☆☆☆ (Easy)
Estimated Time:8 minutes
Tools and Parts Required
(1) H2.0 hex key
(2) New U1 toolhead
Procedure
Step 1. Unload filament
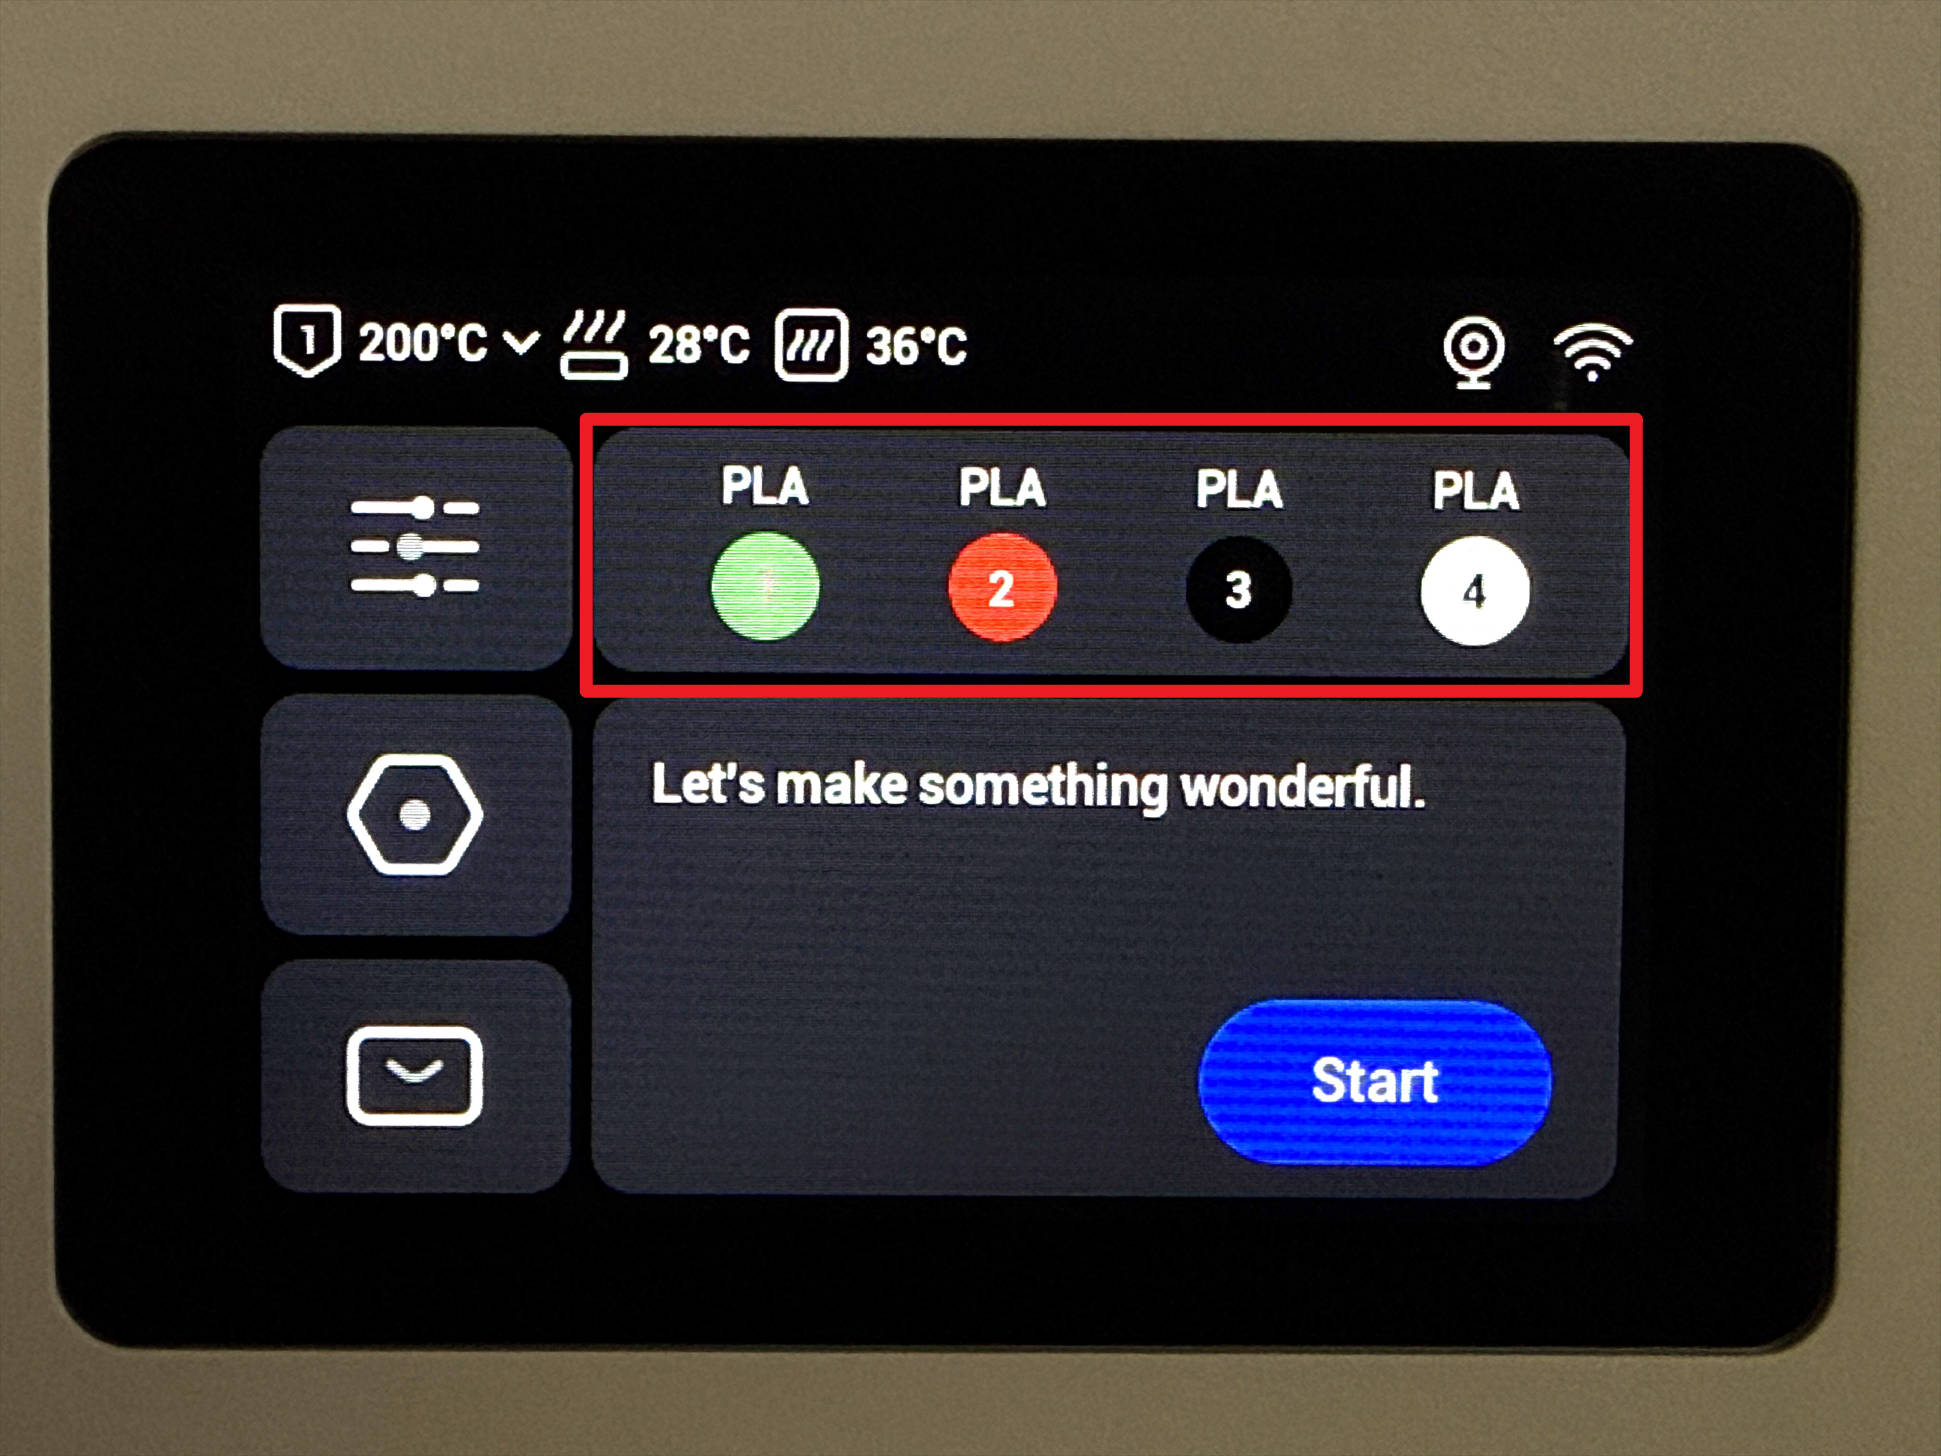
(1) Tap the filament info section on the home page.
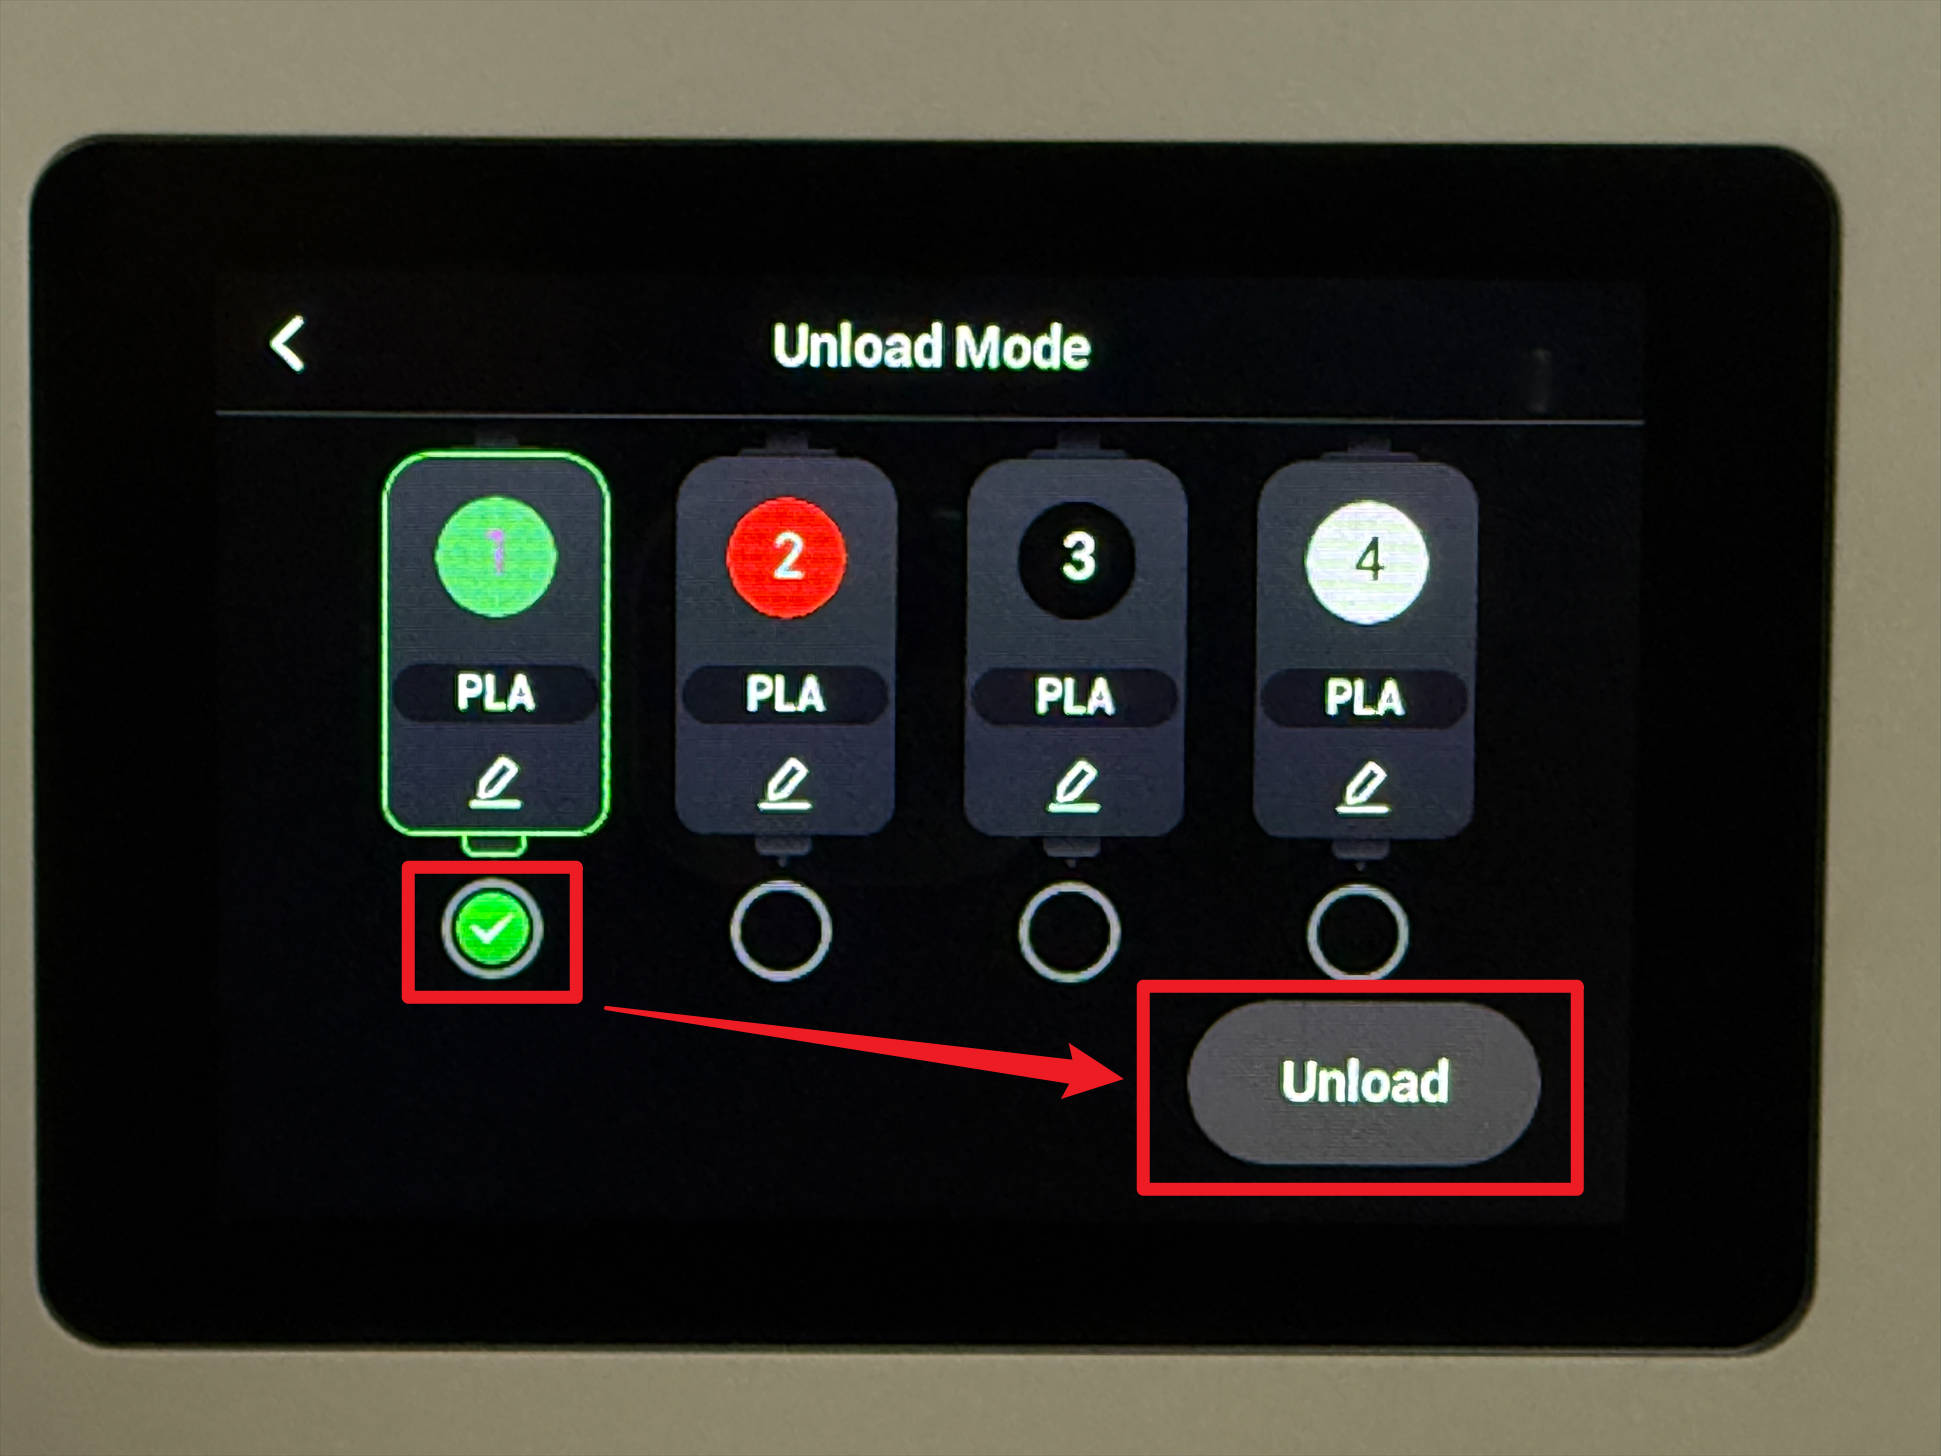
(2) Tap "Unload mode".
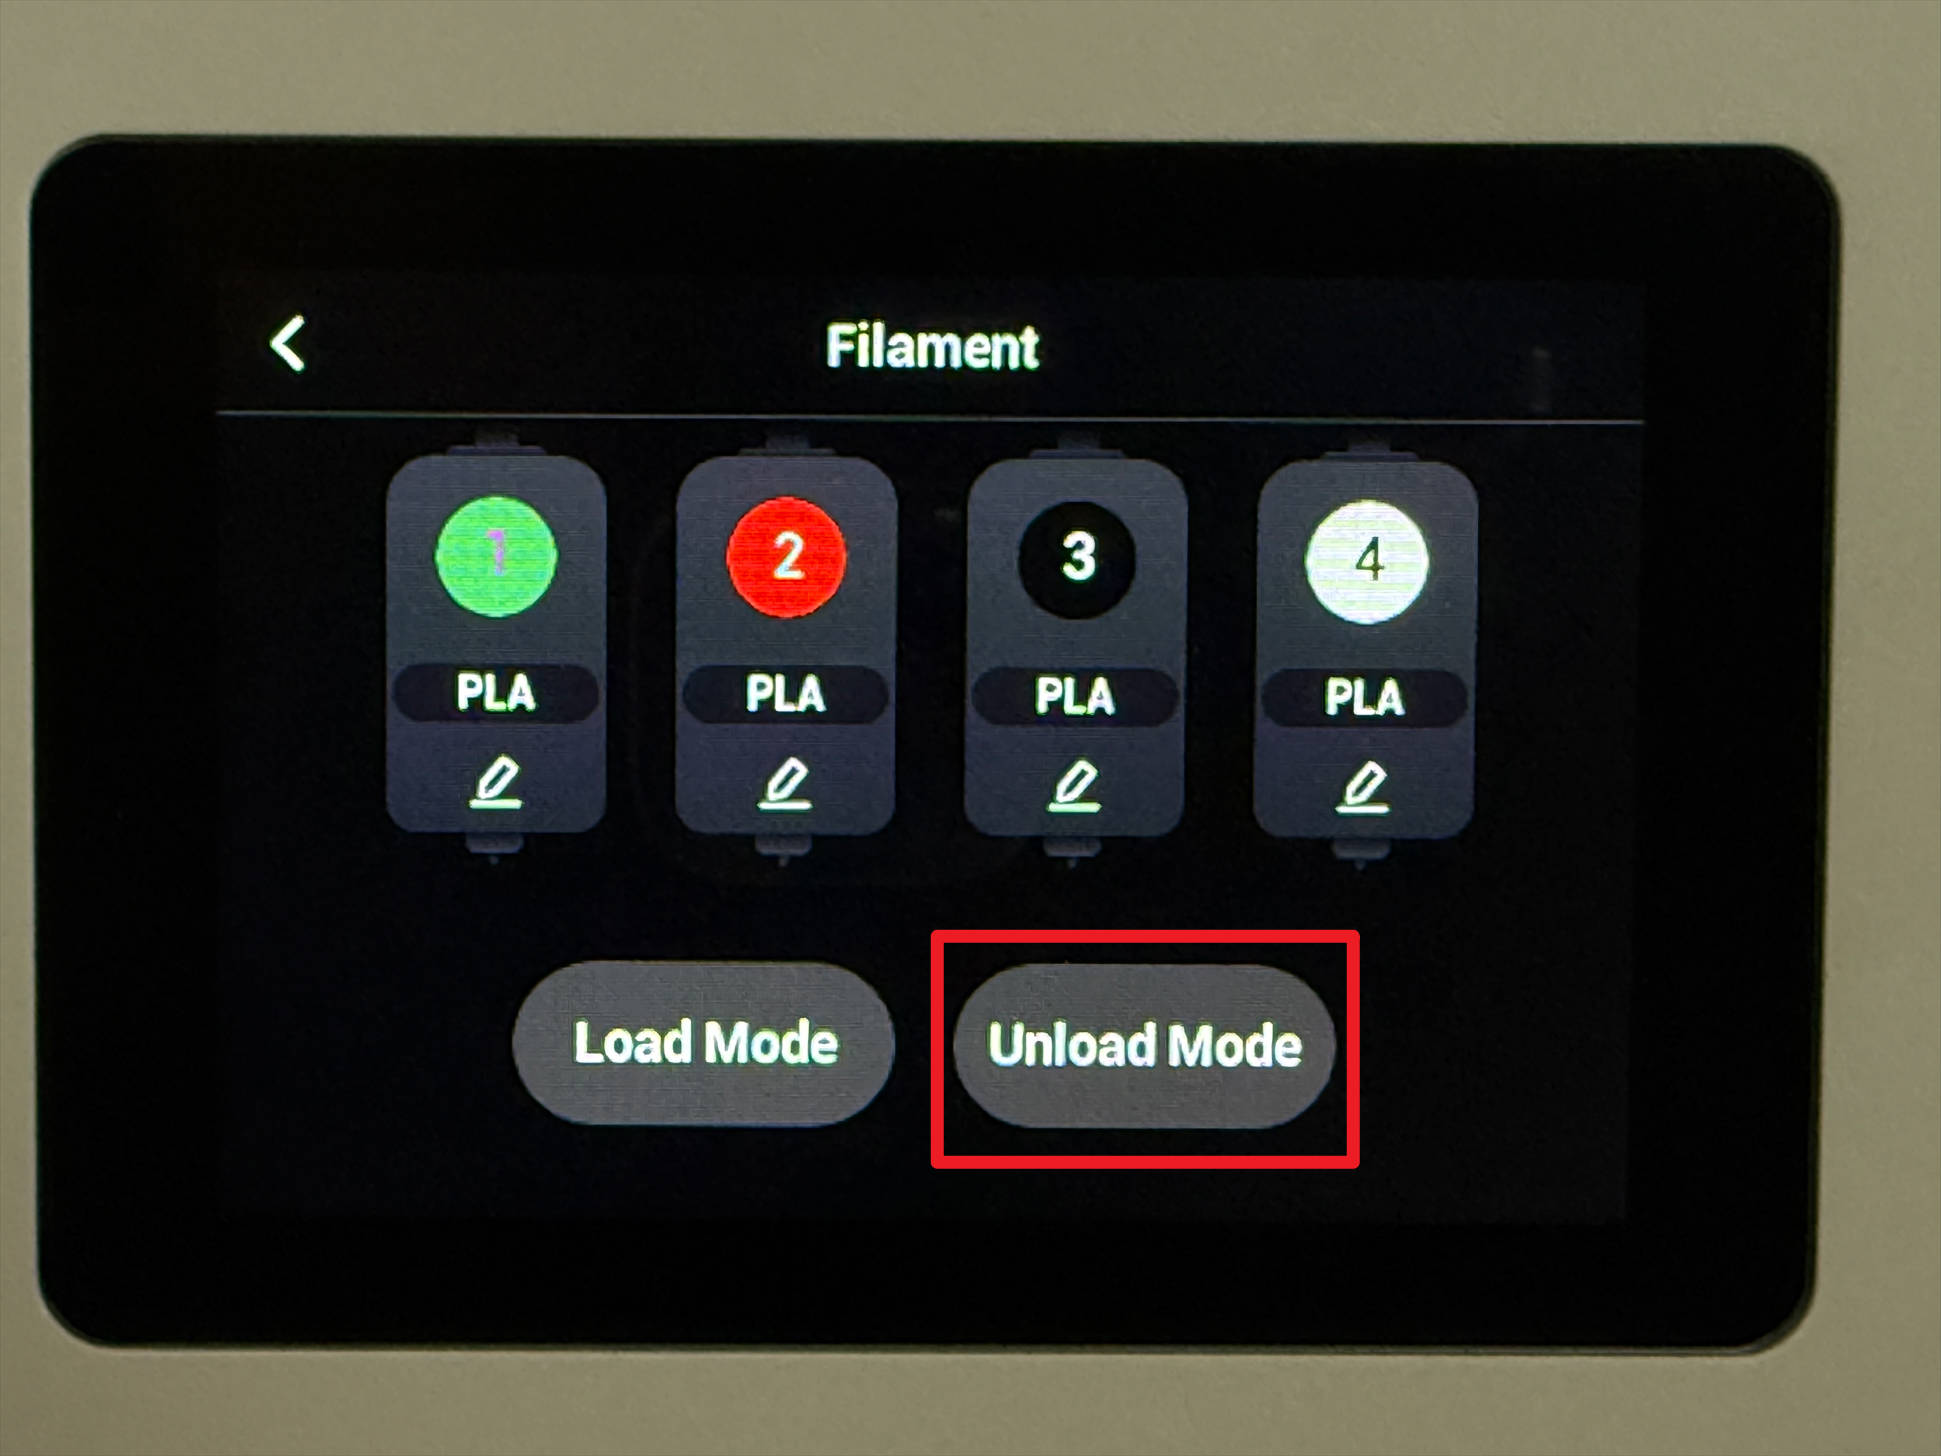
(3) Choose the target toolhead (e.g., Toolhead 1) and tap "Unload".
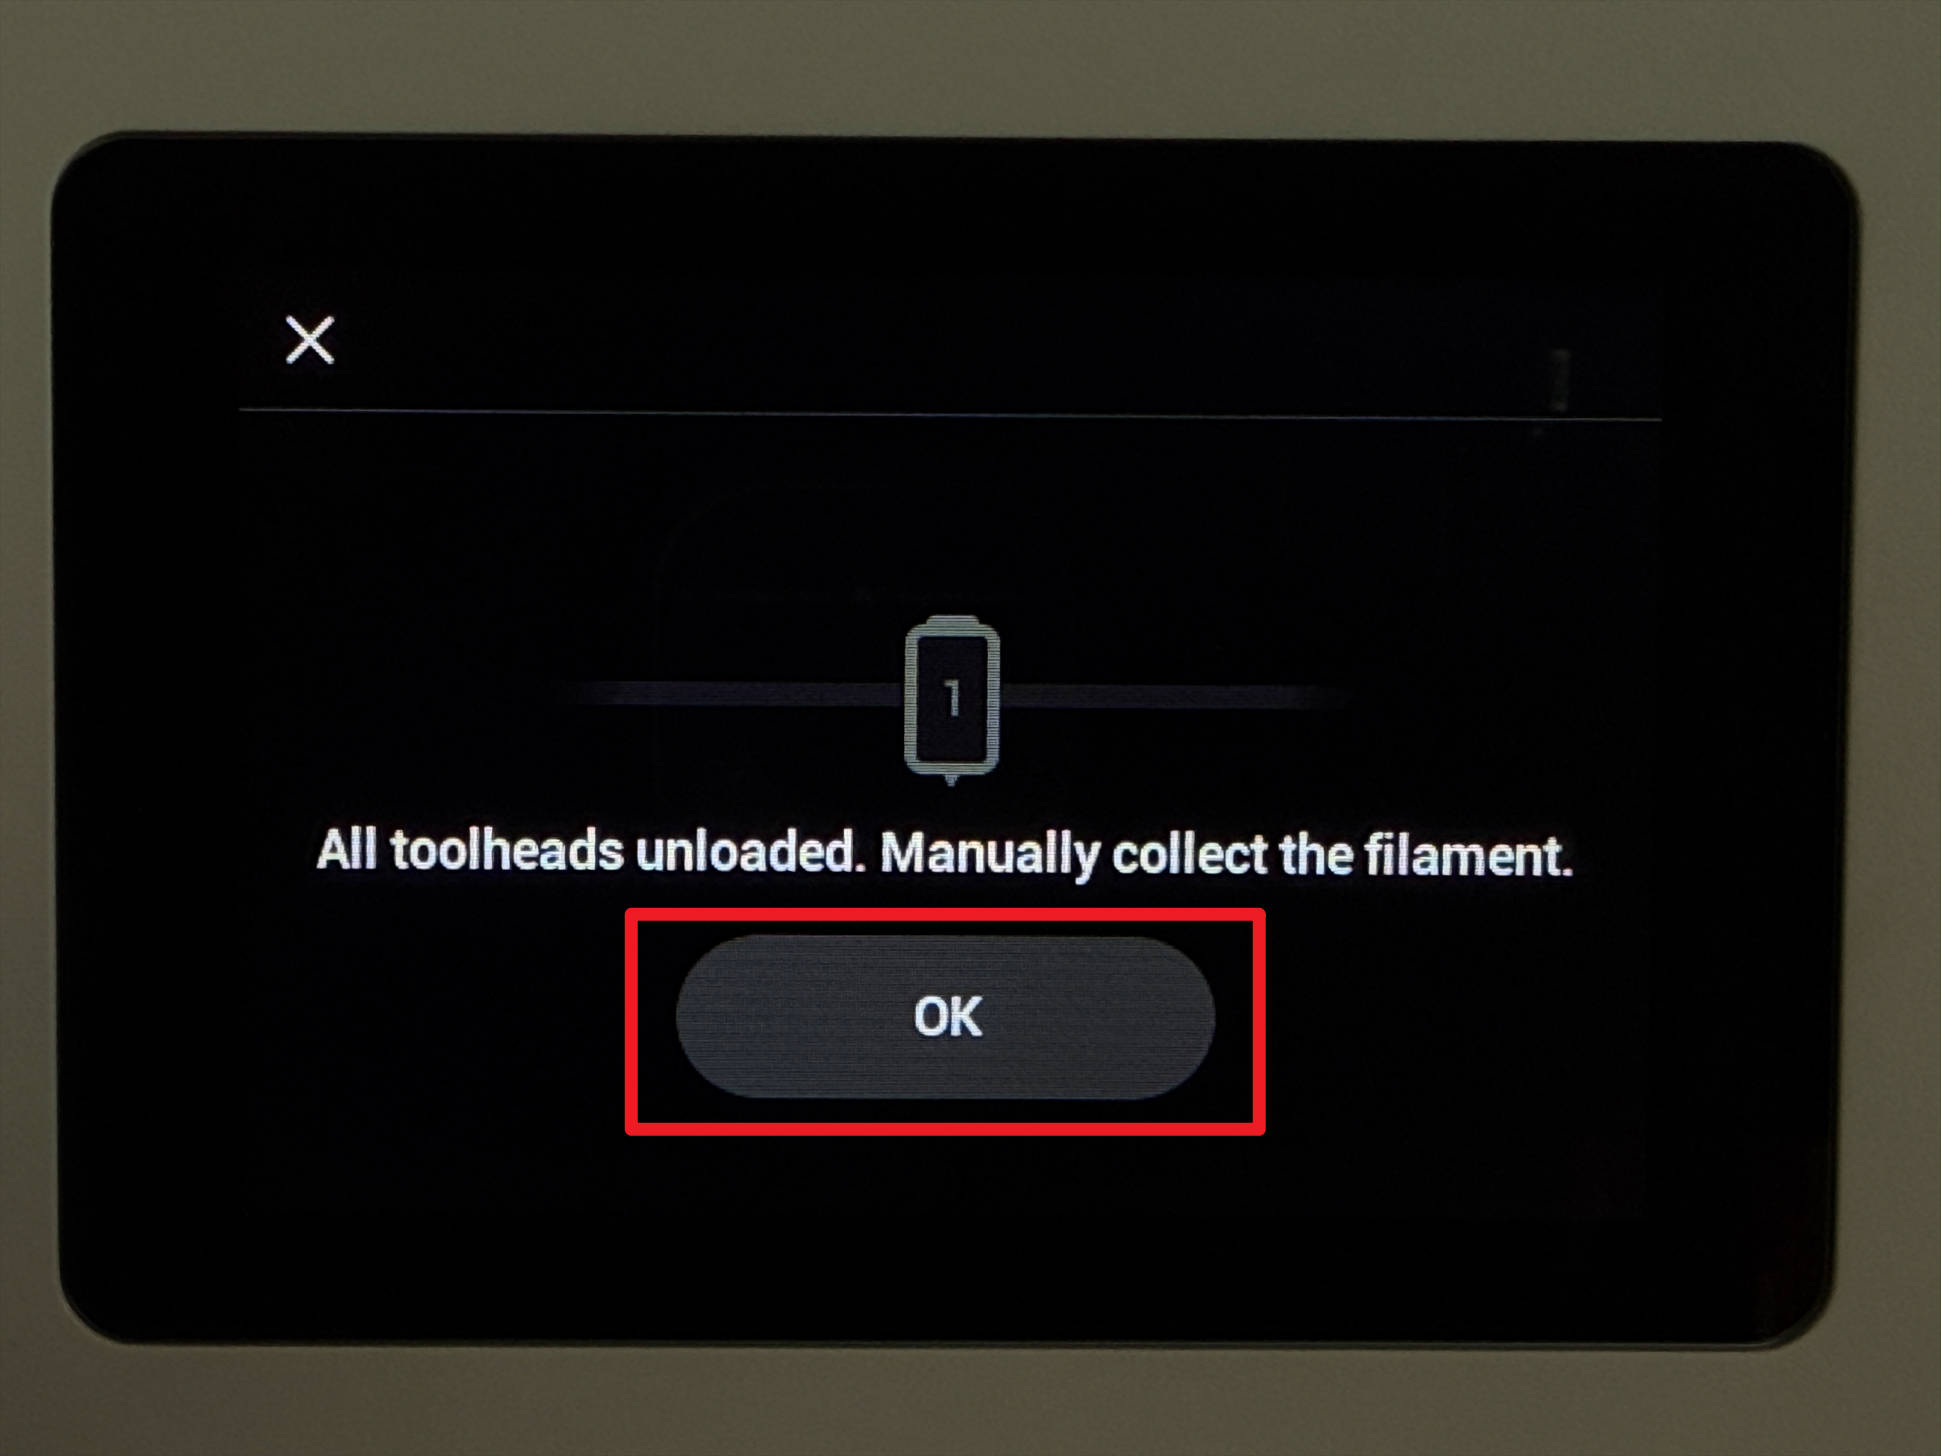
(4) Wait for the printer to finish unloading, then tap "OK".
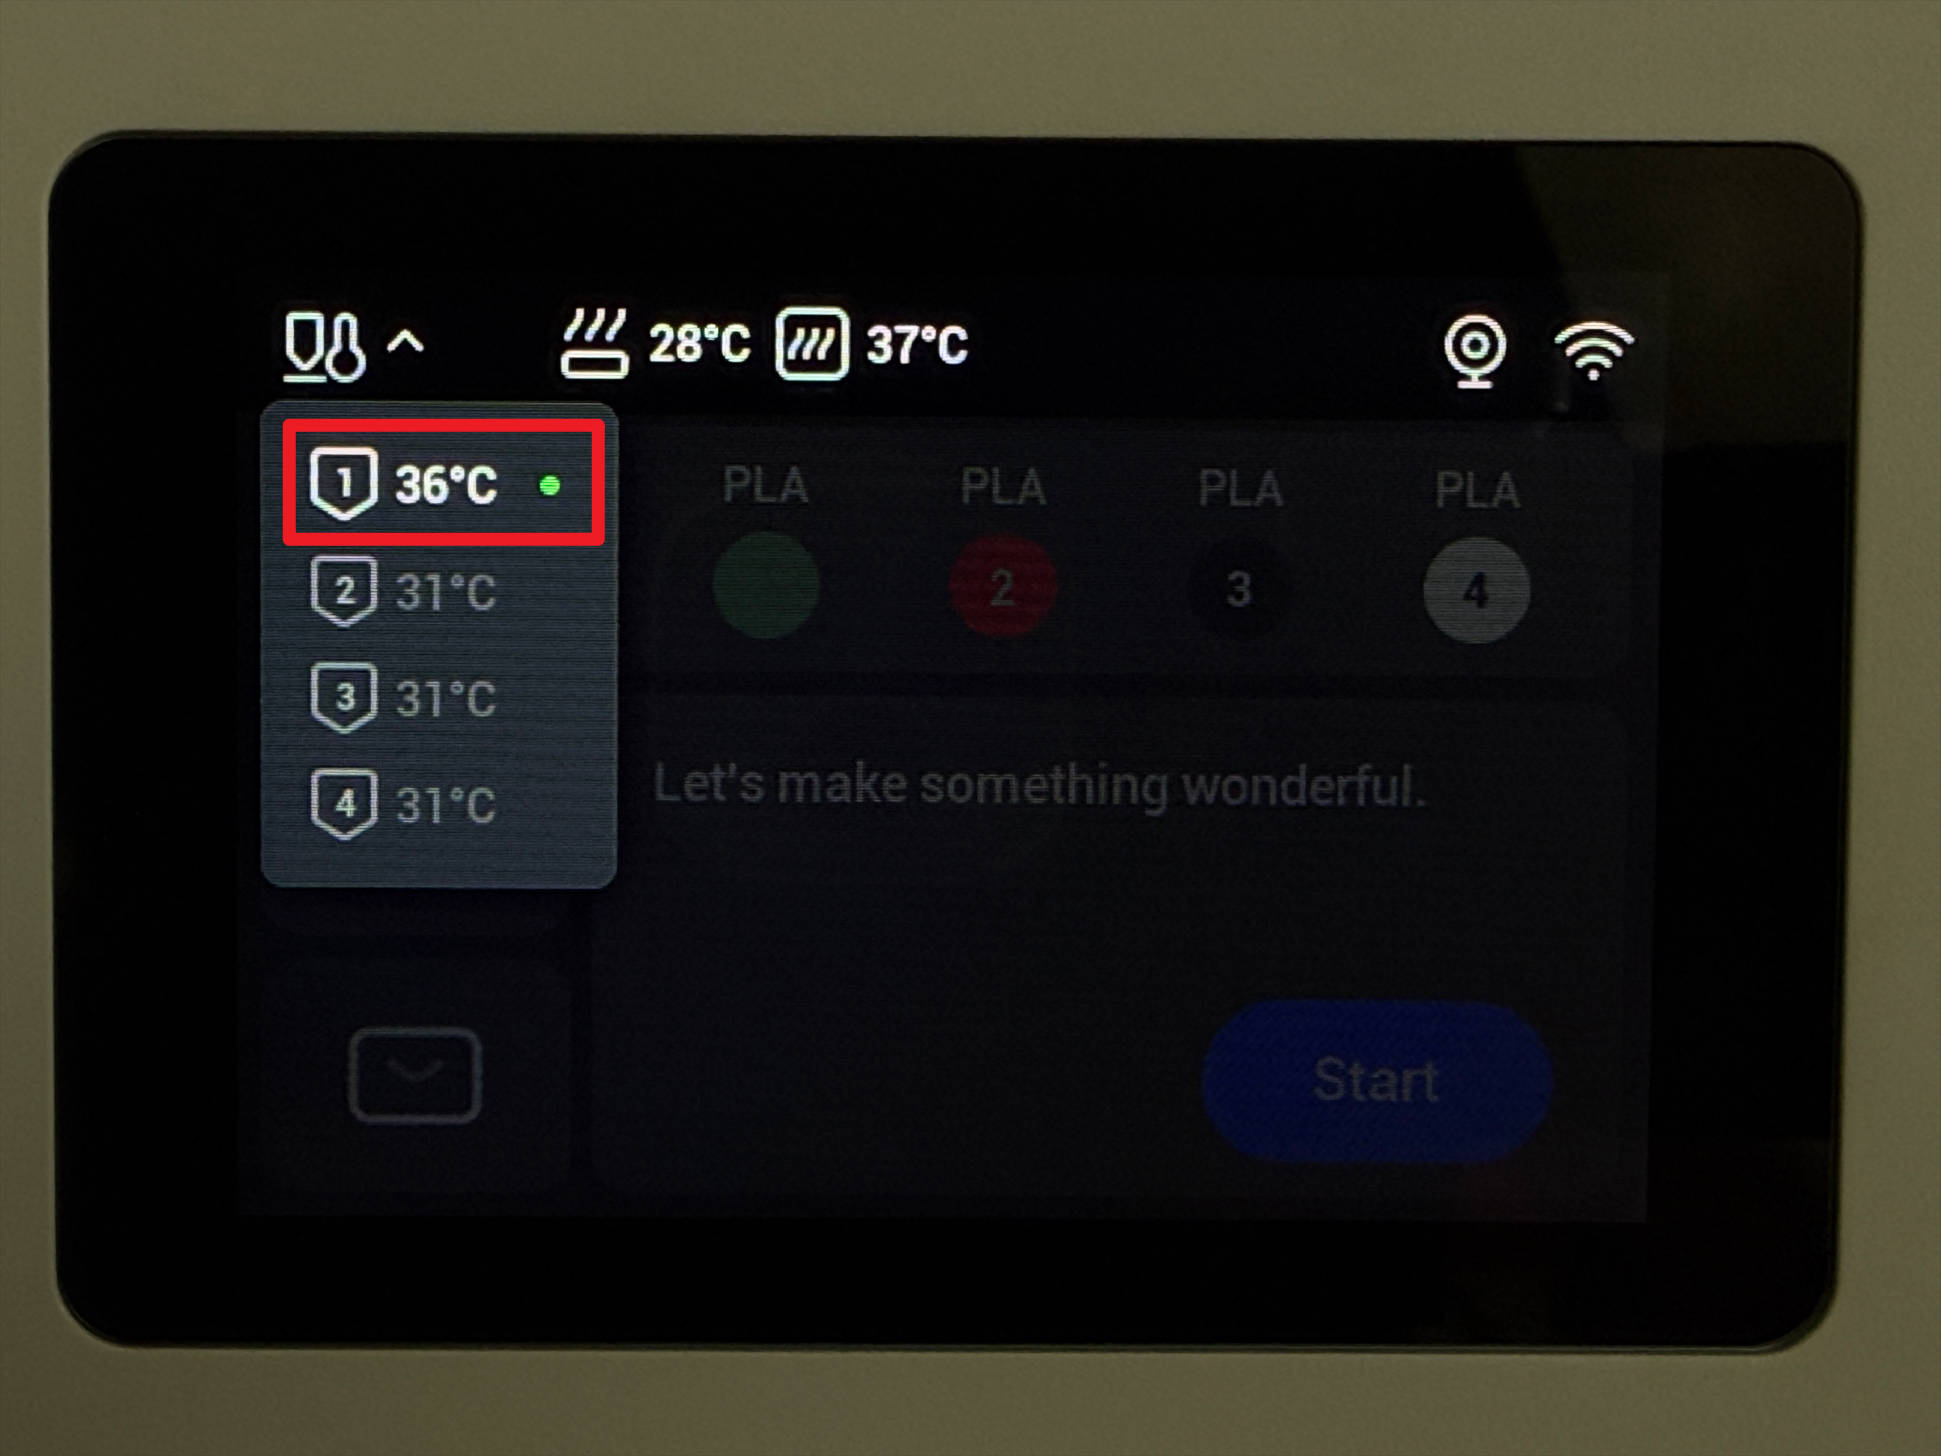
(5) Return to the home page, tap the upper-left corner to check the nozzle temperature, and wait until it cools below 40 °C.
Step 2. Replace the toolhead
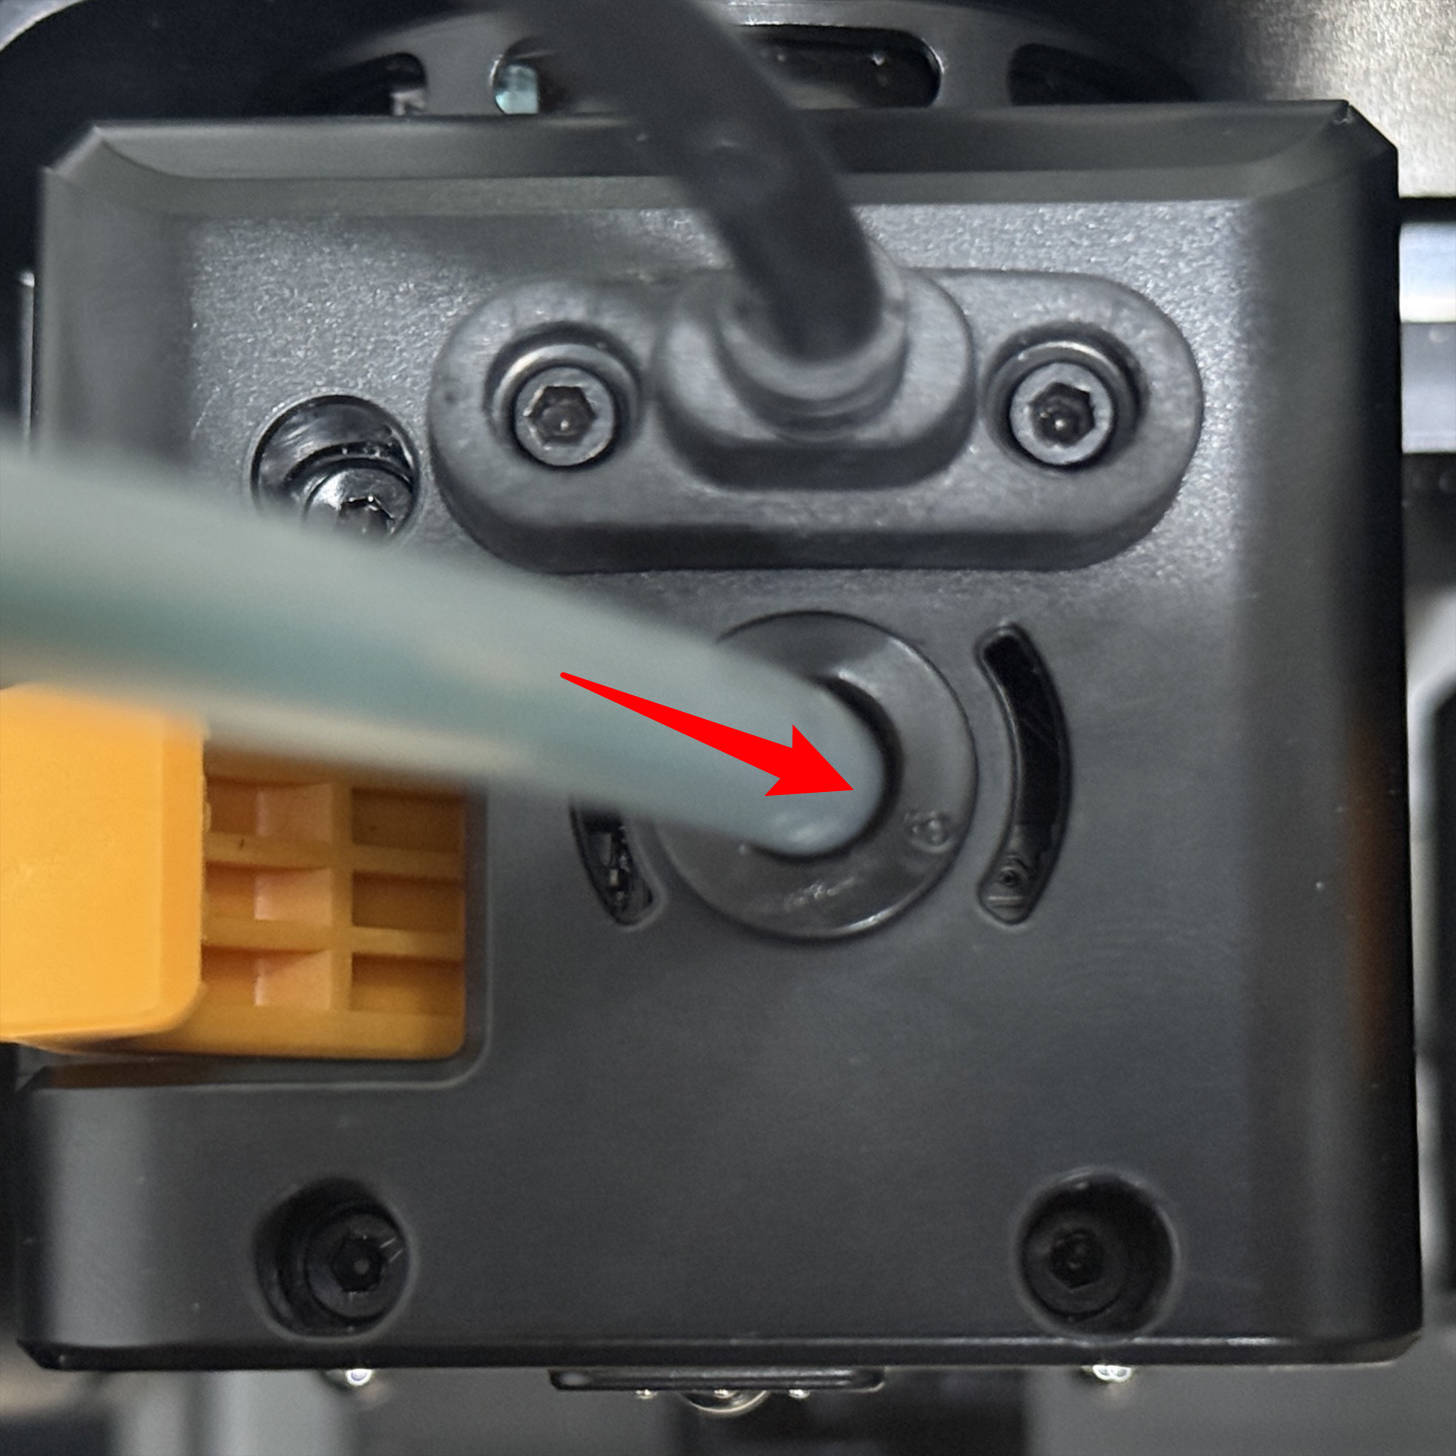
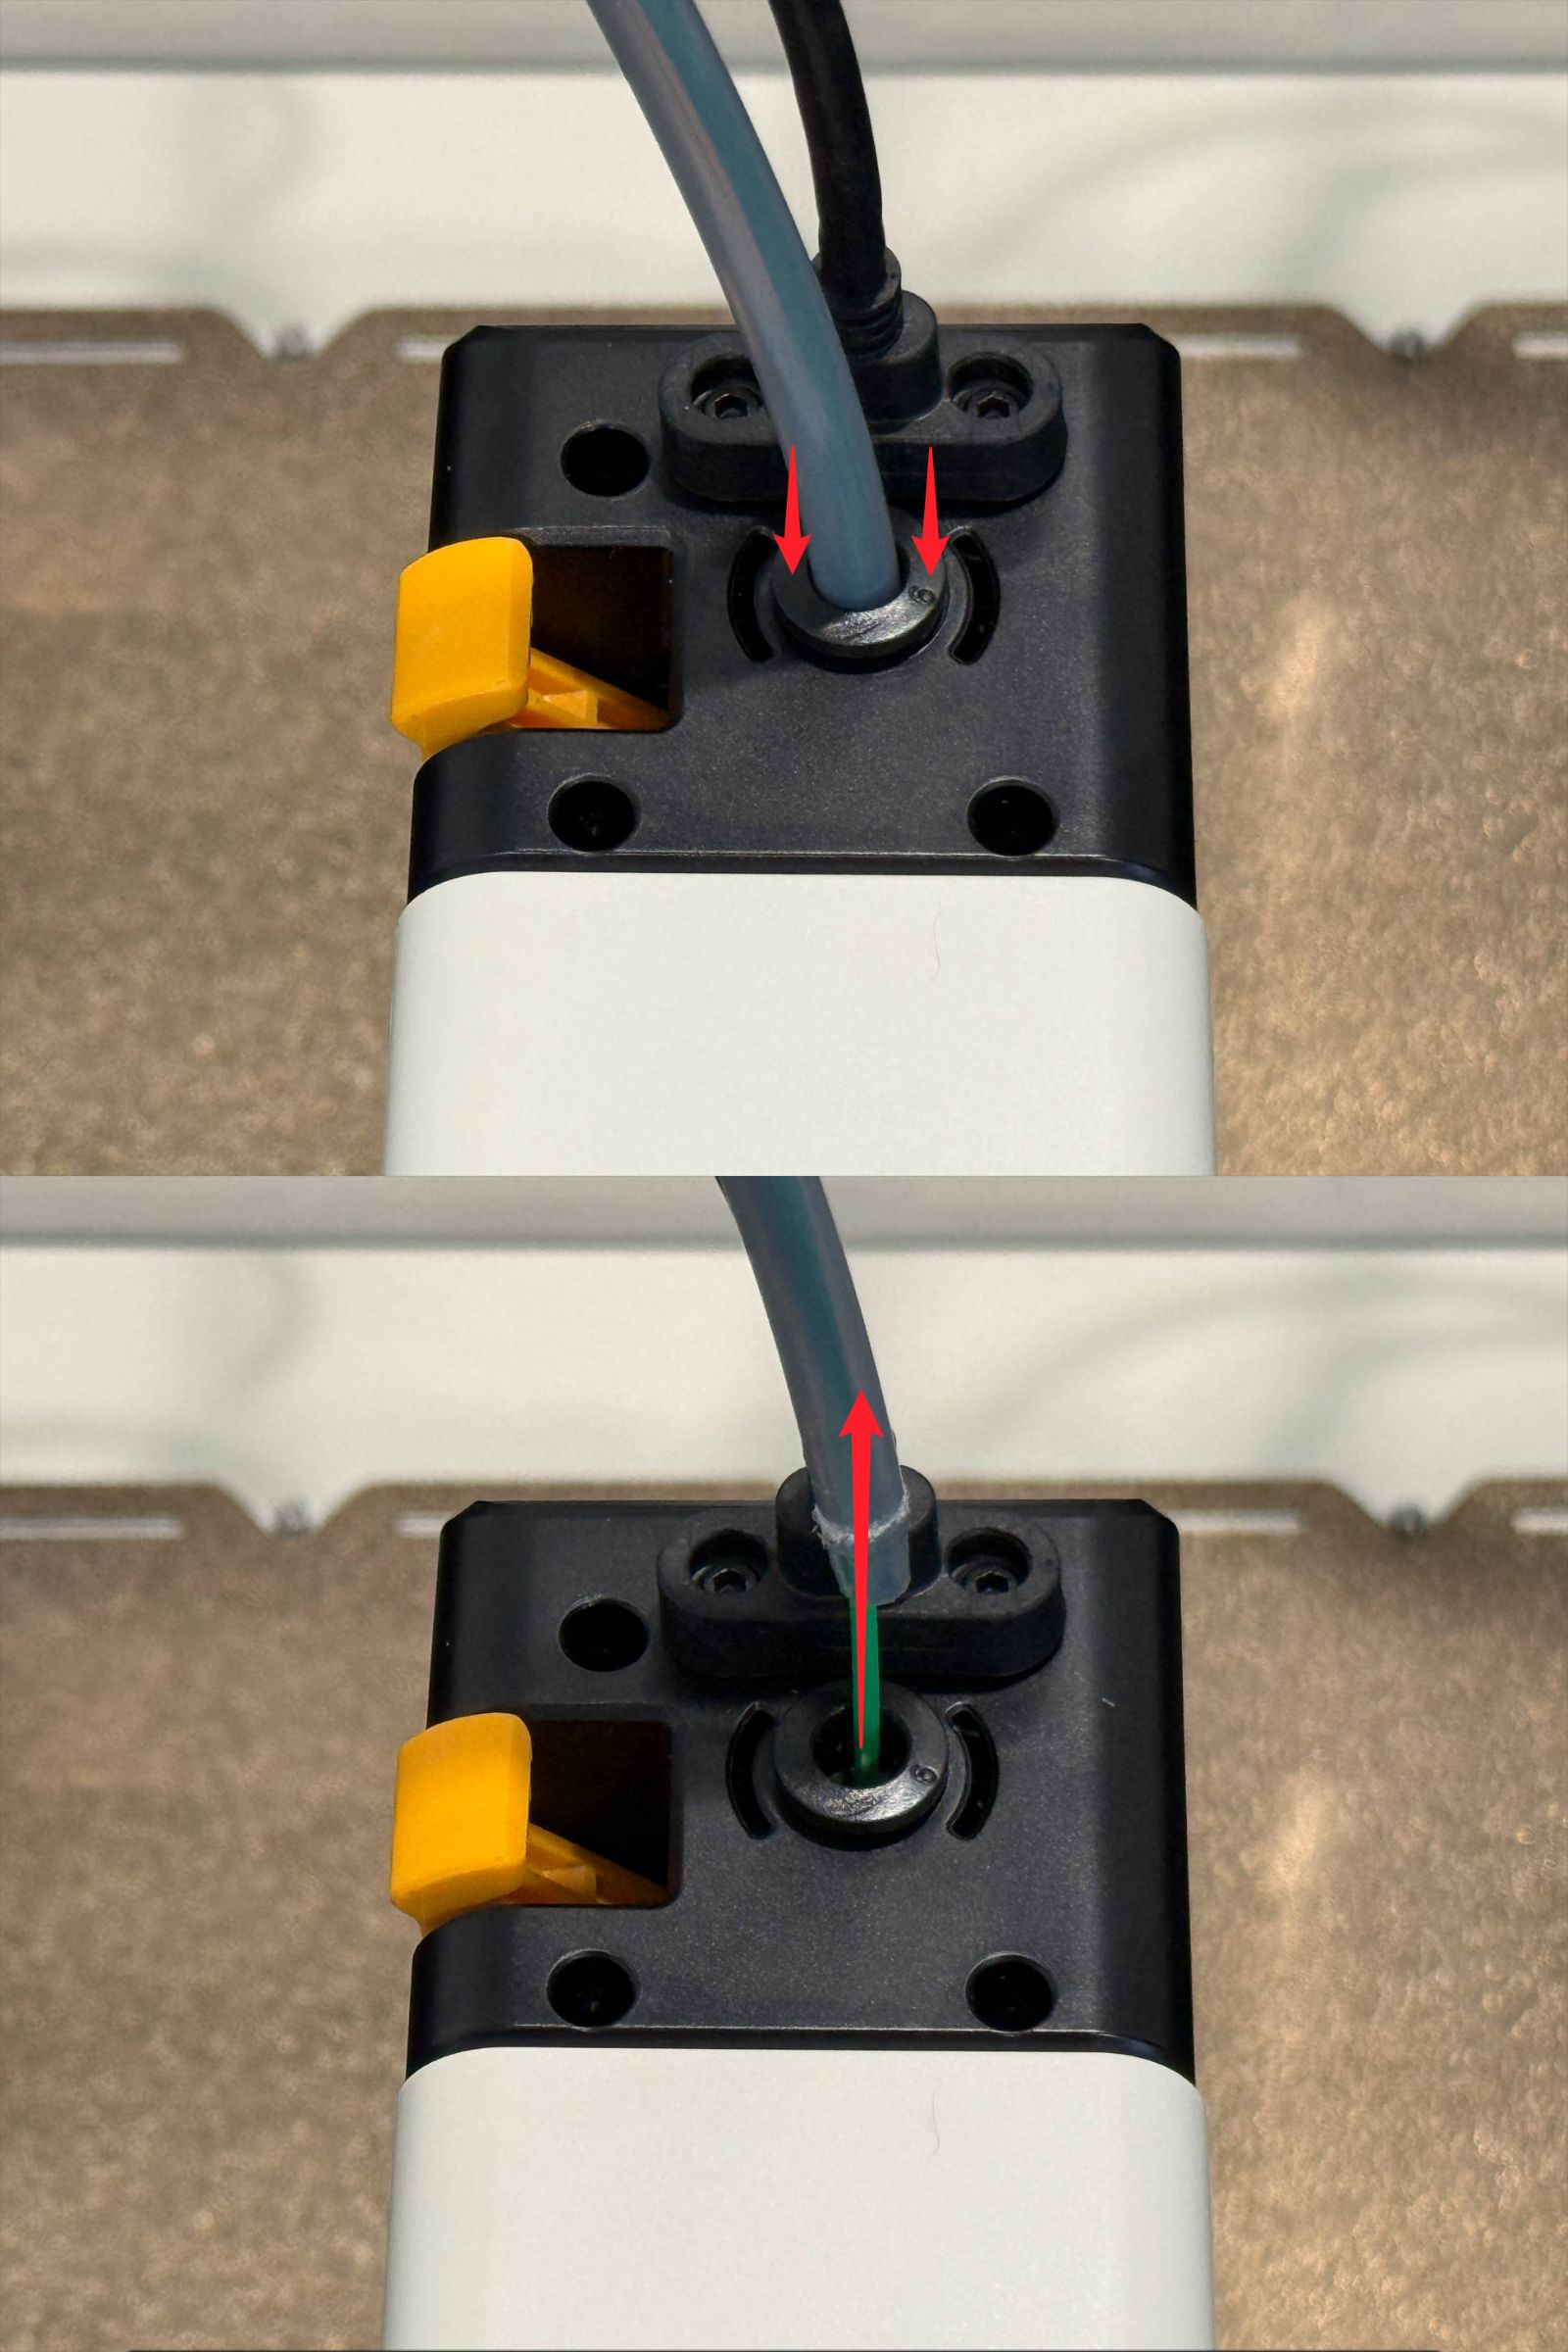
(1) Press the quick connector to remove the filament tube.
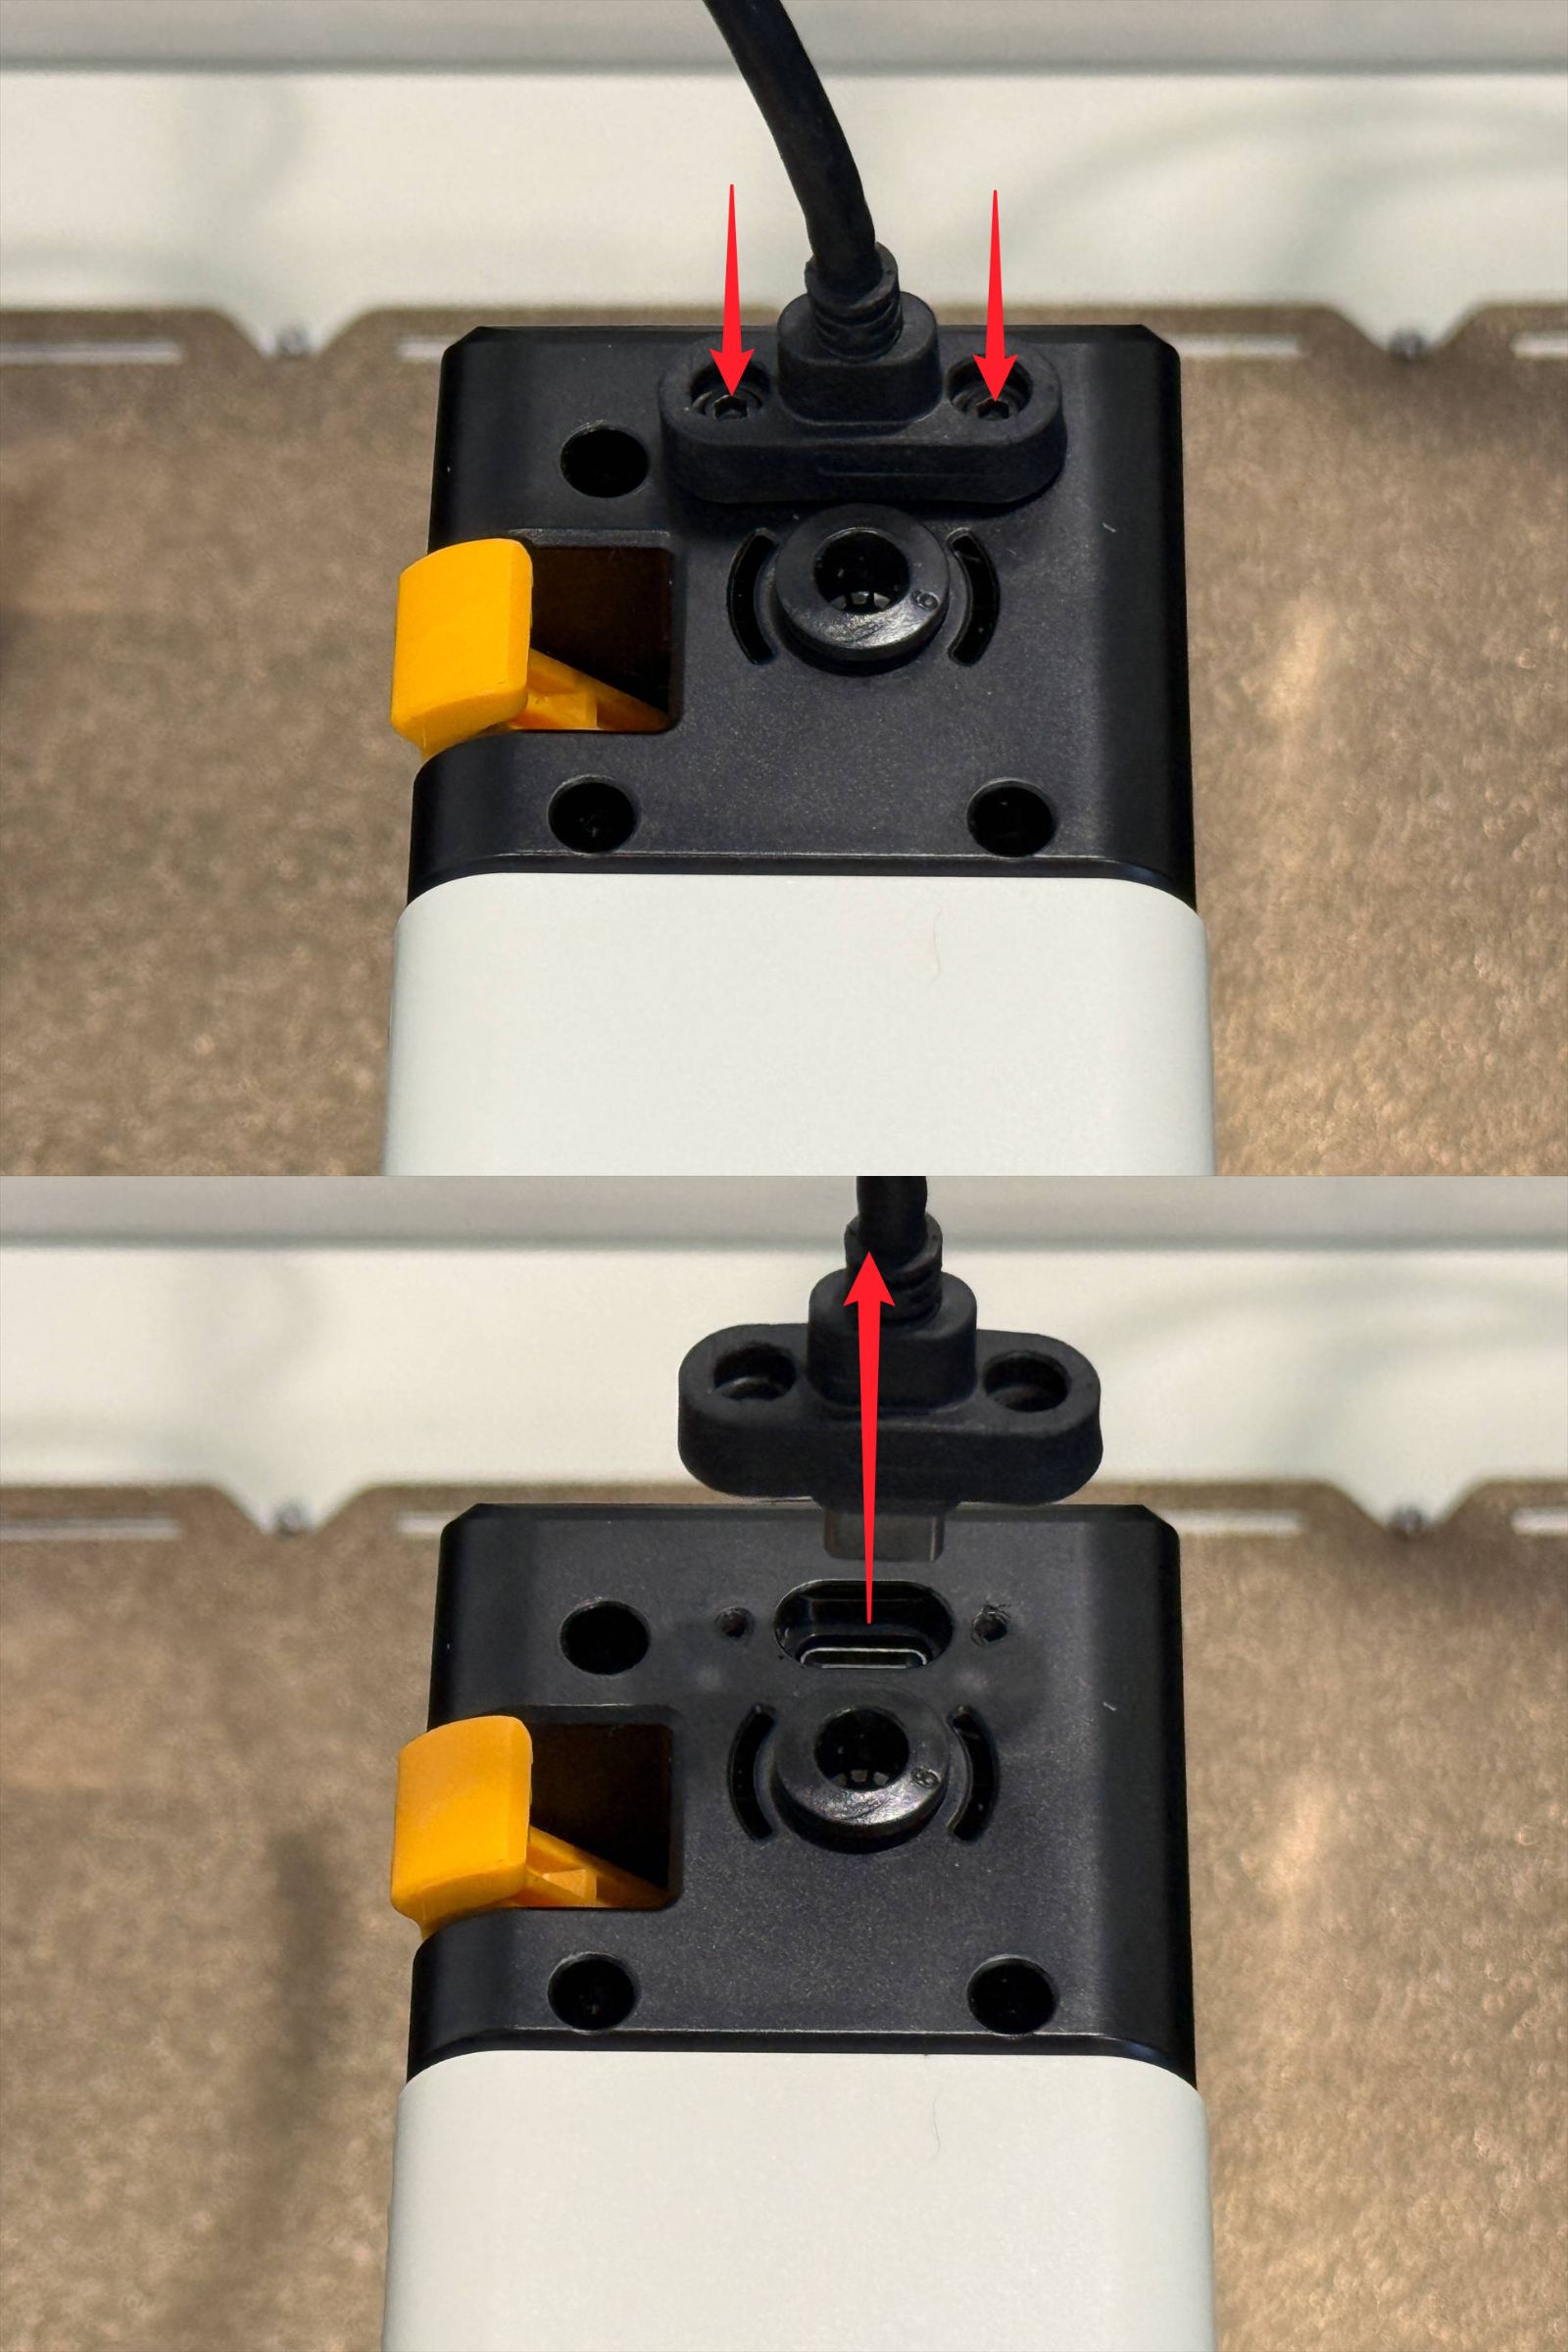
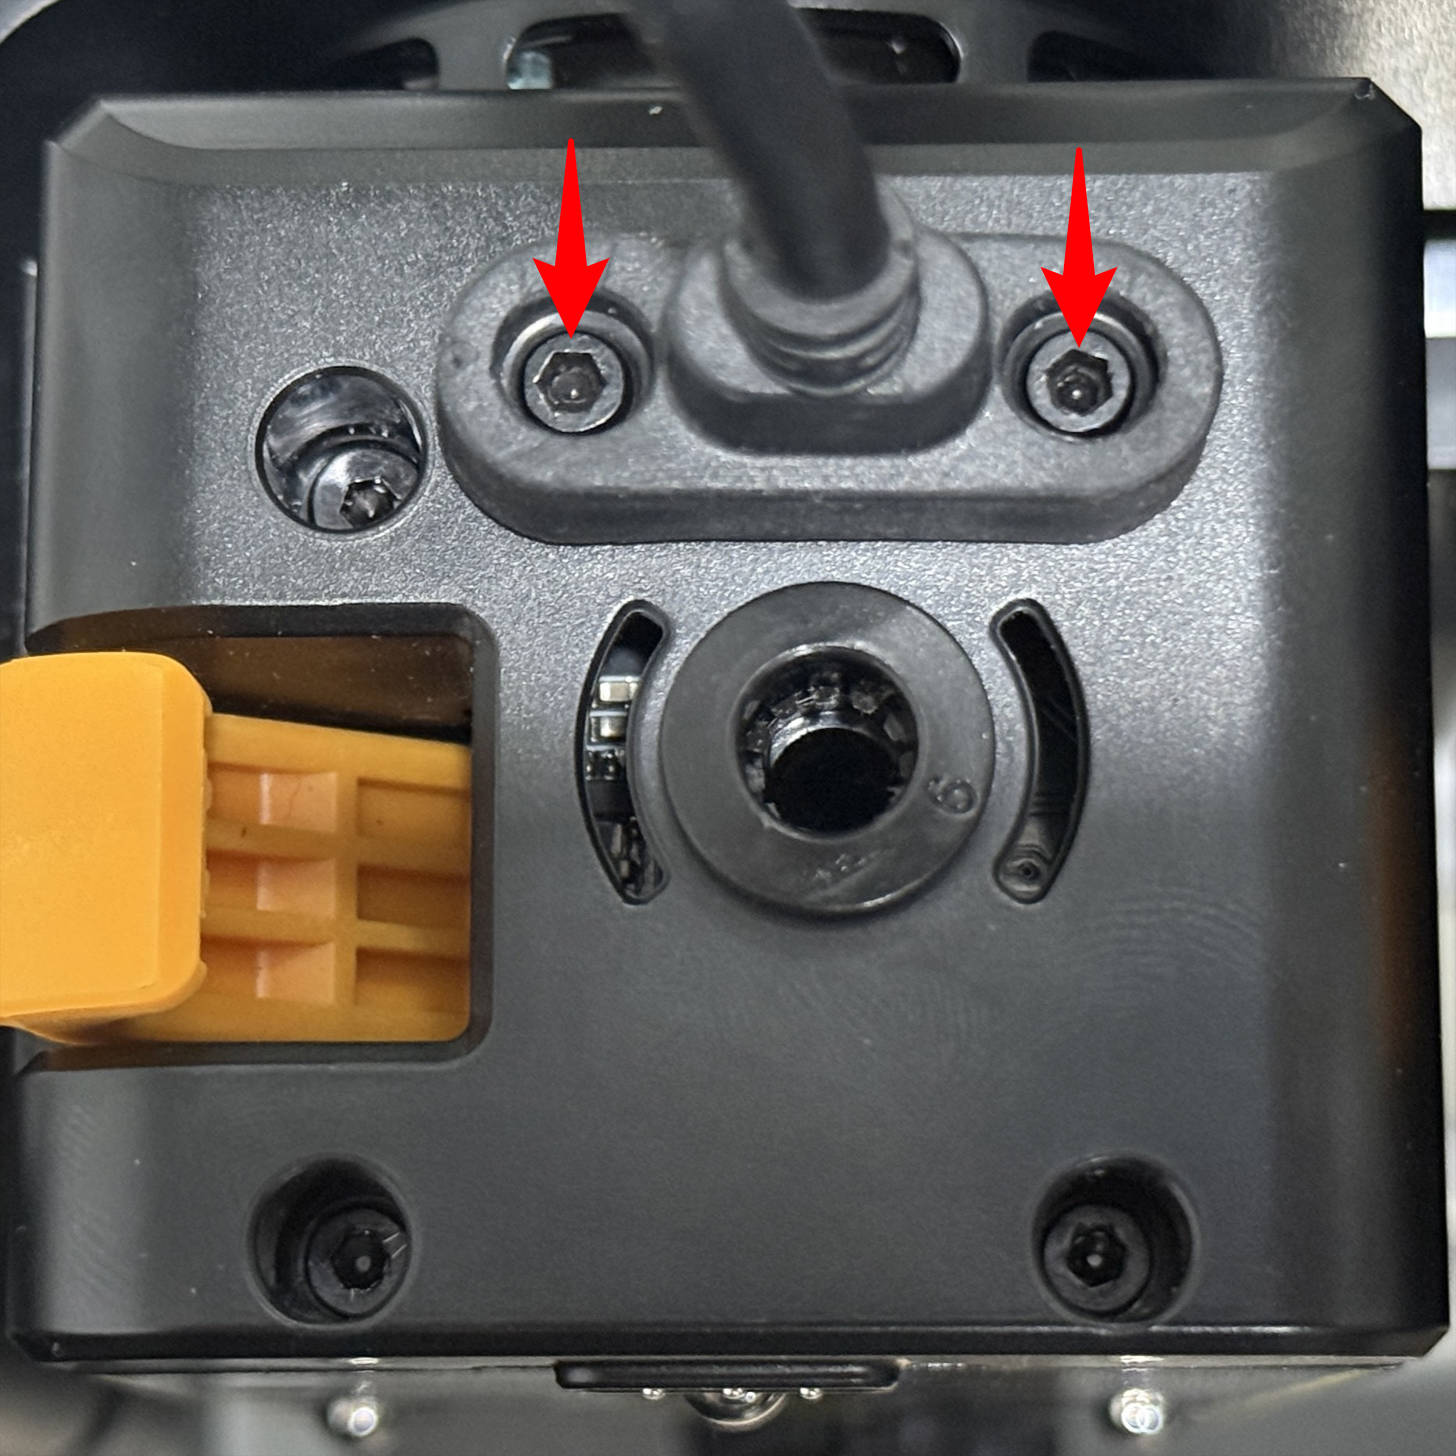
(2) Use an H2.0 hex key to remove the 2 screws and unplug the toolhead cable.
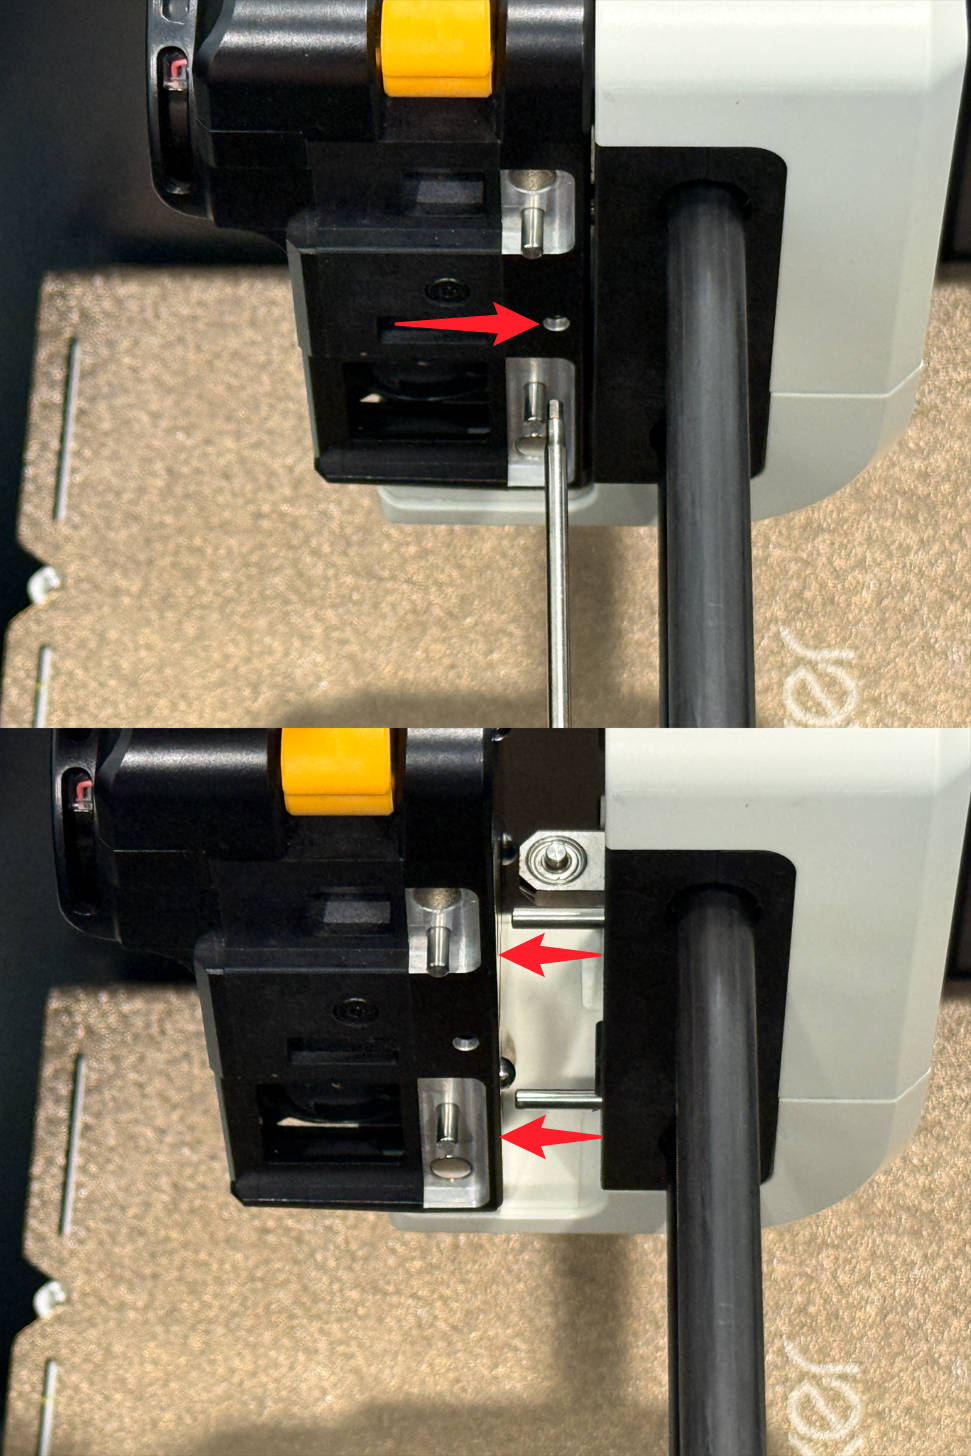
(3) Insert the H2.0 hex key into the middle holes between the 2 locating pins until you hear a click sound, then remove the toolhead.
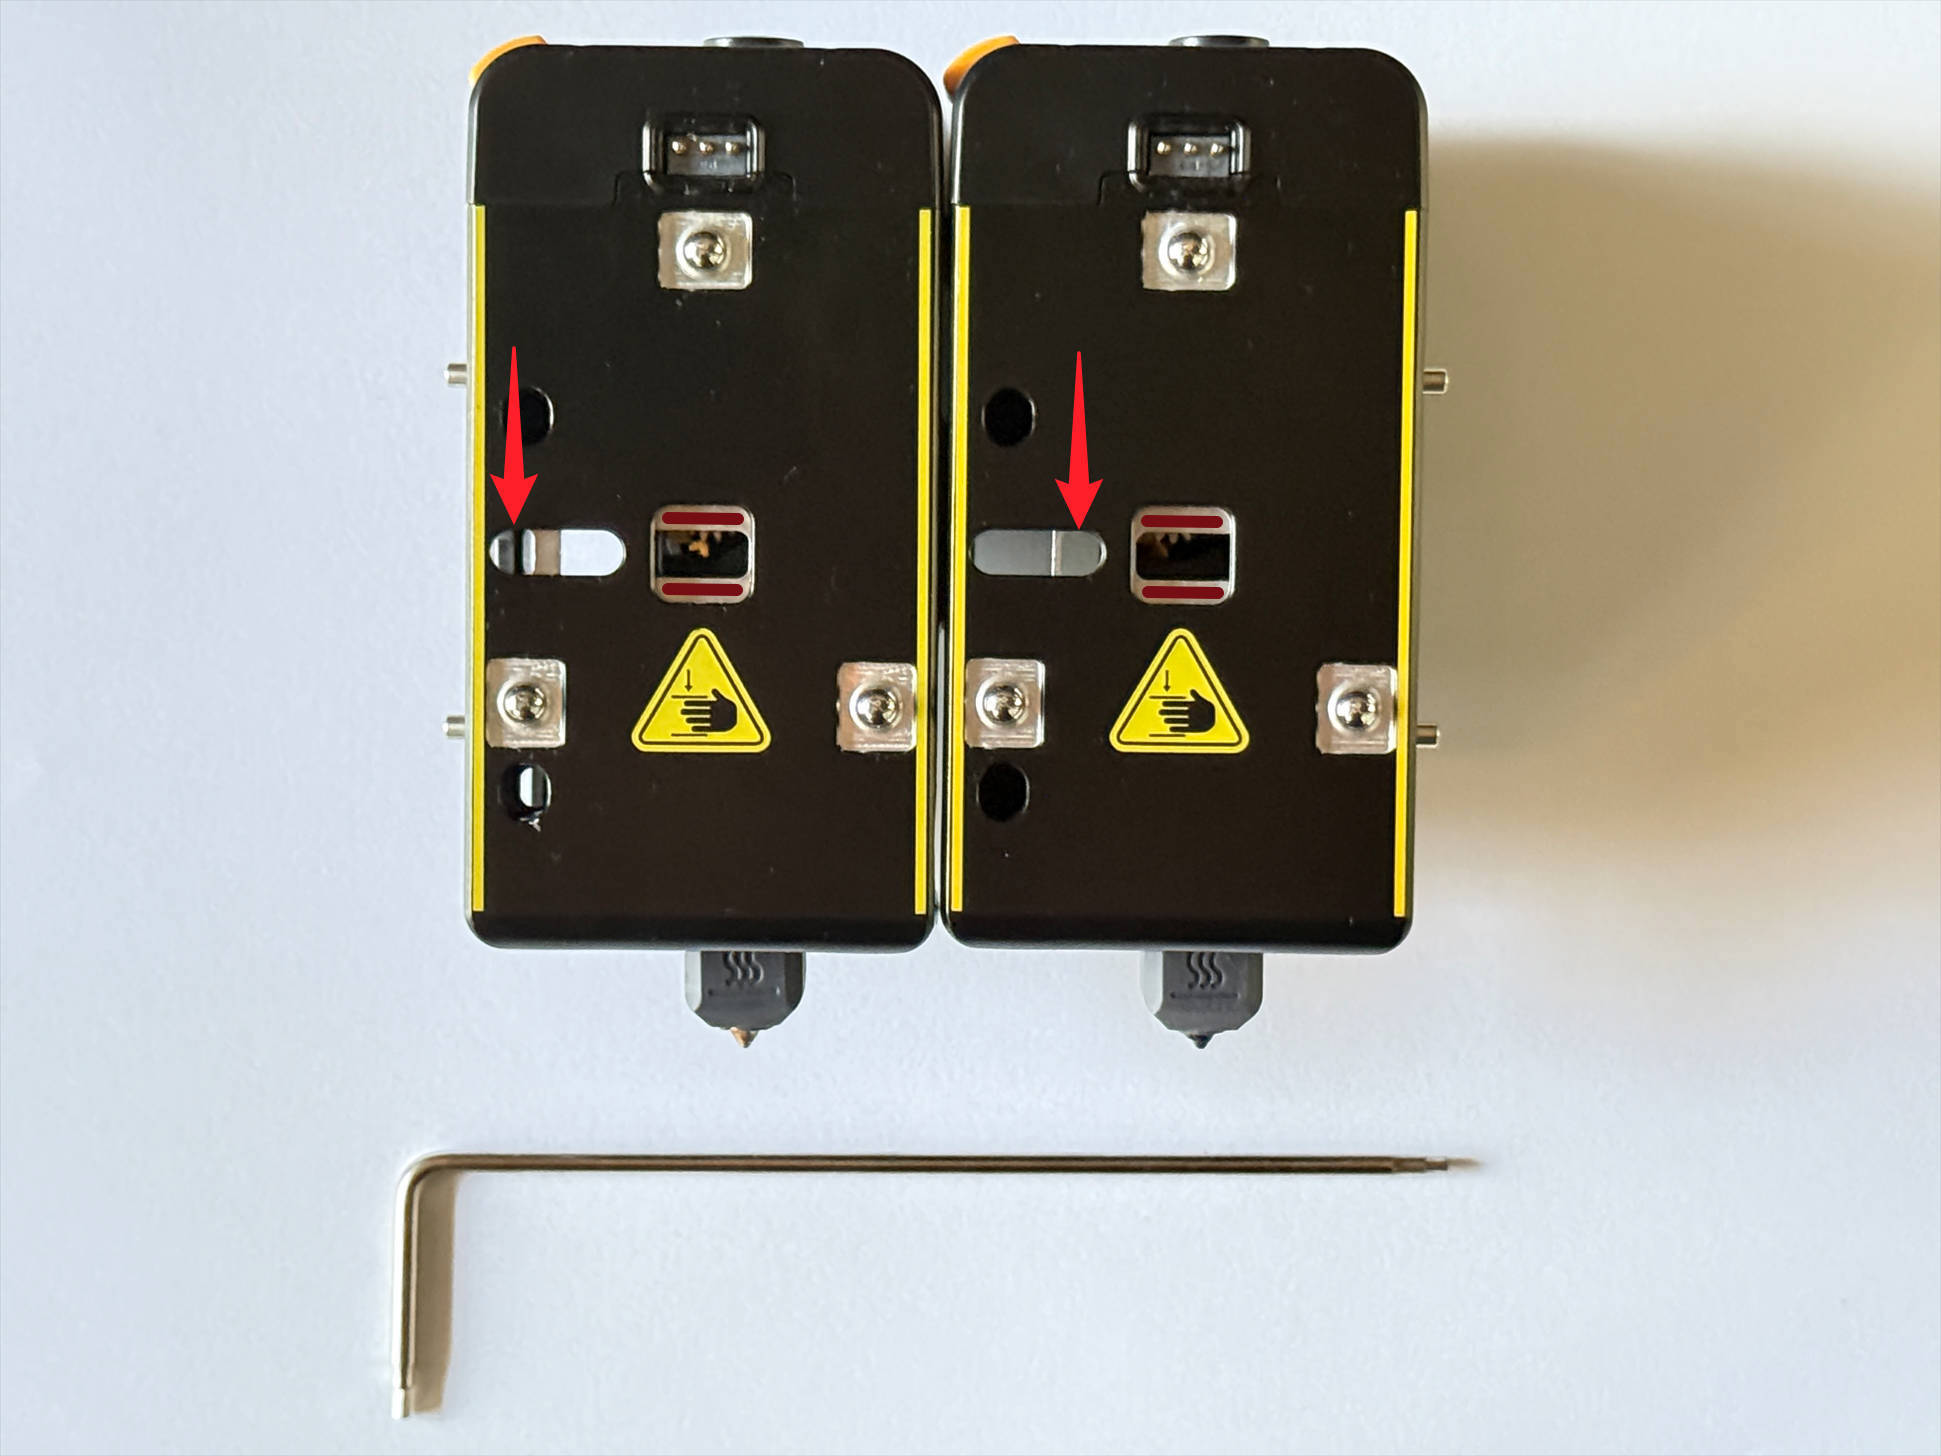
(4) Use an H2.0 hex key to adjust the toolhead latch until two red markings are visible:
Left:Toolhead 1 – latch to the left limit
Right:Toolhead 2/3/4 – latch to the right limit
(5) Align the latch hole with the locating pin on the swapper and push the toolhead inward until it stops.
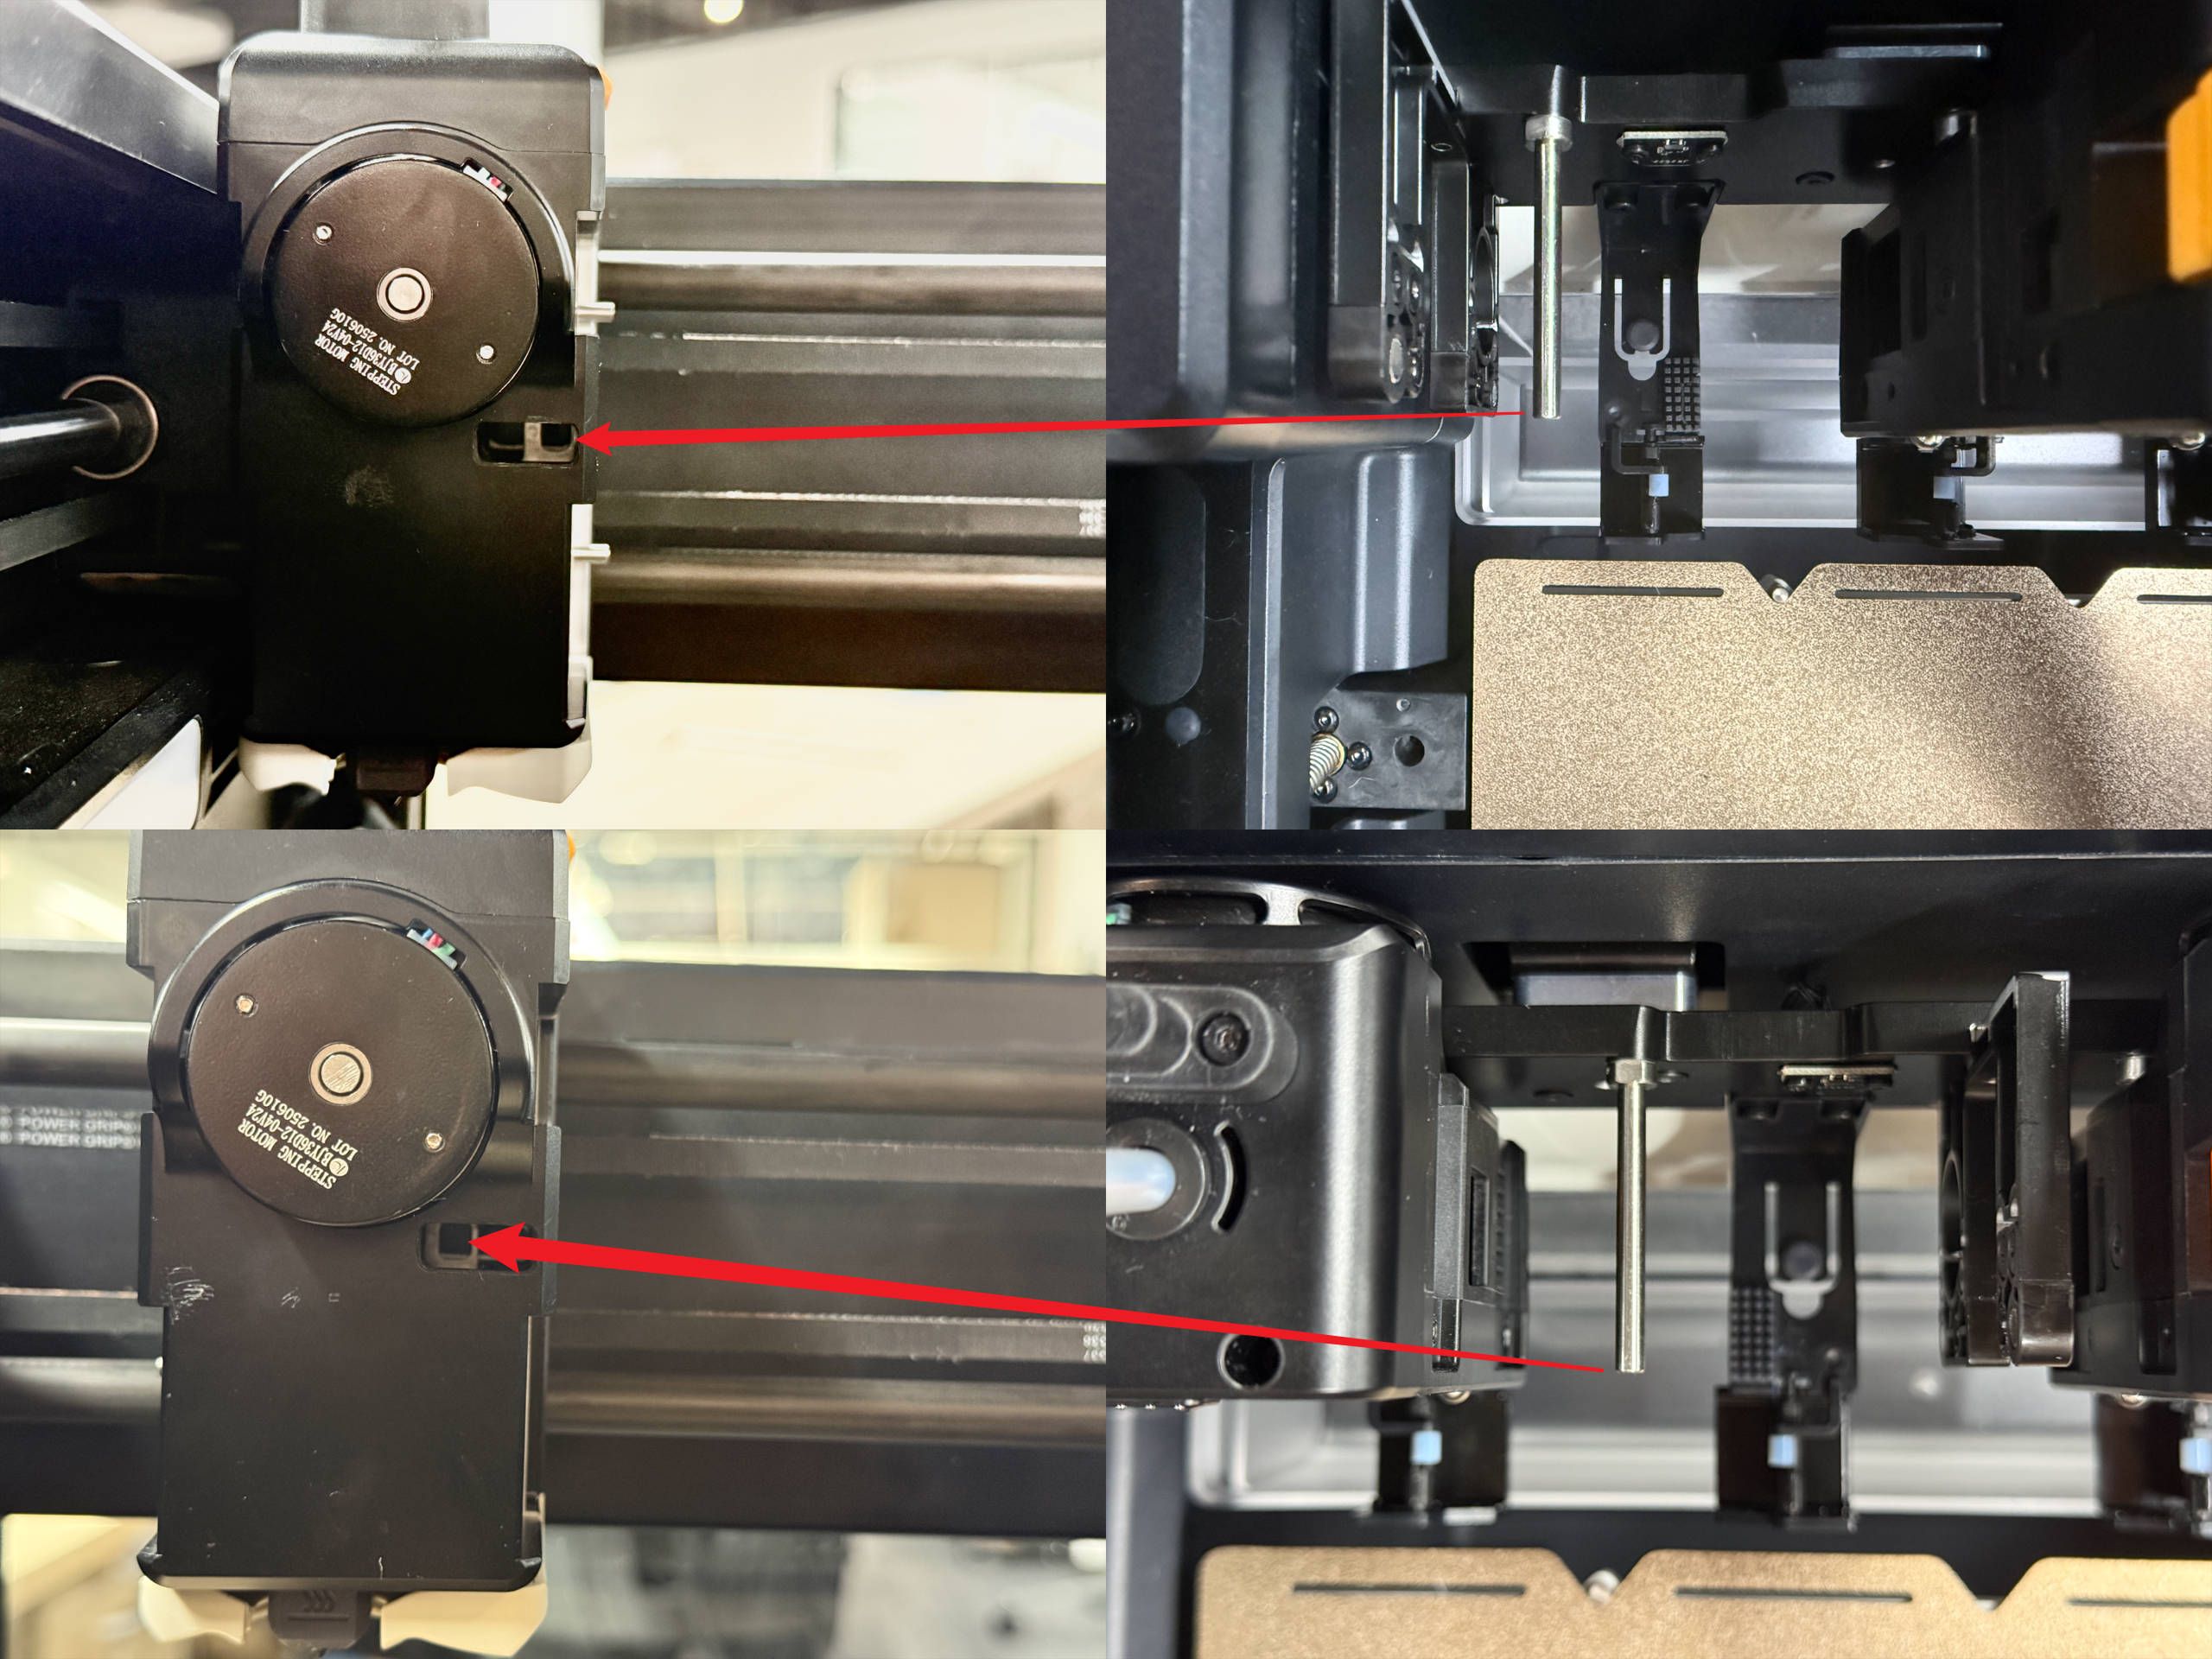
(6) Keep pushing inward and move the toolhead slightly so the 2 side locating pins fit into the bracket holes.
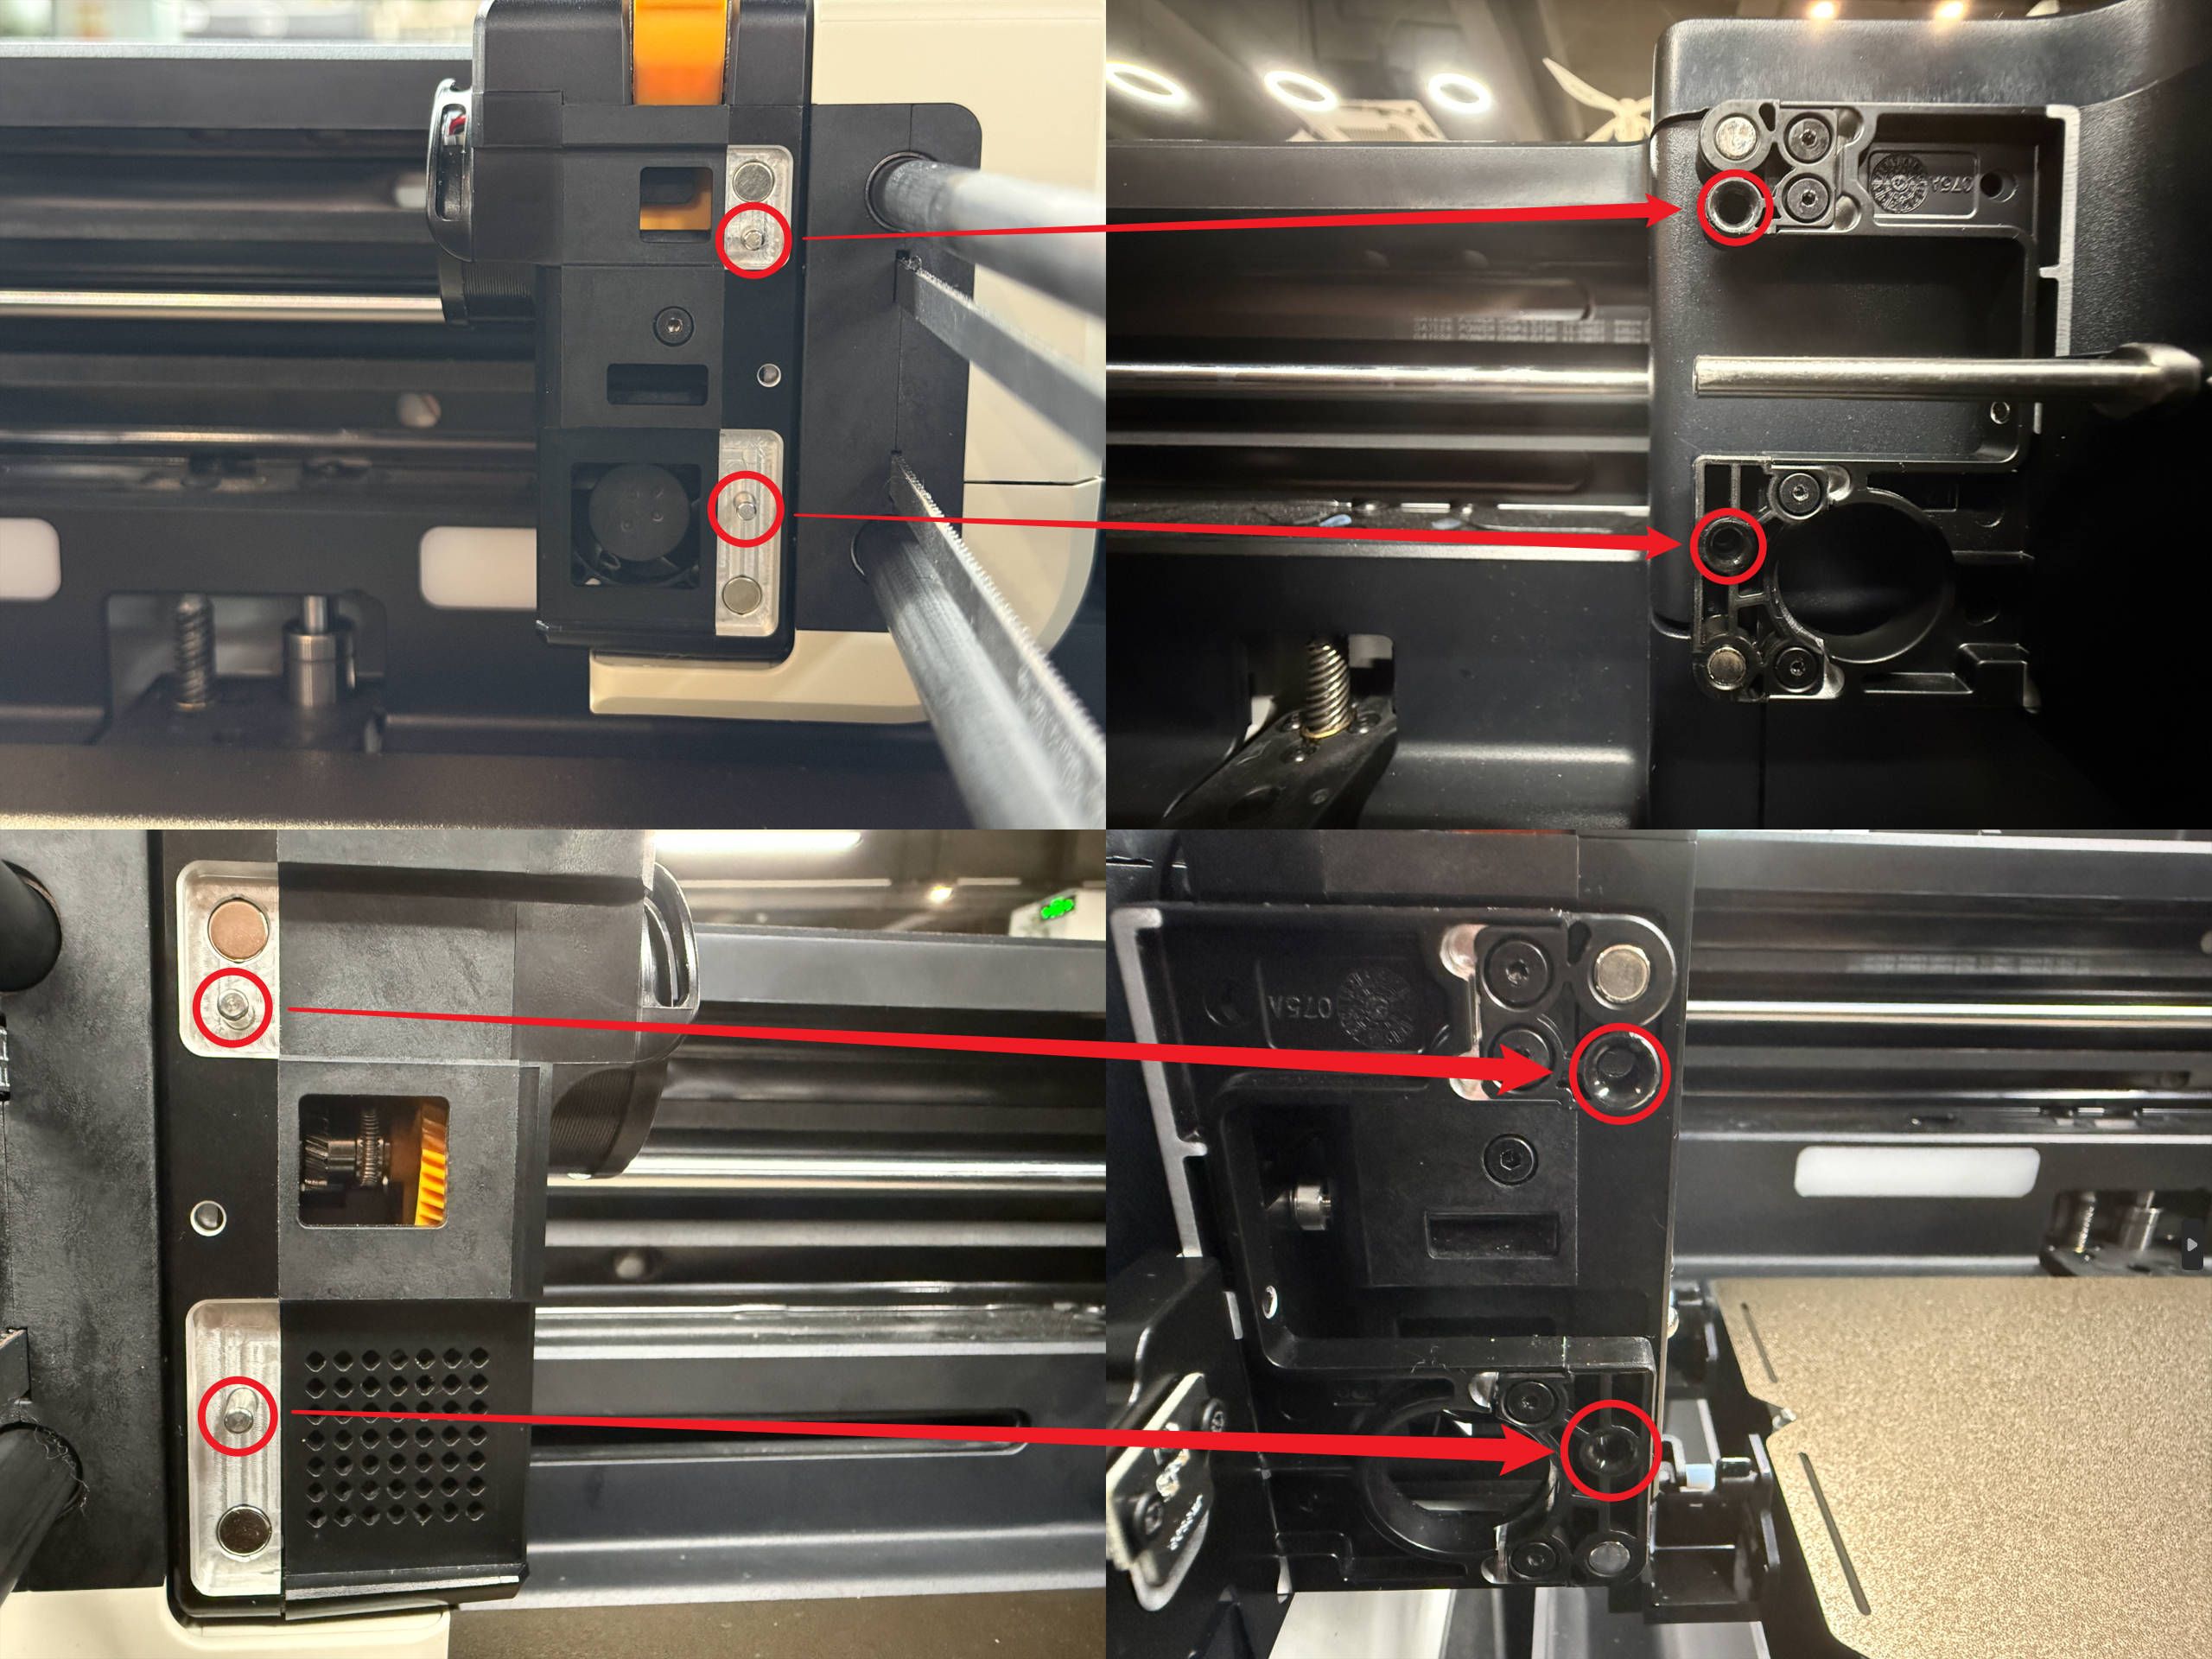
(7) Reconnect the toolhead cable and tighten the 2 screws with an H2.0 hex key.
(8) Insert the filament tube.