


for Snapmaker U1 HUB board
Couldn't load pickup availability
Use this text to encourage communication or promote sharing on social networks.
for Snapmaker U1 HUB board replacement guide
Compatibility
This guide applies to the following machine. Please note when referencing:
Machine model: U1
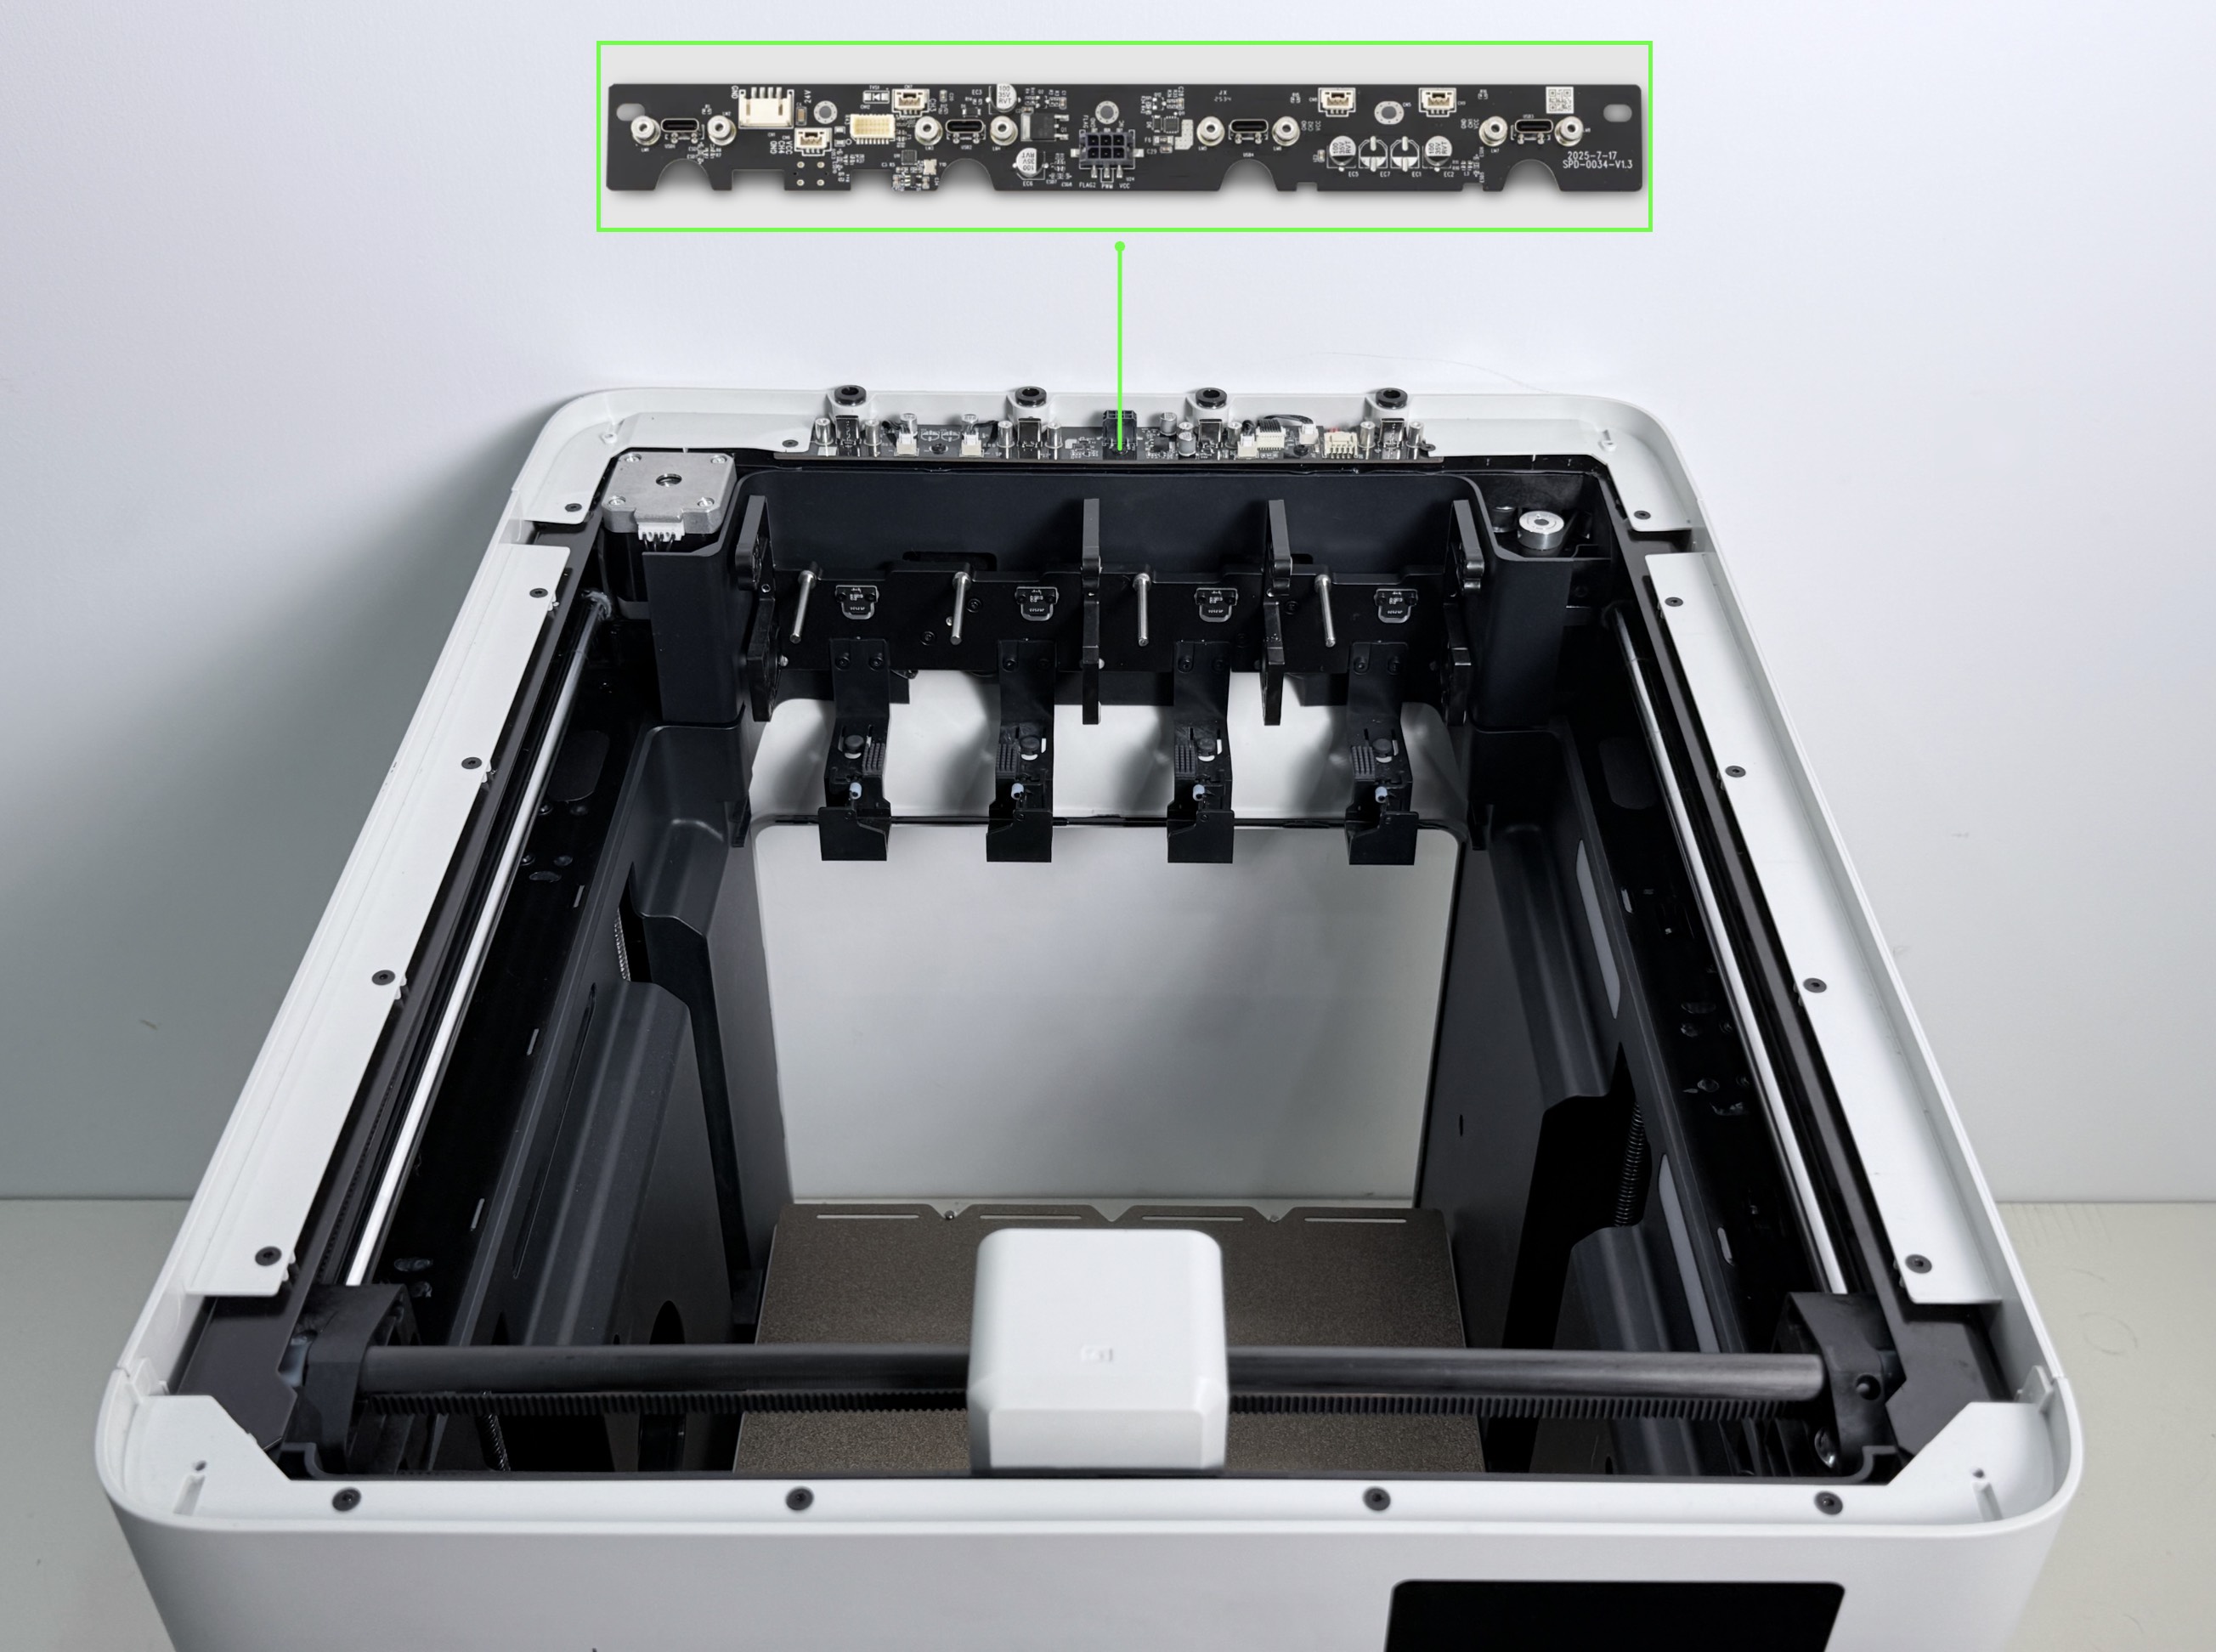
Quick Info card
Difficulty:⭐️⭐️⭐️☆☆(Medium)
Estimated Time:40 Minutes
Preparation

Procedure
Part1 - Remove the filament and feeder
(1) Follow the steps below to unload the filament from all toolheads.

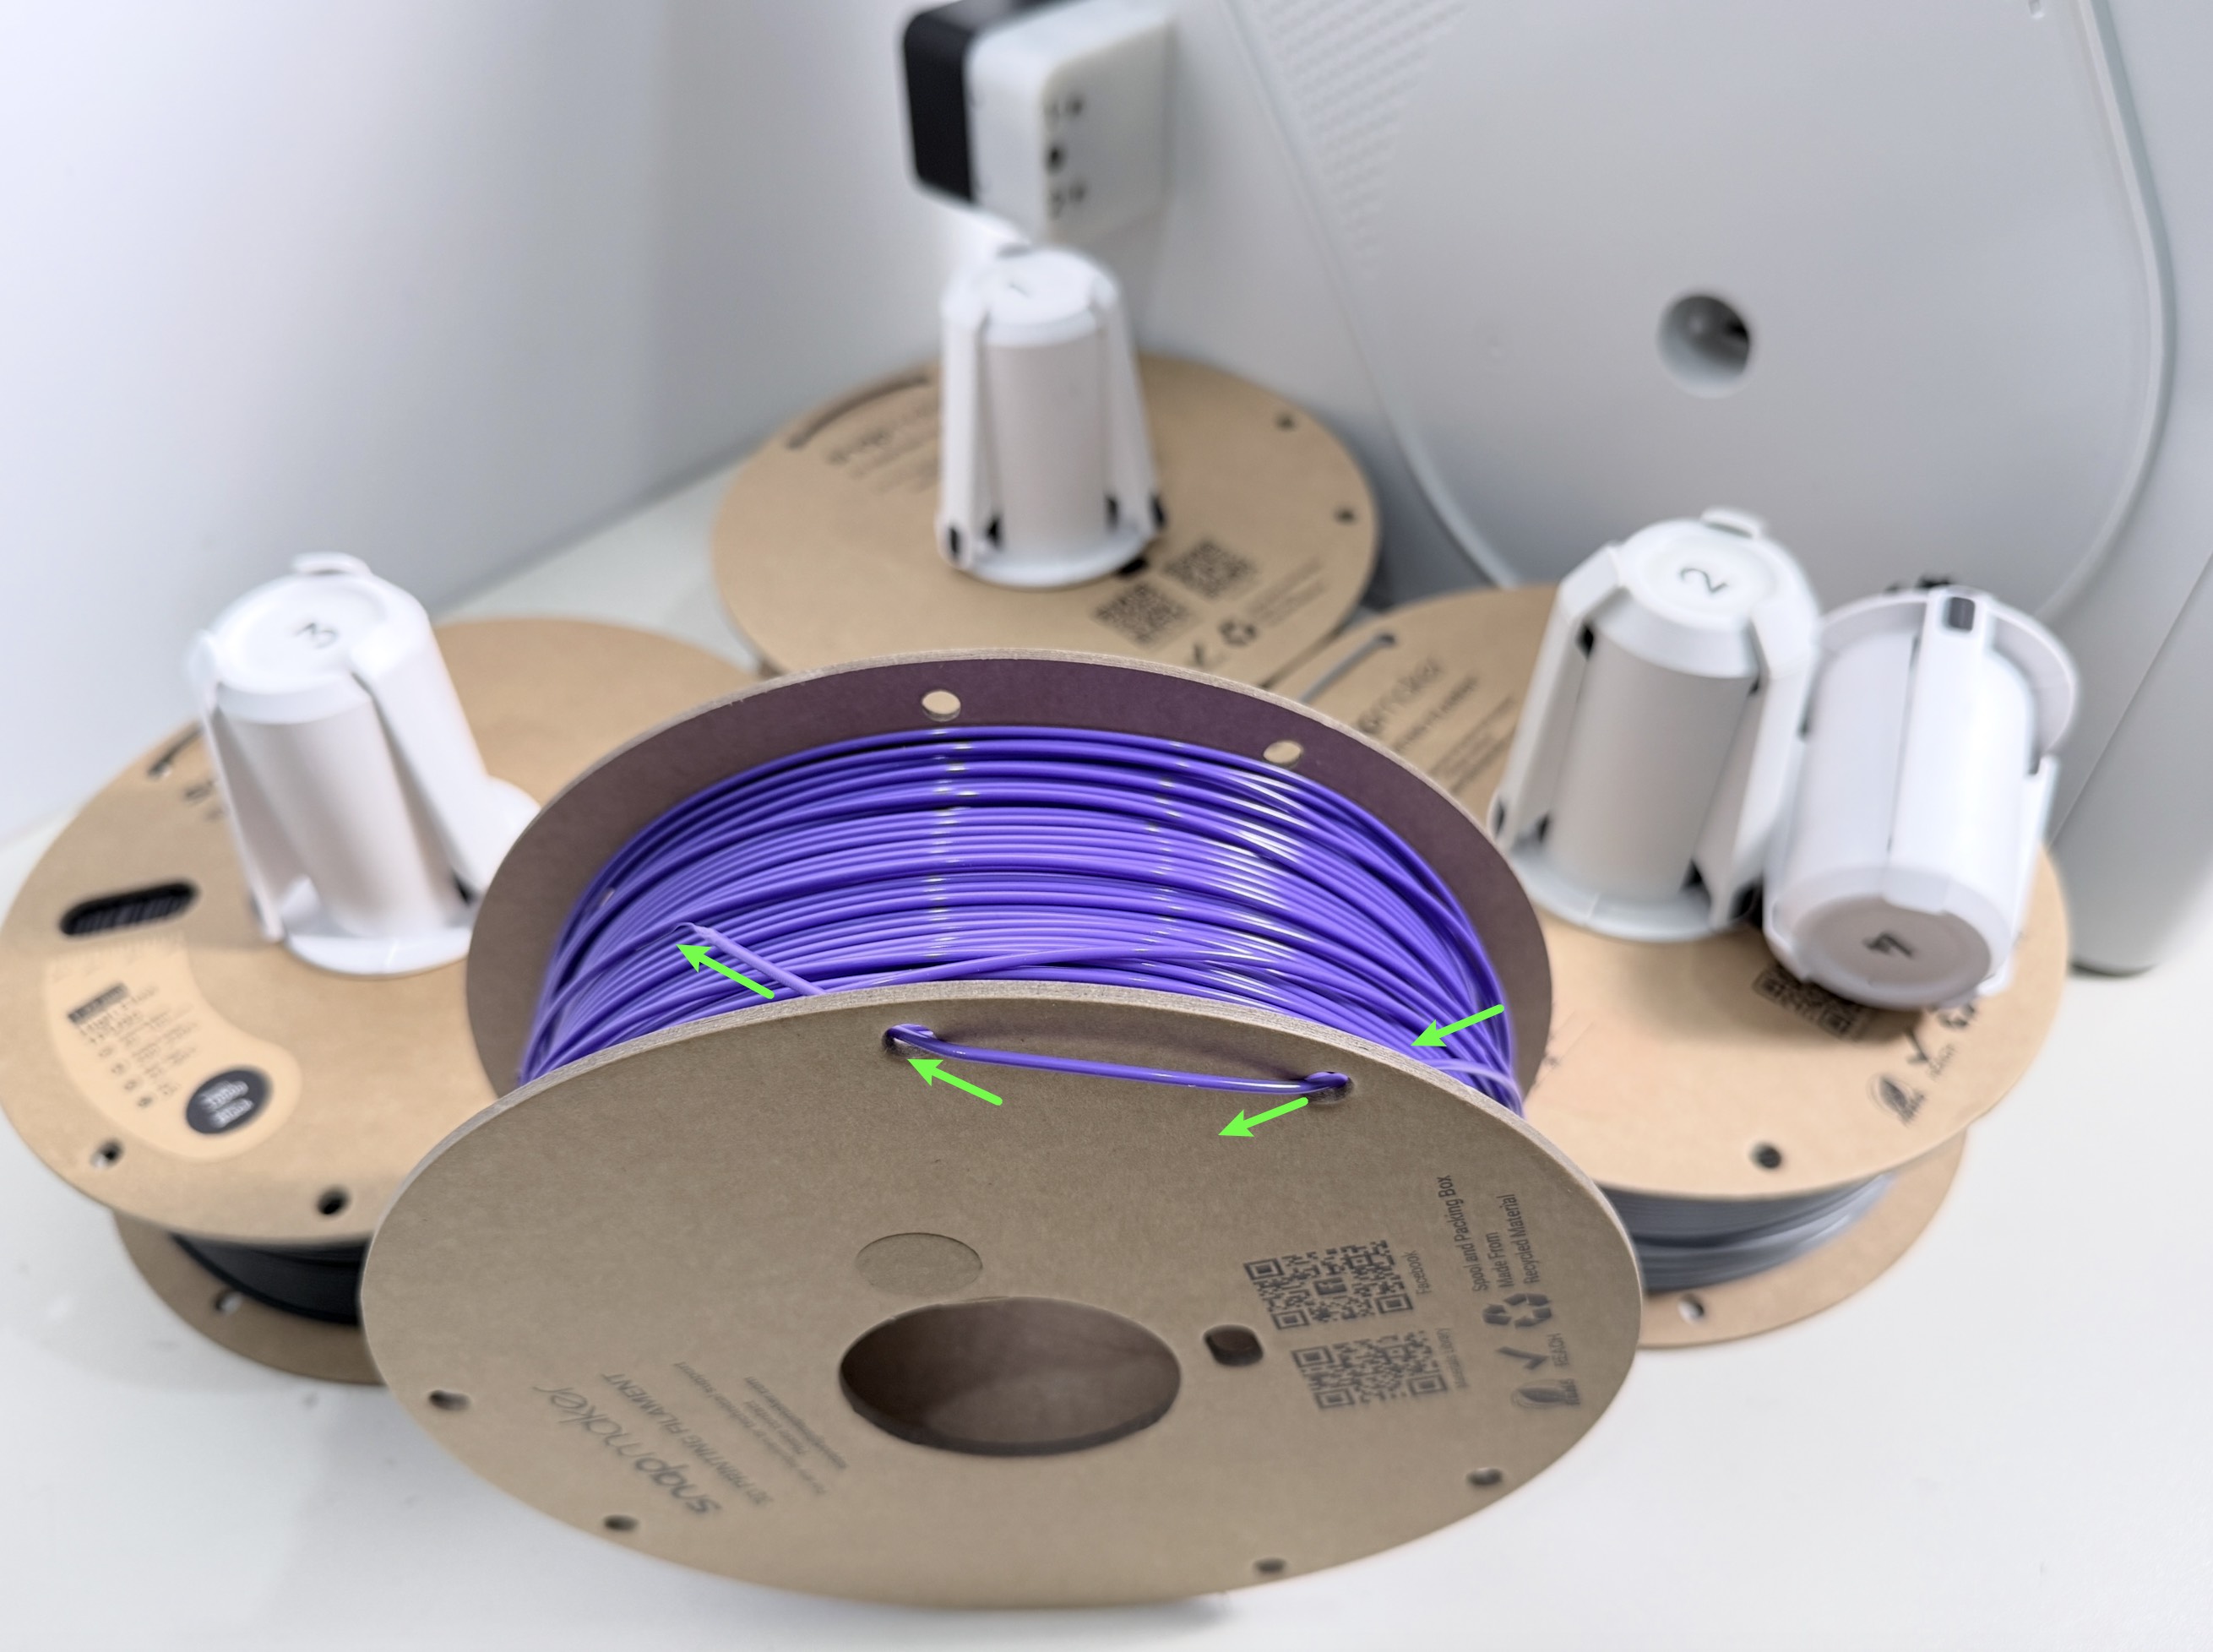
(2) Rotate the spool to rewind the filament, then remove the spool (including the holder). Insert the filament end into the hole to prevent tangling.
Before proceeding, please make sure to power off the machine and disconnect power supply.
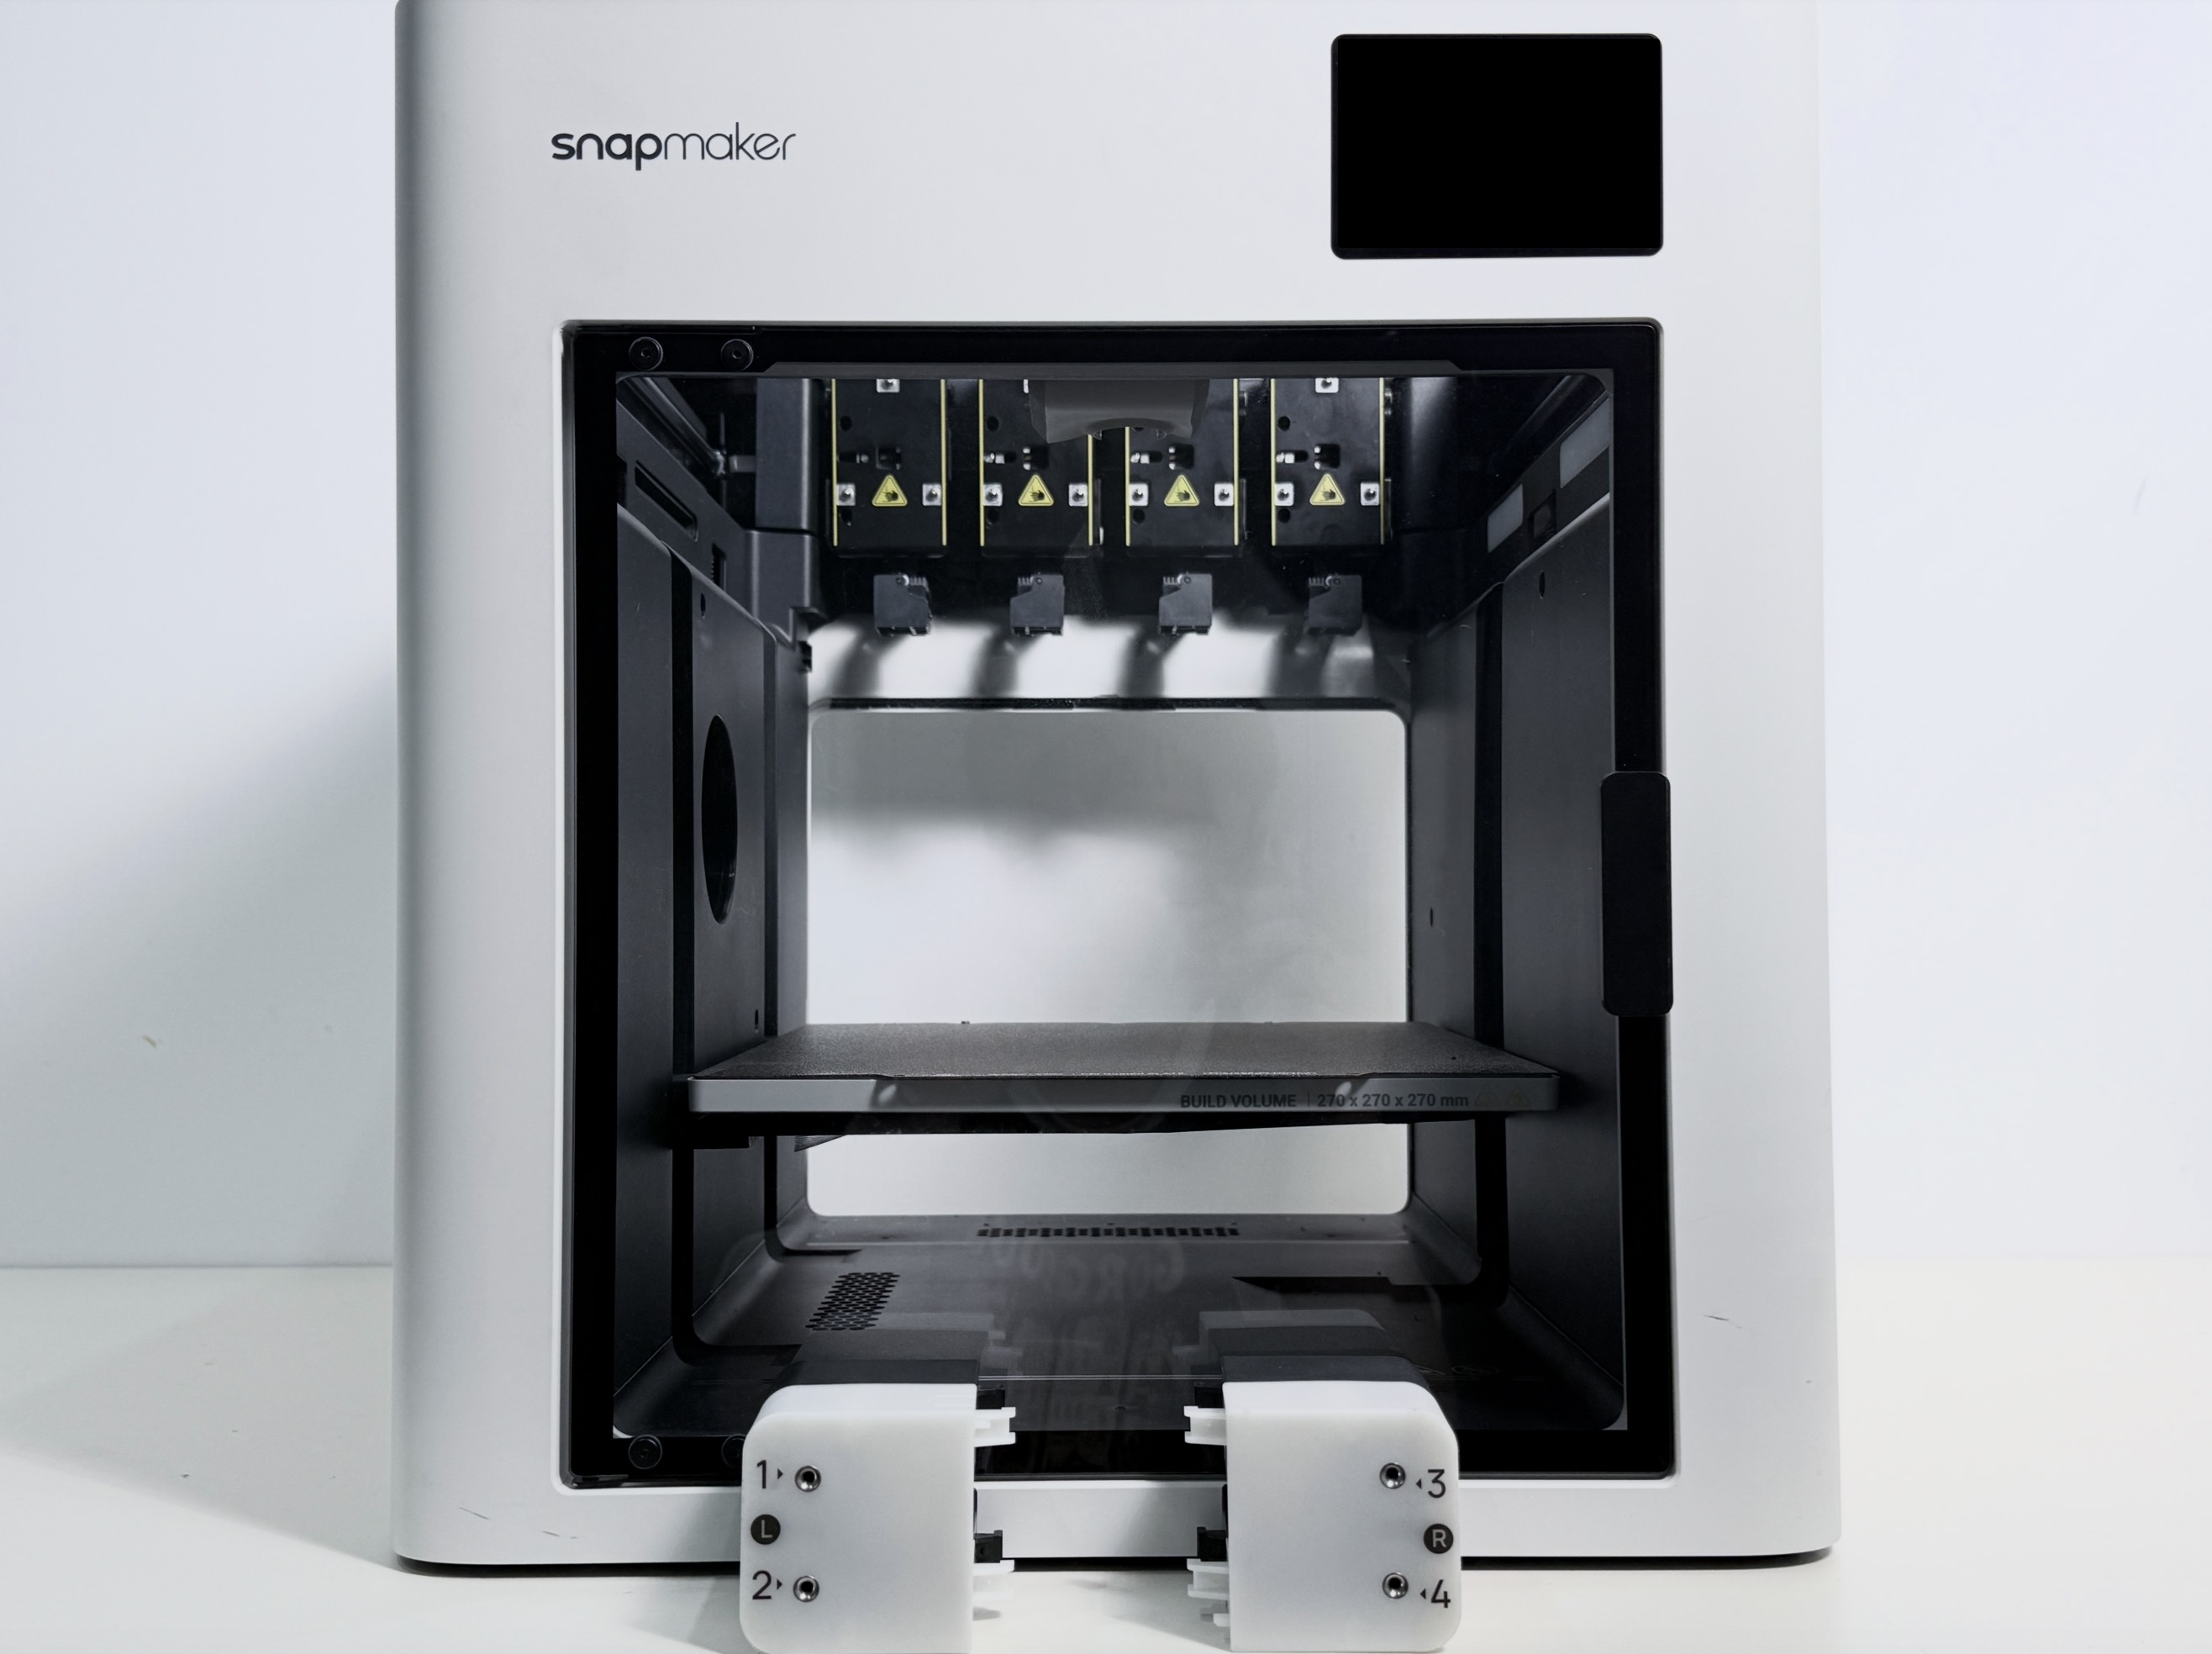
(3) 6:15—6:50 to disconnect the 4 mm tubes at the back of the machine, then remove the left and right feeders.
Part2 - Remove the machine enclosure
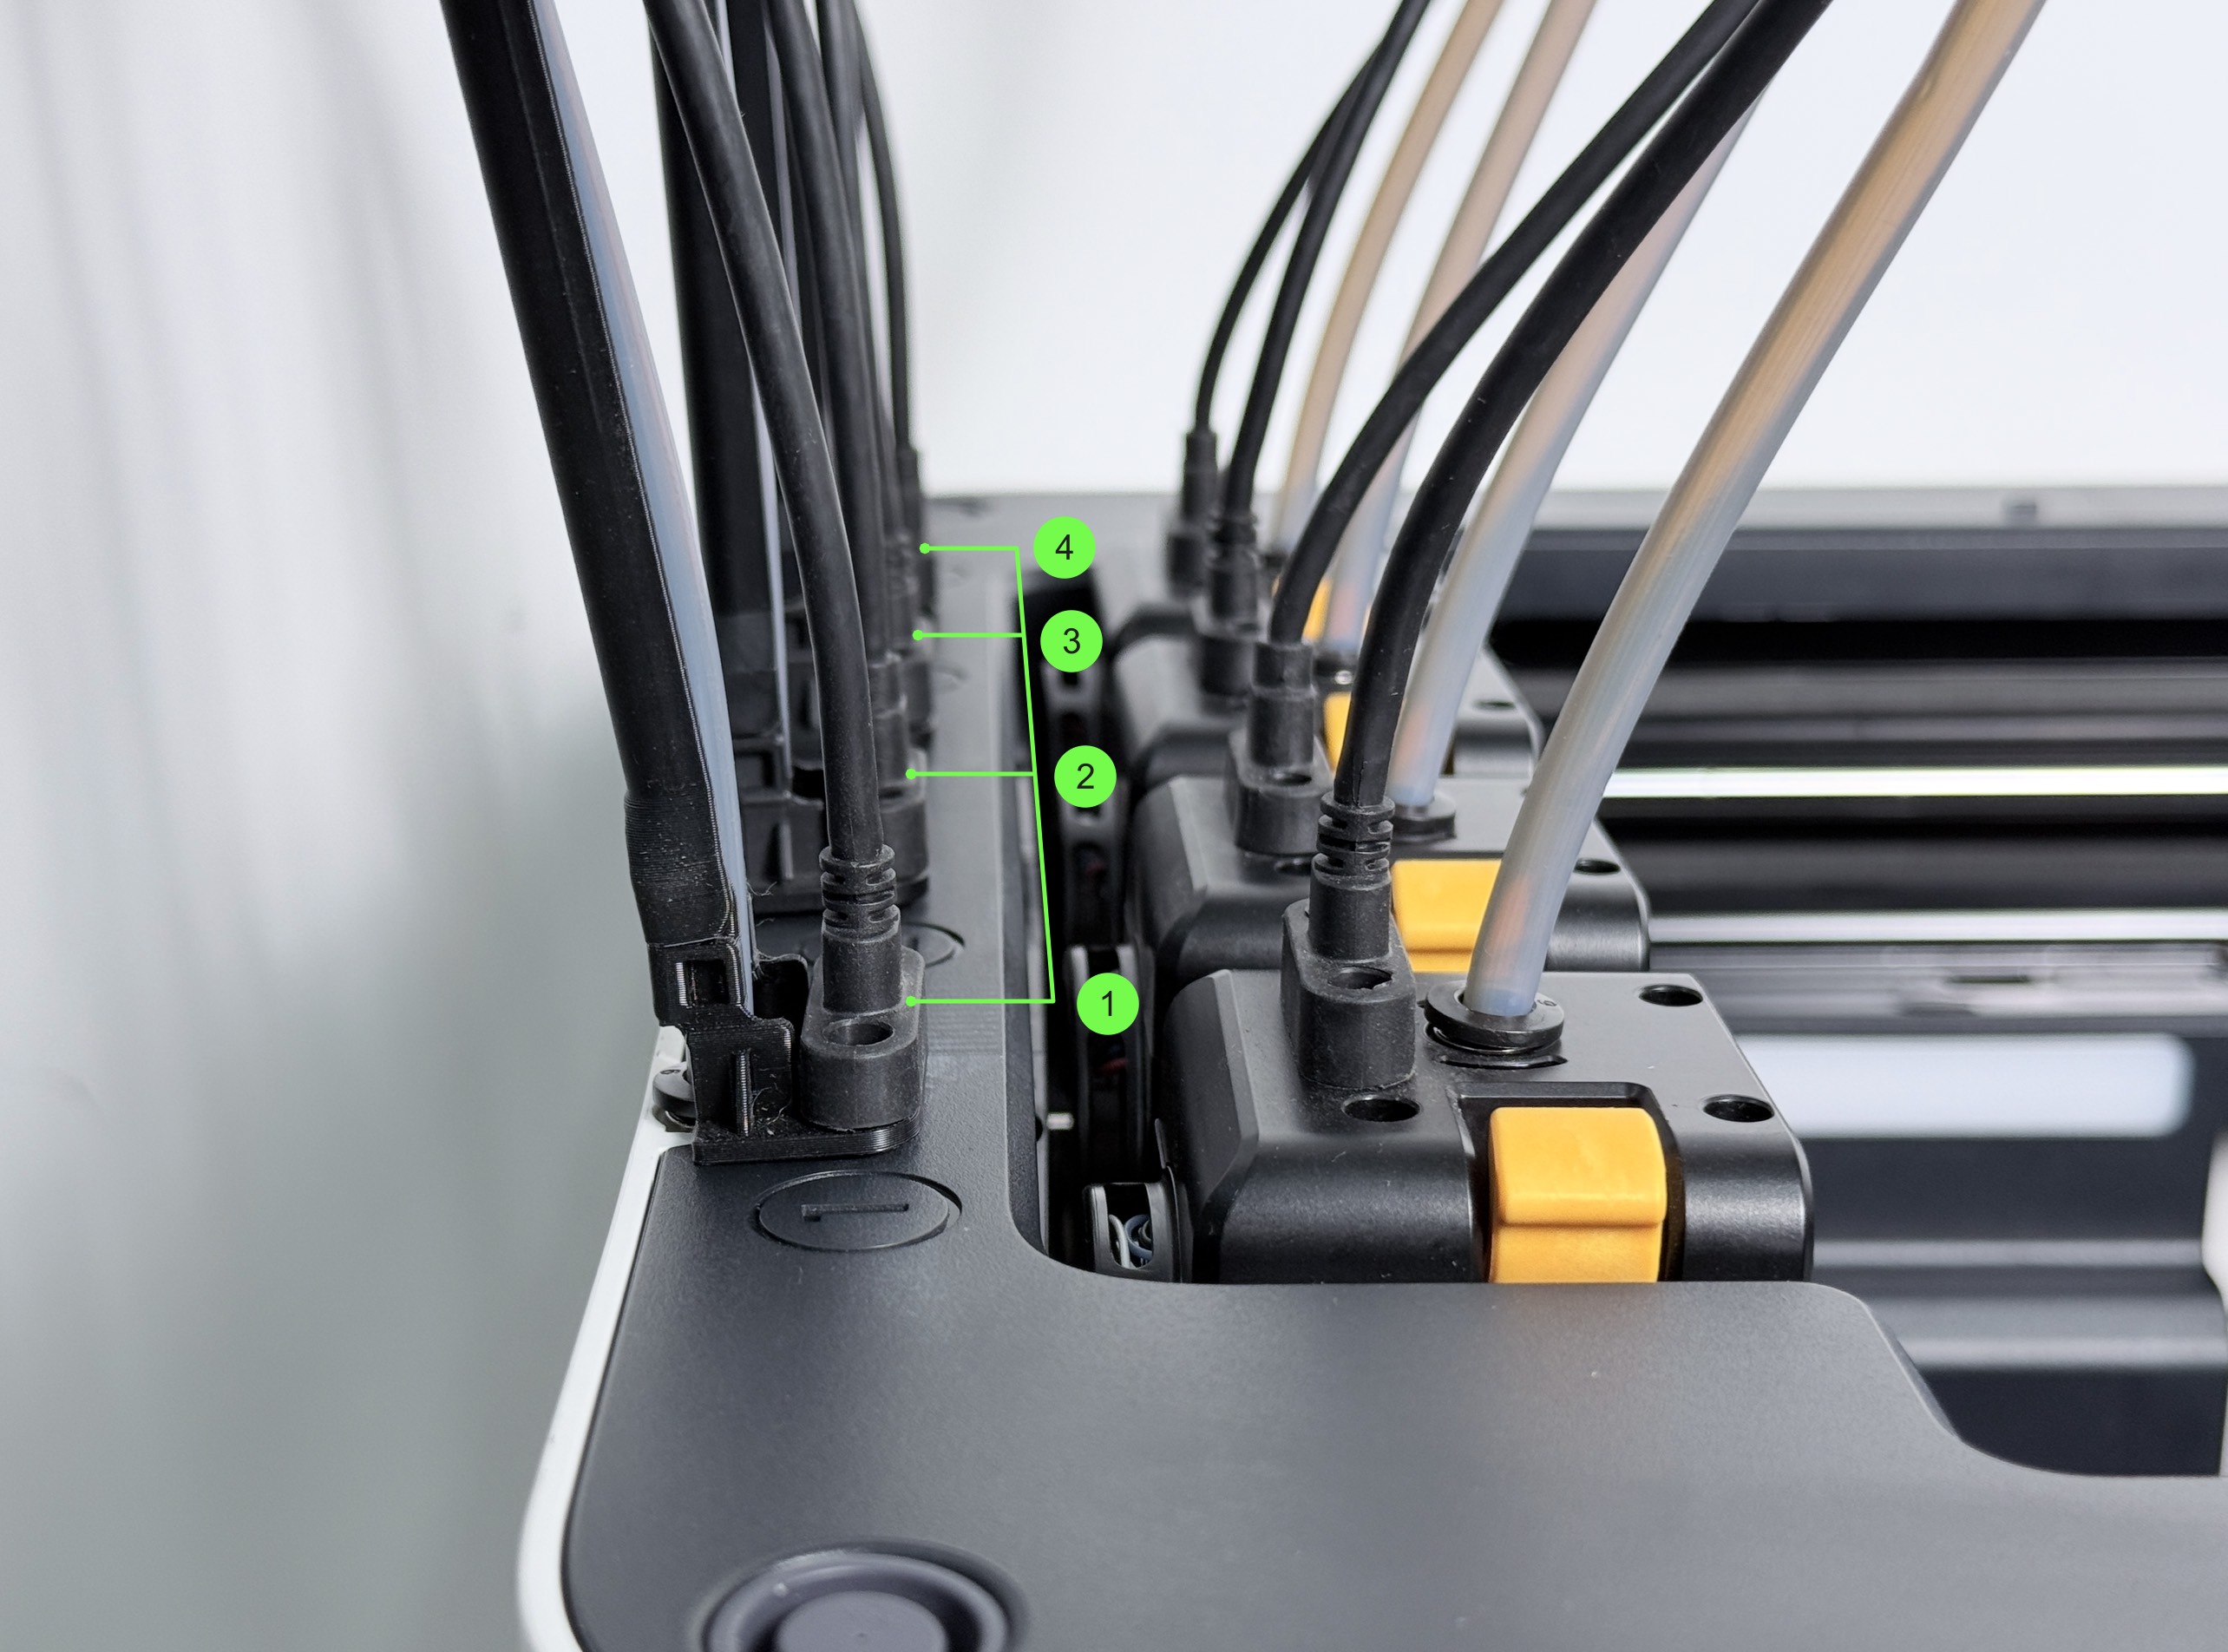
(1) Remove the screws securing the toolhead USB cables, then disconnect all 4 toolhead USB cables.

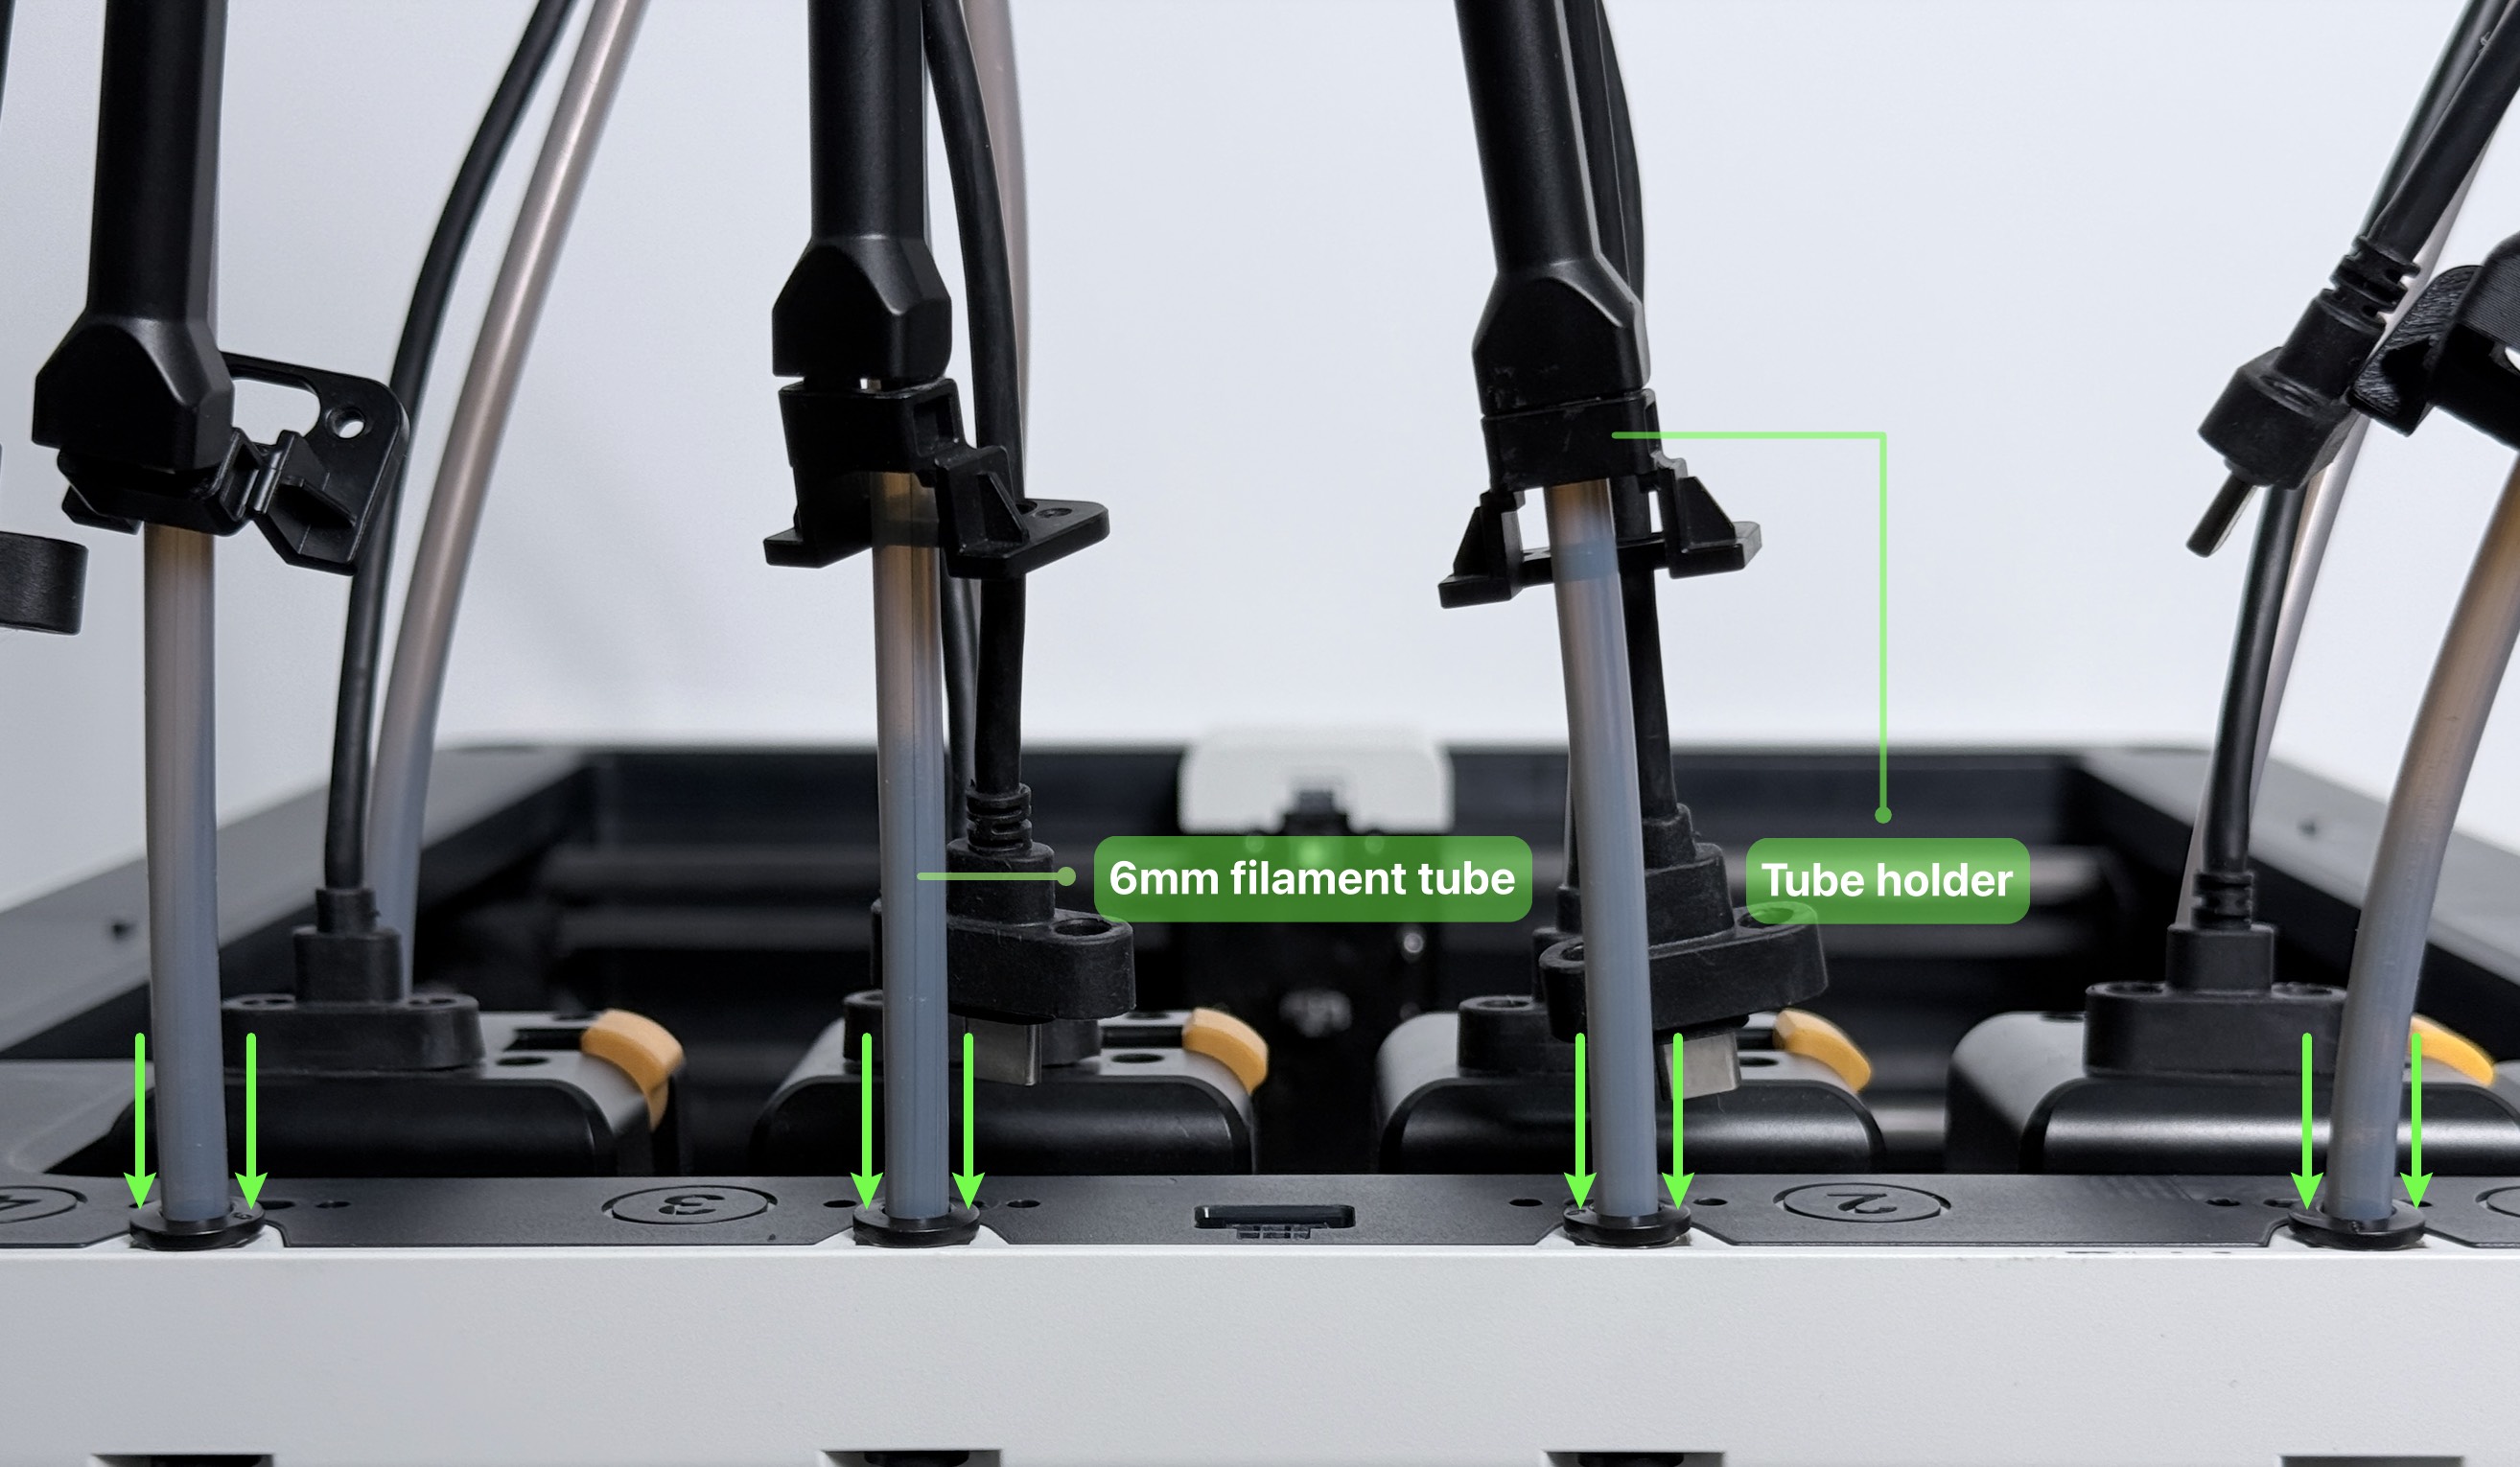
(2) Press the quick connector on the top of the machine to release the 6 mm tube, then remove the tube holder.
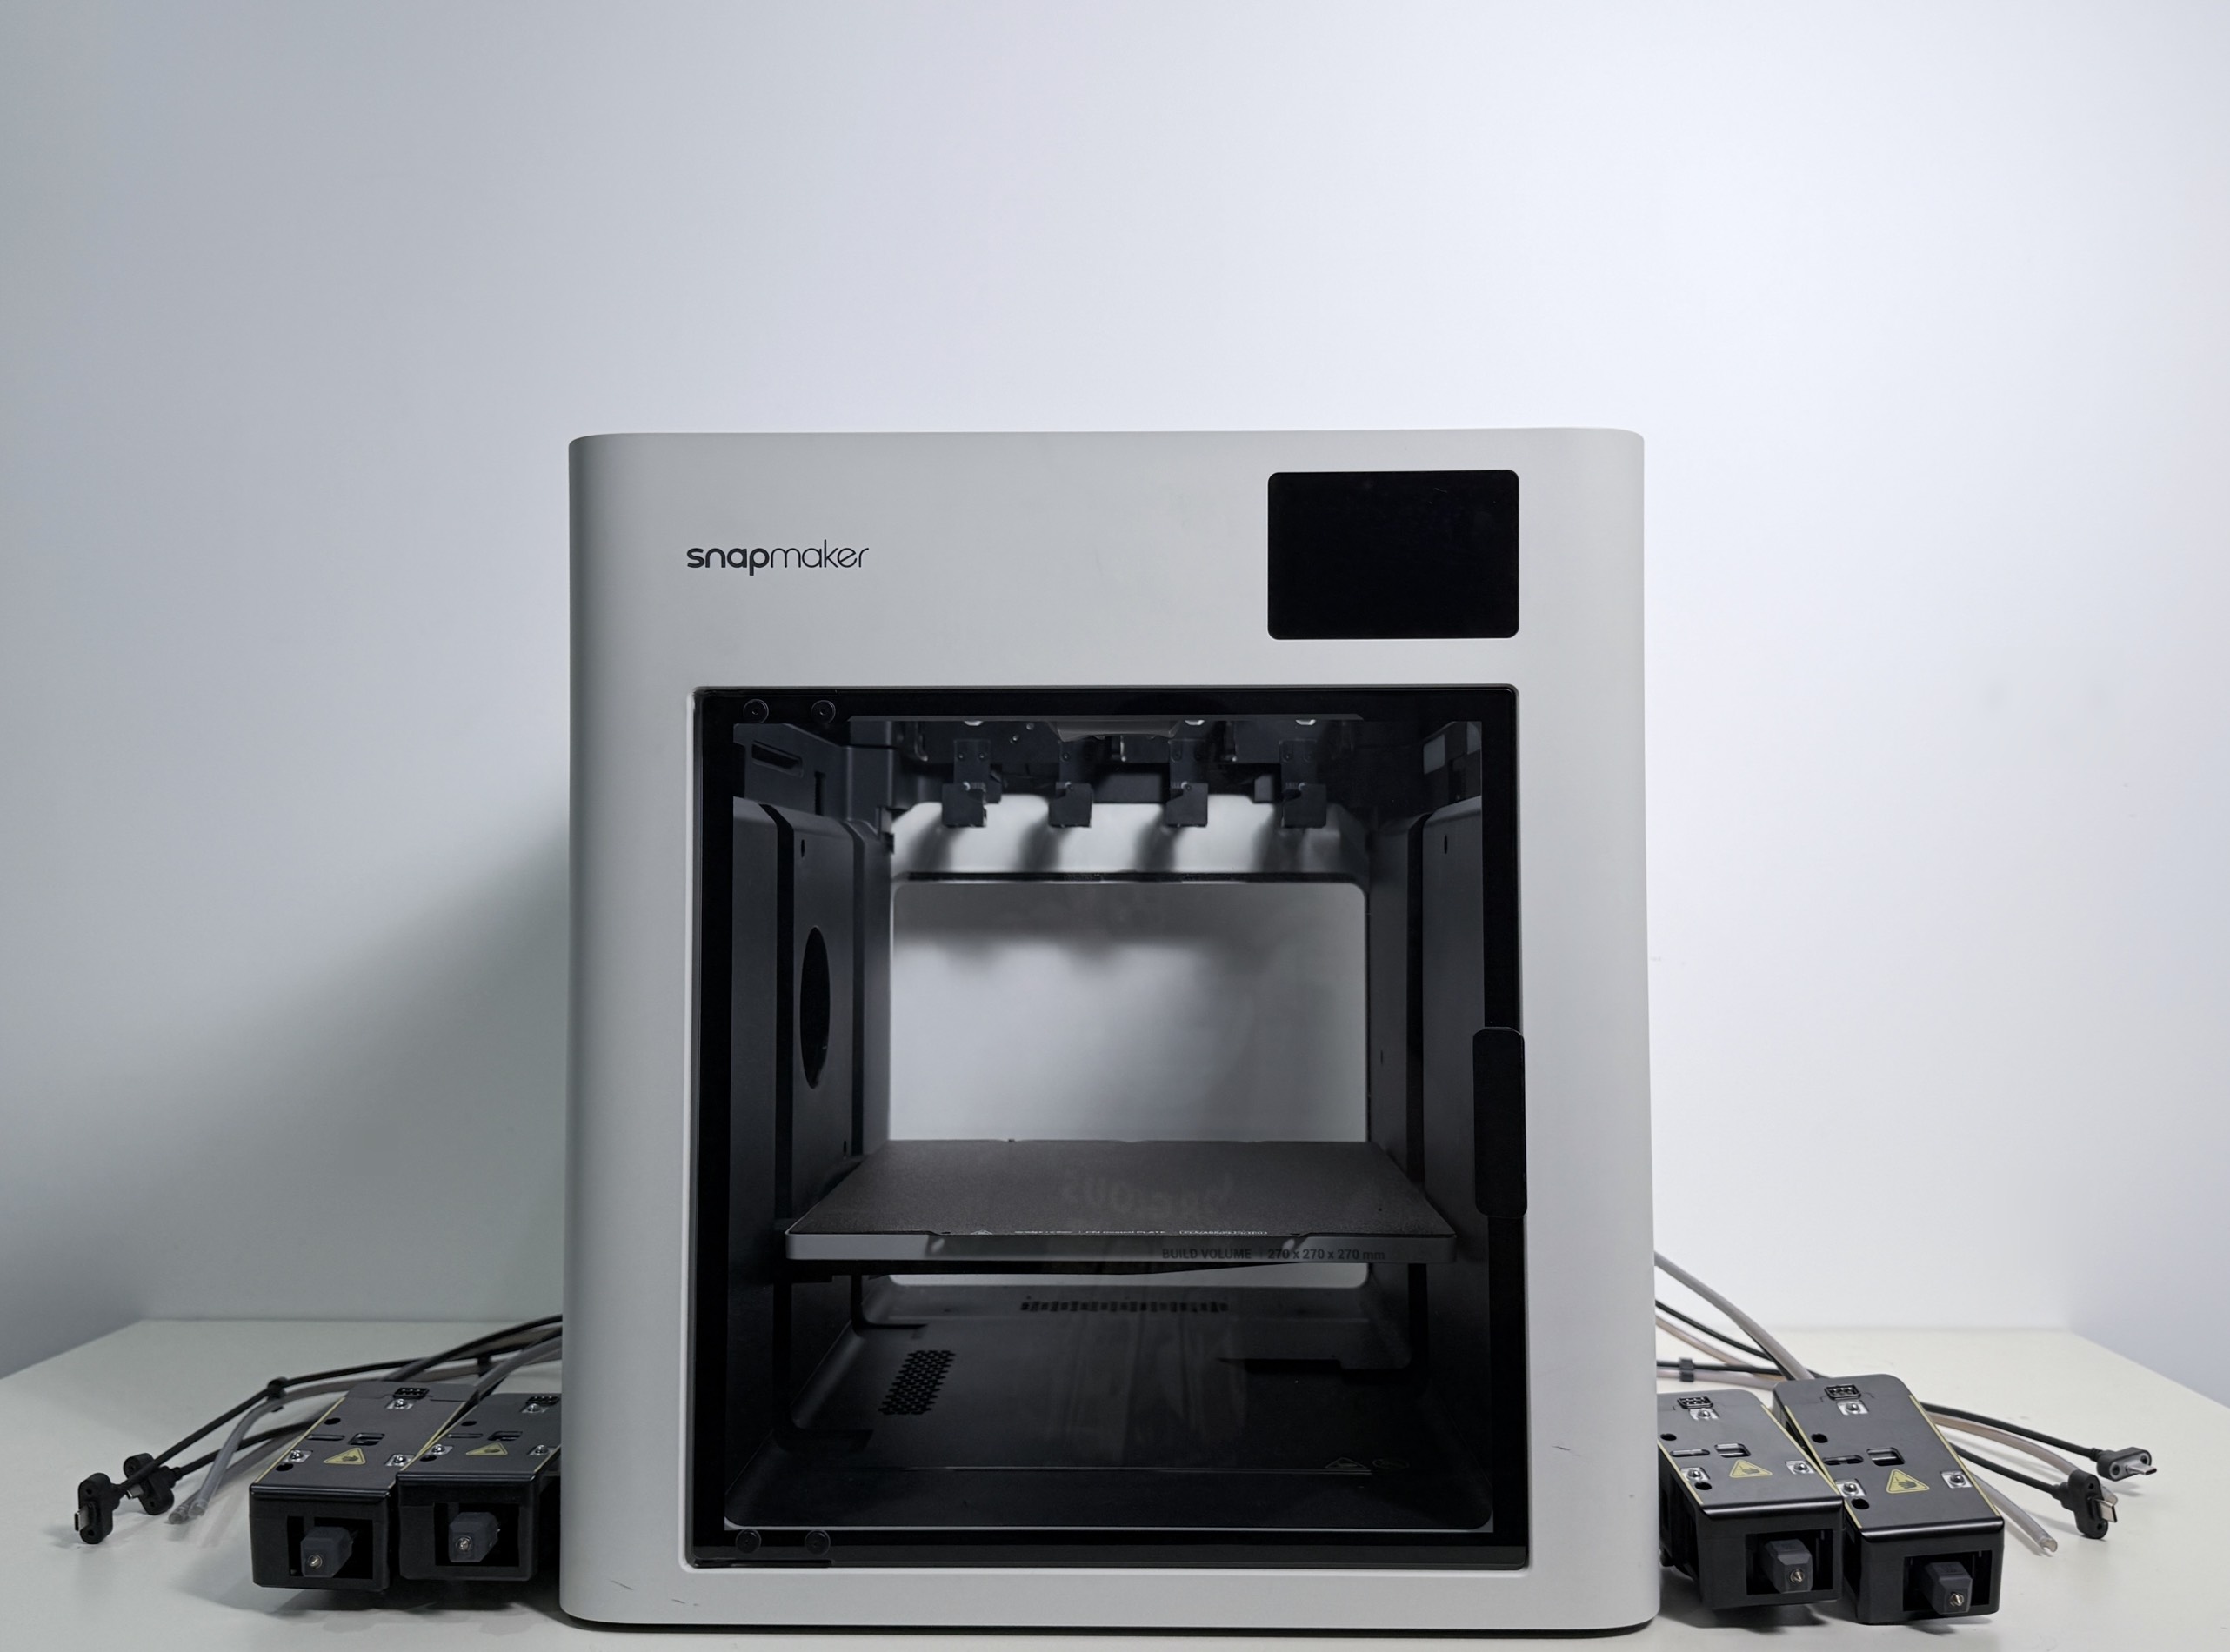
(3) Remove the toolheads.
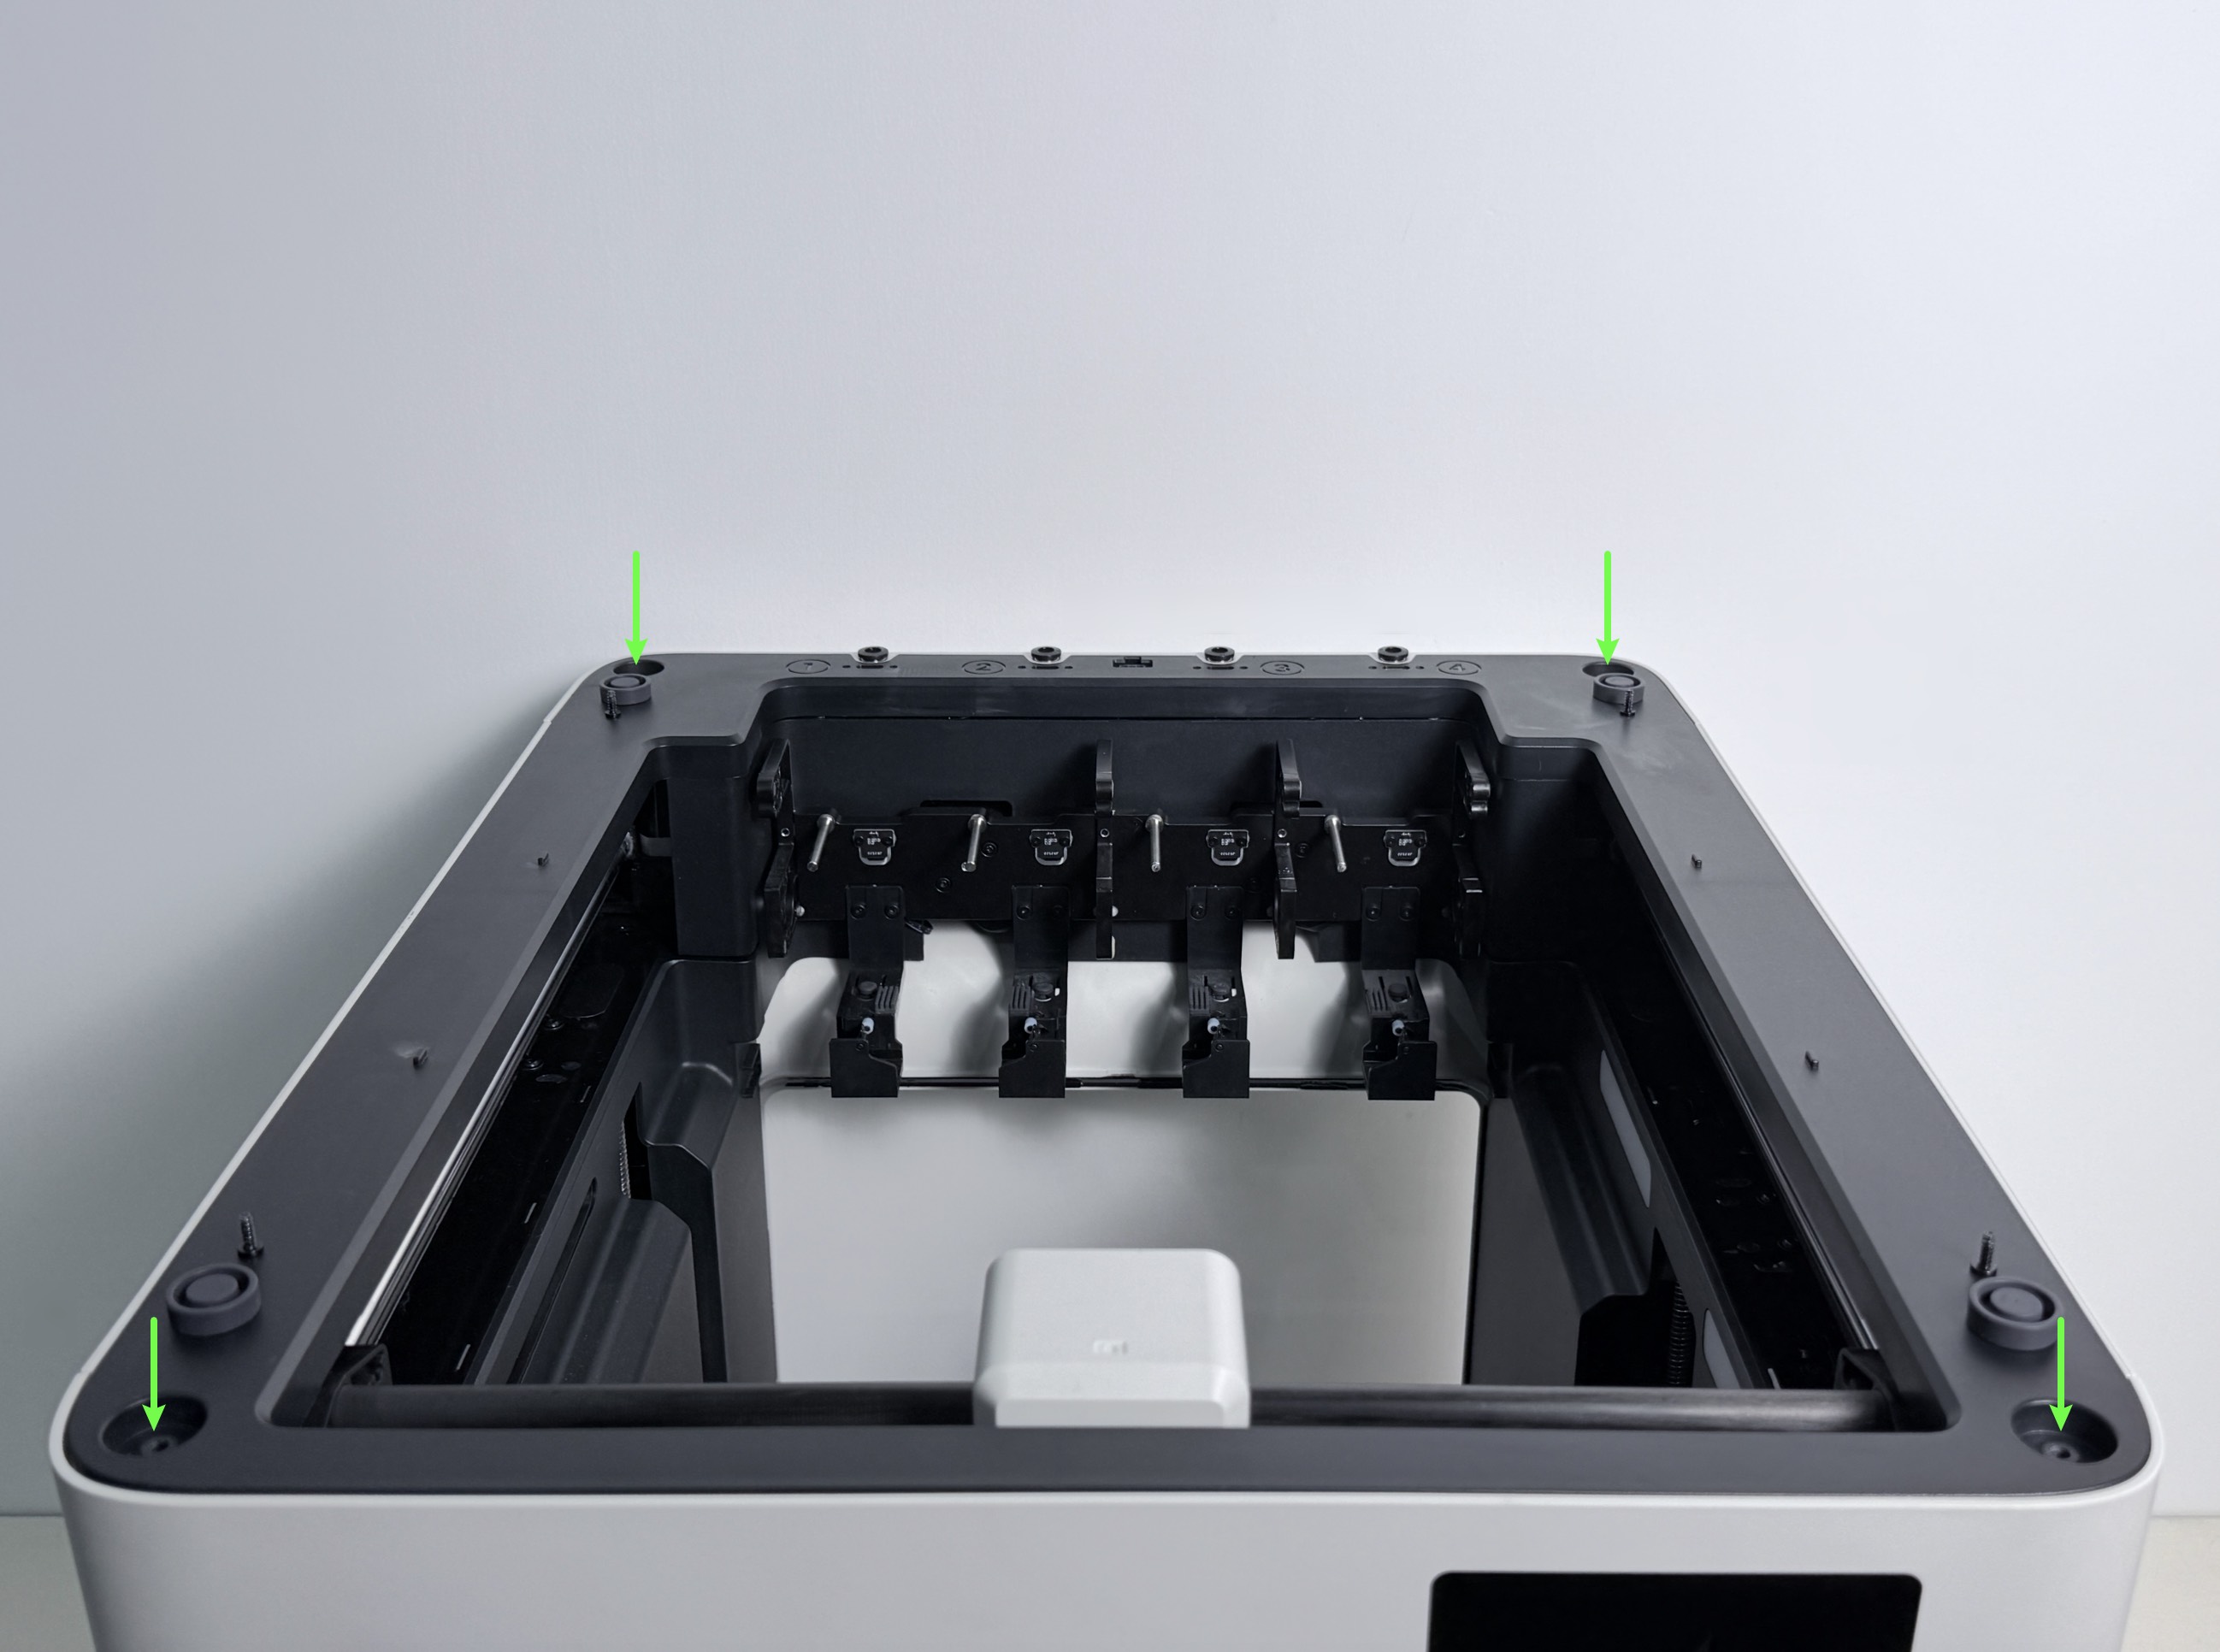
(4) Remove the silicone plugs and screws underneath from the four corners, then remove the top panel.

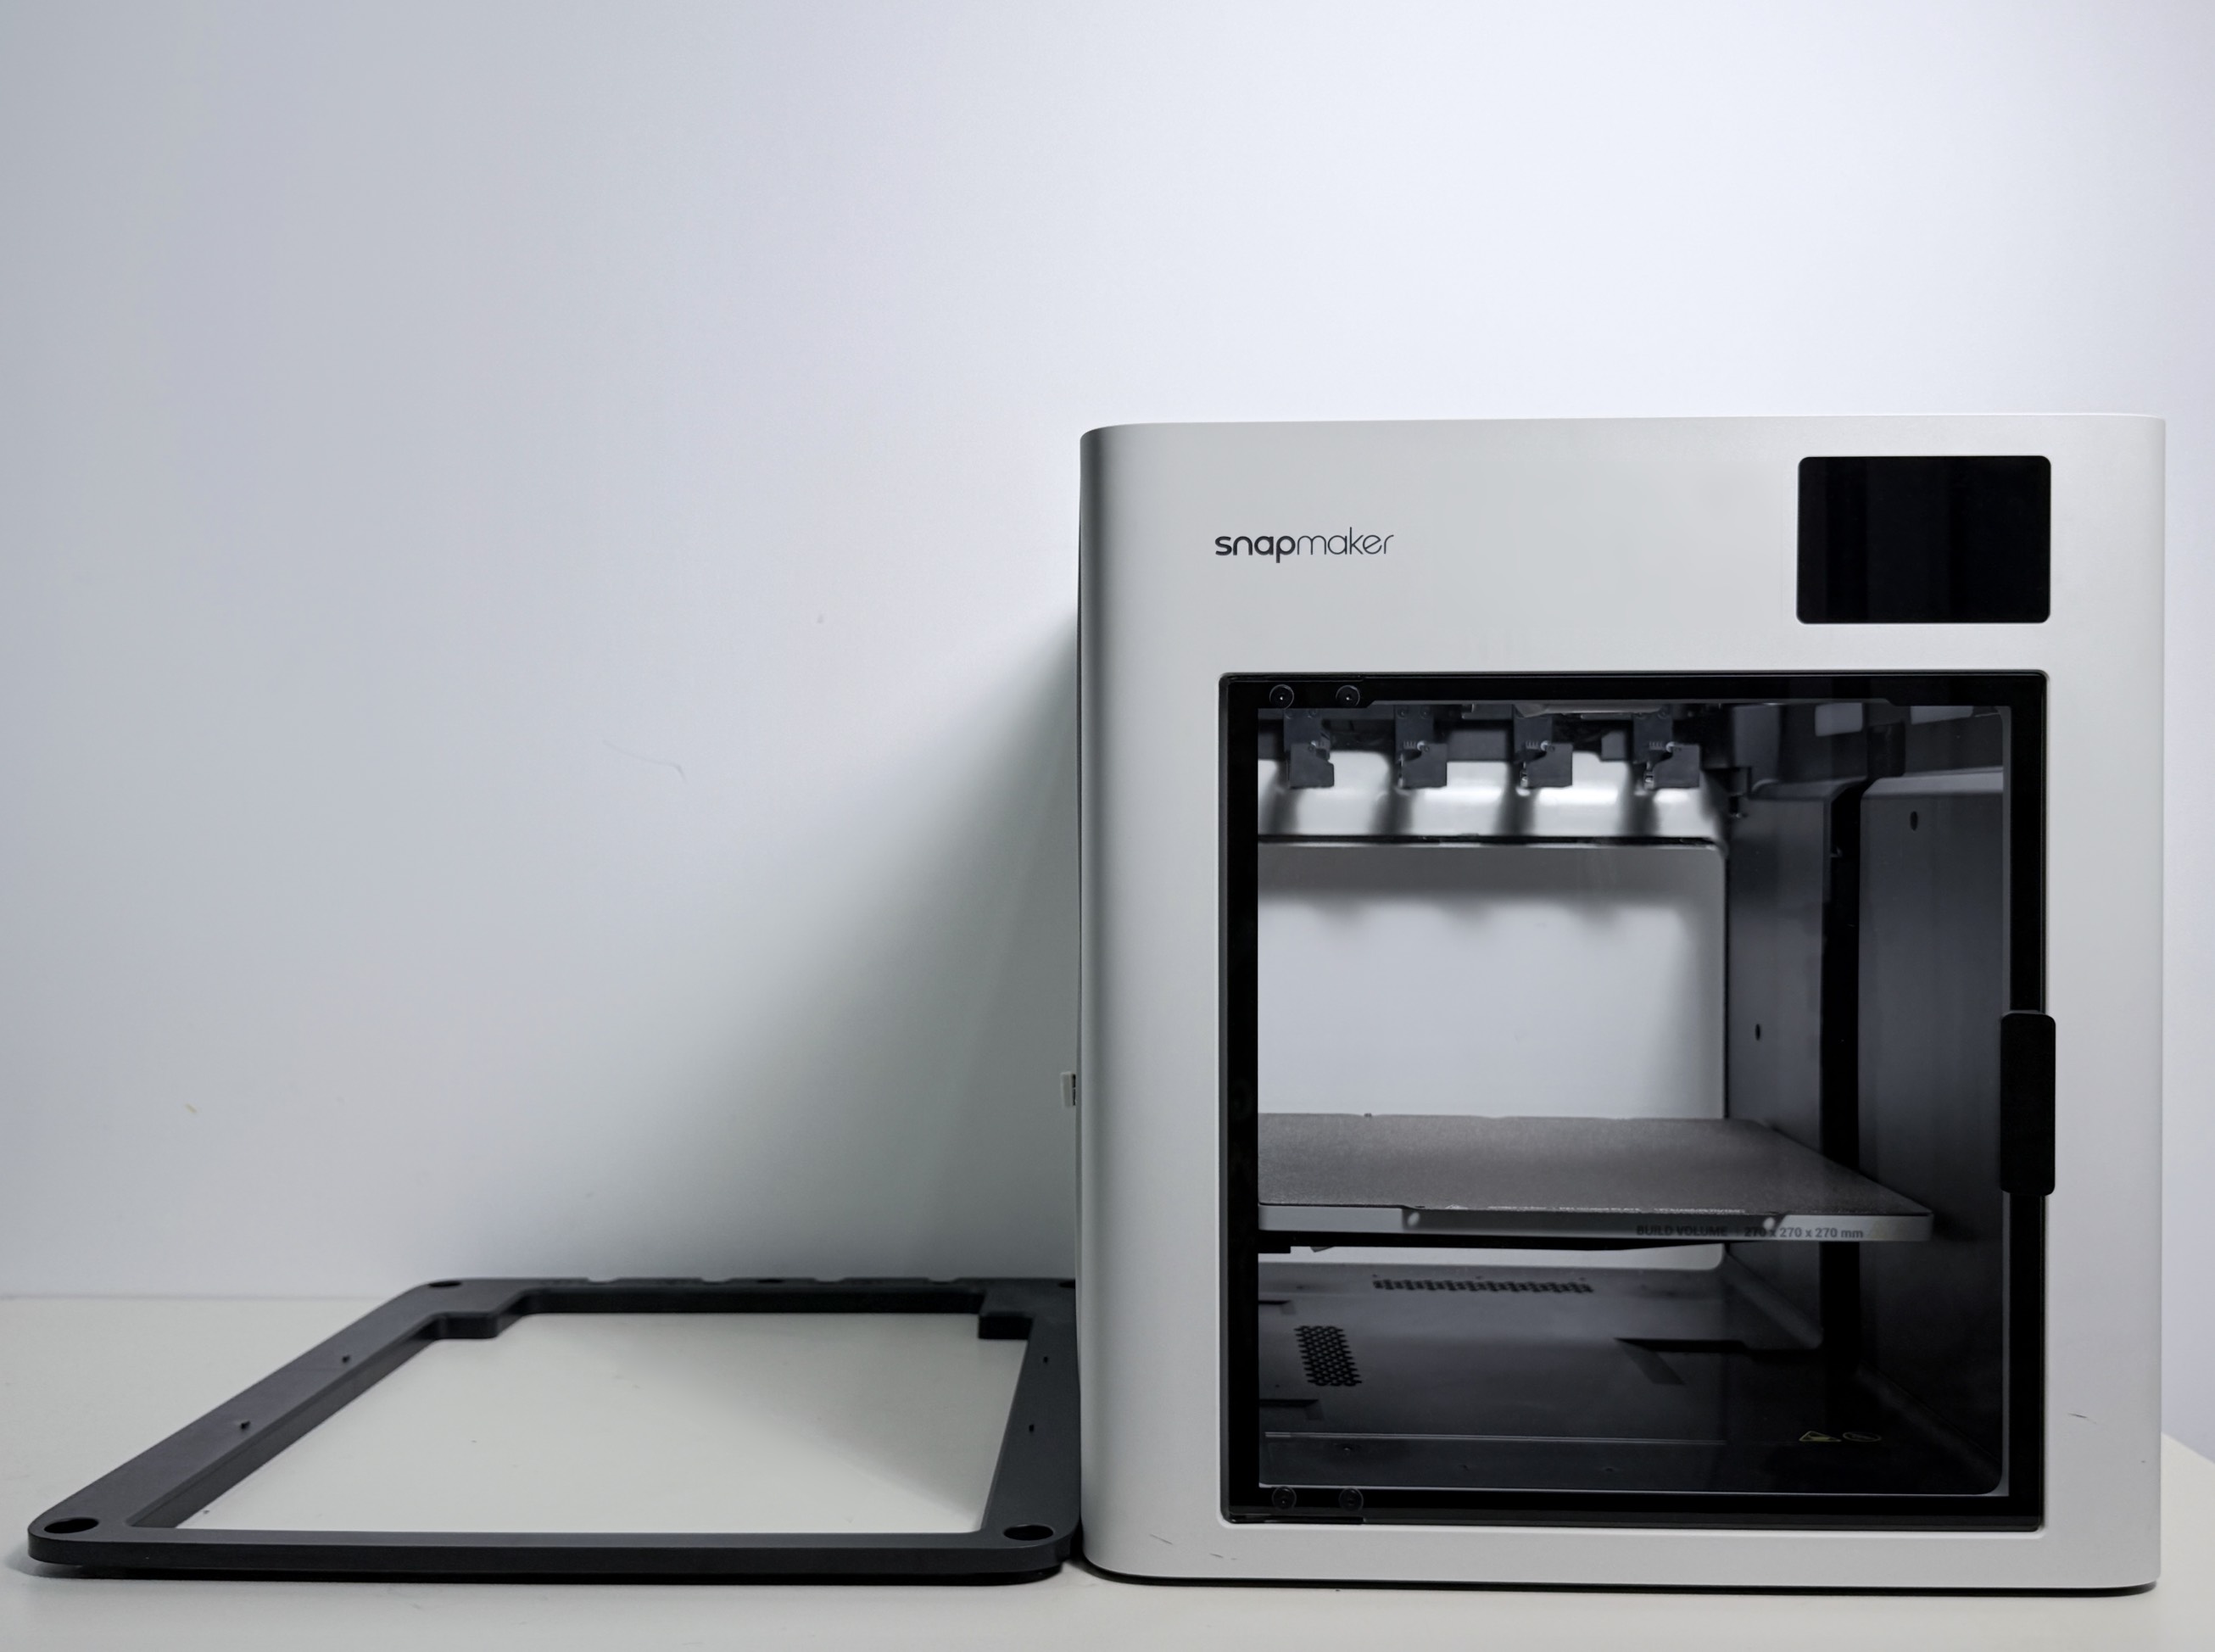
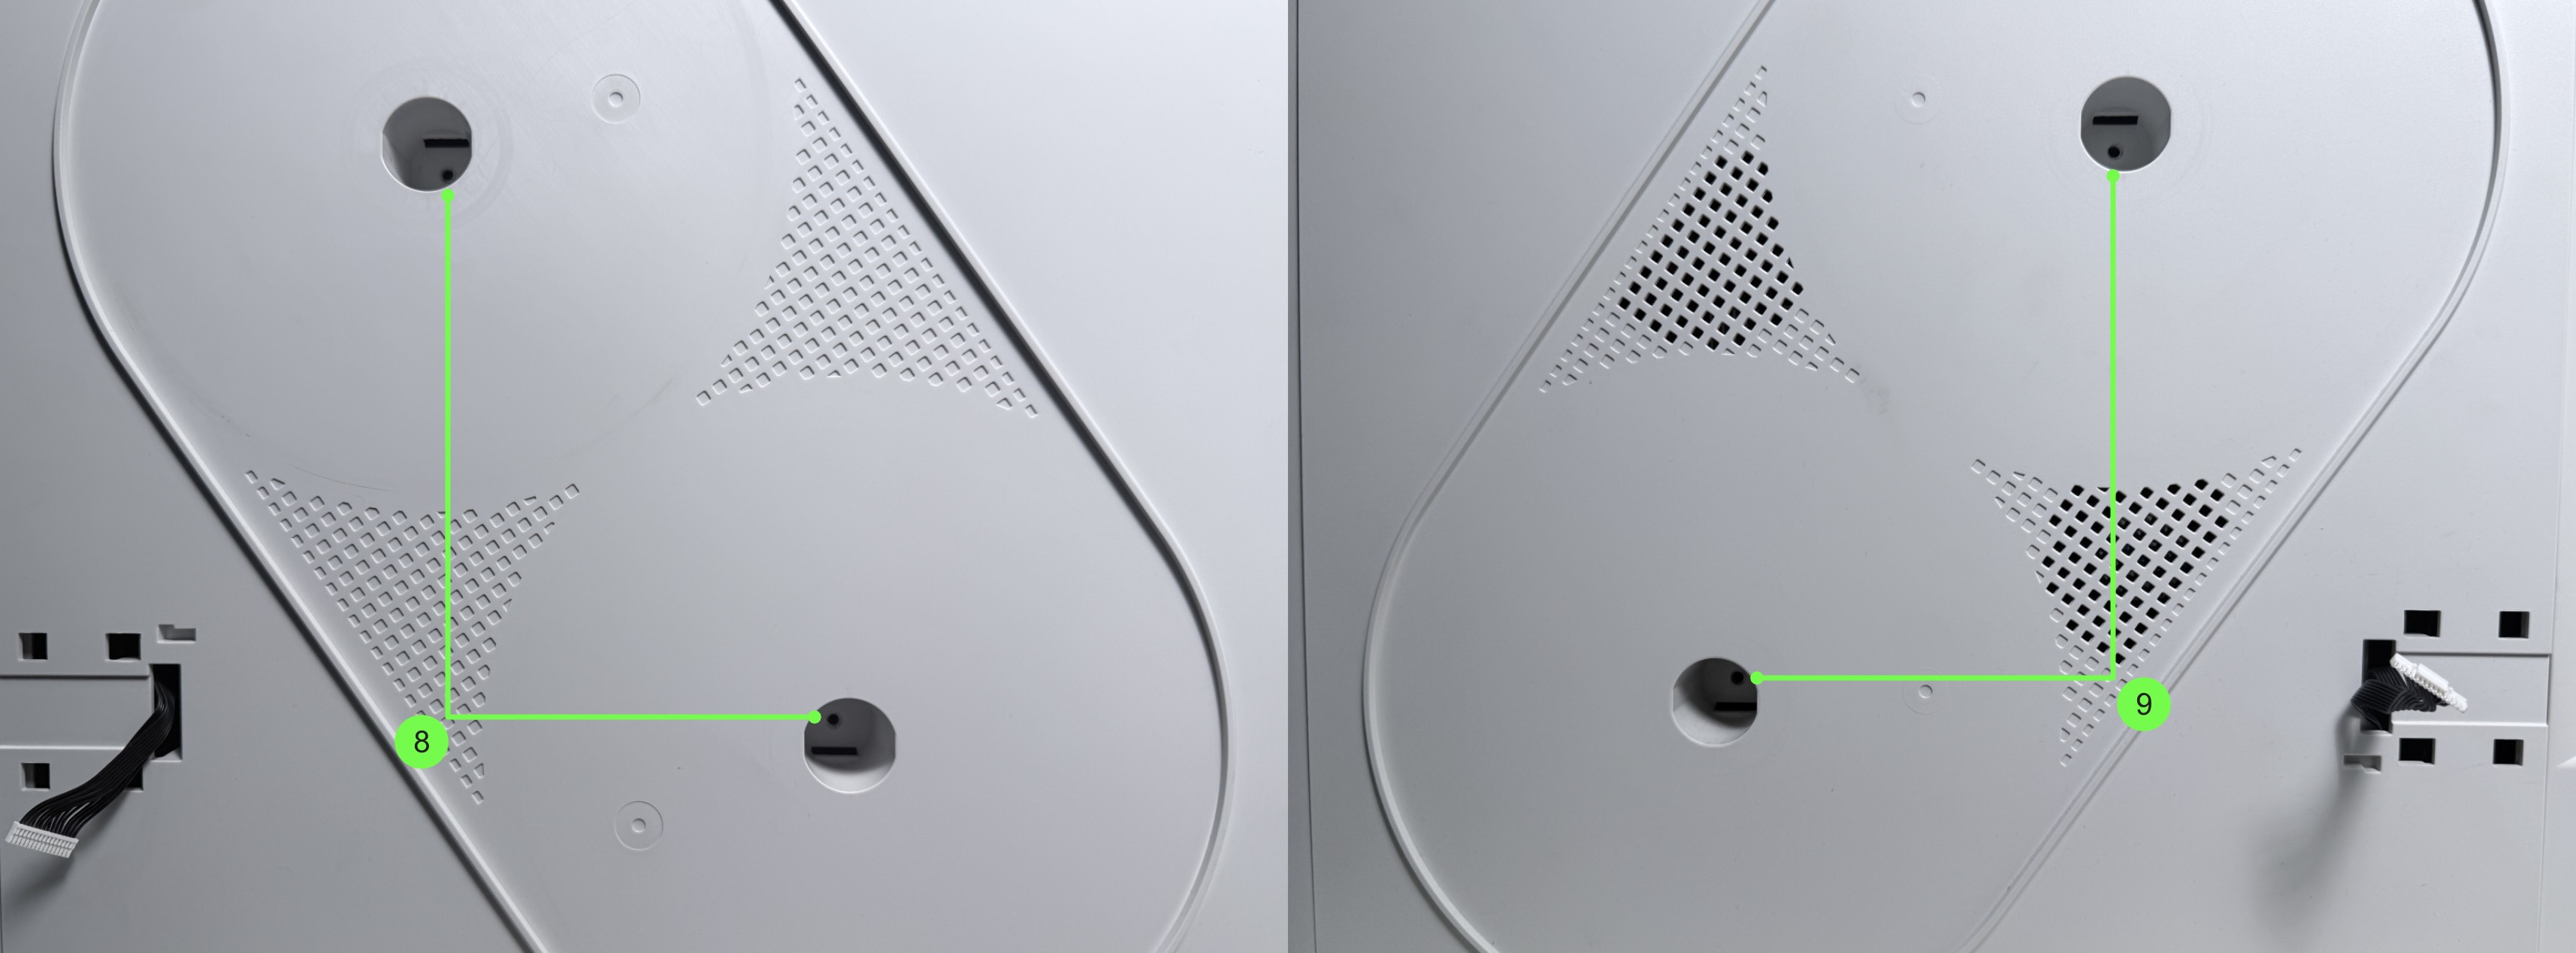
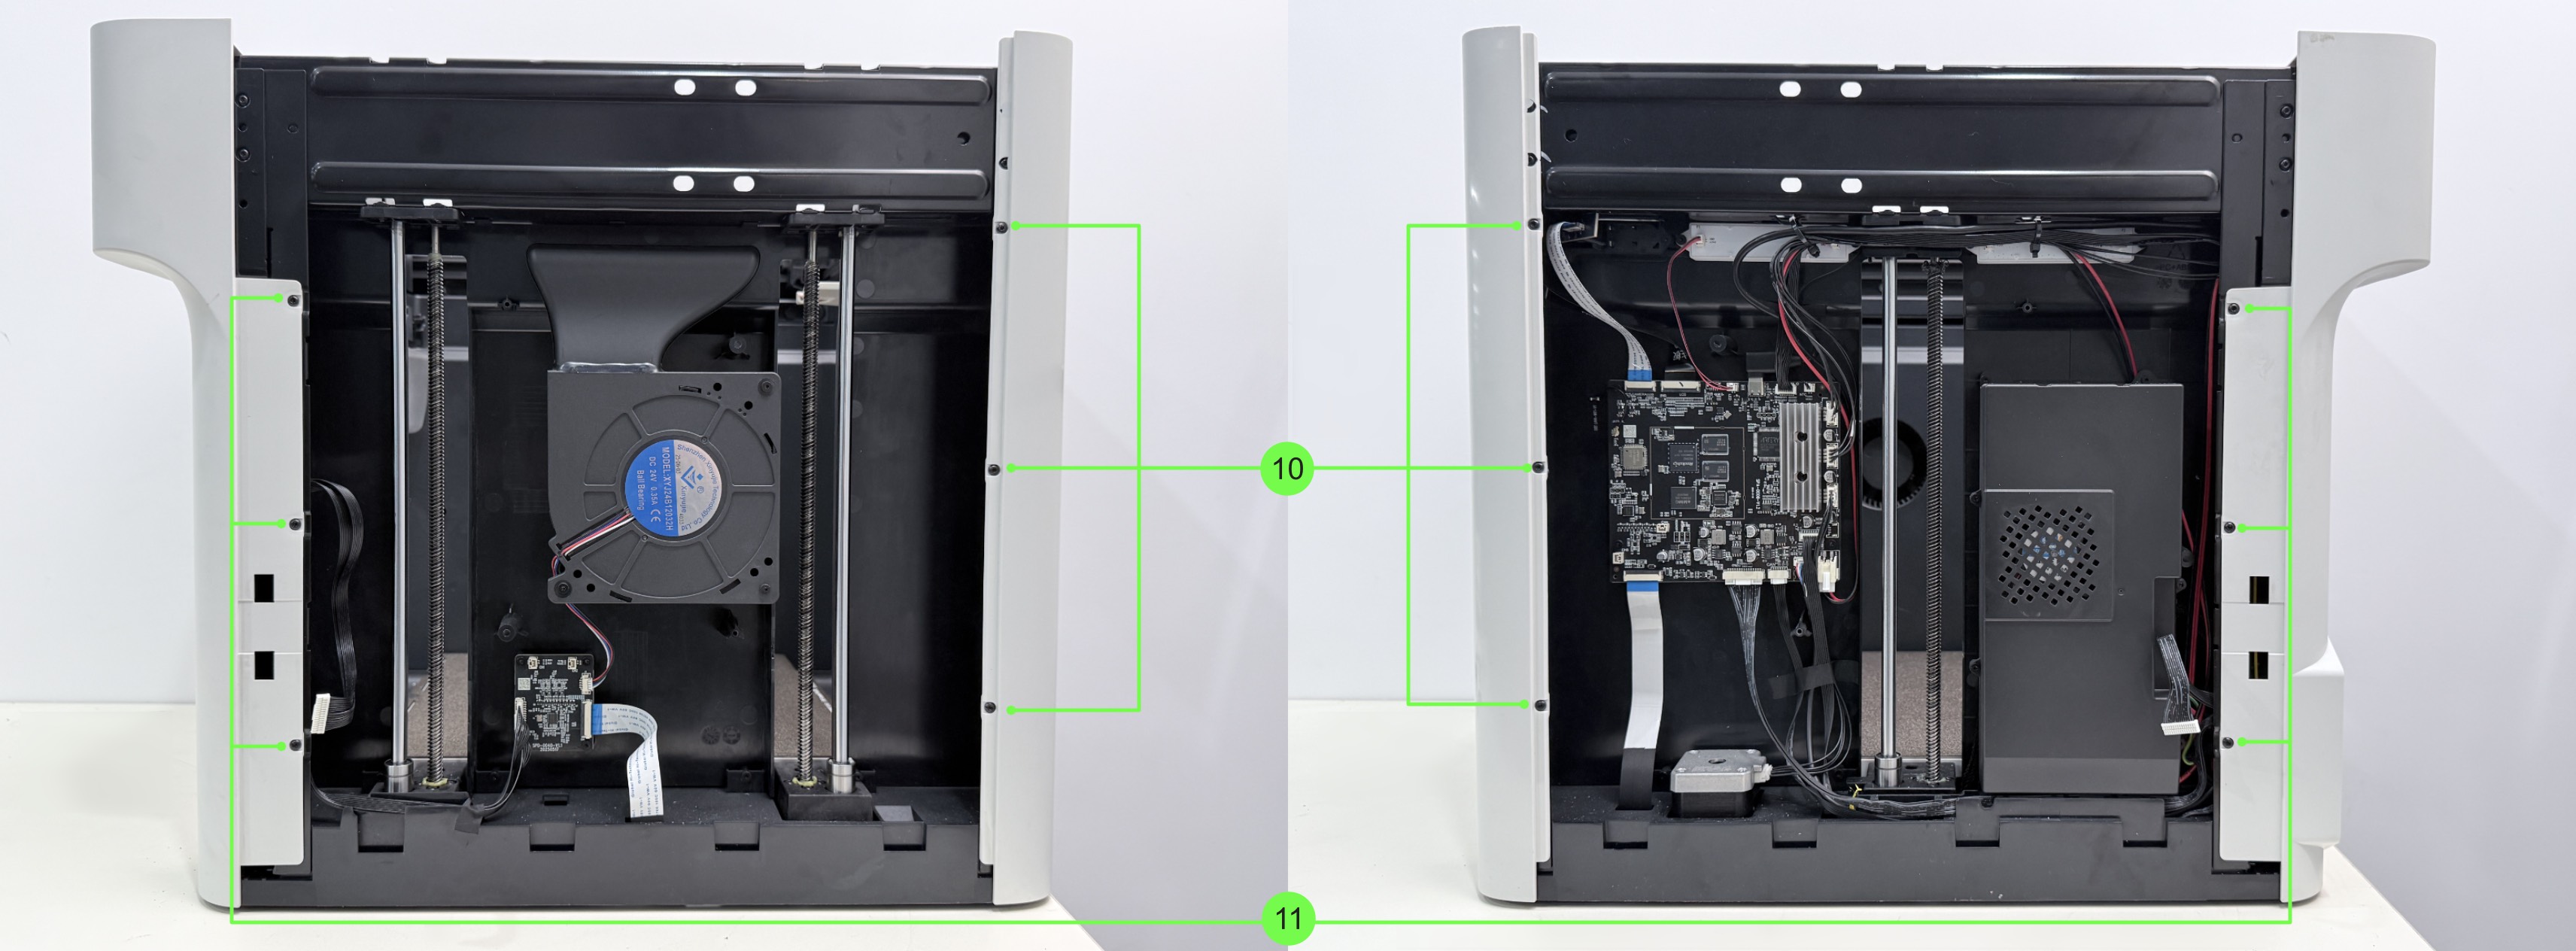
(5) Remove screw groups 1 through 9 in order (do not remove screw group 5).
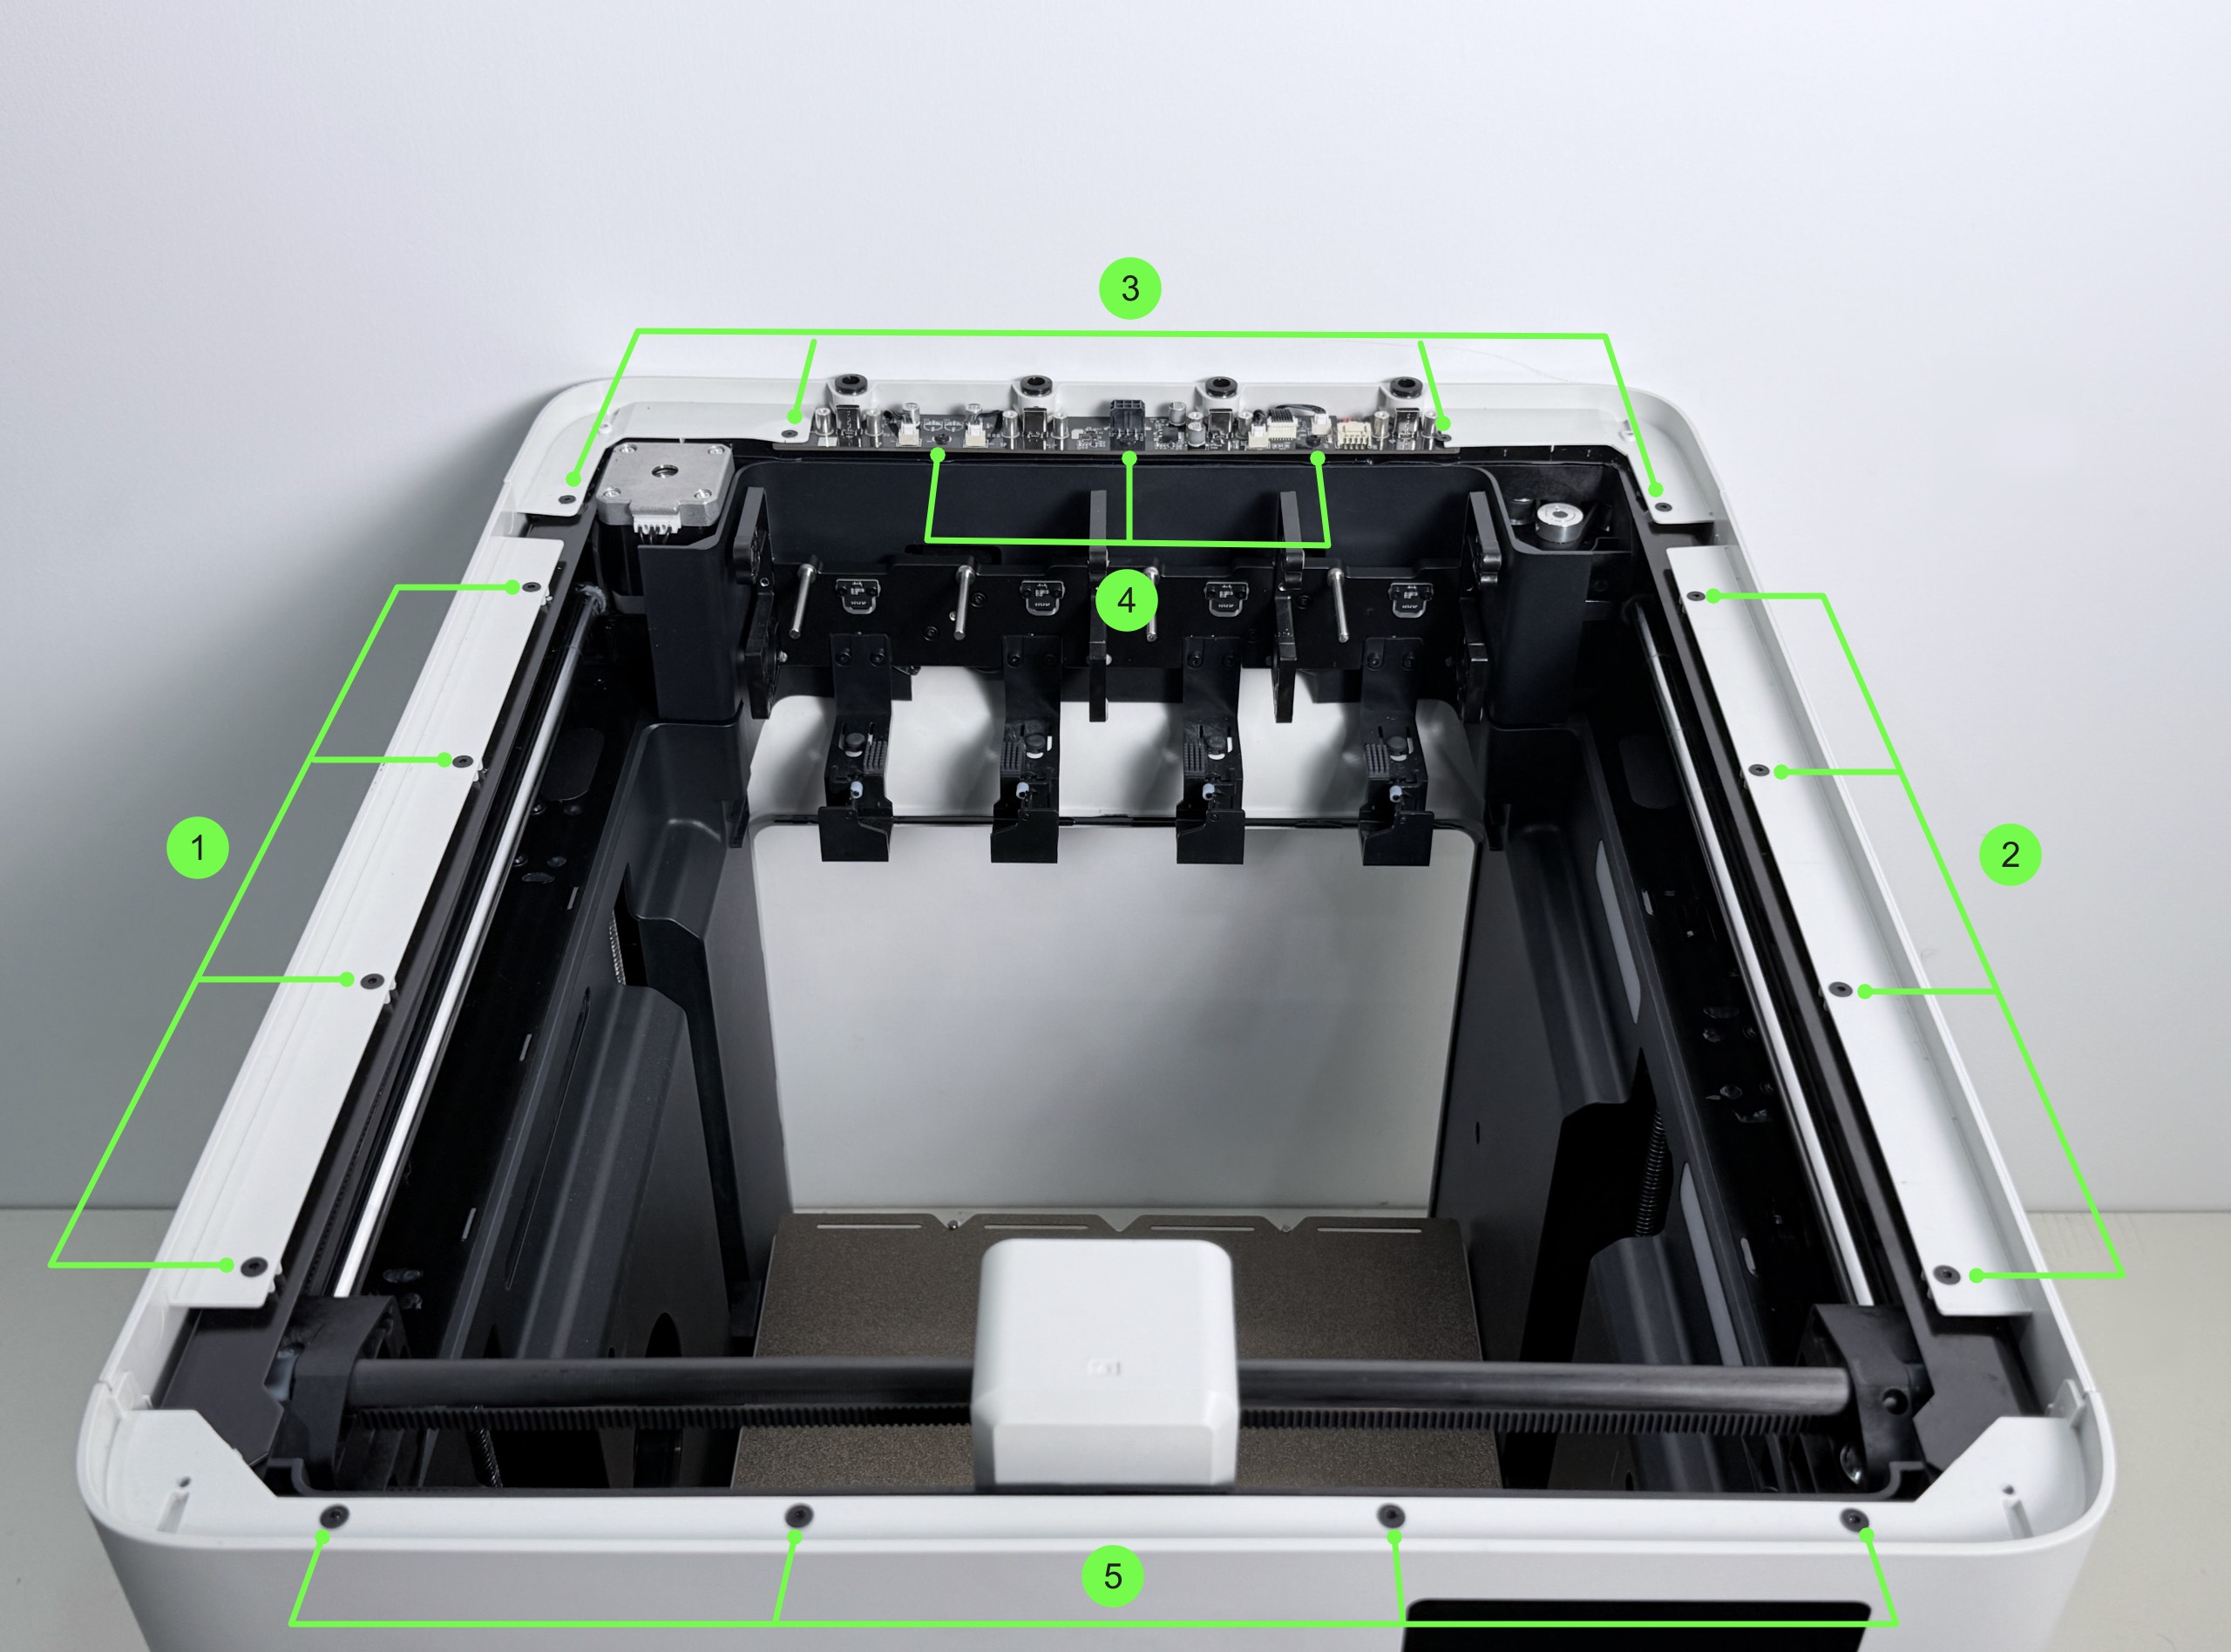

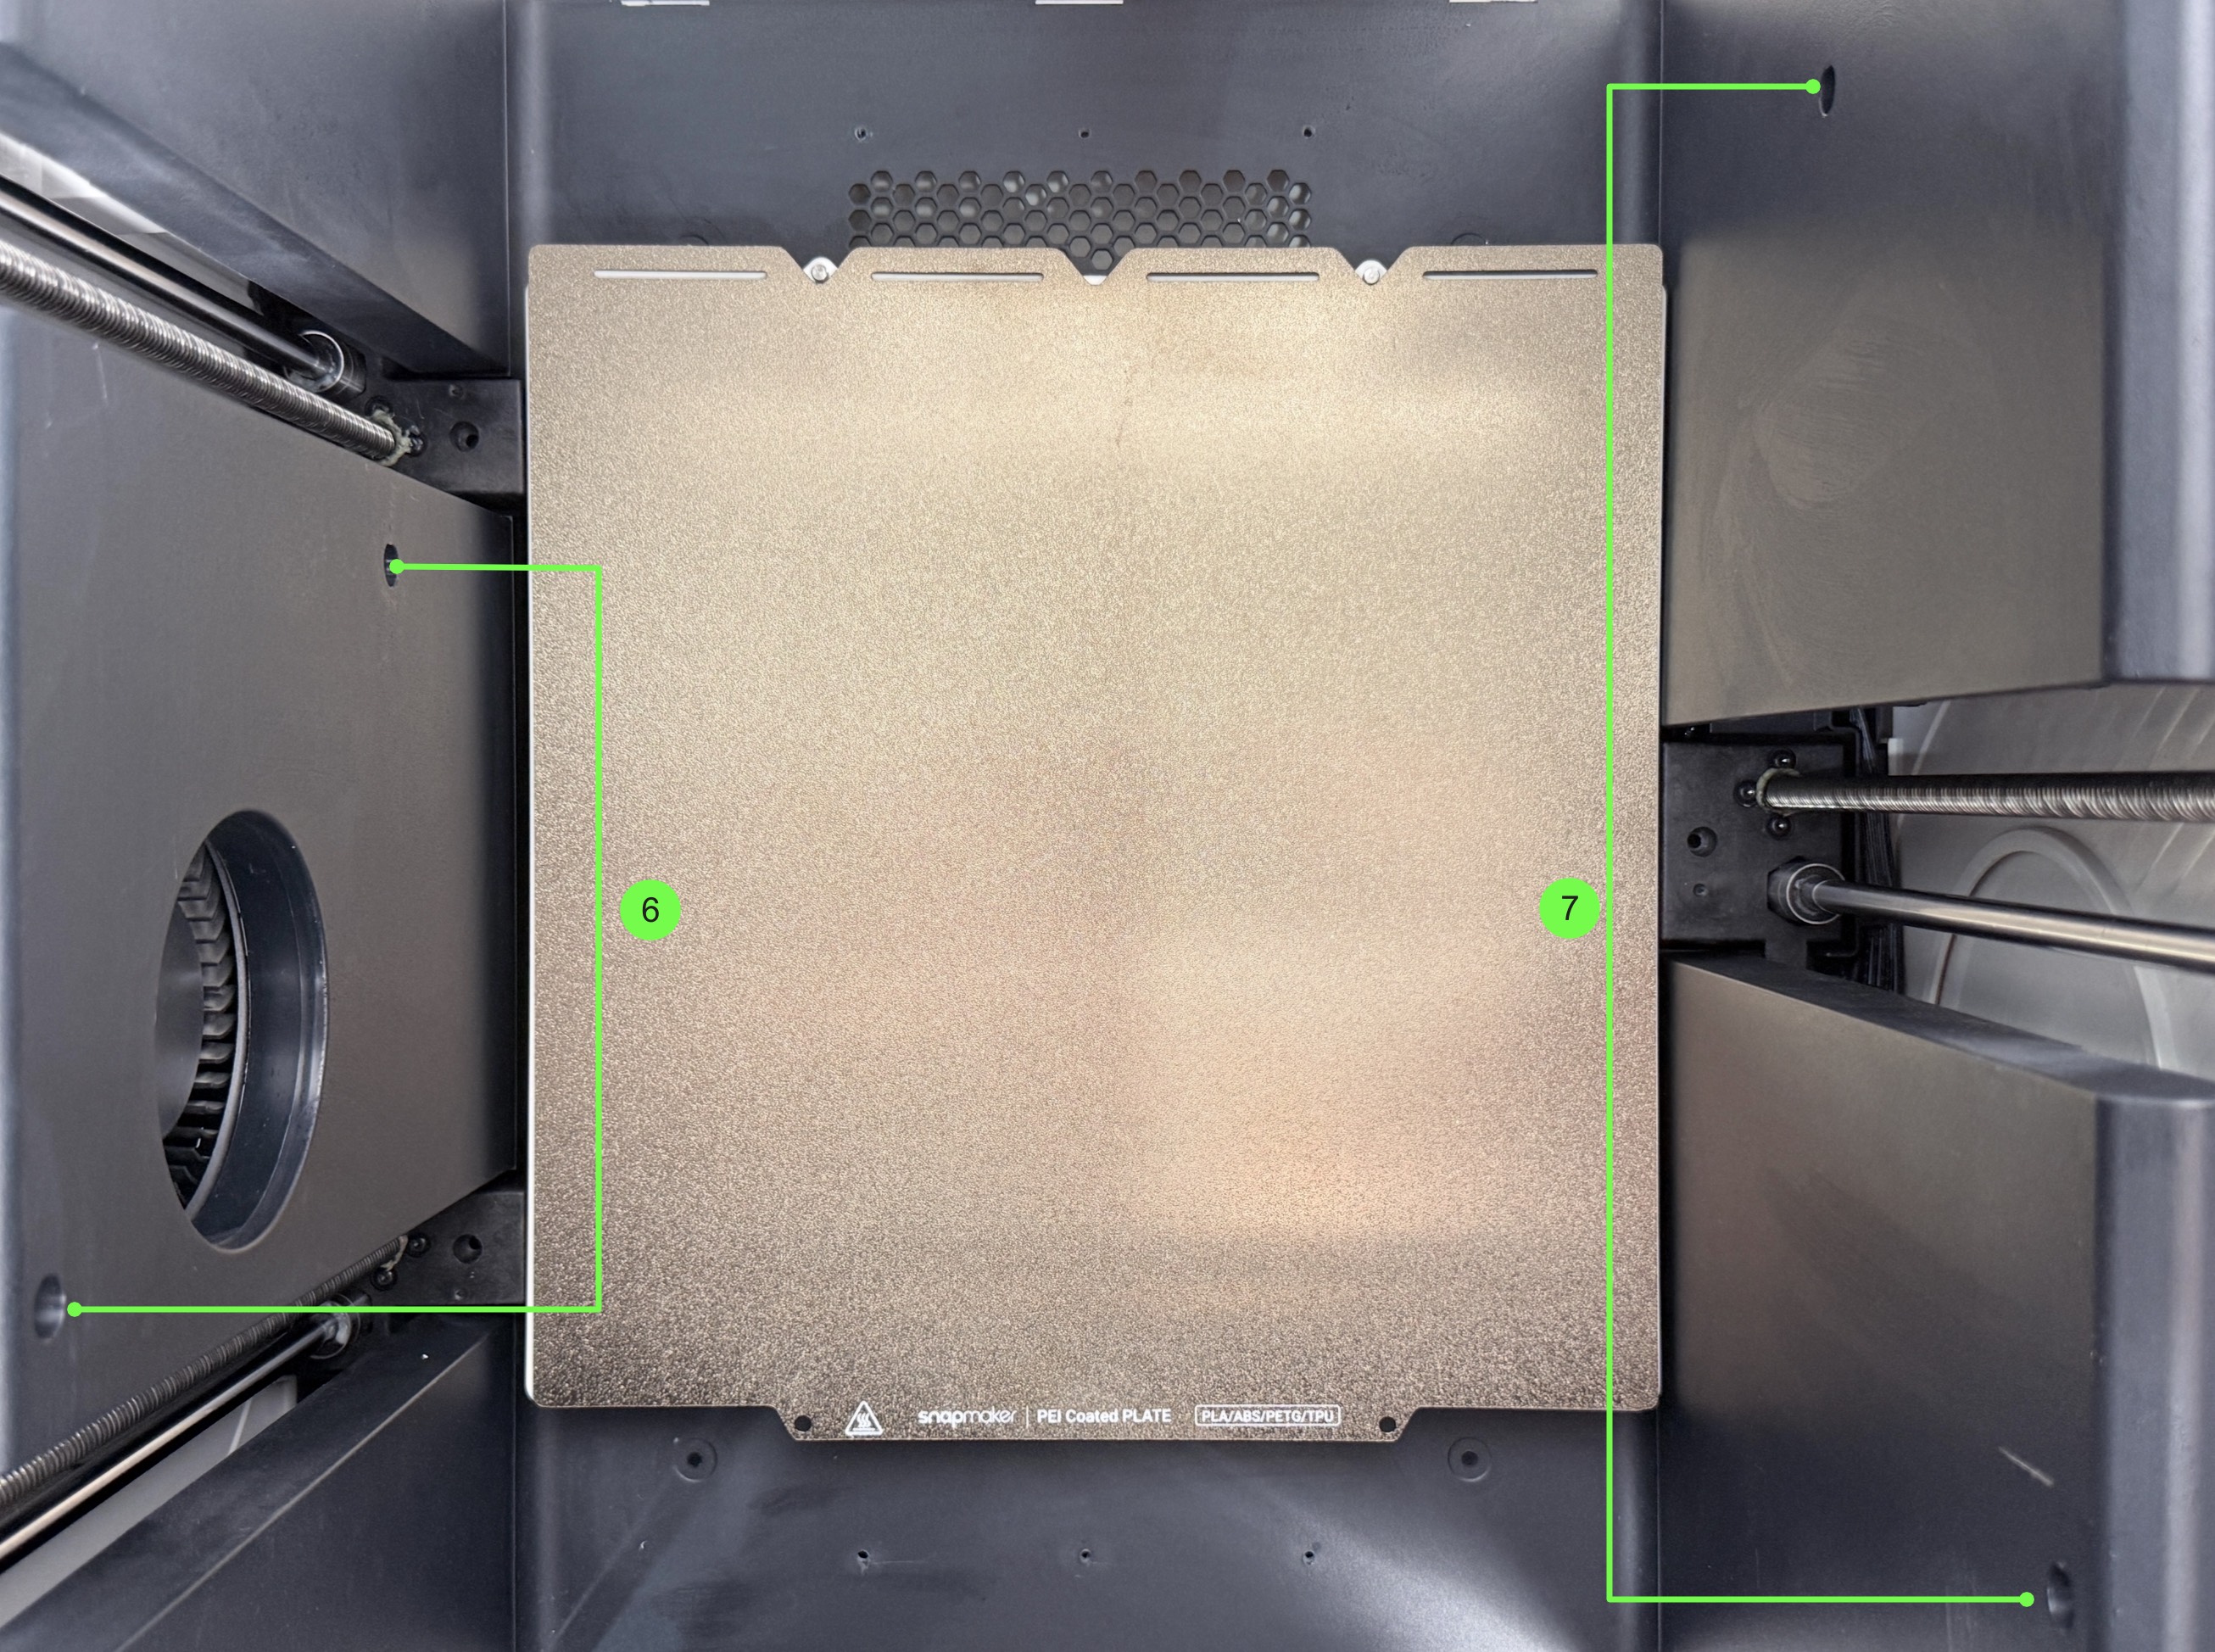


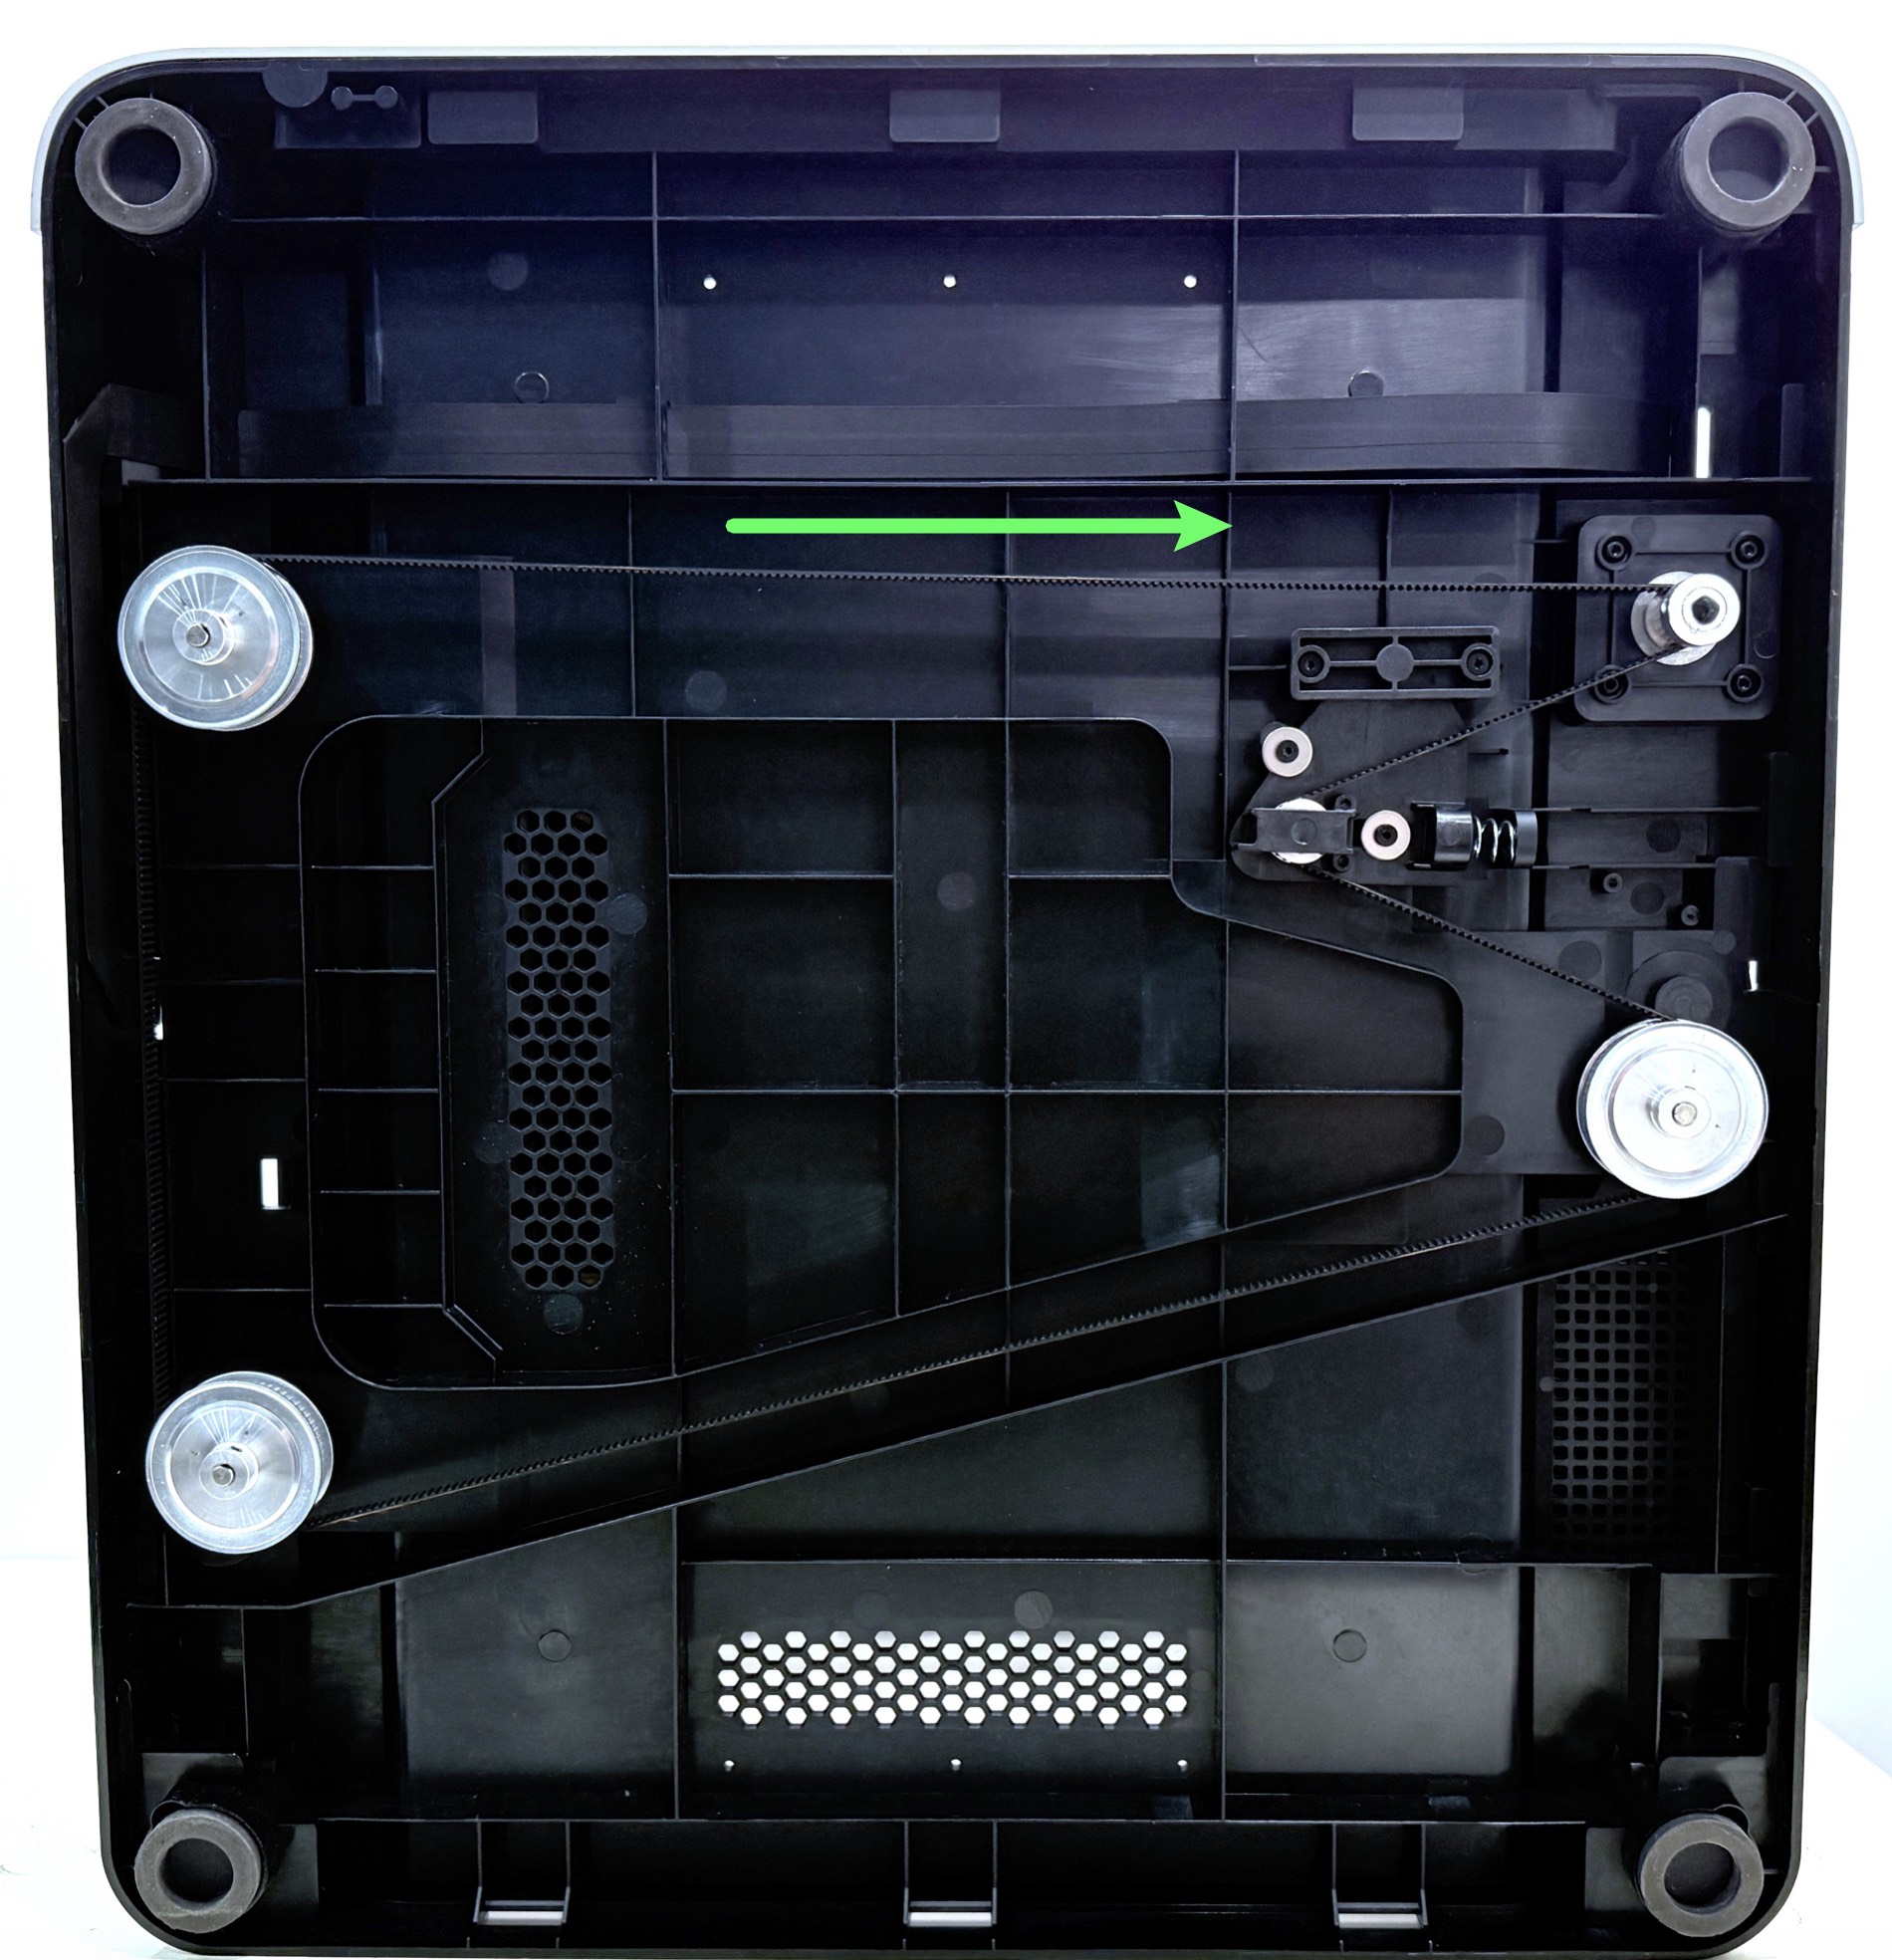
If the heated bed obstructs the operation, you can pull the bottom timing belt to lower it to the limit position.
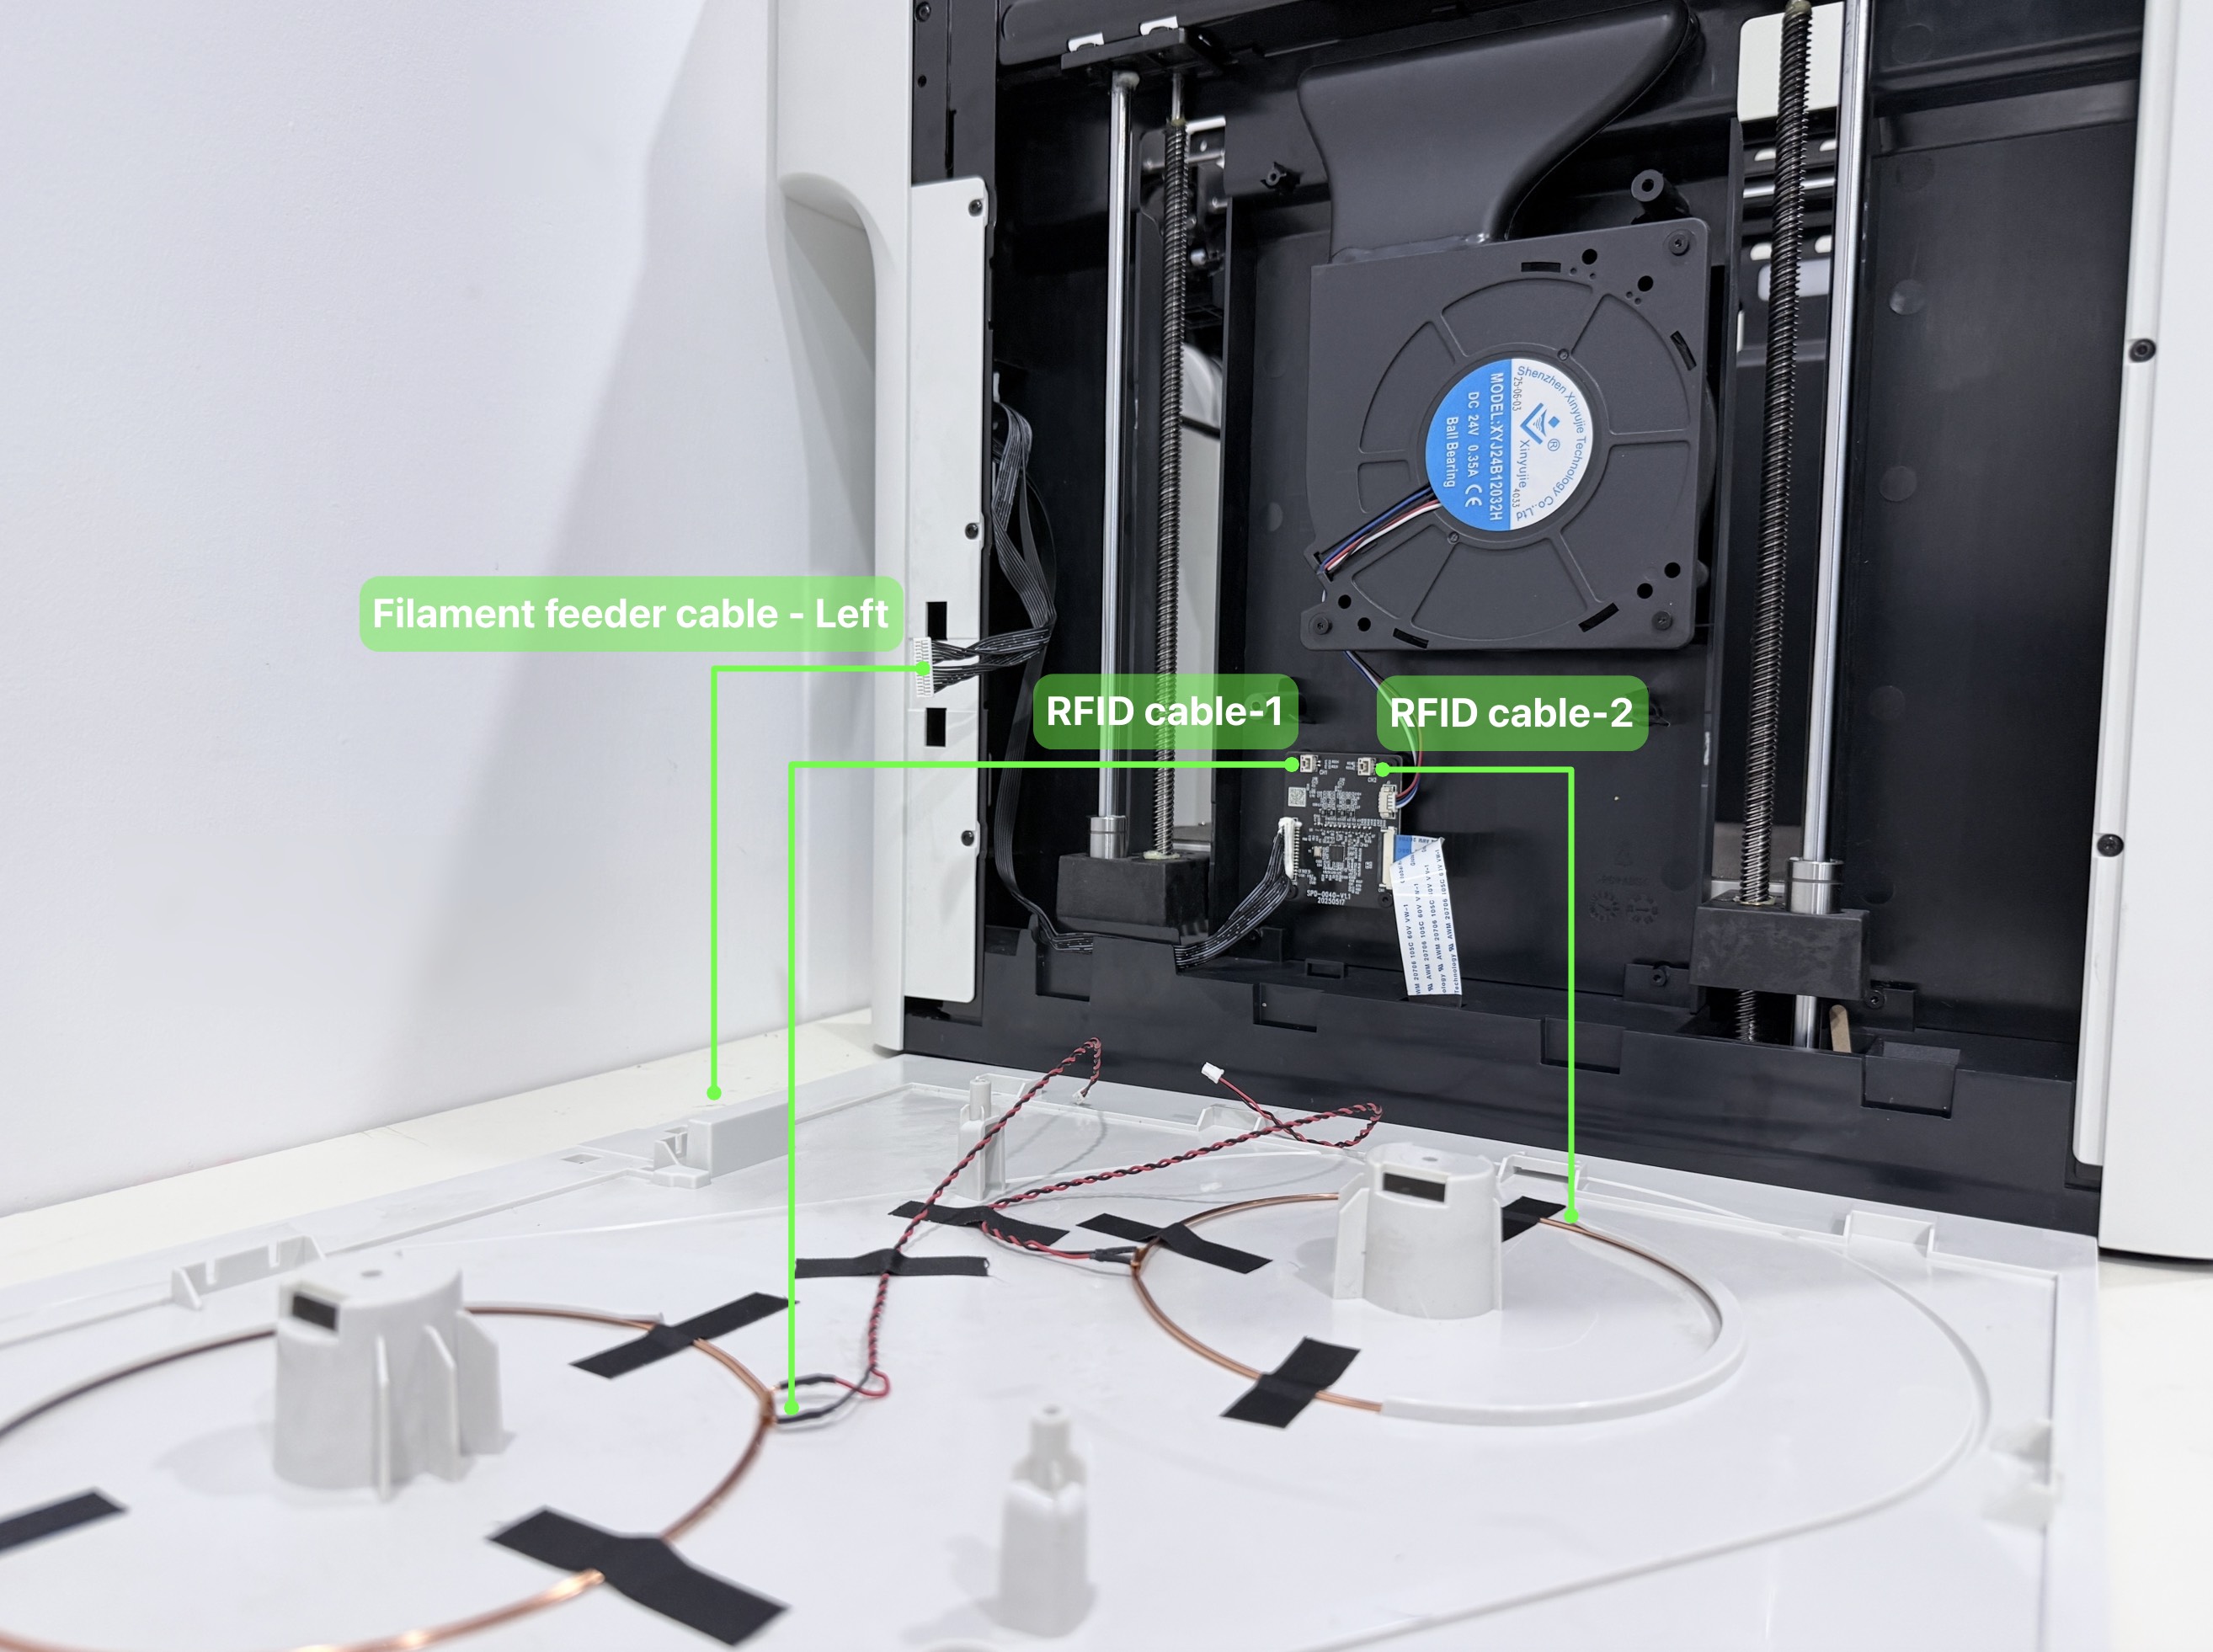
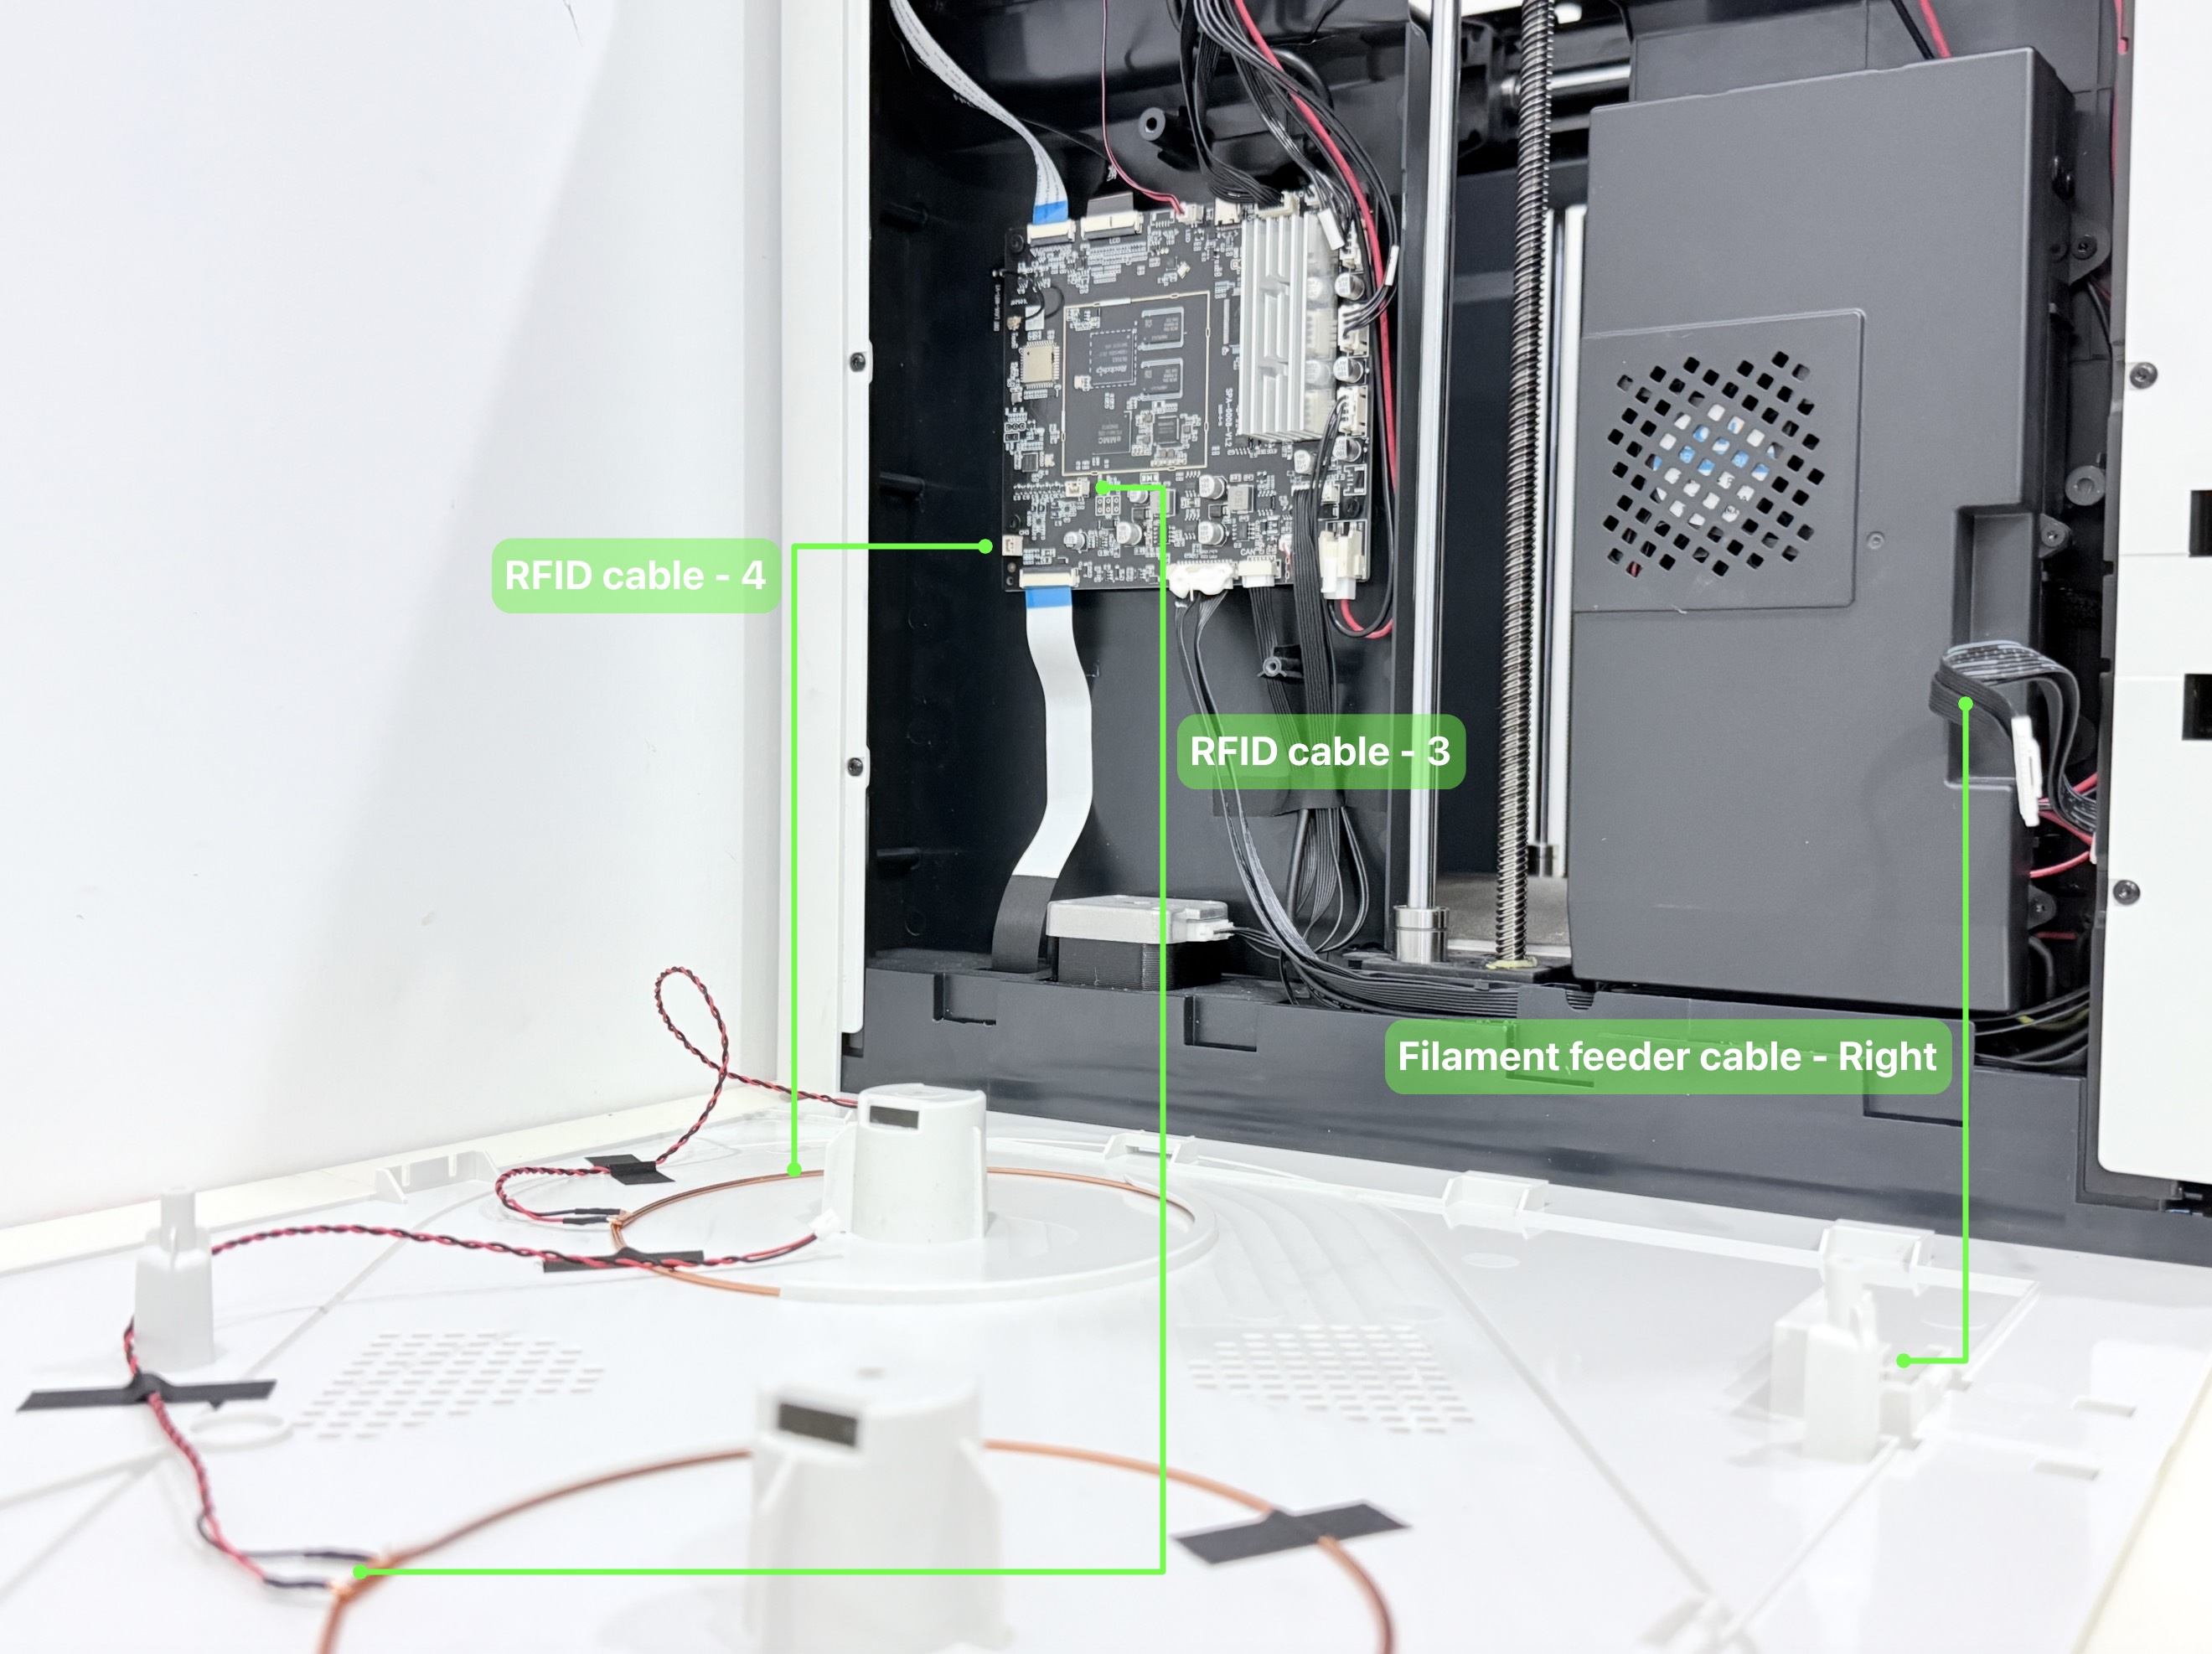
(6) Disconnect the RFID cable-1、2、3、4, then remove Left & Right side panels.
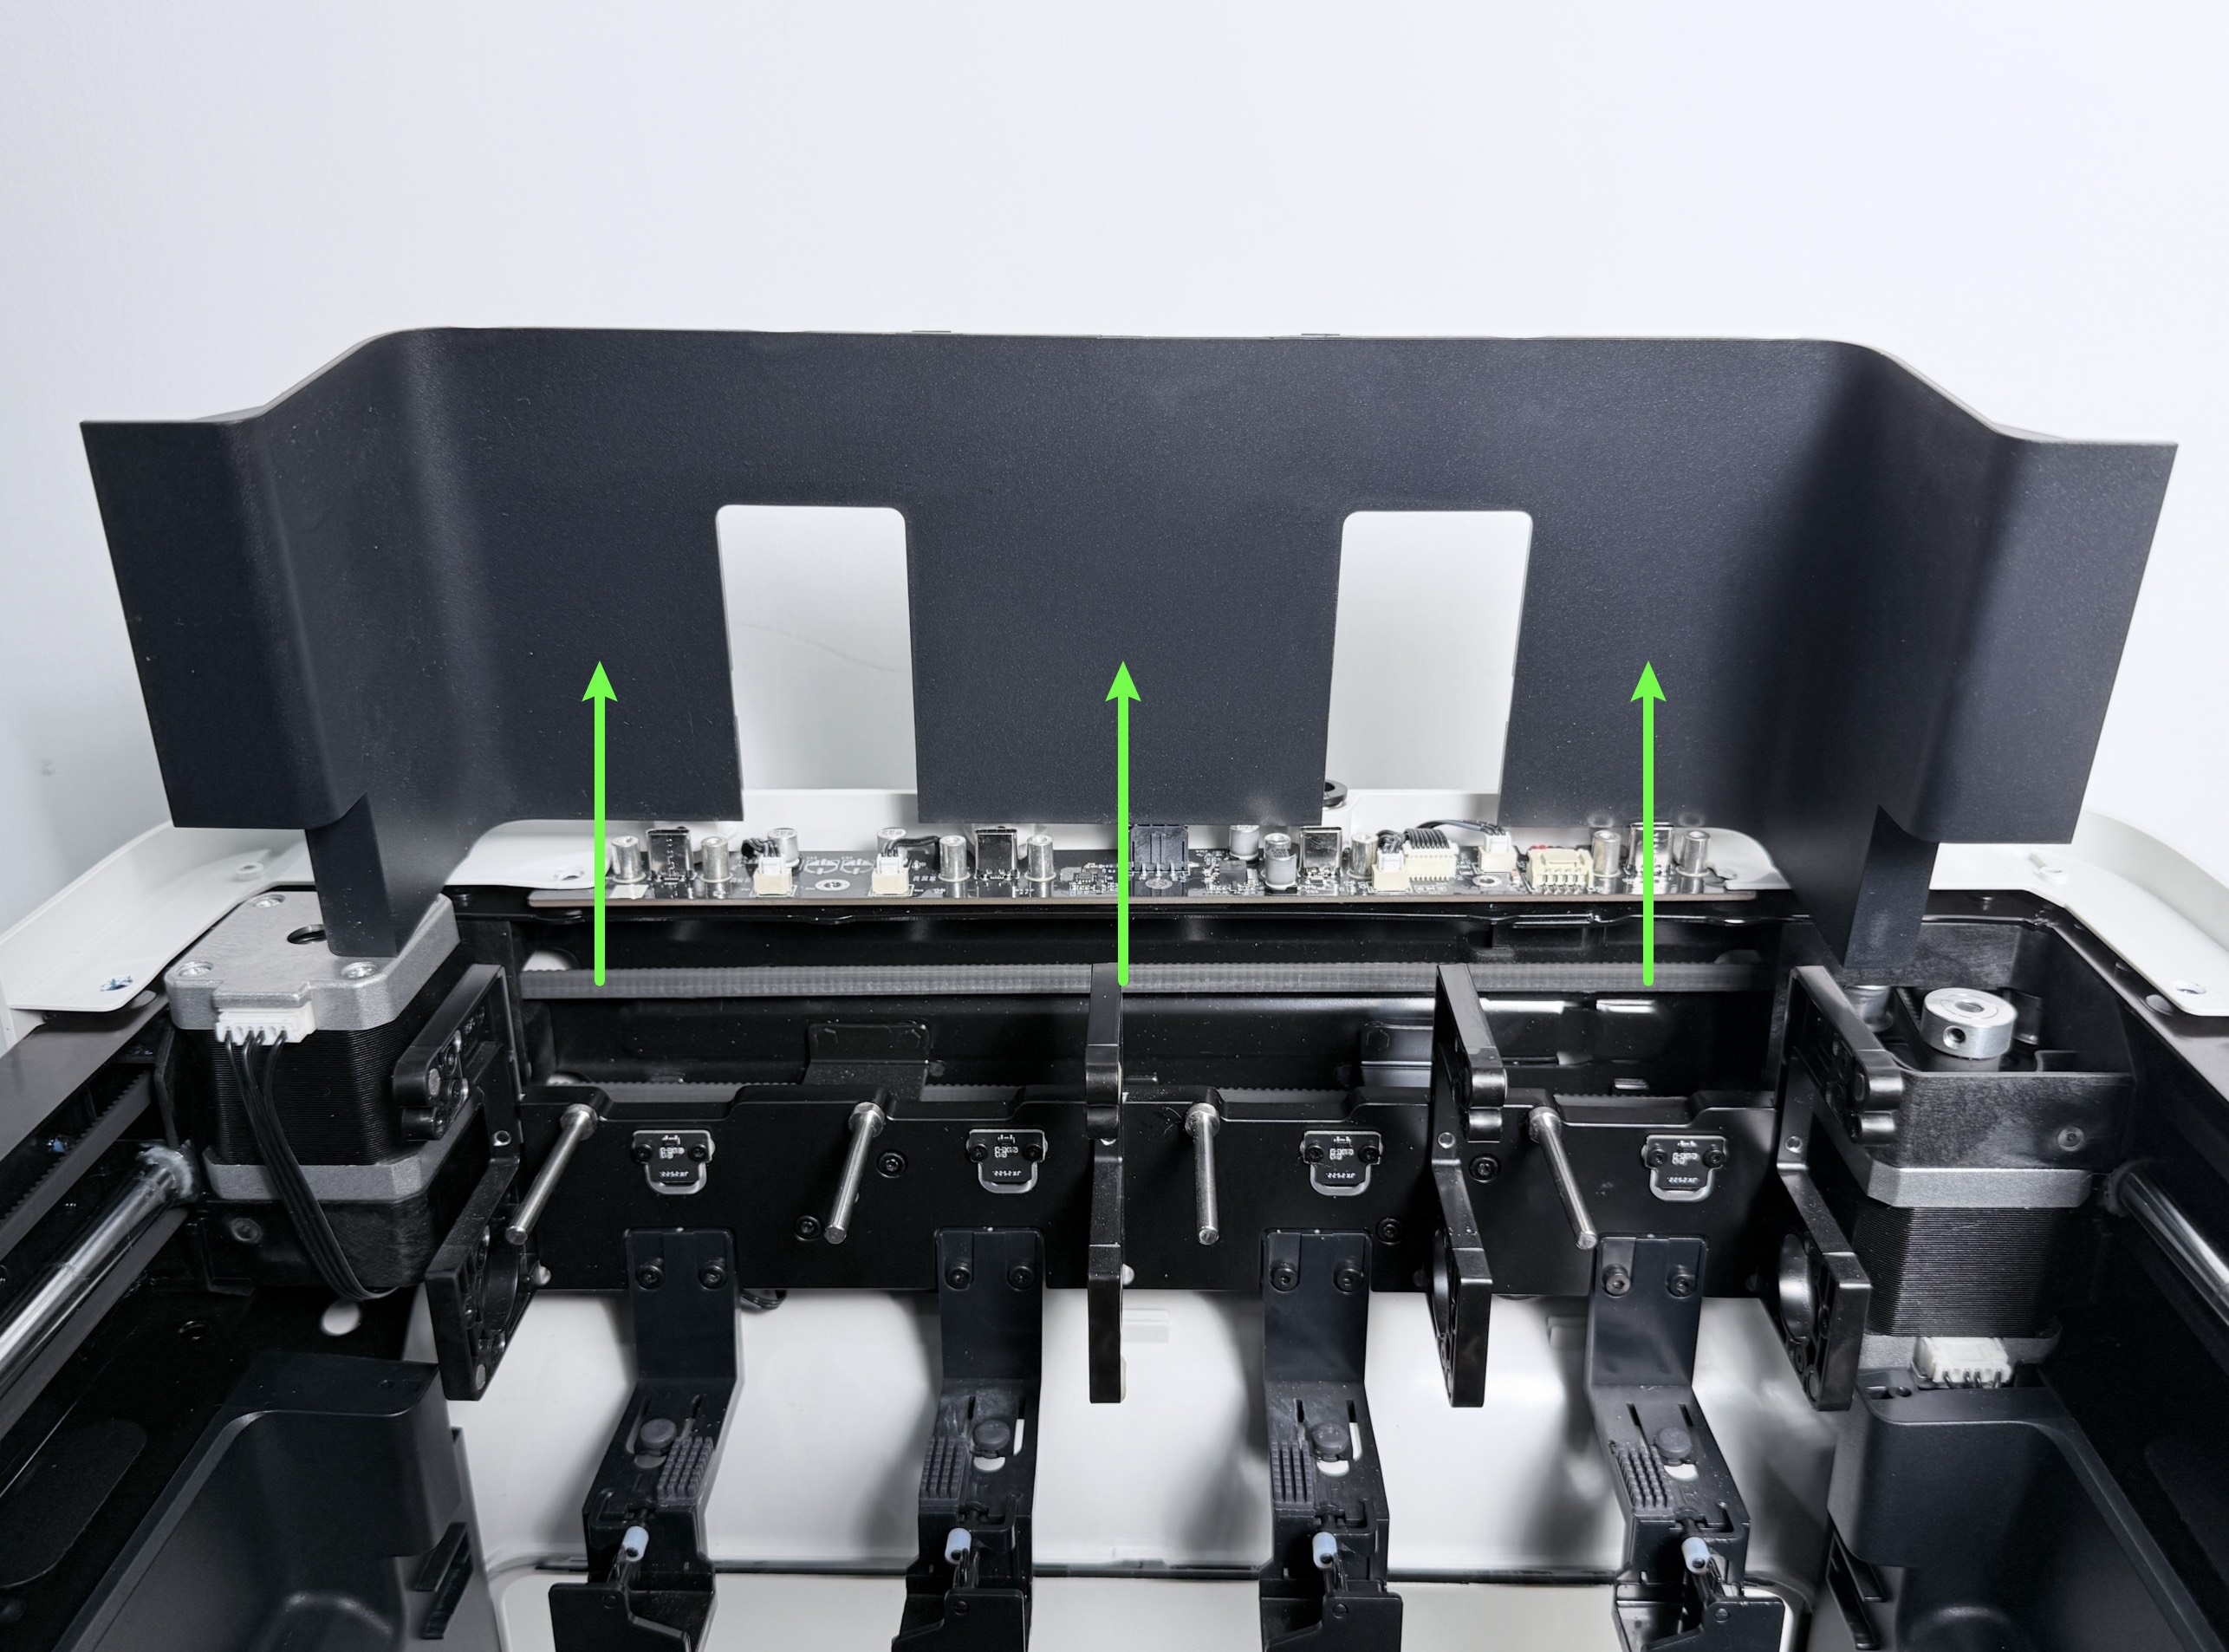
(7) Lift the rear cover behind the bracket, then remove screw group 11 and take off the rear panel.

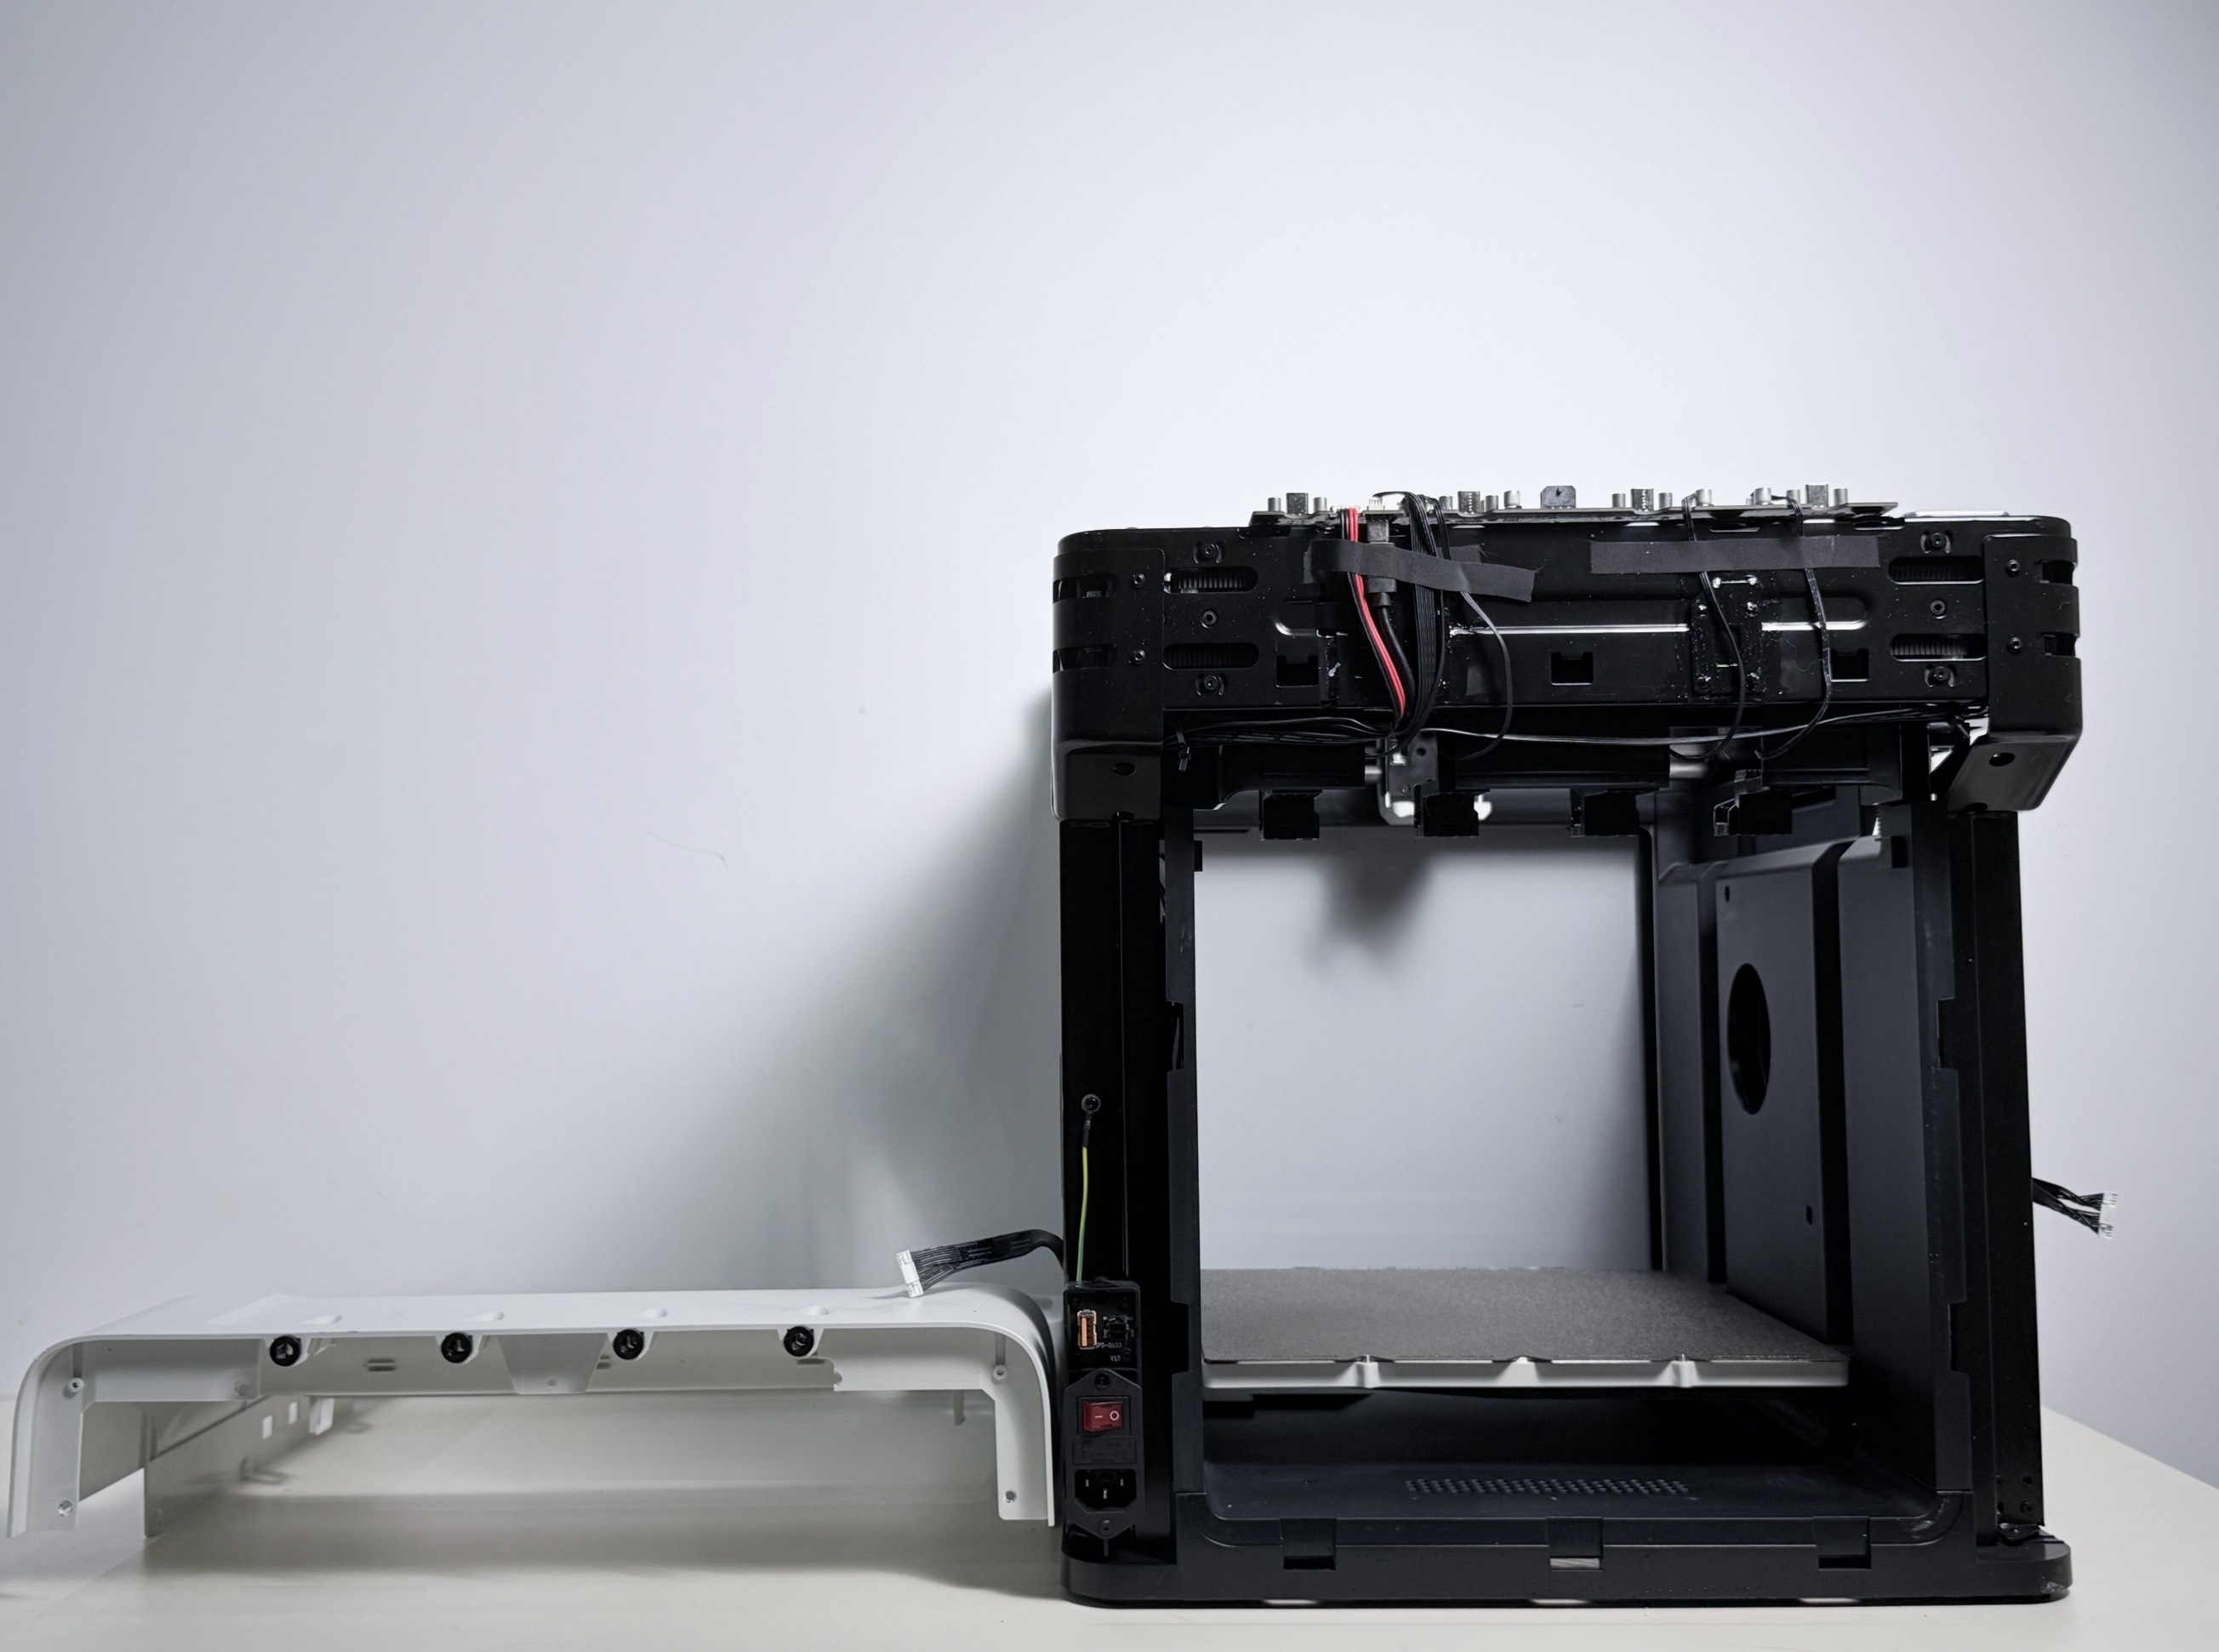
Part3 - Replace the HUB board
(1) Disconnect the cables from the HUB board, then remove the old HUB board.
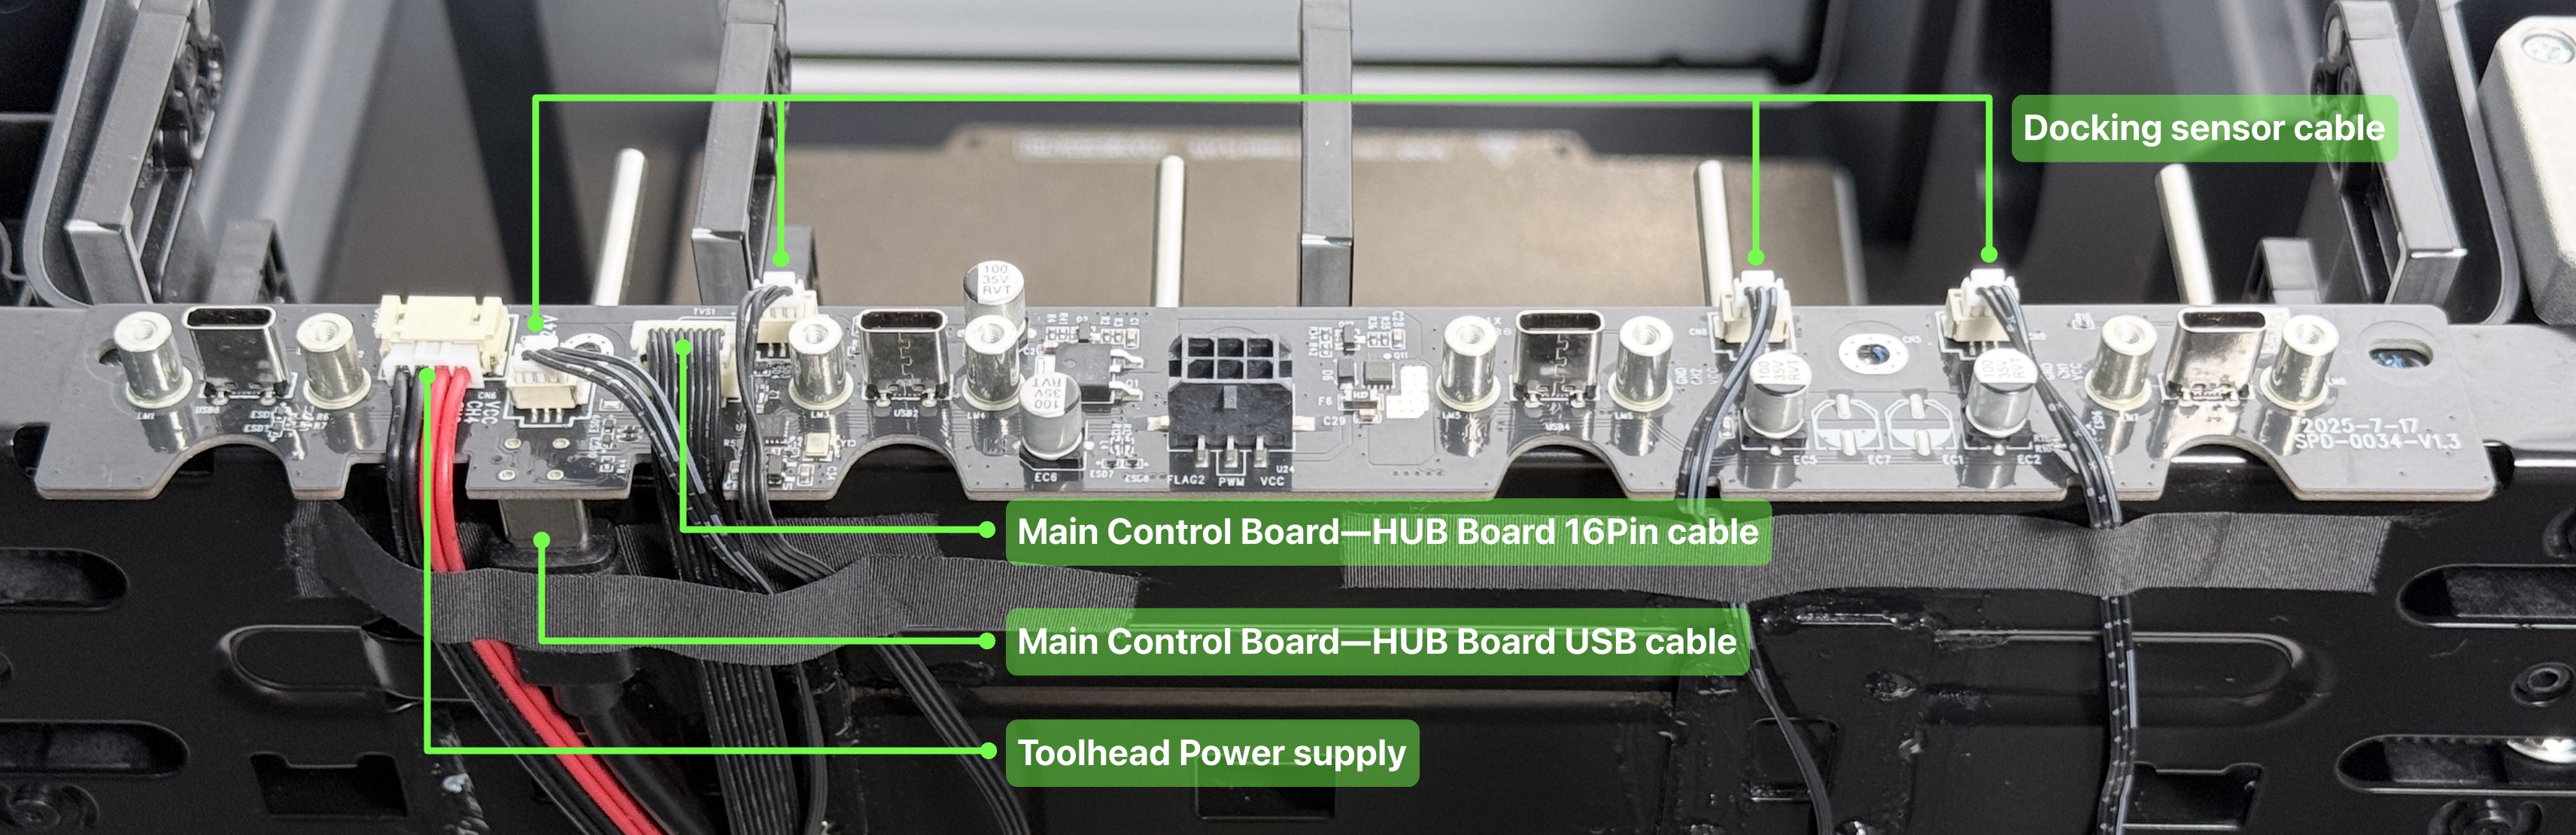
2) Install the new HUB board and restore the wiring (Insert the docking sensor cables from left to right in order; do not cross the cables).
(3) Secure the 2 outer screws of group 4 in their respective positions (the middle screw is shared with the rear panel, so do not install it for now).

Part4 - Restore the machine
(1) Reinstall the rear cover behind the bracket.
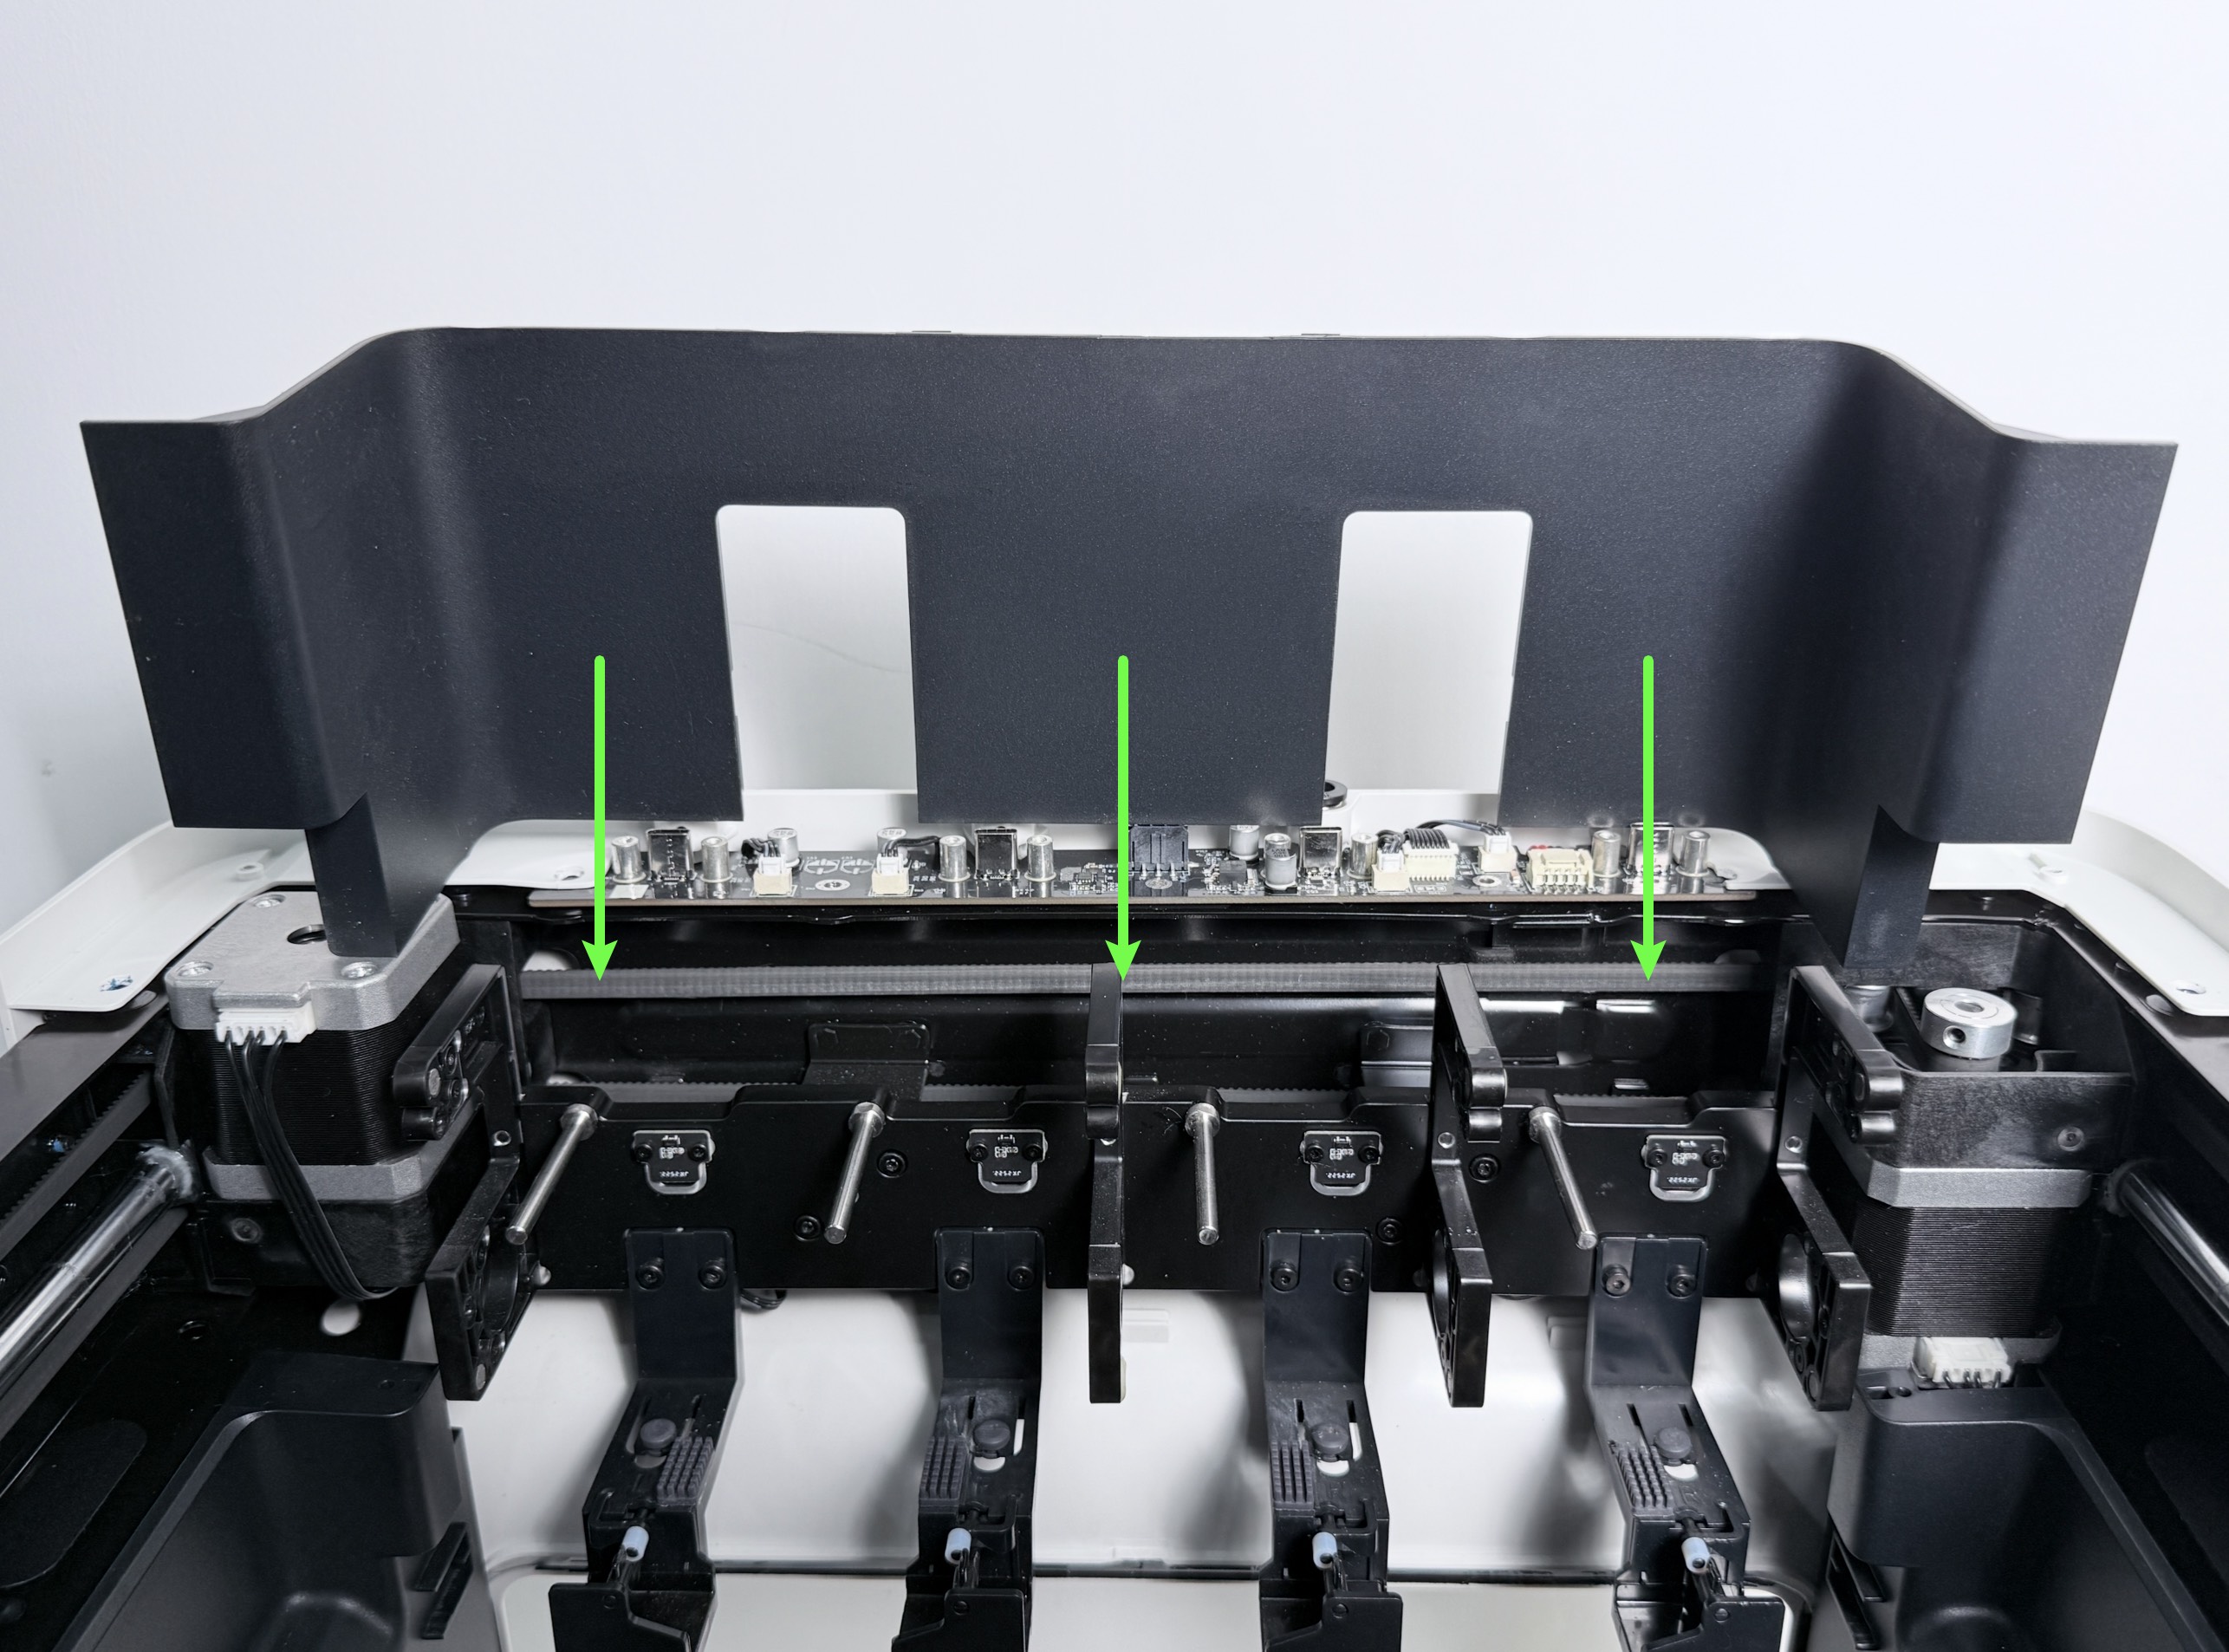
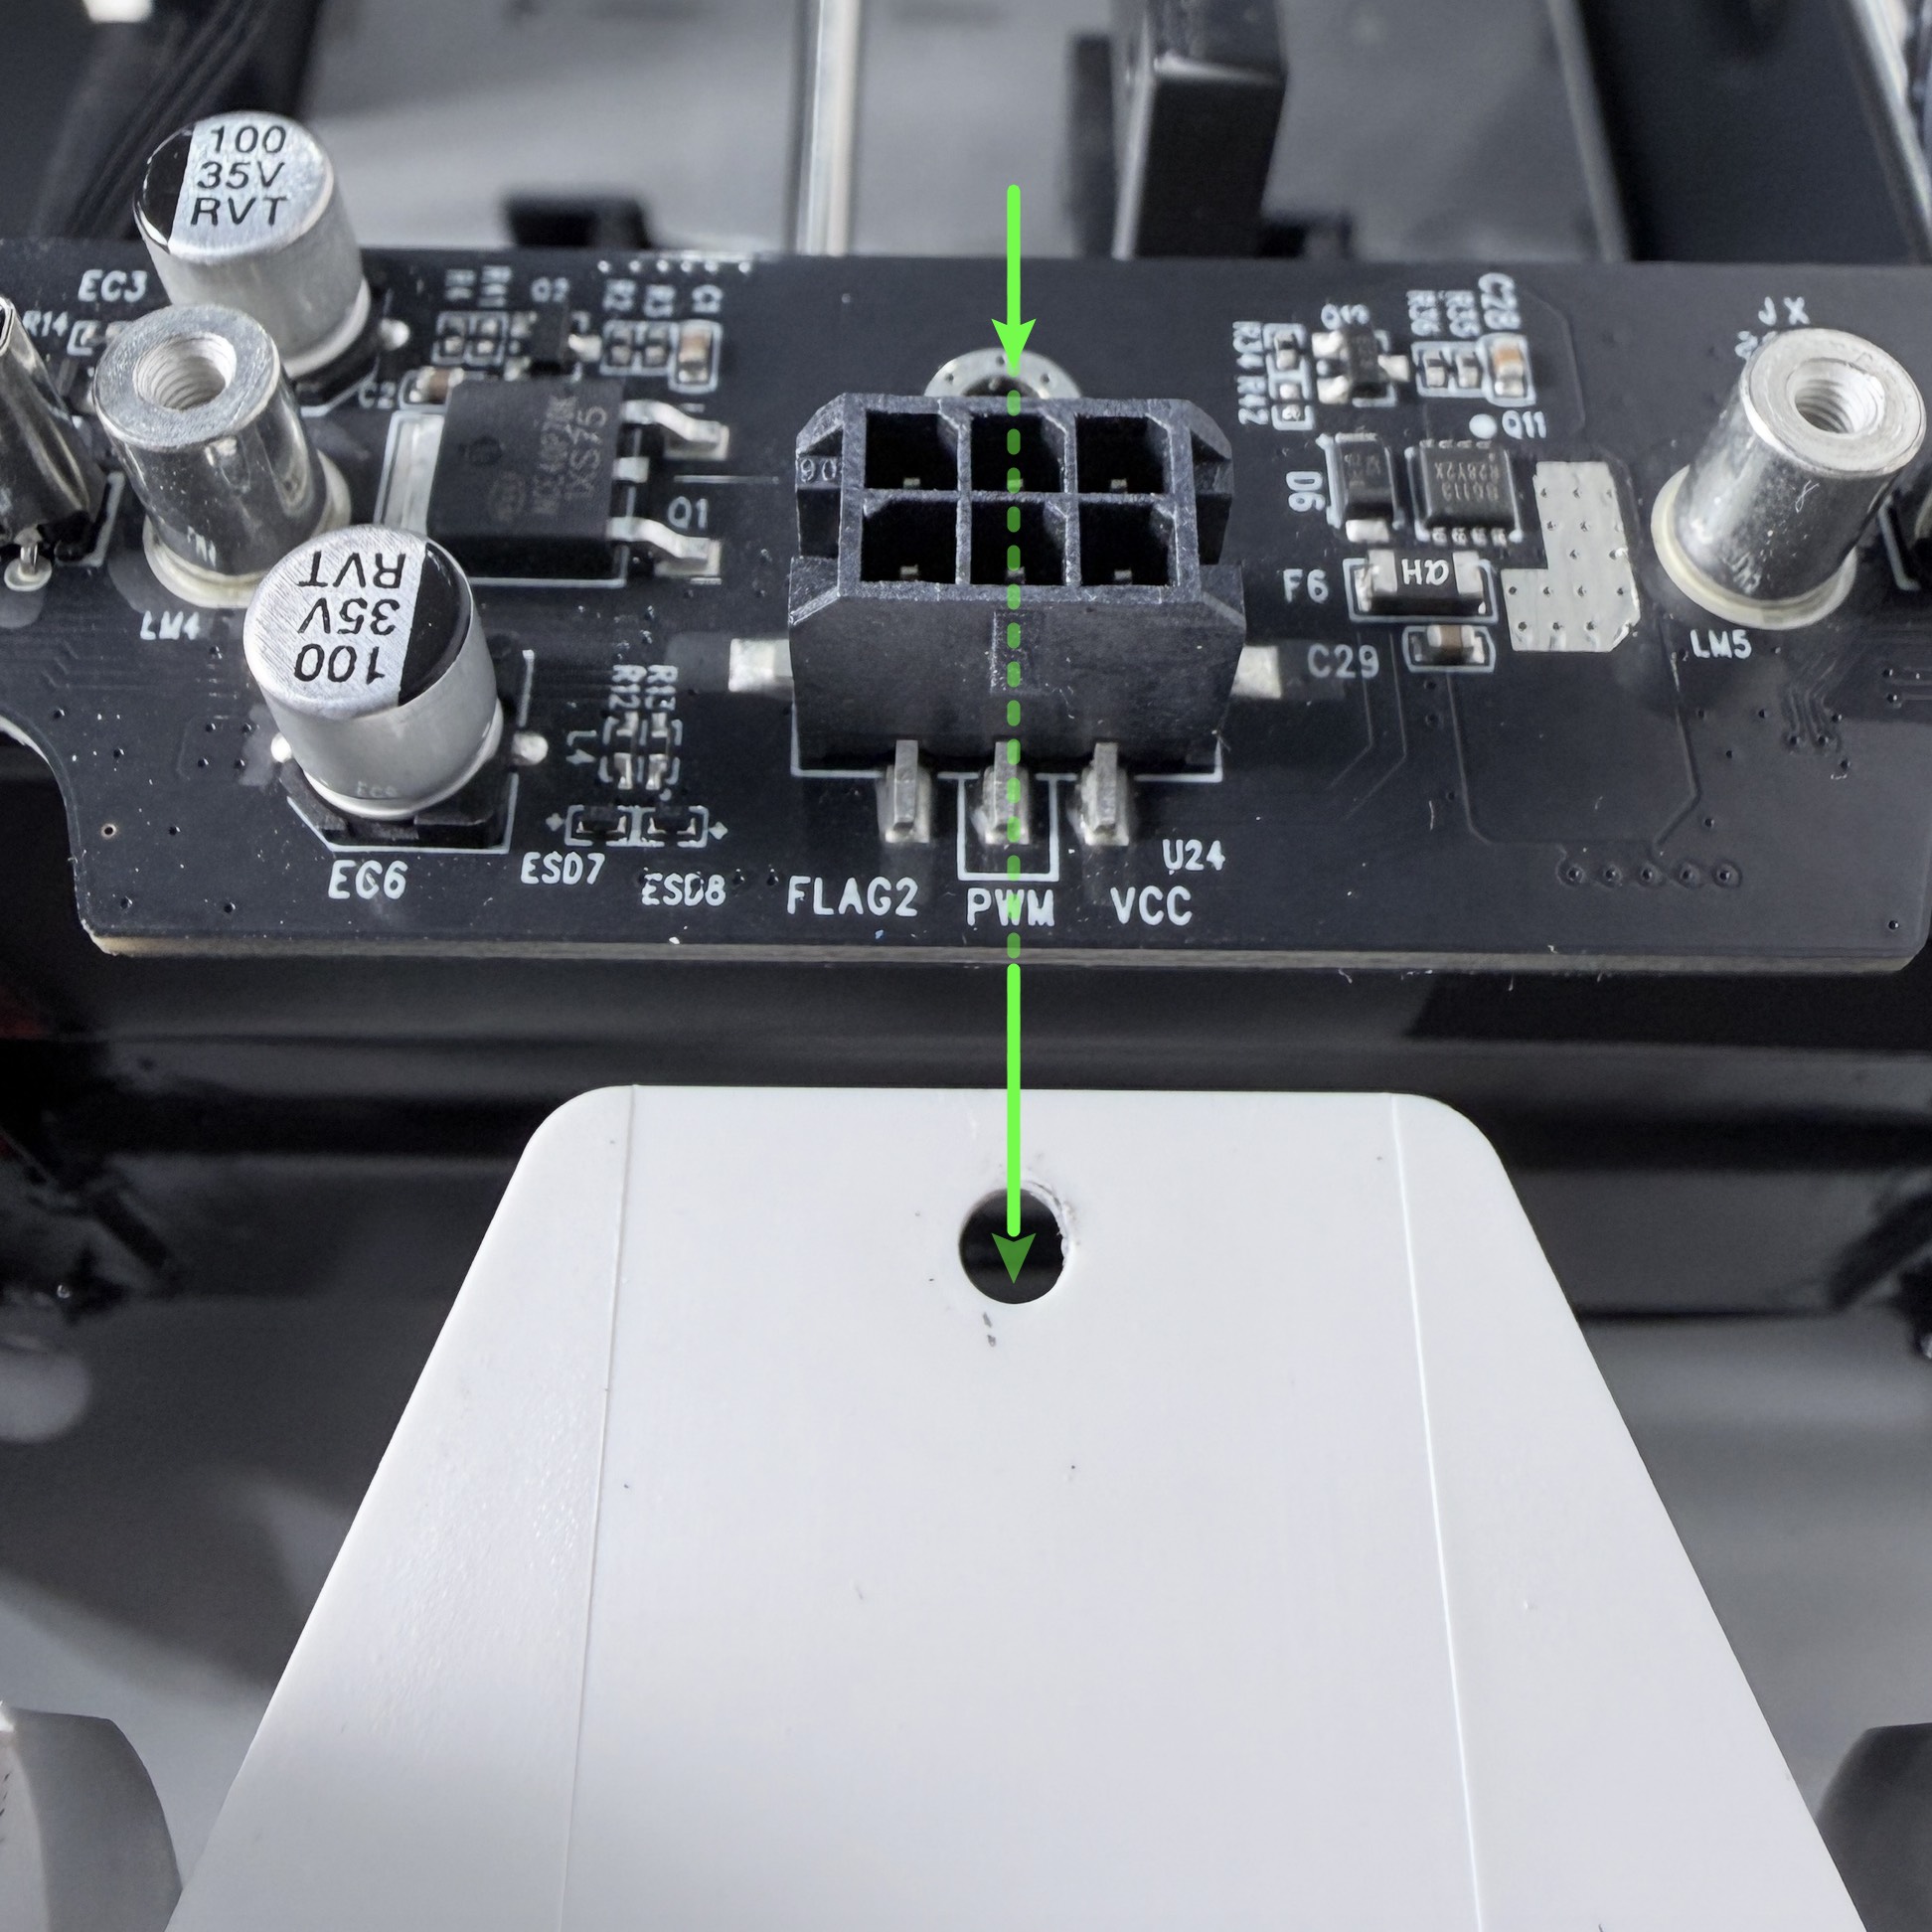
(2) Install the rear panel (make sure the top center hole is positioned beneath the HUB board), then tighten the screws in the following order: group 11, the middle screw of group 4, and group 3.

(3) Route the feeder cable through the side panel, reconnect the RFID cables, and reinstall the left and right side panels. Then tighten screw groups 6, 7, 8, 9, 1, and 2 in order.
(4) Install the top panel, tighten the screws, and then reinstall the silicone plugs.