


for Creality i7 Mainboard Cooling Fan
Couldn't load pickup availability
Use this text to encourage communication or promote sharing on social networks.
【Official Original, Perfect Compatibility】This i7 Mainboard Cooling Fan is an official Creality replacement, engineered exclusively for the SparkX i7 mainboard. It installs directly without modification, restoring full cooling performance in minutes.
【Stable Mainboard Temperature Control】As the dedicated The Mainboard Cooling Fan, this fan delivers consistent airflow to the control board. It prevents overheating during long print runs, maintaining stable electronics performance.
【Prevents Thermal Throttling and System Errors】By keeping the mainboard at optimal operating temperature, this fan eliminates performance drops caused by heat buildup. It prevents unexpected shutdowns, communication errors, and print interruptions.
【Low-Noise, High-Efficiency Operation】Built with precision bearings and balanced blades, this fan runs quietly even at full speed. It provides effective cooling without disruptive noise, ideal for home and office printing setups.
【Durable, Long-Lasting Performance】Crafted with high-quality materials and a reinforced frame, this cooling fan resists wear and fatigue. Rigorously tested for continuous use, it outlasts generic fans and reduces maintenance needs for your i7 printer.
i7 Mainboard Cooling Fan Replacement Guide
Required Tools
H2.0 Hex Wrench
Mainboard Cooling Fan
Procedure
Before starting, power off the printer and unplug the power cable.
Carefully lay the printer on its back to expose the bottom cover.
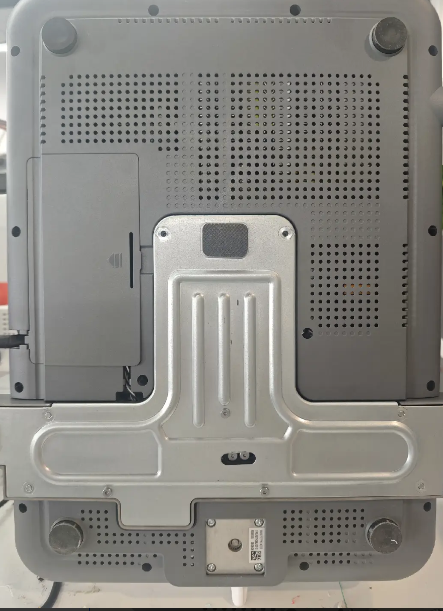
Remove the small cover on the bottom housing to access the internal wiring and screws.

Use an H2.0 hex wrench to remove the screws on the bottom cover (11 screws in total).

Disconnect all cables from the cable slots.
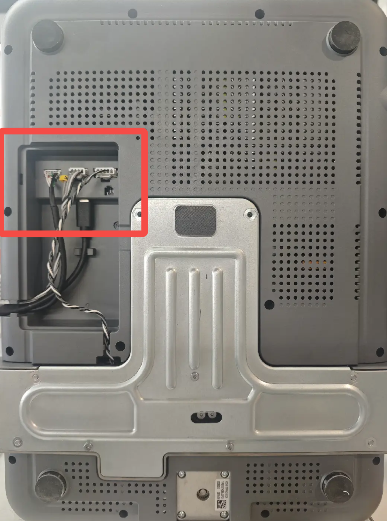
Remove the bottom cover. You may use a prying tool to assist from the edges if needed.
Use the H2.0 hex wrench to remove the two screws securing the fan, then disconnect the fan cable to remove the fan.
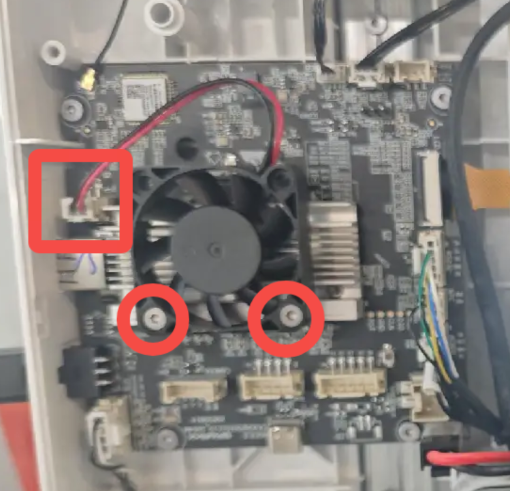
Prepare the new fan. Install it onto the heatsink in the correct orientation as shown, align the screw holes, tighten the screws, and reconnect the fan cable.

Reinstall the bottom cover, ensuring that no cables are pinched.

Reinstall the 11 screws and reconnect all cable connectors. The connectors are keyed by length and orientation—do not force them into place.

Snap the cover back into place. Return the printer to its upright position, then reconnect power and resume use.
