


Bambu Lab Toolhead Cable for P2S
Couldn't load pickup availability
Use this text to encourage communication or promote sharing on social networks.
![]() Toolhead Cable Replacement Guide for the P2S
Toolhead Cable Replacement Guide for the P2S
![]() Toolhead Cable
Toolhead Cable
The toolhead cable connects the printer’s MC board to the TH board and serves as the communication line for the toolhead’s control and data exchange.
The accessories for the toolhead cable include the following:
- Toolhead cable* 1
When to Use This Guide
- The toolhead cable is damaged.
- Bambu Lab technical support determined that the toolhead cable needs to be replaced.
Removing the Toolhead Cable
Step 1: Remove the PTFE Tube Bracket, Filament Buffer, and Rear Panel
Refer to the disassembly section of the guides below to remove the PTFE tube bracket, filament buffer, and rear panel in sequence:
Replace the PTFE tube bracket
Replace the Filament Buffer
Replace the Rear PanelStep 2: Remove the TH board
Refer to the wiki page Replacing the Toolhead Circuit Board to remove the TH board.
When removing the toolhead housing, only the toolhead rear cover should be removed.
Step 3: Remove the AP board cover
You can refer to this wiki to remove the AP board cover: Replacing the AP Board Cover
Step 4: Remove the Toolhead Cable
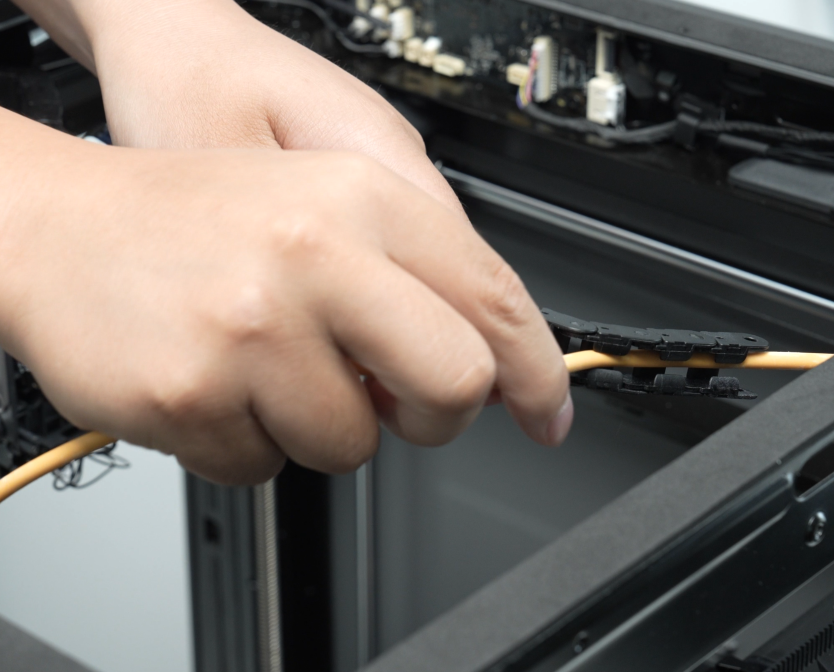
Open the cable chain bracket and remove the buckle from the cable chain.
 Rotate the cable chain bracket to release the toolhead cable from it.
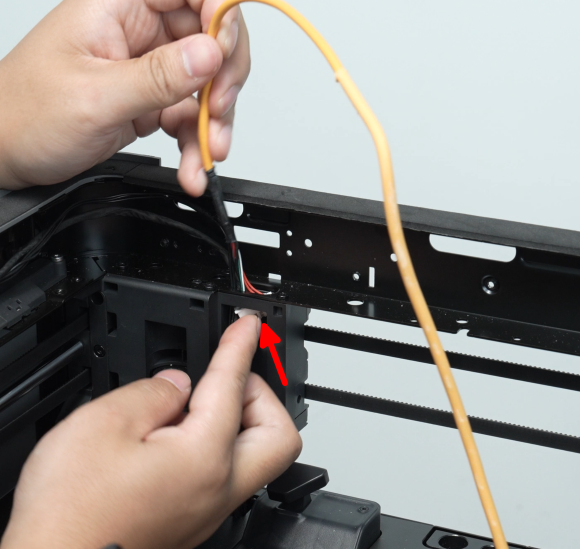
 Disconnect the toolhead cable from the MC board, release it from the two clips on the frame one by one, and then pull it upward to remove it.
Installing the Toolhead Cable
Step 1: Connect the Toolhead Cable to the MC Board
Pass the end of the toolhead cable that connects to the MC board through the through-holes on the top of the frame and the liner.

Connect the toolhead cable to the MC board and arrange the cables neatly.

Step 2: Install the Toolhead Cable Into the Cable Chain
Secure the toolhead cable into the cable chain.
 Starting from the toolhead side, install the cable chain clip onto the 12th section of the cable chain.
Step 3: Install the TH board
Refer to the wiki page Replacing the Toolhead Circuit Board" to install the TH board and toolhead housing.
Step 4: Install the AP cover
You can refer to this wiki to remove the AP board cover: Replacing the AP Board Cover | Bambu Lab Wiki
Step 5: Install the Rear Panel, Filament Buffer, and PTFE tube bracket
You can refer to the installation section of the Wikis below to install the rear panel, filament buffer, and PTFE tube bracket in sequence.
Verifying Functionality
Connect the power supply, turn on the printer, and perform device calibration. If the calibration passes, the replacement is successful.