


Anti-Vibration Feet Pad for Bambu H2 Series
Couldn't load pickup availability
Use this text to encourage communication or promote sharing on social networks.
Compatible Fit for Bambu Lab: H2D/H2S anti vibration feet exclusively designed to match the Bambu Lab H2D/H2S 3d printer, ensuring seamless integration without disassembly or modifications.
Advanced Vibration & Noise Control: Effectively filters vibrations and reduces operating noise, eliminating vibration marks for smoother, higher-quality prints.
Tool-Free, Beginner-Friendly Install: Simply lift the printer, align the pad with the base groove, and set it down—installation takes seconds, no tools required.
Proven Print Quality Upgrade: Visible before/after results show reduced vibration-induced defects, delivering cleaner layers and professional-grade finishes.
Package Included: 4 X Anti-Vibration Feet (with adhesive backing), 4 X Screw, 4 X Gasket
To minimize vibrations: Soft vibration-damping feet offer superior isolation performance, effectively blocking external vibrations, even when multiple machines are operating simultaneously, there will be no interference, making prints more stable.
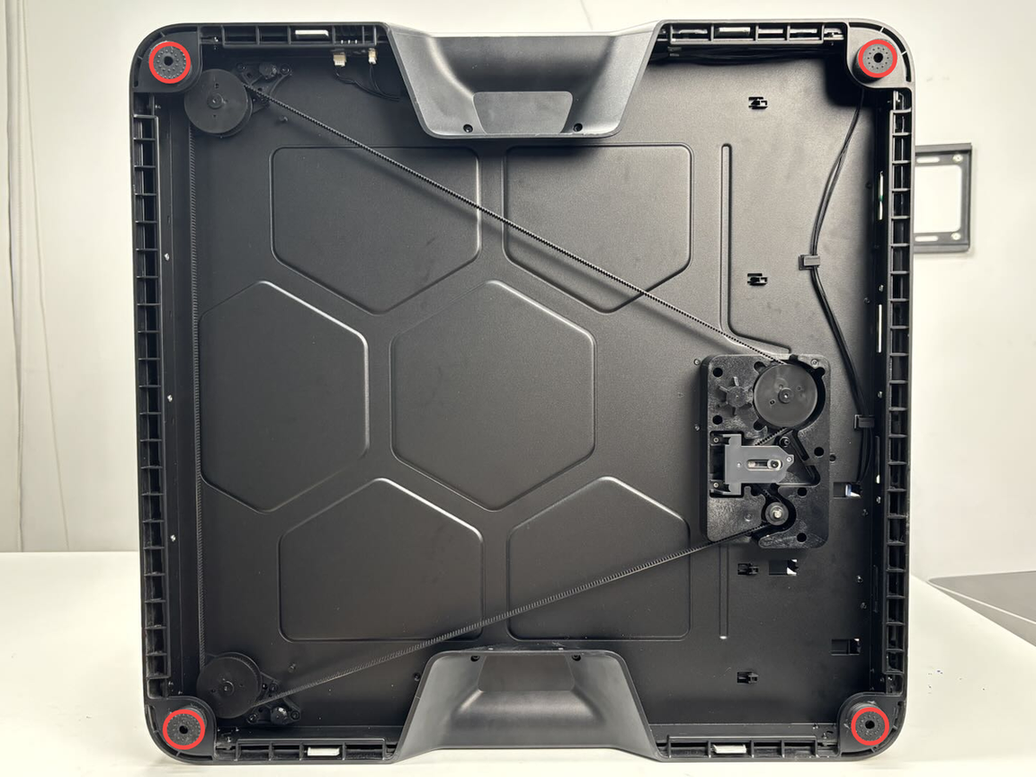
Installation Position: The anti-vibration feet are installed at the bottom of the printer, they attached to the 4 corners of the printer's base using adhesive backing, secured with washers and screws. (NOTE: Given the printer's weight, it is recommended that two people work together to avoid potential damage).
Replace H2 Series Anti-Vibration Feet
This article describes how to replace H2 Series Anti-Vibration Feet
Note: This page uses the H2D machine as an example. The replacement steps are exactly the same for the H2S, and H2C.
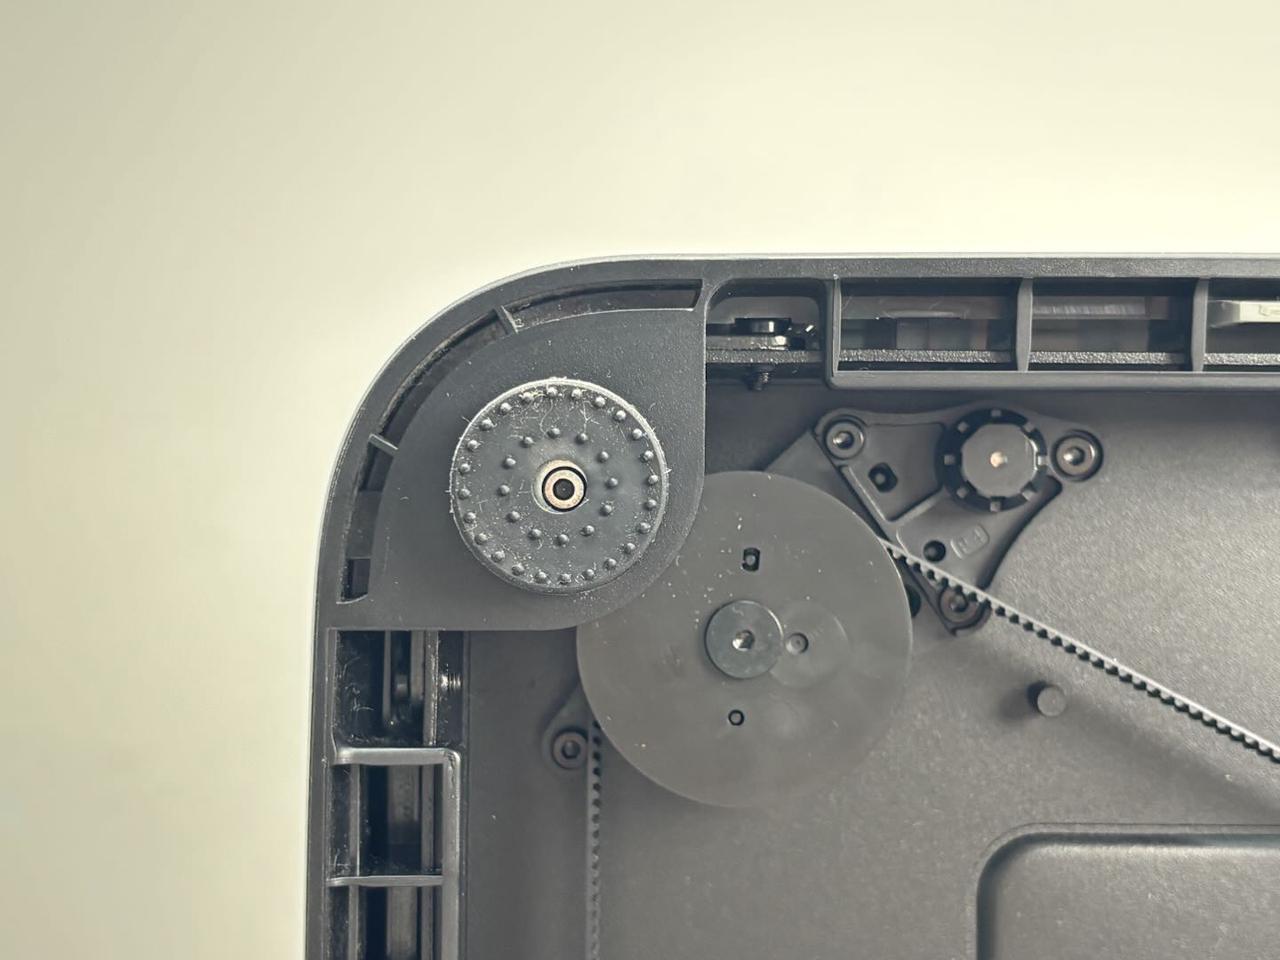
Anti-Vibration Feet
The anti-vibration feet are installed at the bottom of the printer to reduce vibrations during the printing process. The anti-vibration feet are attached to the 4 corners of the printer's base using adhesive backing, secured with washers and screws.
The replacement kit for the printer feet includes the following:
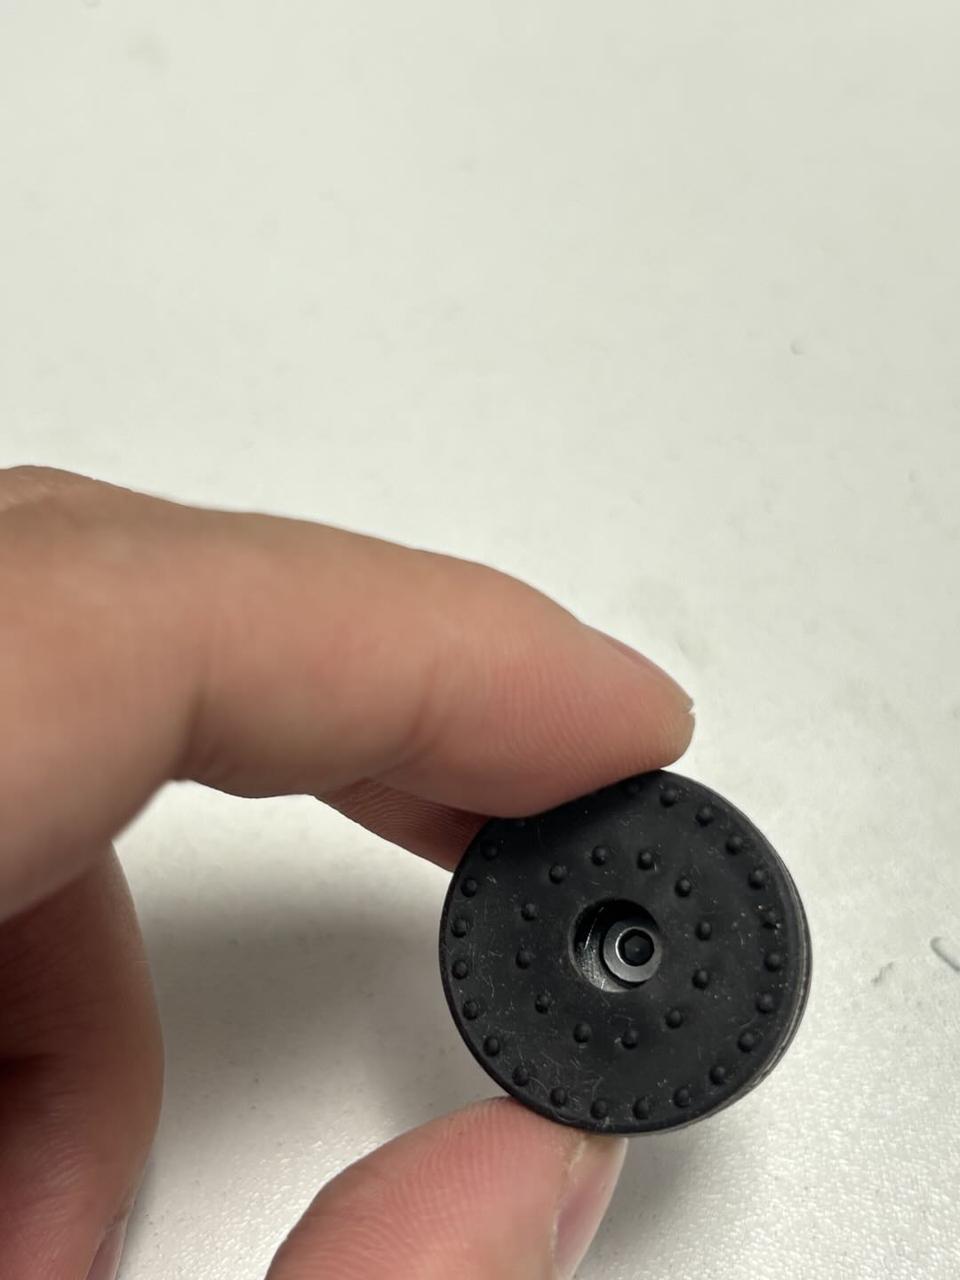
Anti-vibration feet * 4
M3x3.2x10x0.5 washers * 4
M3x21.5x6 screws * 4
When to Use
Replace the anti-vibration feet when they are damaged.
Tools and Materials Needed
New anti-vibration feet
H2.0 Allen key
Specifications and quantities of screws involved in replacing the H2D anti-vibration feet (it is recommended to keep the removed screws properly to avoid loss):

Safety Warning
IMPORTANT!
It's crucial to power off the printer before conducting any maintenance work, including work on the printer's electronics and tool head wires. Performing tasks with the printer on can result in a short circuit, leading to electronic damage and safety hazards.
During maintenance or troubleshooting, you may need to disassemble parts, including the hotend. This exposes wires and electrical components that could short circuit if they contact each other, other metal, or electronic components while the printer is still on. This can result in damage to the printer's electronics and additional issues.
Therefore, it's crucial to turn off the printer and disconnect it from the power source before conducting any maintenance. This prevents short circuits or damage to the printer's electronics, ensuring safe and effective maintenance. For any concerns or questions about following this guide, we recommend submitting a technical ticket regarding your issue.
Remove the anti-vibration feet
Step 1: Lay down the printer
Turn off the printer and disconnect the power cable. Then, lay the printer on its side to facilitate the removal of the printer feet.
Given the printer's weight, it is recommended that two people work together to avoid potential damage.
Step 2: Remove the anti-vibration feet
1.Use the H2.0 Allen key to remove the screw (M3x21.5x6) securing the feet.
Please replace the corresponding printer feet as needed.


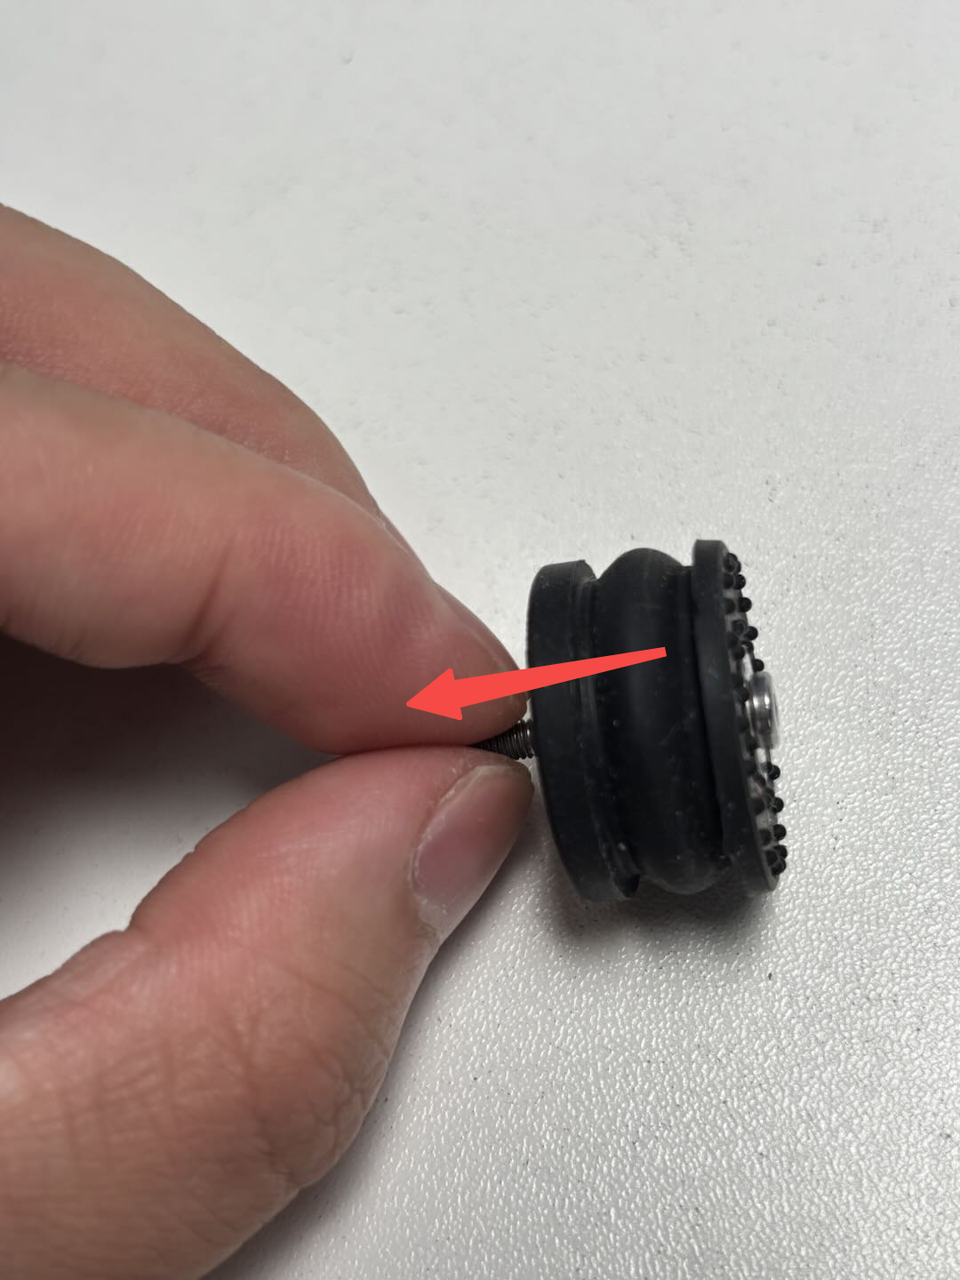
2.Remove the feet, screws, and washers together.
The feet are also attached to the ring with adhesive backing, and can be torn off after removing the screws.
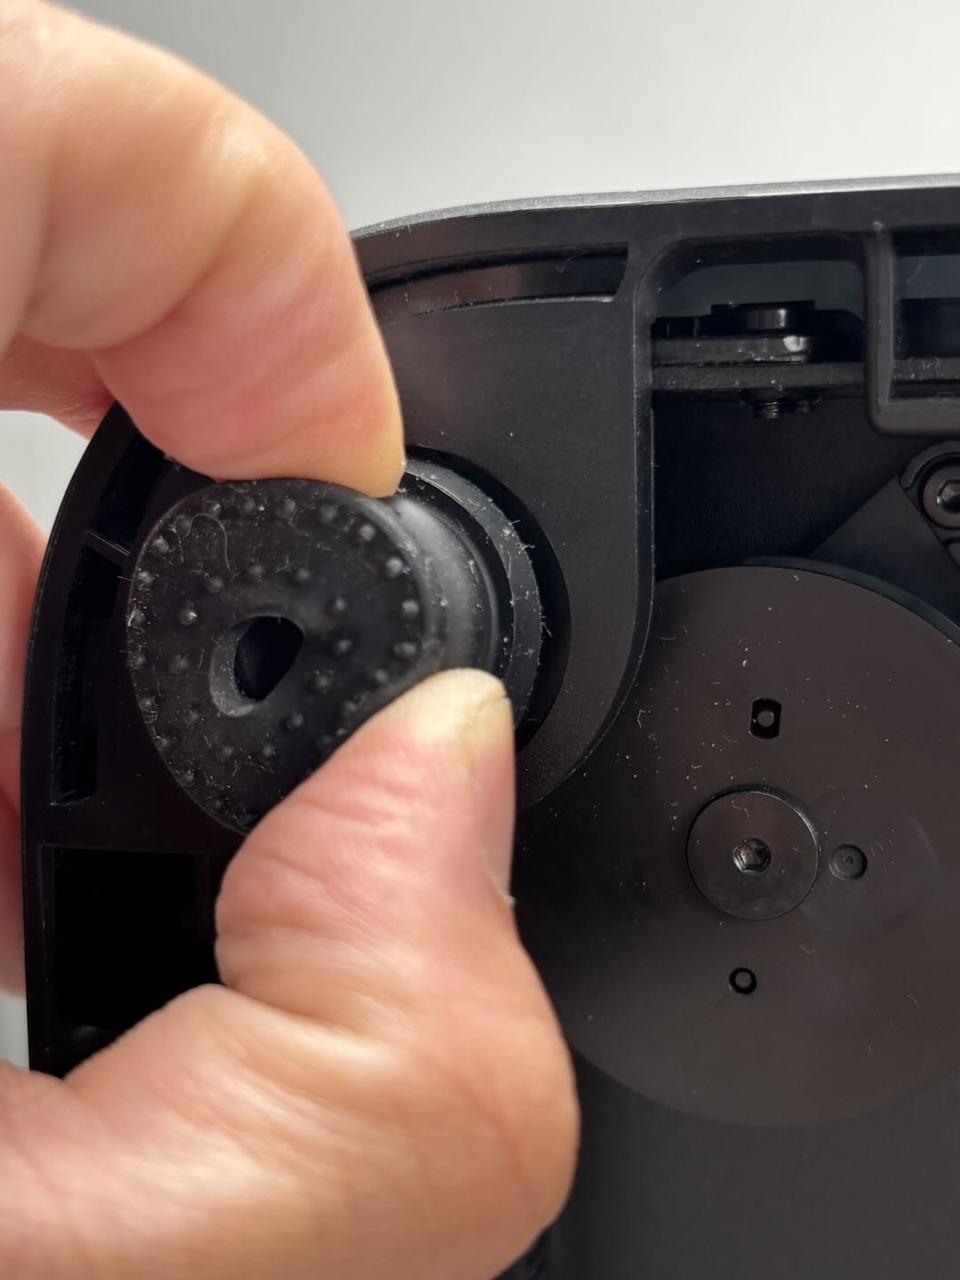

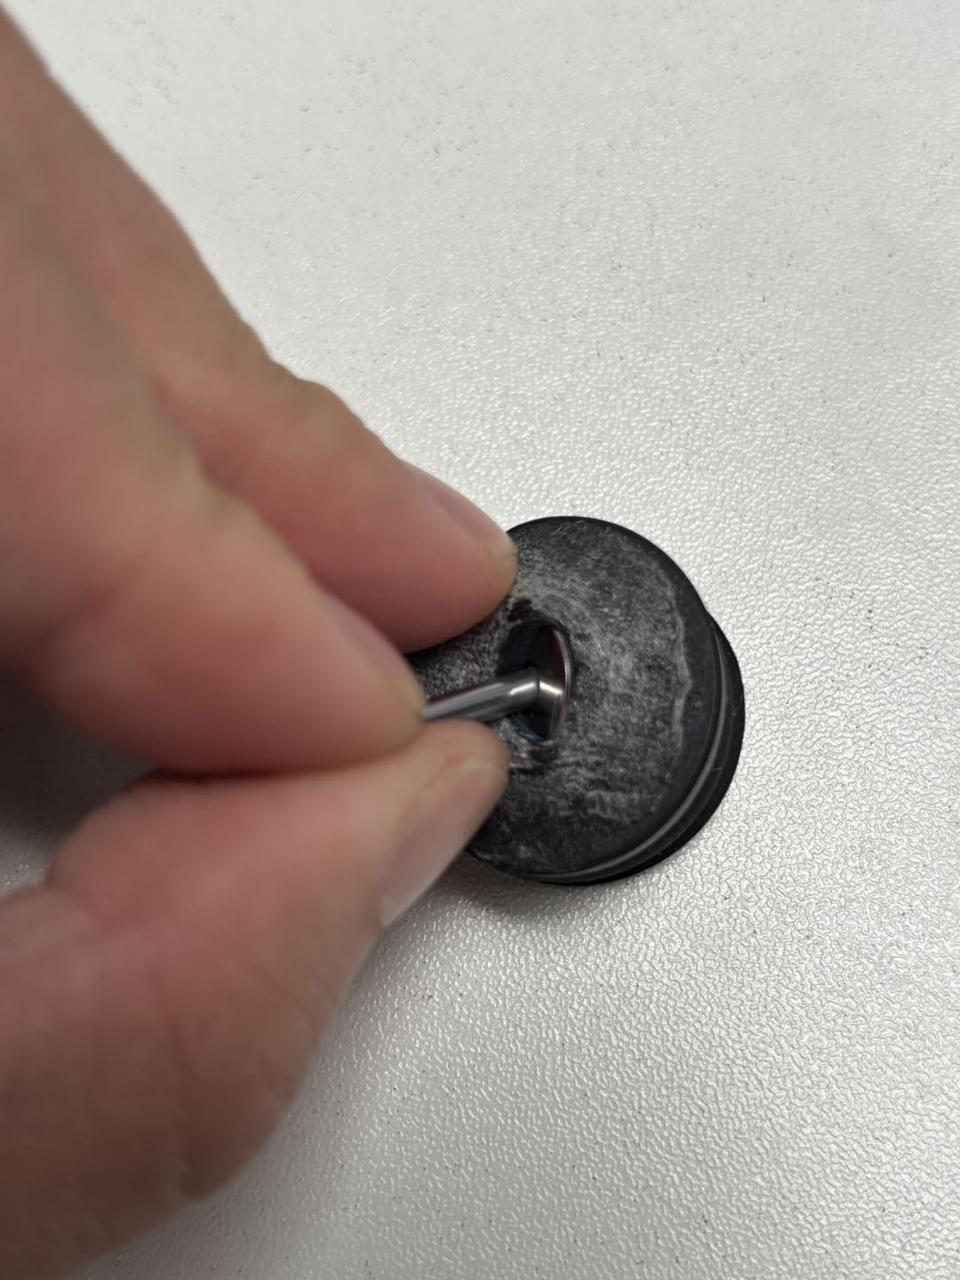
If you need to remove the screw and washer from the feet together, you can pull the screw from the adhesive side and pull the washer and screw out of the feet together.
Install the anti-vibration feet
Step 1: Install the anti-vibration feet
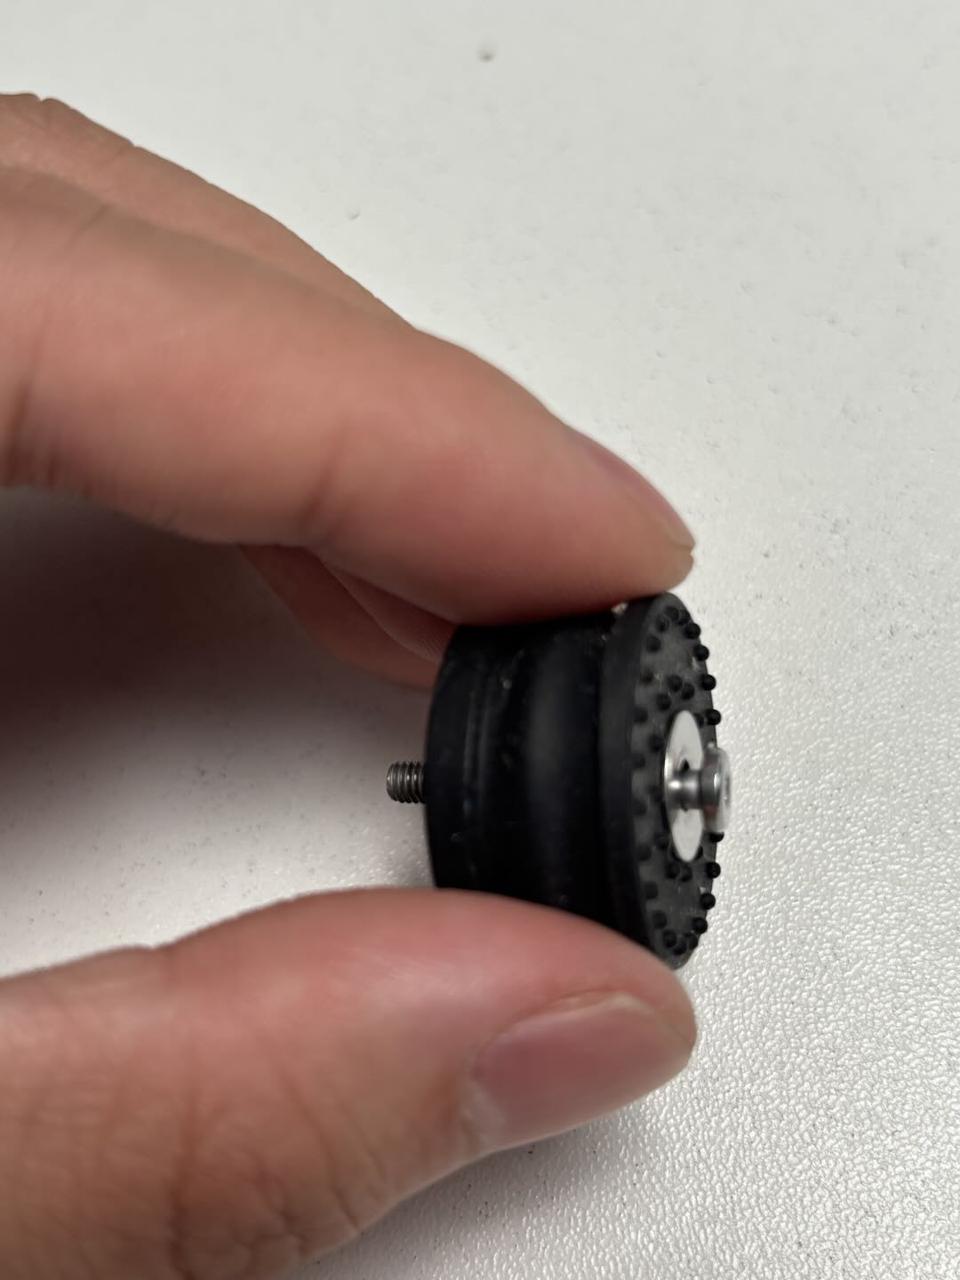
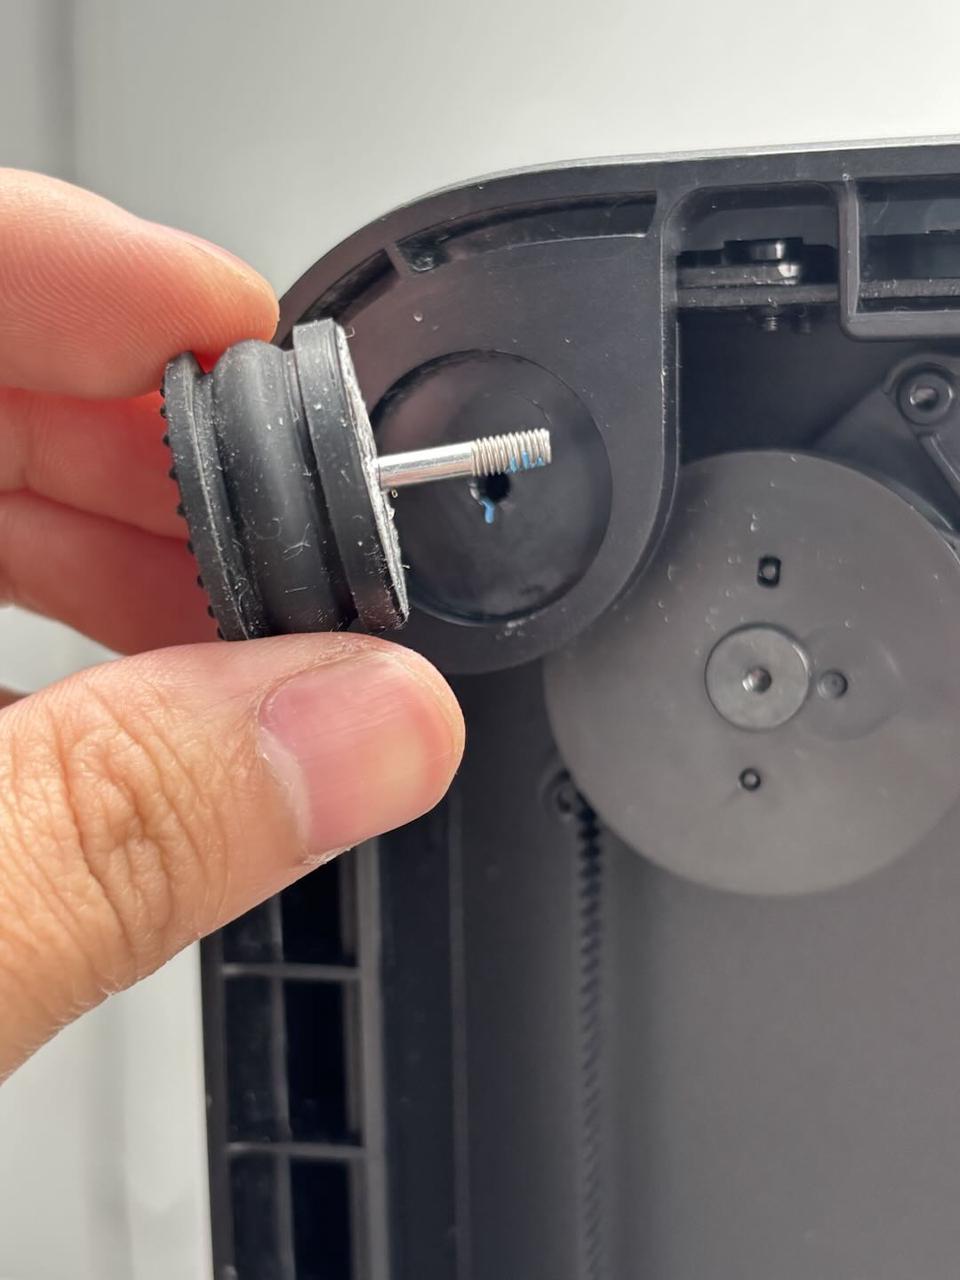
1.Thread the washers onto the screws (M3x21.5x6), then insert the screws and washers into the feet. Pull the bottom of the screws by hand to secure the washers and screws into the feet.
2.Peel off the adhesive backing of the new feet, align the screws with the holes, and install the feet and screws together. Press the feet firmly to adhere them to the ring, then use the H2.0 Allen key to tighten the fixing screws (M3x21.5x6).
The remaining three feet can be installed using the same method.

Step 2: Place the printer upright
Place the printer flat on the table, ensuring it is stable and does not wobble.
Given the printer's weight, it is recommended that two people work together to avoid potential damage.
Verify the Functionality
Make sure the printer is placed upright without any shaking.