


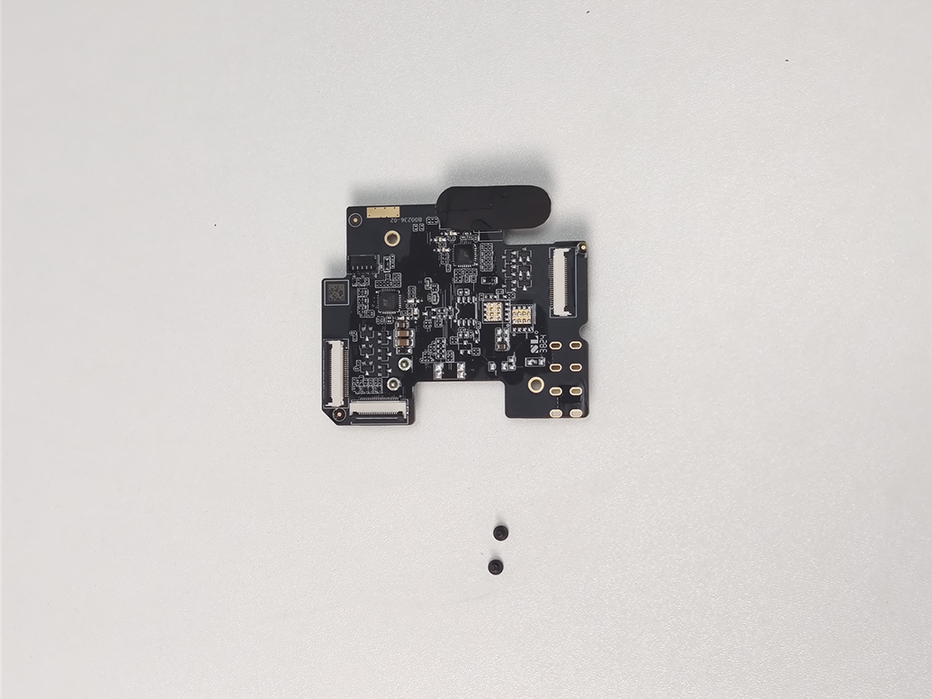
Extruder Connection Board for Bambu Lab H2D / H2C
Couldn't load pickup availability
Use this text to encourage communication or promote sharing on social networks.
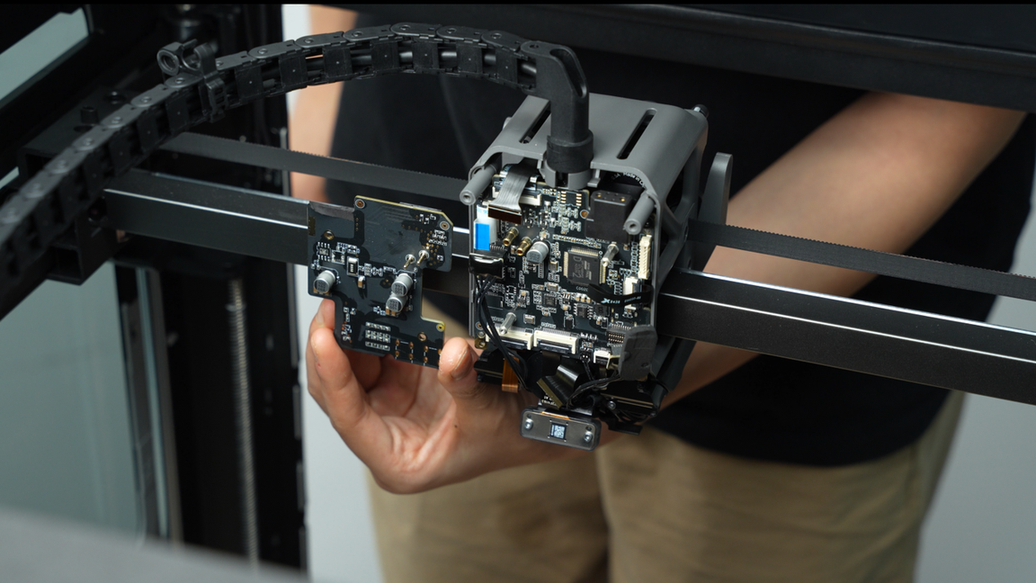
The Extruder Connection Board is installed on the back of the toolhead and primarily serves to connect and manage the electrical signals and power supply for the extruder. It acts as an interface between the extruder components and the main control system, ensuring stable operation of sensors, heating elements, and motors.
Installation
Learn more about H2D Extruder Connection Board on Bambu Lab Wiki.

Learn more about H2C Extruder Connection Board on Bambu Lab Wiki.

In the Box
For H2D
- H2D Extruder Connection Board*1
- M1.6-4 Screw*2
For H2C
- Extruder Connection Board*1
- M1.6x4 Screw *2
- Thermal Silicone Pad *1
Compatibility
H2D and H2D Laser
H2C and H2C Laser
Extruder Connection Board Replacement Guide for the H2C
This article will provide you with a detailed guide on the step-by-step process and important considerations for replacing the extruder connection board on your H2C.
Extruder Connection Board
The extruder connection board is located on the back of the toolhead and linked to the TH board through an FPC cable.
The accessories included with the extruder connection board are as follows:
Extruder connection board * 1
M1.6x4 screws - for securing the extruder connection board * 2
Thermal conductive silicone pad * 1
Required Tools and Materials
New extruder connection board
H2.0 hex wrench
H1.5 hex wrench
Safety Warning
It's crucial to power off the printer before conducting any maintenance work, including work on the printer's electronics and tool head wires. Performing tasks with the printer on can result in a short circuit, leading to electronic damage and safety hazards.
During maintenance or troubleshooting, you may need to disassemble parts, including the hotend. This exposes wires and electrical components that could short circuit if they contact each other, other metal, or electronic components while the printer is still on. This can result in damage to the printer's electronics and additional issues.
Therefore, it's crucial to turn off the printer and disconnect it from the power source before conducting any maintenance. This prevents short circuits or damage to the printer's electronics, ensuring safe and effective maintenance.
Removing the Old Extruder Connection Board
Step 1: Remove the Part Cooling Fan and Duct
You can refer to the H2C Part Cooling Fan Replacement Guide or the video below (first 1 minute 40 seconds) to remove the part cooling fan and part cooling fan duct.
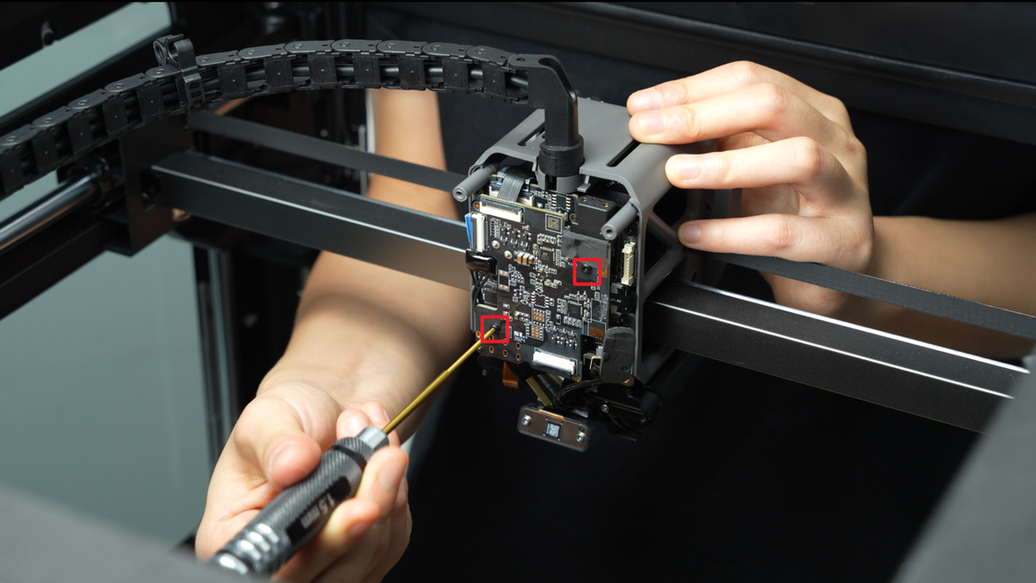
Step 2: Remove the Extruder Connection Board
Disconnect the 2004 switching motor FPC plug (#1), the TH board interface FPC plug (#2), and the 2004 lifting motor FPC plug (#3) from the interface board in sequence.
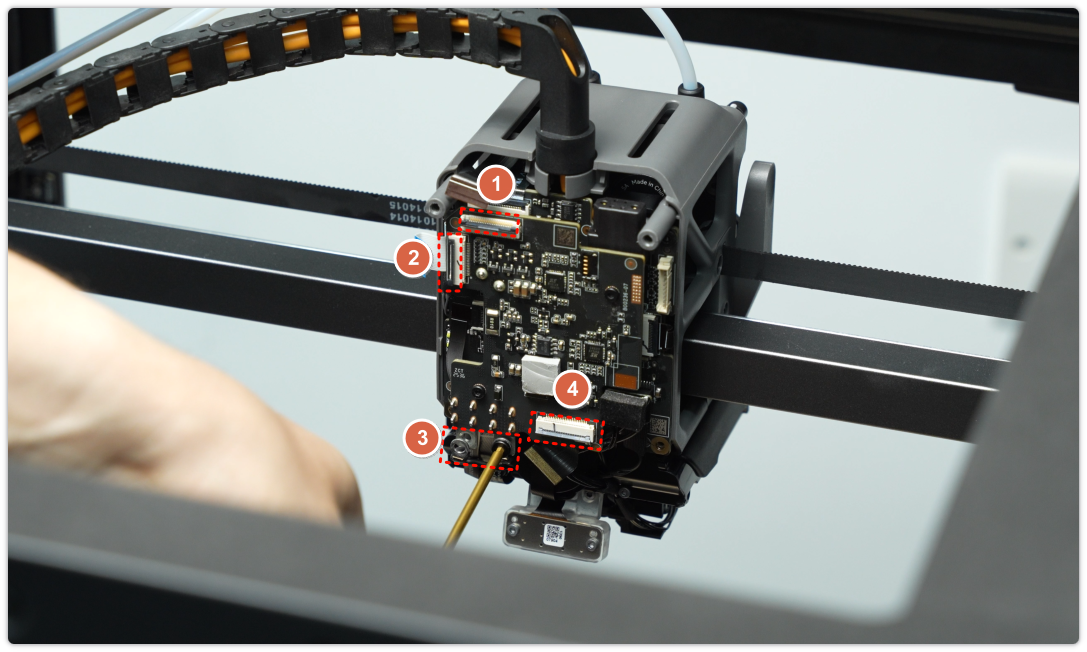

Note: The plugs are secured with clips. Make sure to release them before disconnecting the FPC cable.
Position 1:
Position 2:

Position 3:
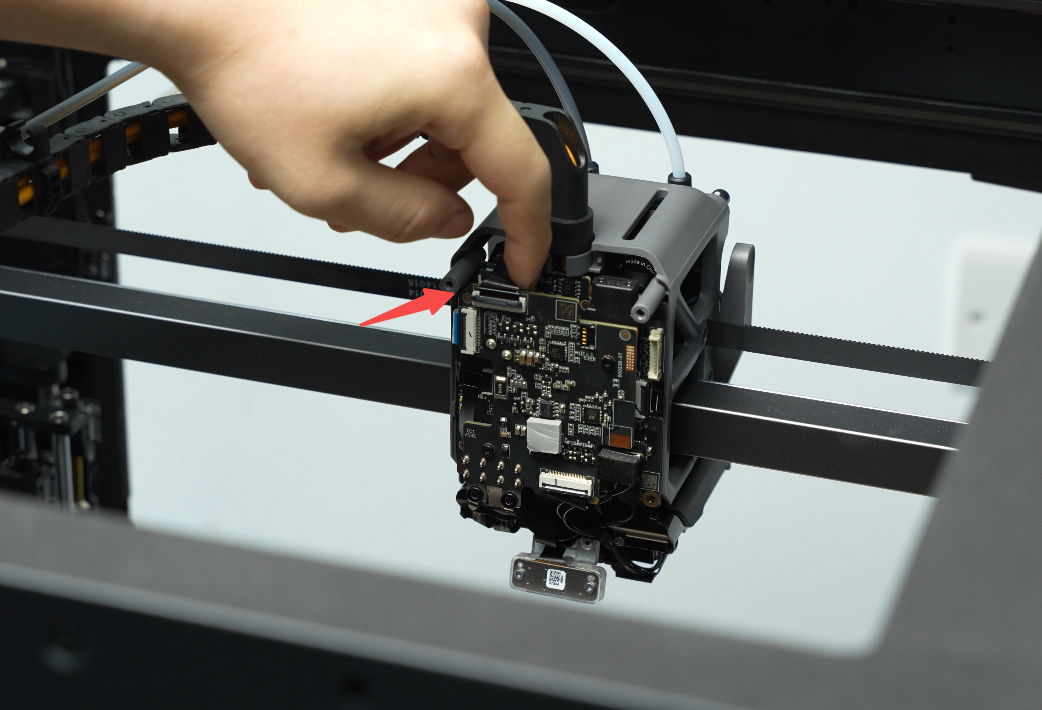
After disconnecting the plugs one by one, use an H1.5 hex wrench to remove the two screws and release the heating element power cable.

Remove the two extruder connection board fixing screws (M1.6x4).

Gently wiggle the extruder connection board near the 2004 motor plug switch, then carefully remove it.

Installing a New Extruder Connection Board
Step 1: Install the Extruder Connection Board
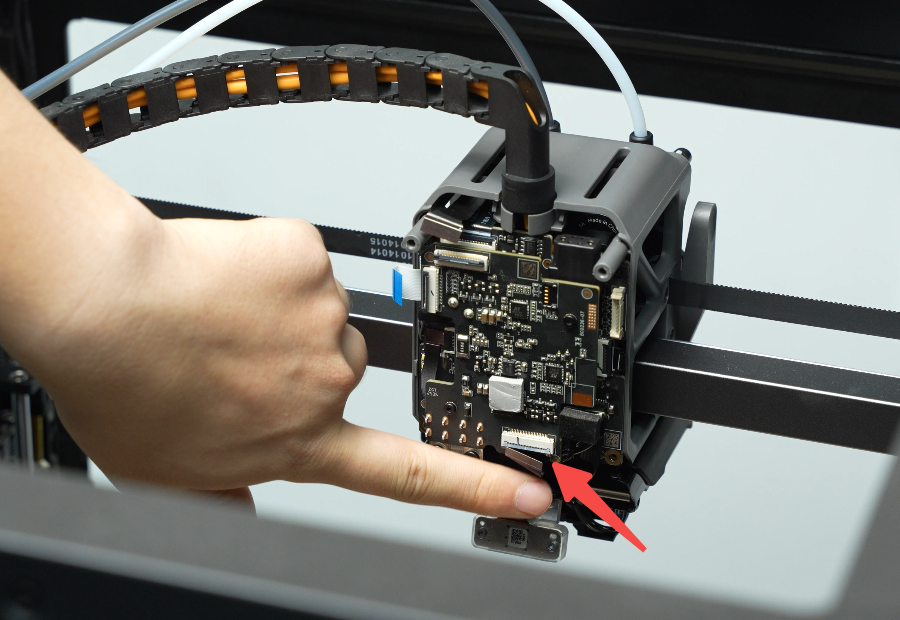
1.Align the pins on the extruder connection board with the slots on the TH board, then mount it in place.
2.Tighten the two retaining screws (M1.6×4) using an H1.5 hex wrench.
3.All plugs are secured with clips. Insert each ribbon cable into its connector on the extruder connection board, then lock the clips once the cables are fully inserted.

Step 2: Install Part Cooling Fan and Duct
You can refer to the installation steps in this Wiki to install the part cooling fan and part
cooling fan duct: Replacing the H2C Part Cooling Fan Guide.
Verifying Functionality
Connect the power supply, turn on the printer and initiate printing, then check if the print job can be successfully completed.
If you encounter any problems, please first go back through your steps and check all connections to try again. If the problem persists, please contact Bambu Lab technical support for further assistance.
Screws Involved
Screw types and quantities required for replacing the H2C extruder connection board, TH board, or FPC cable (keep the removed screws safe to avoid losing them):
BT3x8x4pcs;
ST3x20x2pcs;
BT2.6x8x2pcs;
M1.6x4x2pcs;