


Chamber Exhaust Fan for Bambu Lab H2D/H2C/H2S
Couldn't load pickup availability
Use this text to encourage communication or promote sharing on social networks.
The Chamber Exhaust Fan, mounted on the right inner liner behind the activated carbon filter, vents air from the printer's interior.
Installation
Learn more about the Chamber Exhaust Fan on Bambu Lab Wiki.
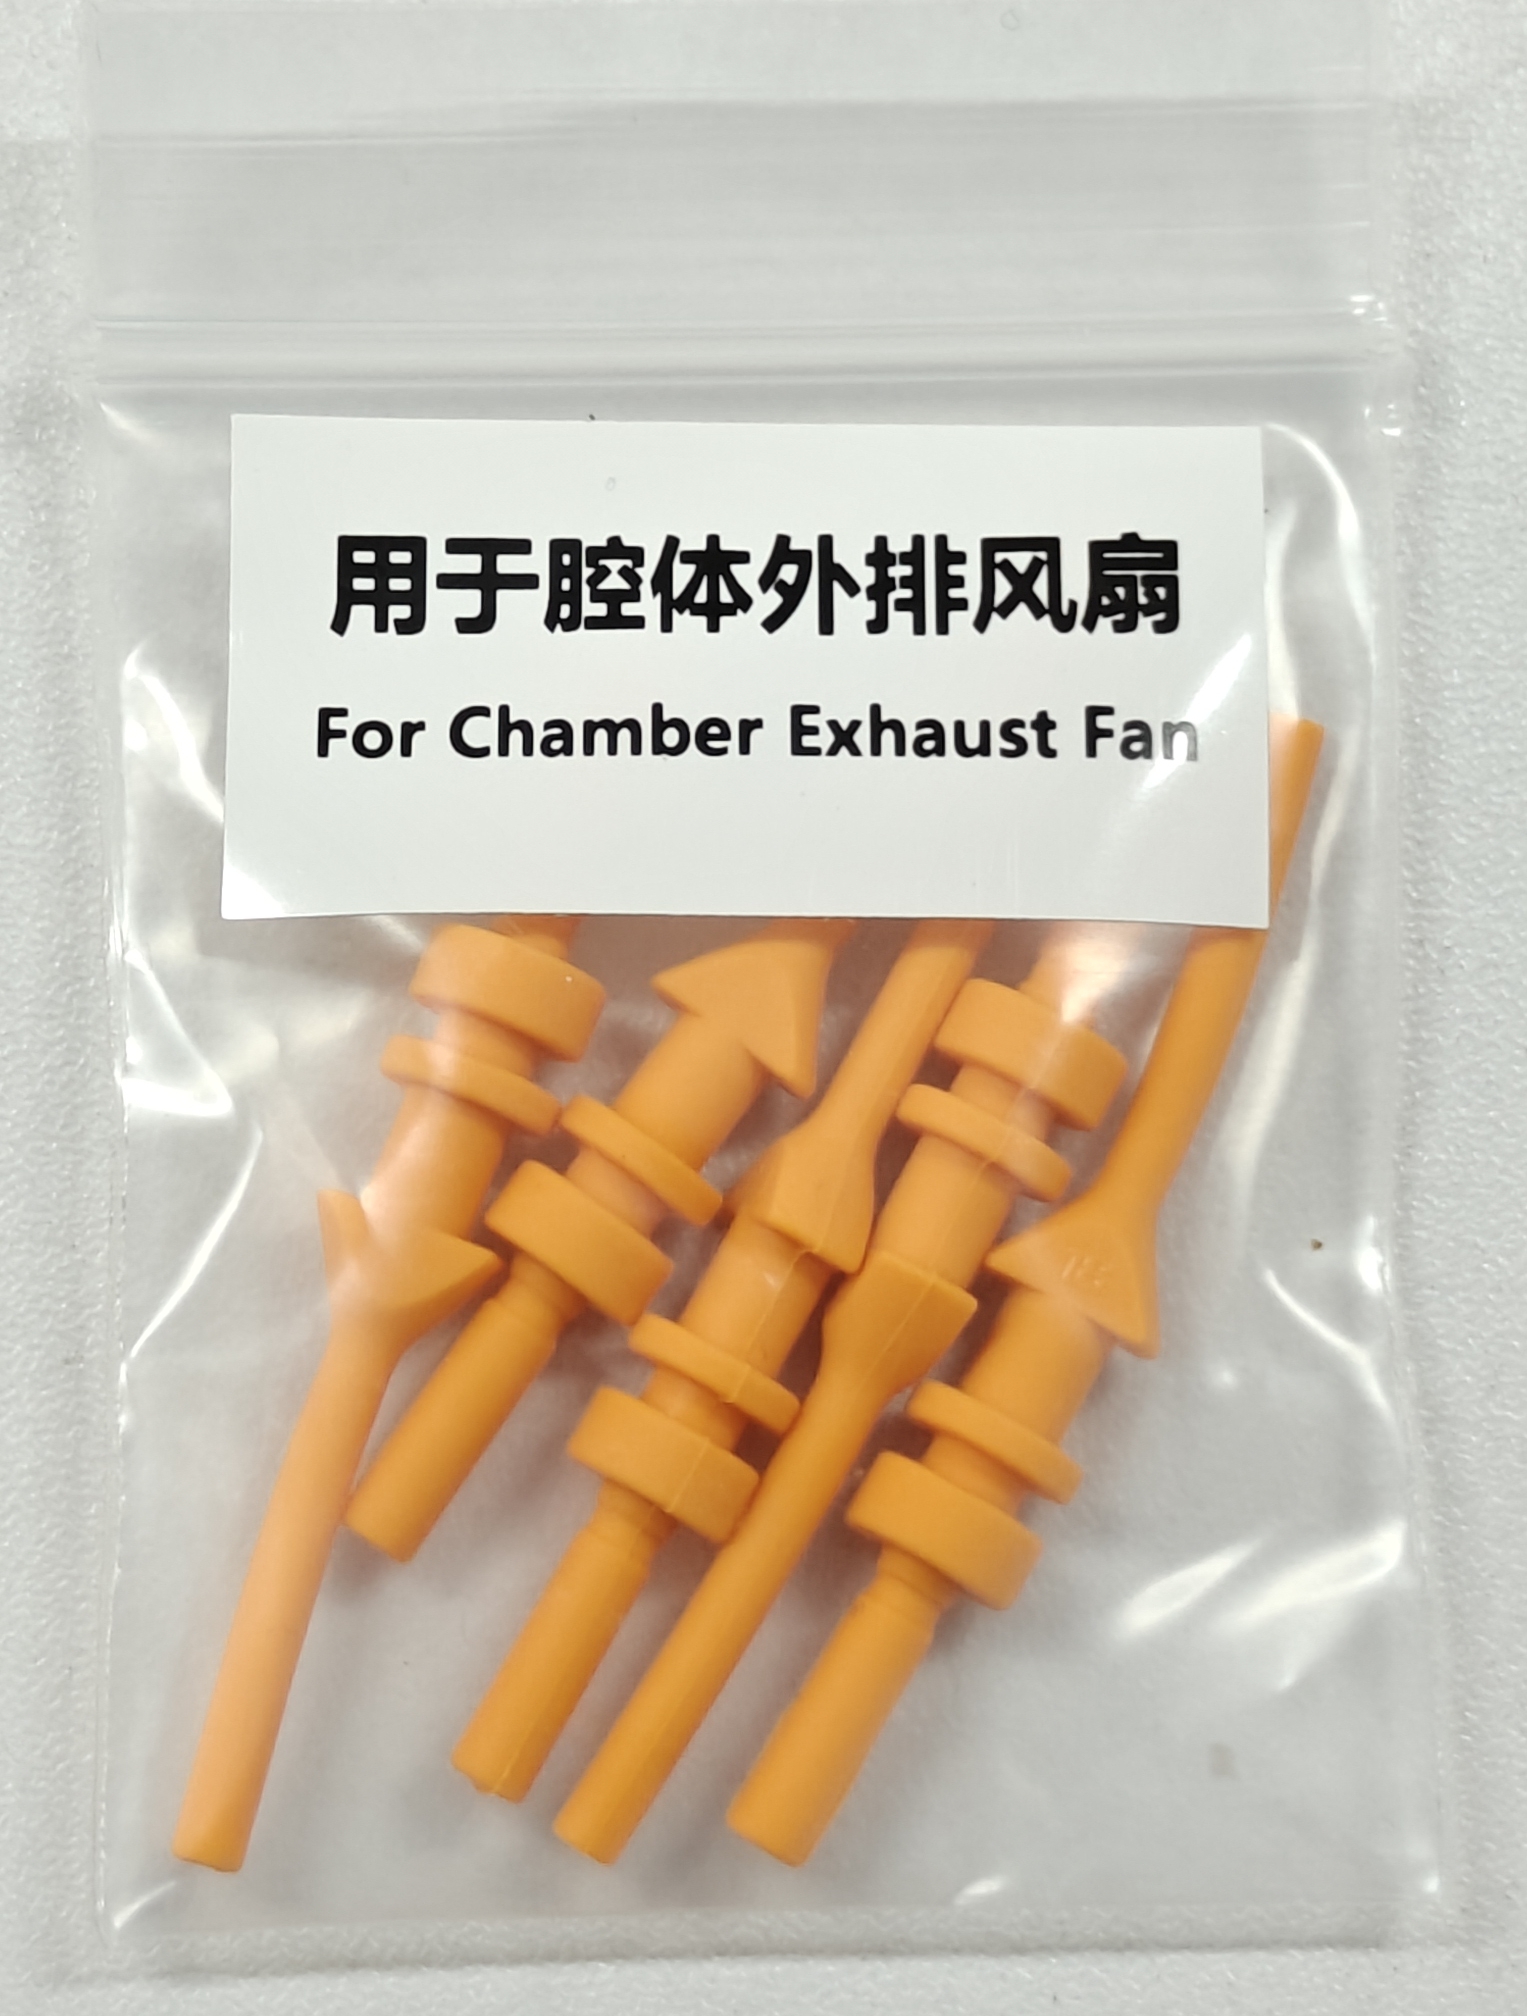
In the Box
- Chamber Exhaust Fan*1
- Soft Screw*6
- Active Chamber Exhaust*2
Compatibility
for Bambu Lab H2D/H2C/H2S
Replace H2D Chamber Exhaust Fan
This article describes how to replace H2D Chamber Exhaust Fan
Chamber Exhaust Fan
The chamber exhaust fan is installed on the right inner lining of the printer, behind the activated carbon air filter, and is used to vent air from inside the printer to the outside.
The spare parts for the chamber exhaust fan include the following:
1.Chamber exhaust fan * 1
2.Active chamber exhaust * 2
3.Soft screws * 4
When to Use
Fan is squeak
Fan is damaged
Tools and Materials Needed
1.New chamber exhaust fan
2.H2.0 Allen key
Specifications and quantities of screws involved in replacing the H2D chamber exhaust fan (it is recommended to keep the removed screws properly to avoid loss):
BT3x8x12pcs;
ST3x8x11pcs;
ST3x12x2pcs;
Safety Warning
IMPORTANT!
It's crucial to power off the printer before conducting any maintenance work, including work on the printer's electronics and tool head wires. Performing tasks with the printer on can result in a short circuit, leading to electronic damage and safety hazards.
During maintenance or troubleshooting, you may need to disassemble parts, including the hotend. This exposes wires and electrical components that could short circuit if they contact each other, other metal, or electronic components while the printer is still on. This can result in damage to the printer's electronics and additional issues.
Therefore, it's crucial to turn off the printer and disconnect it from the power source before conducting any maintenance. This prevents short circuits or damage to the printer's electronics, ensuring safe and effective maintenance. For any concerns or questions about following this guide, we recommend submitting a technical ticket regarding your issue and we will do our best to respond promptly and provide the assistance you need.
Remove the Chamber Exhaust Fan
Step 1: Remove the rear panel cover and purge chute
You can refer to this Wiki to remove the panel cover and purge chute:
Step 2: Remove the active chamber exhaust
Carefully remove the active chamber exhaust. If it is damaged, use the spare exhaust. You can refer to this Wiki for removal:
Replace H2D Active Chamber Exhaust
Step 3: Remove the activated carbon air filter cover and activated carbon air filter
Since the soft screws need to be secured from this side later on, you can refer to this Wiki to remove the activated carbon air filter cover and activated carbon air filter:
Replace H2D Activated Carbon Filter Cover/Activated Carbon Filter
Step 4: Remove the chamber exhaust fan
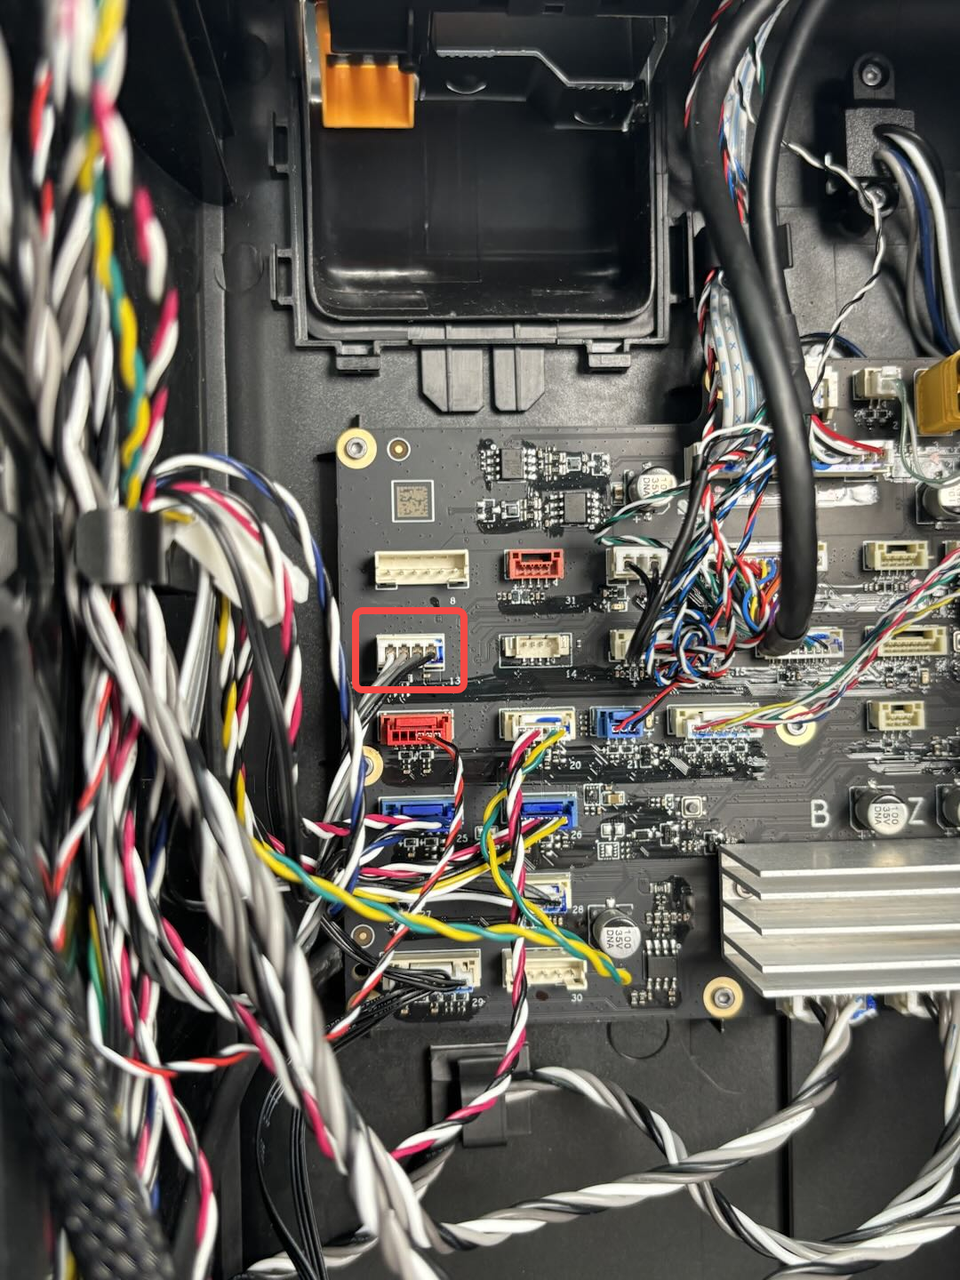
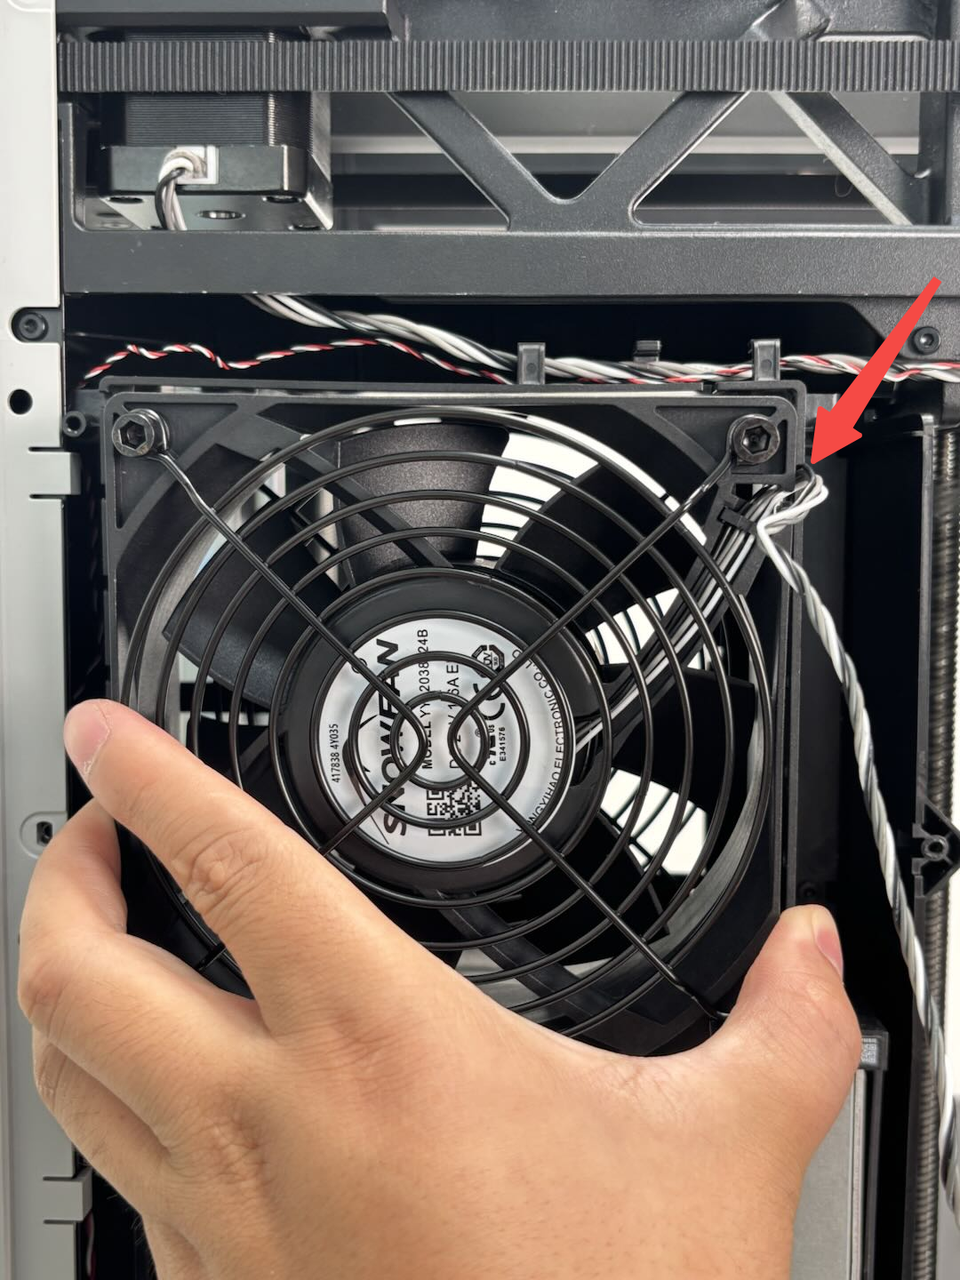
First, disconnect the chamber exhaust fan connector from the MC board, and remove the cable from the cable clip.
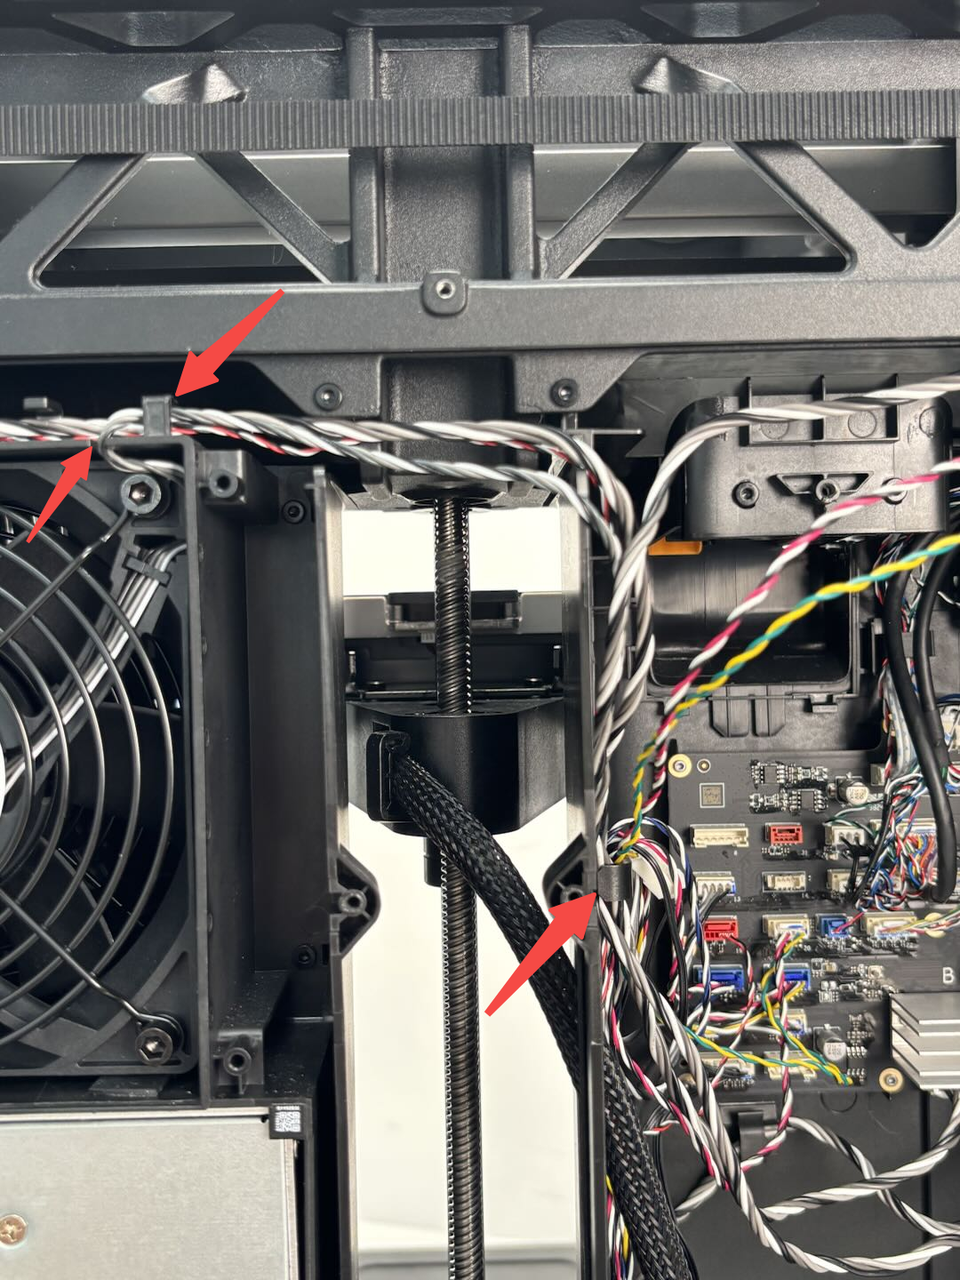
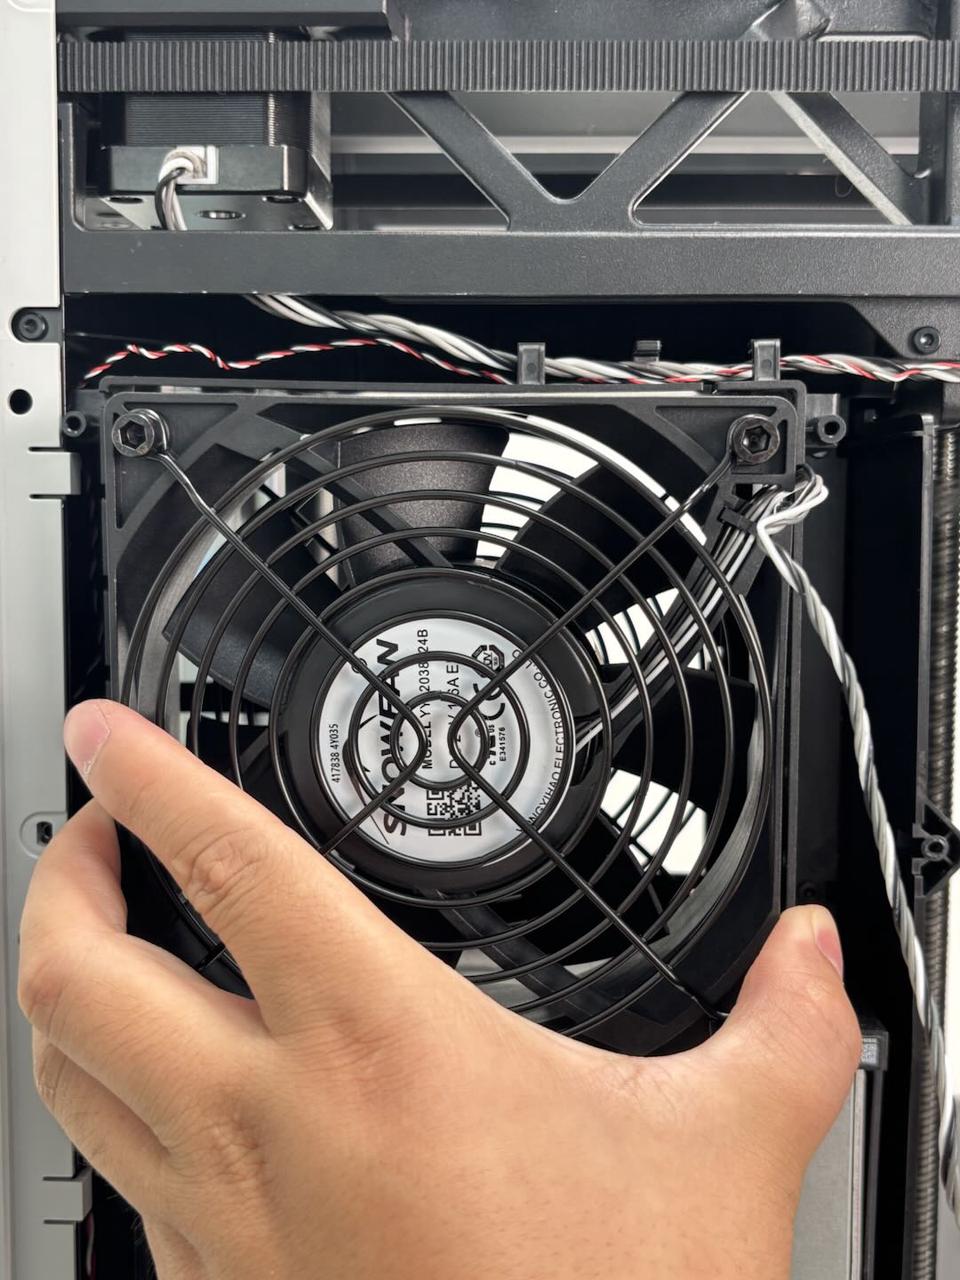
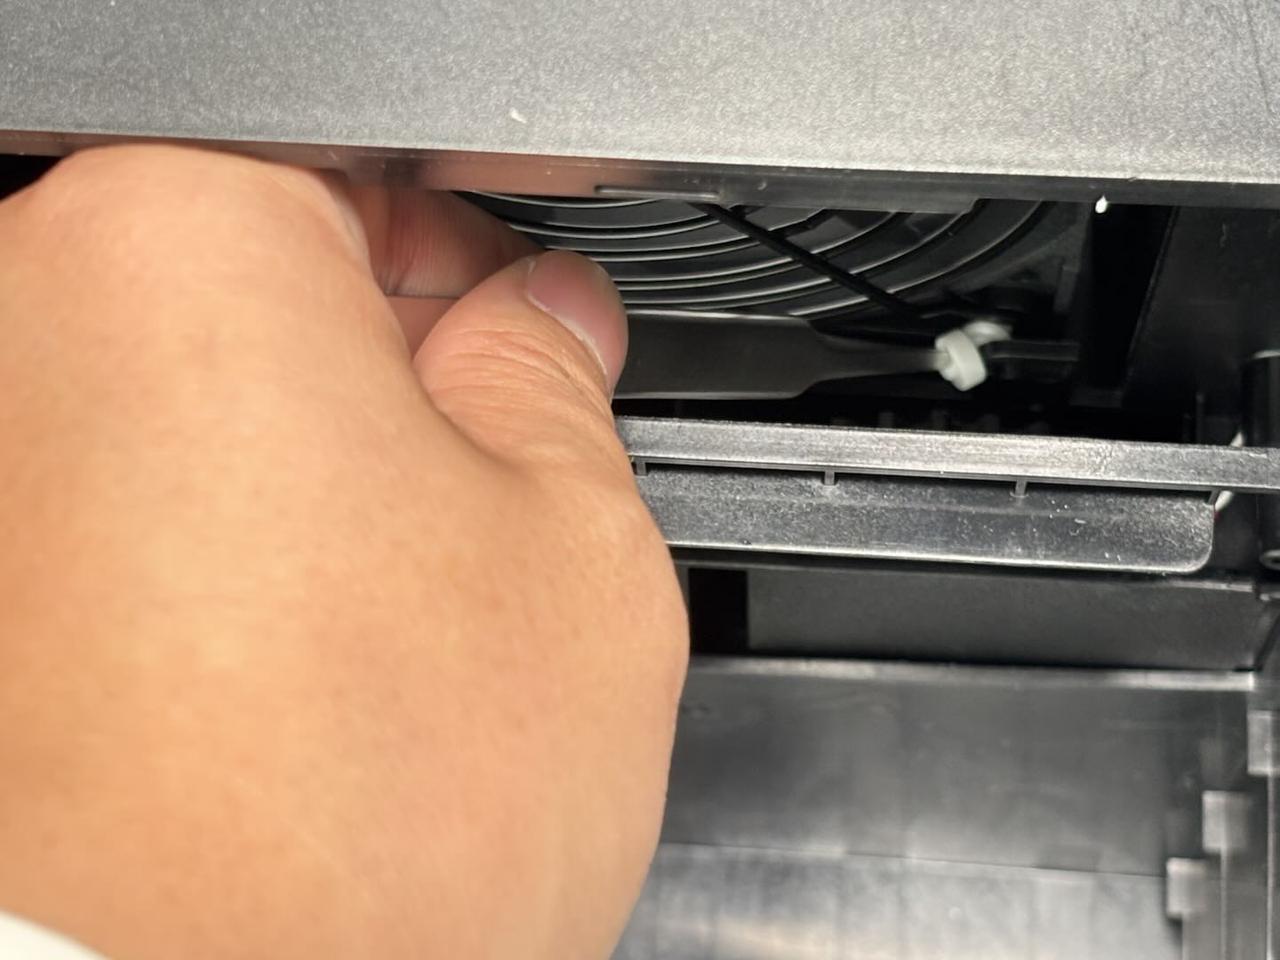
The chamber exhaust fan is fixed to the right inner lining with soft screws. You can firmly pull the fan out. After removal, take out the soft screws remaining on the inner lining
Soft screw may vary in color; this is normal and does not affect installation or performance.
Install the Chamber Exhaust Fan
Step 1: Install the chamber exhaust fan
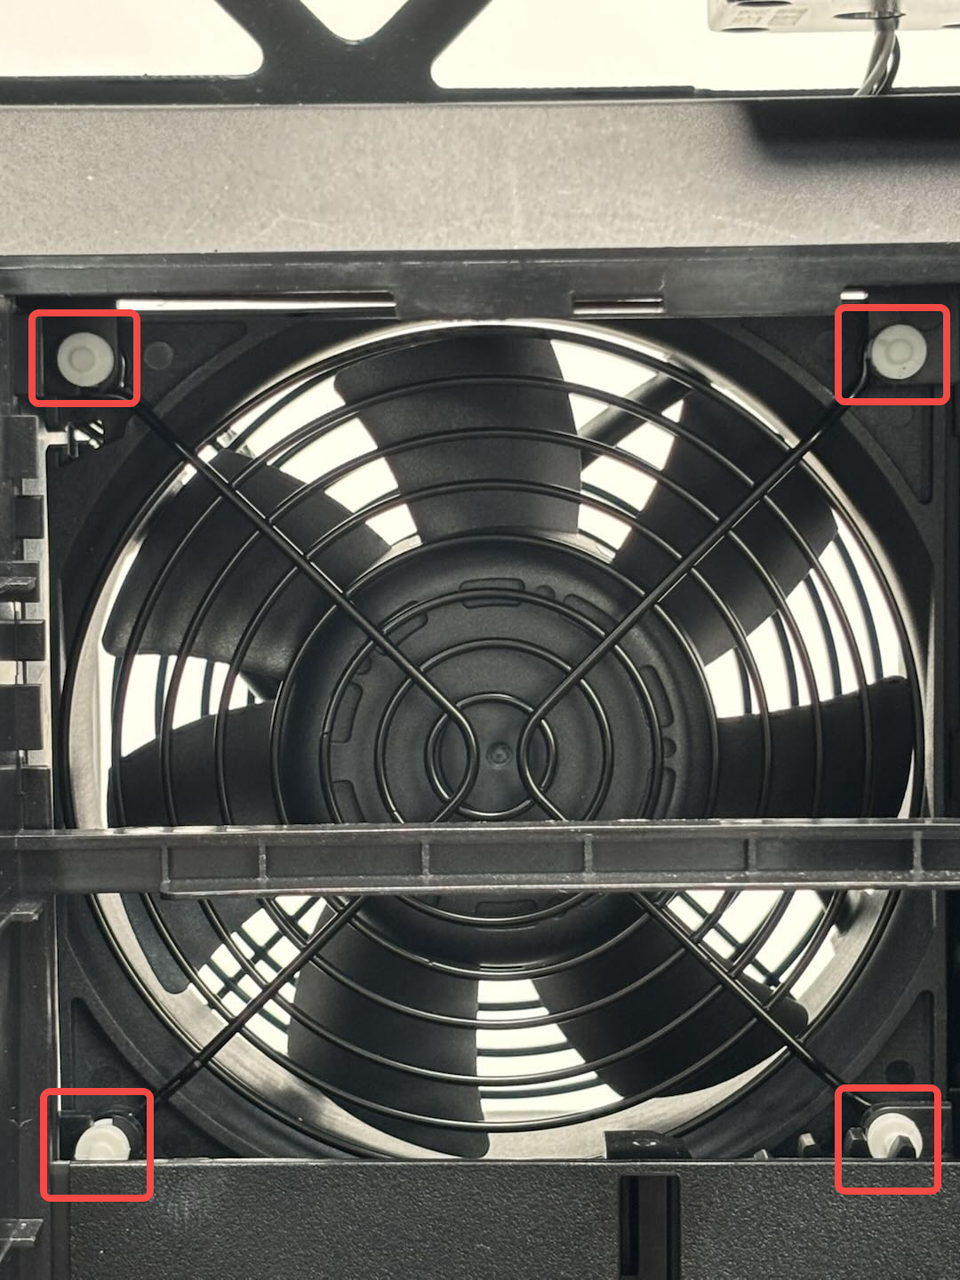
First, install the soft screws onto the chamber exhaust fan. Then, confirm the position of the cable, ensuring it is in the upper right corner. Push the chamber exhaust fan into the inner lining.
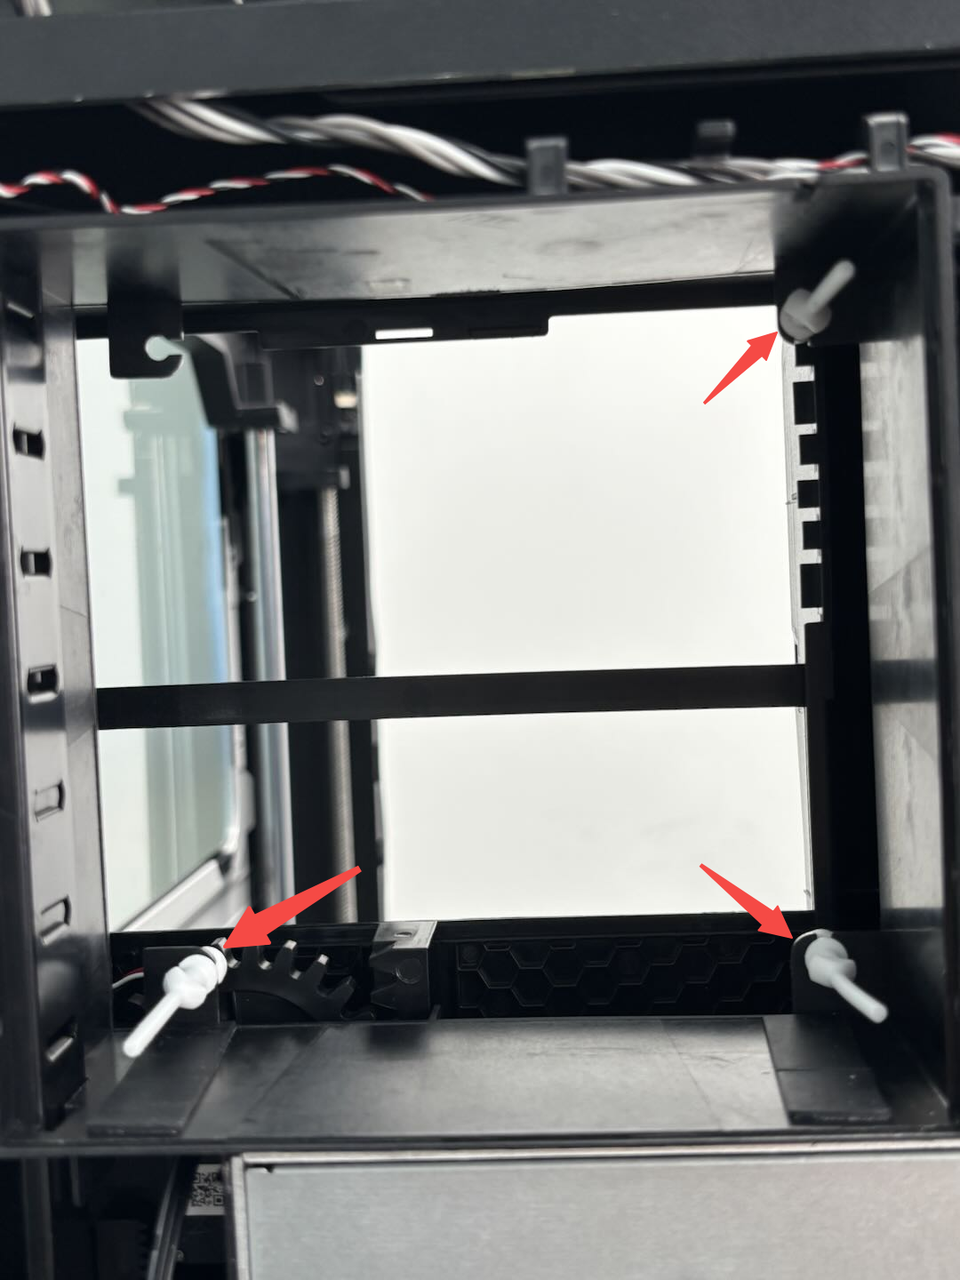
Use tweezers to pull the soft screws from the activated carbon air filter side. You can manually push the wind deflector downward to facilitate the installation of the soft screws. Start by using tweezers to pull the soft screw on the lower right corner and snap it into the inner lining’s clip, then install the soft screws on the lower left, upper right, and upper left in sequence.

Pass the cable through the notch on the inner lining, then secure it into the cable clips in sequence, and finally connect it to the MC board.


Step 2: Install the purge chute and rear panel
You can refer to the following Wiki to install the purge chute and rear panel:
Step 3: Install the active chamber exhaust
You can refer to the following Wiki to install the active chamber exhaust:
Replace H2D Active Chamber Exhaust
Step 4: Install the activated carbon air filter cover and activated carbon air filter
You can refer to the following Wiki to install the activated carbon air filter cover and activated carbon air filter:
Replace H2D Activated Carbon Filter Cover/Activated Carbon Filter
Verify the Functionality
Connect the power and turn on the printer, and check that the chamber exhaust fan operates normally.