


Bambu Lab P2S XY Belt
Couldn't load pickup availability
Use this text to encourage communication or promote sharing on social networks.
XY Belt Replacement Guide for the P2S
A step by step guide for replacing the belts which connect the P2S printhead to the A and B motors and move it on the XY plane
XY Belt
The P2S uses two XY belts, each 1444 mm in length and 7 mm wide. They connect the XY motors to the toolhead and drive its movement along the XY plane.
This procedure uses a traction method to replace the XY belts which requires a quick drying glue to be used.
The X/Y belt replacement parts include:
X/Y Belts × 2
Belt Holders × 4
M2.5×5 Screws × 6
When to Use This Guide
An XY belt is broken or torn
One or both XY belt is worn
Required Tools and Materials
- Replacement XY Belt
- H2.0 hex wrench
- Fast-drying glue
Safety Warning
IMPORTANT!
It's crucial to power off the printer before performing any maintenance work on the printer and its electronics, including tool head wires, because leaving the printer on while conducting such tasks can cause a short circuit, which can lead to additional electronic damage and safety hazards.
When you perform maintenance or troubleshooting on the printer, you may be required to disassemble some parts, including the hotend. This process can expose wires and electrical components that could potentially short circuit if they come into contact with each other or with other metal or electronic components while the printer is still on. This can damage the electronics of the printer and cause further damage.
Therefore, it's essential to switch off the printer and disconnect it from the power source before doing any maintenance work. This will prevent any short circuits or damage to the printer's electronics. By doing so, you can avoid potential damage to the printer's electronic components and ensure that the maintenance work is performed safely and effectively.
Removing the XY Belt
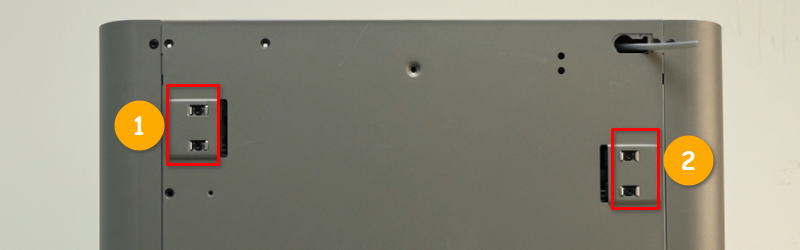
Step 1: Release the XY Tensioner
Loosen the XY tensioning screws on the back of the printer with an H2.0 hex wrench.
 Step 2: Remove the XY Belt Fixing Blocks
Use the H2.0 hexagon wrench to remove the three screws (M2.5x5) of the belt fixing block and remove the belt from the toolhead.
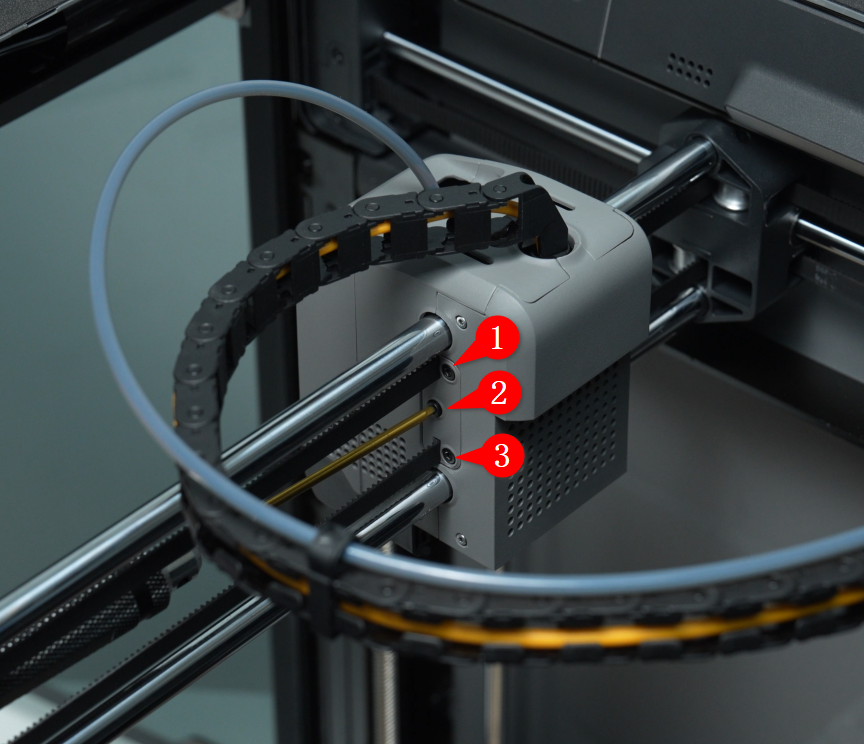 Do the above for both sides of the toolhead.

Then use a hex wrench to push against the belt holder, pushing it out slightly, and remove the belt holder from the belt. You can then take out the belt.
Note:
To simplify reinstallation, you only need to remove the two belt holders on one side; the other side can stay in place.
If the belt is not held tightly, you can simply push the belt out of the clamp without using a hex wrench.
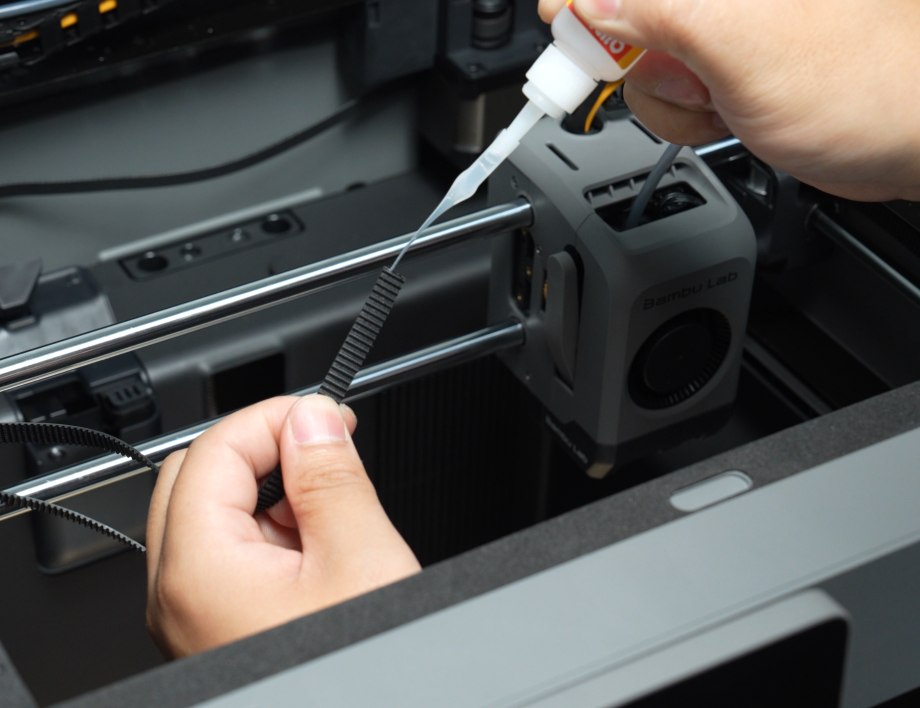
 Step 3: Bonding the Belt
With one end of the old belt freed, you can use the quick-drying glue to carefully align the end of the old belt with the replacement one and glue them together (with belt teeth facing the same direction).
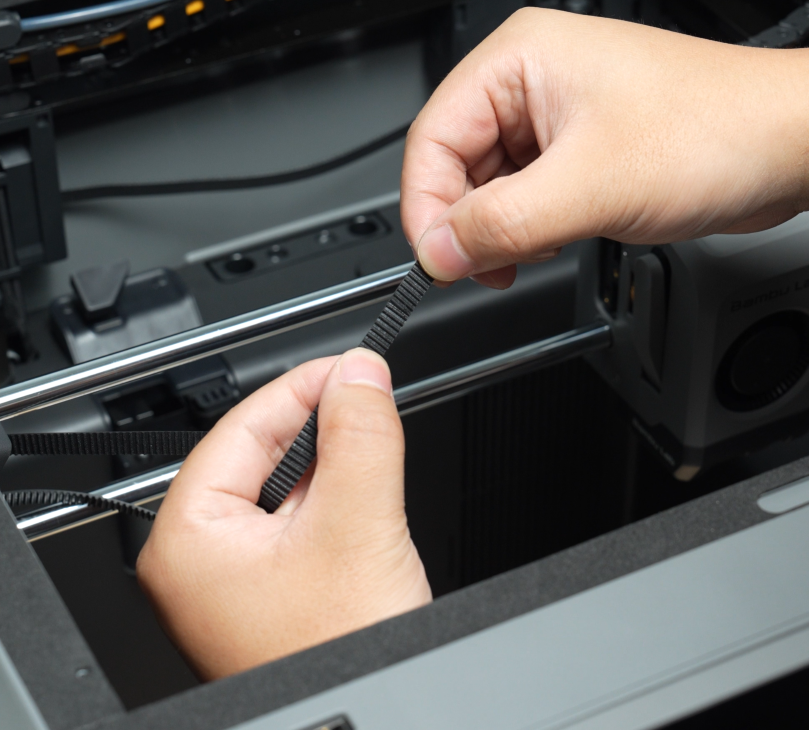
 Hold them together carefully until the glue has set.
 You can use to the same glueing method for replacing either or both XY belts.
Step 4: Install the Belt Fixing Block
Thread the free end of the new belt through the belt fixing block.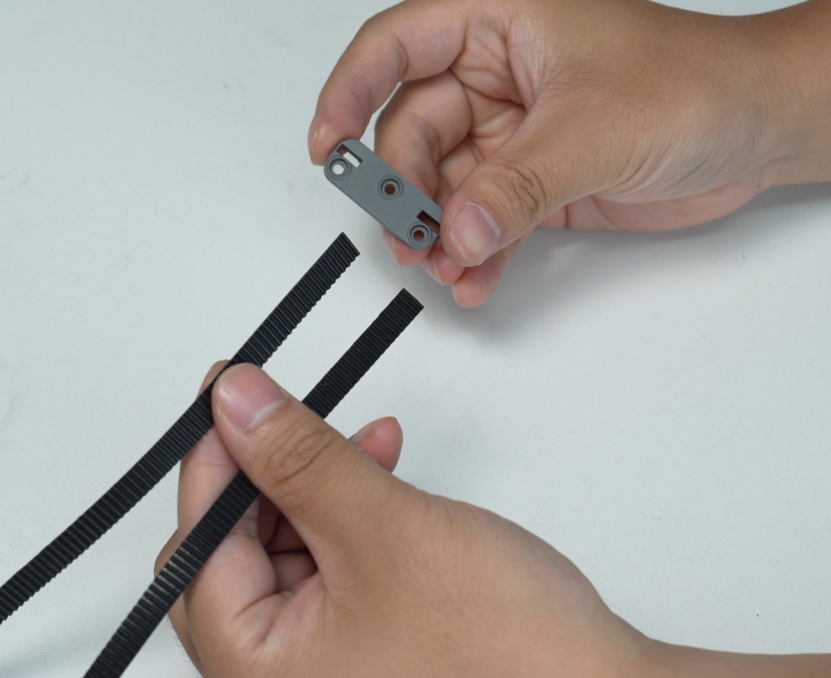 Then attach the belt holder to the end of the new belt, meshing their teeth together.
 Pull the belt so the holder is pulled through the belt fixing block and secured back in place.
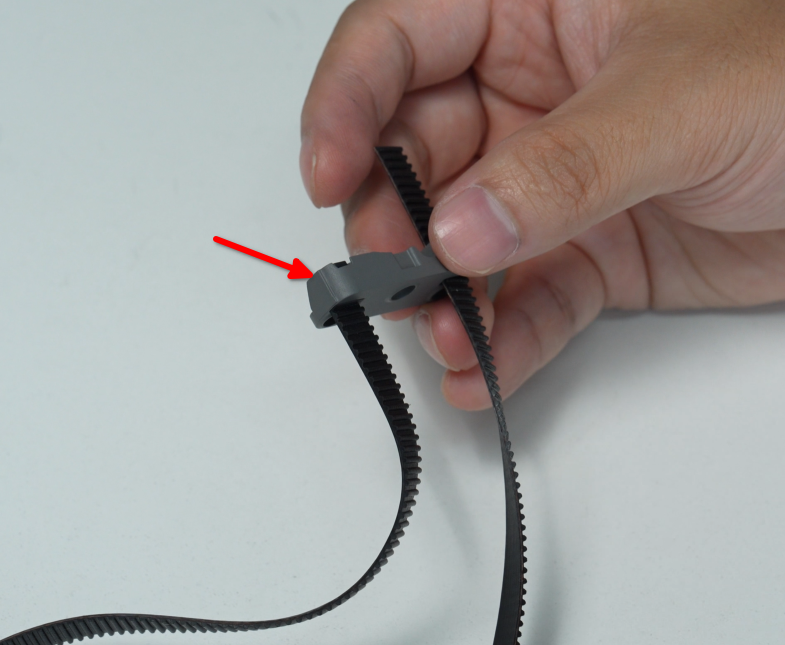
You can use to the same method for to fix either belt in place.
Installing XY belt
Step 1: Route the XY Belt
Pull the other end of the old belt, routing the new belt behind the old belt and through the idlers and motors which make up the belt path.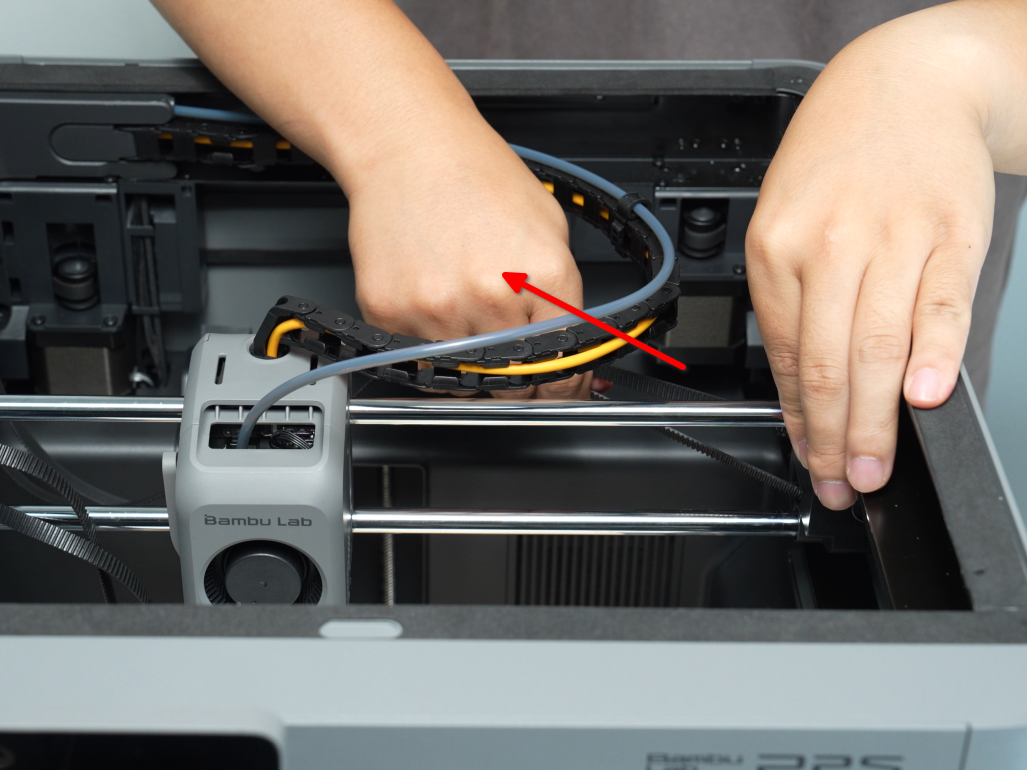
Work slowly and carefully. You can feed the belt by pushing from one side while pulling from the other, using the pull to guide the new belt fully through the printer.
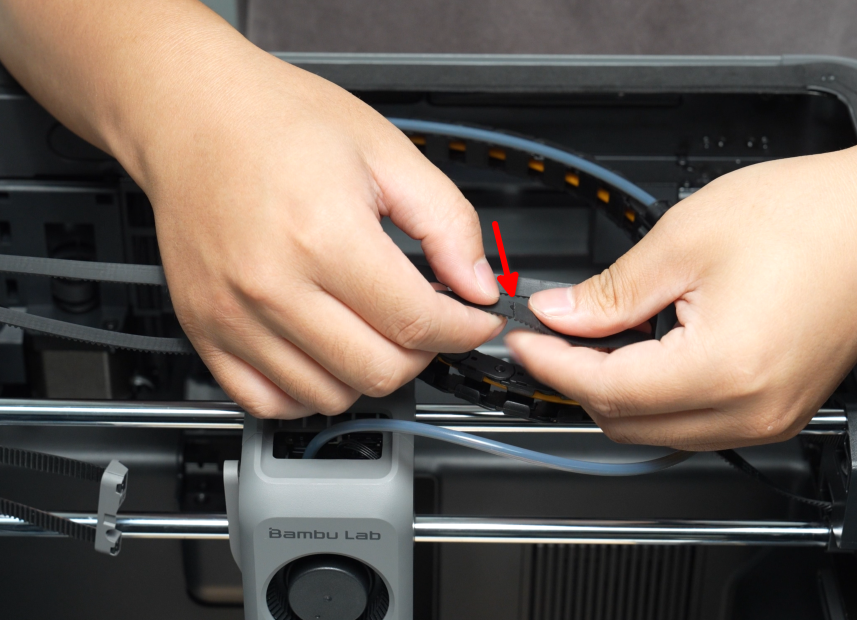
Step 2: Remove the Old XY Belt
When the new belt is fully routed through the belt path, you can tear the old belt from the new belt and clean remaining glue from the end of the new belt.
Remove the other end of the old belt from the other belt fixing block and belt holder (as was done in Step 1: Remove the XY belt fixing blocks).
Mount the new belt to this other belt fixing block and belt holder (as done in Step 3: Install the belt fixing block).
Step 3: Install the Belt Fixing Block
Install the belt fixing block onto the toolhead and tighten the three M3×8 screws using an H2.0 hex wrench. When installing one side, it is recommended to push the toolhead all the way over to the other side.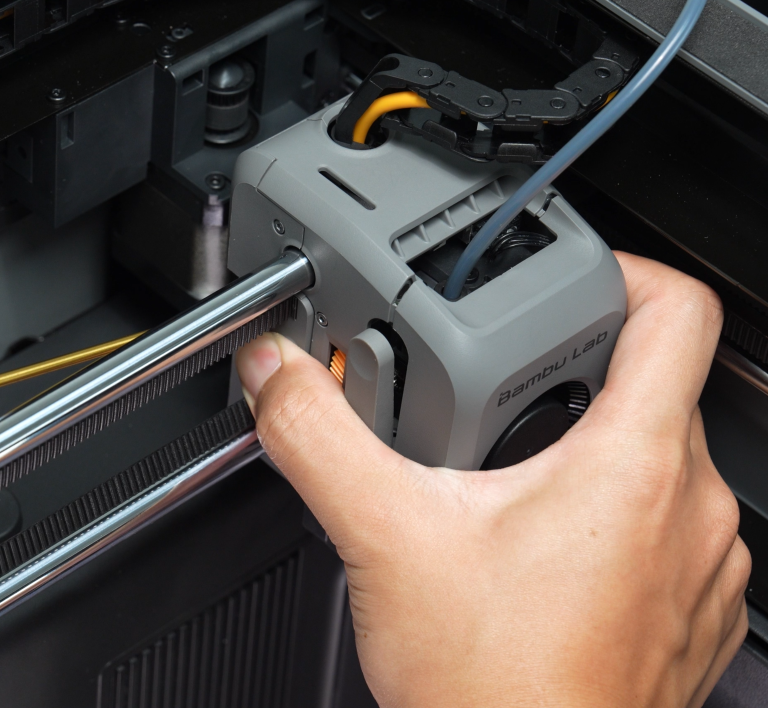 Because the belt is under tension, push and hold the belt clamp into place by hand, then tighten the three M3×8 screws with the H2.0 hex wrench. It’s recommended to tighten the middle screw first.
Step 4: Tighten the XY Belt Tensioner
Move the toolhead 3 to 4 times in each direction, then tighten down the XY Belt Tensioner screws on the back of the printer.
Please refer to: P2S Belt Tensioning | Bambu Lab Wiki
Verifying Success
The toolhead should move normally, the idler on the tensioner should rotate without unusual noise, and there should be no errors indicating abnormal or low belt resonance frequency.
If you encounter any problems, review the steps and check all connections before trying again.