


Bambu Lab Filament Buffer for the P2S
Couldn't load pickup availability
Use this text to encourage communication or promote sharing on social networks.
The filament buffer is a special component installed on the back of the printer to reduce tension fluctuations during the feeding process and ensure smooth filament feeding.
When to Replace: Ideal replacement when your P2S feed buffer is visibly damaged or Bamboo Lab technical support confirms it needs replacement
Core function: This P2S AMS feed buffer Minimizes tension fluctuations during filament feeding to maintain consistent, smooth material delivery for 3D printing
Simple Removal & Installation: Remove the existing buffer by unplugging the cable lock, removing two screws with an H2.0 Allen key, and disconnecting the PTFE tubing – then reverse the steps to install the new buffer
Verifying Functionality: After installation, initiate AMS loading operation to confirm success; If loading completes normally, the replacement is successful. If not,check that the buffer’s connection cable and the PTFE tube are properly connected, then try again
Direct Fit for P2S: Designed specifically for Bambu Lab P2S printer, this filament buffer unit replaces the original component and restores optimum feeding performance with minimal effort
Filament Buffer Replacement Guide for the P2S
When to Use This Guide
Analysis by Bambu Lan technical support confirmed that the filament buffer has to be replaced.
Required Tools and Materials
- New filament buffer
- H2.0 Allen key
Removing the Filament Buffer
Step 1: Remove the PTFE Tube
Press the left side of the material connector to remove the input PTFE tube.
Push the buffer slider in the output direction to expose the material tube connector. Then, press the connector and remove the output PTFE tube.


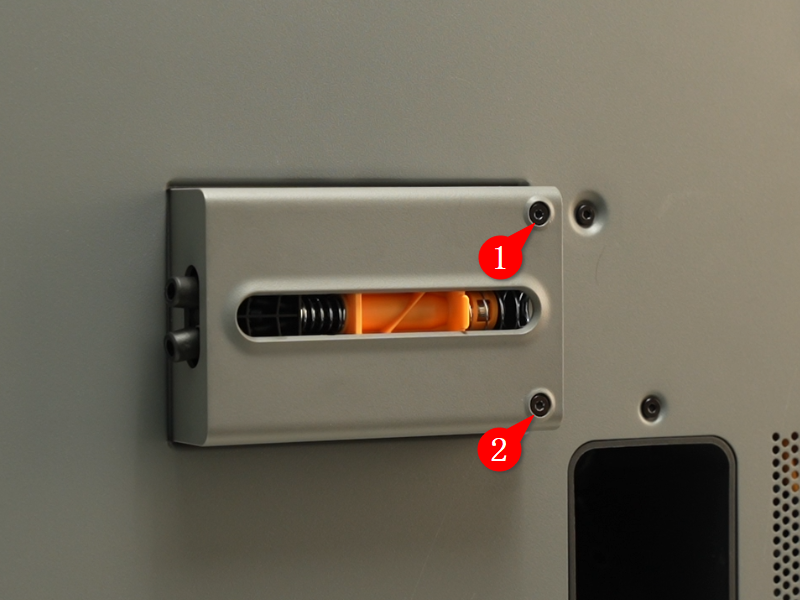
Step 2: Remove the Filament Buffer
Use an H2.0 Allen key to remove the two screws shown below.
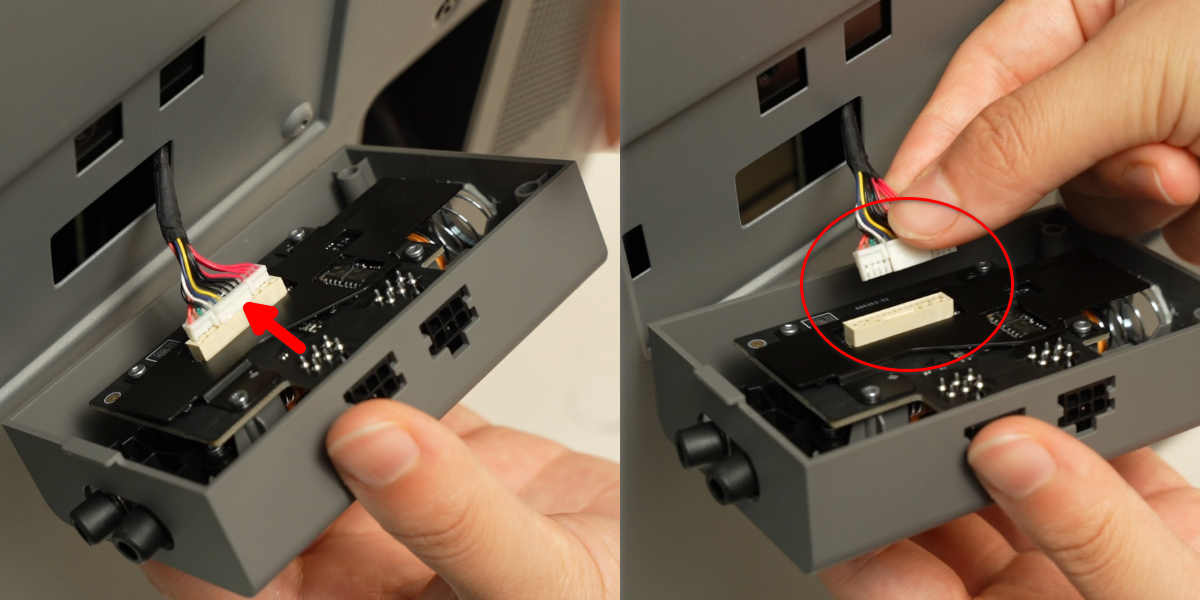
 Flip the buffer to expose the connecting cable. Then, press the connector lock by hand, unplug the cable, and remove the buffer.
Installing the Filament Buffer
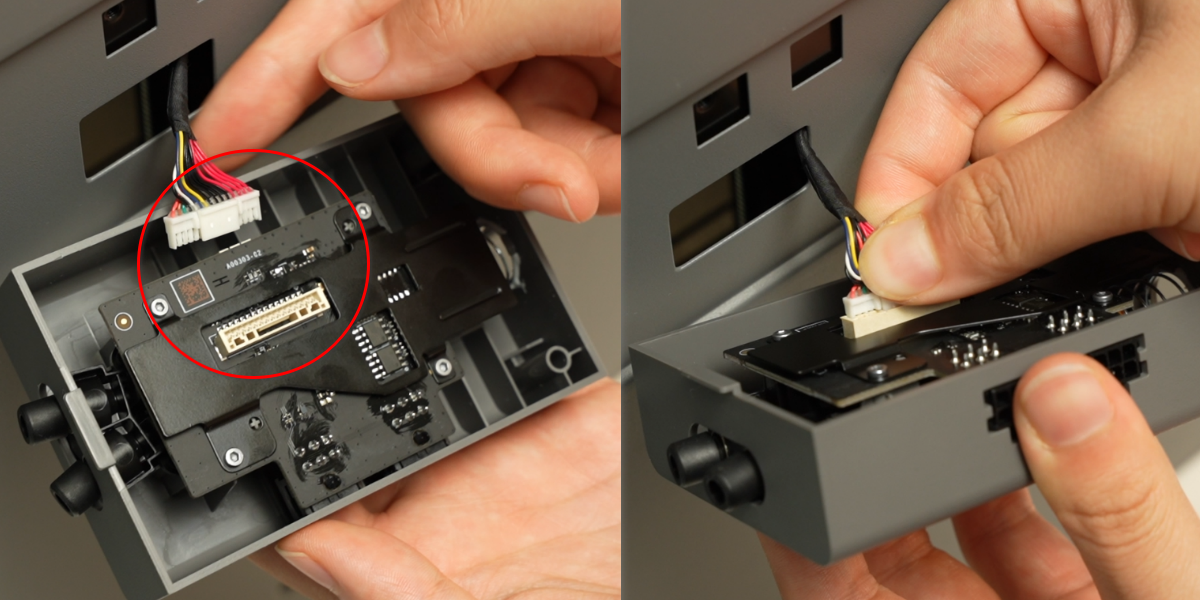
Step 1: Install the Filament Buffer
Connect the cable to the buffer’s connector, ensuring the lock is oriented correctly.
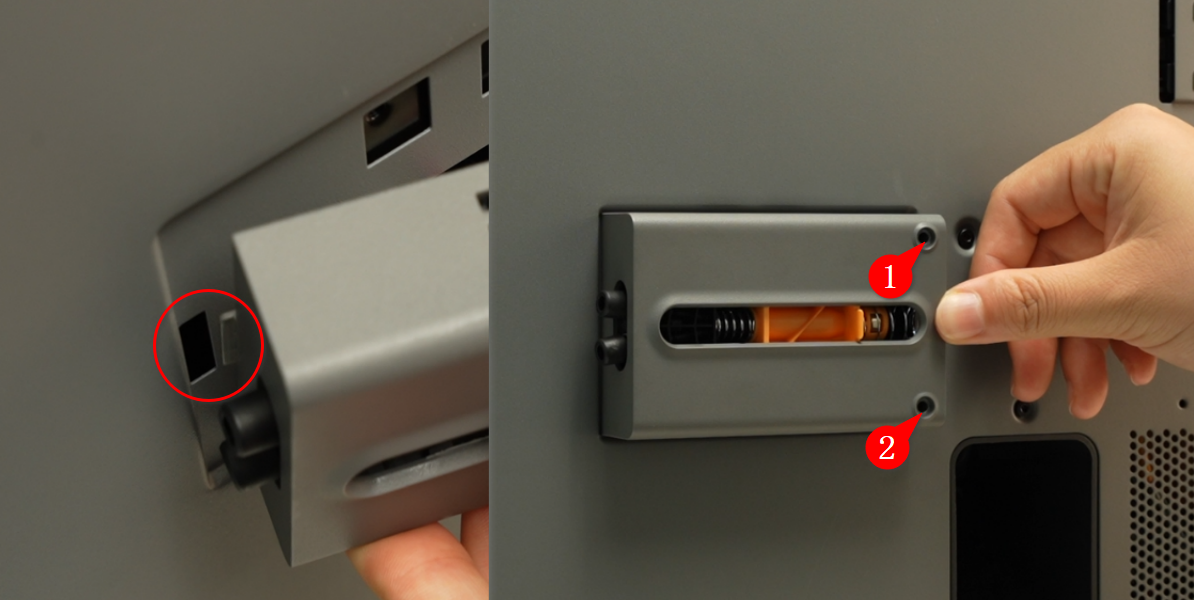
Snap the buffer into the mounting hole on the rear panel, then tighten the two screws with an Allen key.
Step 2: Connect the PTFE Tube
Reconnect the PTFE tube to both ends of the filament buffer.
Verifying Functionality
Turn on the printer, and use AMS to initiate a loading operation. If the loading process completes normally, the replacement was successful. Otherwise, check that the buffer’s connection cable and the PTFE tube are properly connected, then try again.