


Bambu AMS 2 Pro Filament Funnel
Couldn't load pickup availability
Use this text to encourage communication or promote sharing on social networks.
AMS 2 Pro Filament Funnel Cleaning
AMS 2 Pro Filament Funnel cleaning instruction and sensor troubleshooting
When to clean
Clean the funnel when the AMS 2 Pro (AMS) feeder's filament detection sensor fails.
Fault phenomena
Faulty filament detection sensor
Each feeder of AMS has a filament detection sensor. When you insert a small segment of filament into the feeder, the feeder will automatically pull the filament in after the detection sensor detects it. In daily use, you may encounter the following abnormal situations:
1.When you insert the filament, the feeder's filament detection sensor can not detect it;
2.When you insert the filament, the feeder's sensor detects it, but the motor still does not respond, the gears will not turn to pull the filament in;
3.When no filament is inserted, the feeder's sensor always detects that there is a filament inside;
You can tell if the issue is with the feeder unit by referring to the AMS 2 Pro LED Status Troubleshooting.

Filament detection sensor parts
This problem is usually caused by residual debris or broken filament at the sensor position, you can try to insert a segment of filament into the feeder and poke it several times. Then judge whether the sensor returns to normal state according to the LED status.
If the sensor remains abnormal, you can follow the following instructions to disassemble the feeding funnel and further troubleshooting and funnel cleaning.
* Faulty feeder's motor
If the feeder's sensor is normal, but the motor still does not respond after inserting the filament, it means that the feeder's motor is abnormal. Please refer to Troubleshooting- Step 4 to re-plug the motor cable.
When to use
The funnel-shaped feeding inlet is seriously worn, which has affected the loading and unloading filaments, or it has been confirmed by the after-sales team that the circuit board on it is faulty.
Tools and materials needed
1. H2.0/H1.5 hex key
2. Tweezers
3. Pliers
4. A length of filament
Safety warning and Machine state before starting operation
Turn the power OFF to the printer and disconnect the AMS 2 Pro connection with the printer.
Remove the AMS feeder funnel unit
¶Step 1 - Remove the first stage feeder from the AMS 2 Pro
Please refer to steps 1~7 of Replace AMS 2 Pro Feeder Unit to remove the AMS 2 Pro first stage feeder, and then disconnect the PFTE tube.

Step 2 - Remove screws
Remove 4 screws with the H1.5 hex key.

Step 3 - Detach the bottom base and the upper cover
Detach the upper cover from the bottom base, remove the springs, and disconnect the cable from the circuit board.
.jpg)
Step 4 - Knock out the shaft
Knock out the feed funnel assy shaft with the H1.5 hex key and pliers, pay attention to the place where the shaft comes out, and leave a place for avoidance.

Step 5 - Remove the shaft, and take off the AMS 2 Pro feeder funnel unit
Remove the shaft with pliers, and then take off the AMS 2 Pro feeder funnel unit.

Troubleshooting
¶Step 1 - Detach the circuit board

Step 2 - Check the sensor magnet
Take out the sensor magnet and spring and inspect the magnet, as shown below.

Step 3 - Clean the feeder funnel
Repeatedly insert a length of filament into the feeder to clear any blockage in the channel and the hole.

If the sensor remains abnormal, it indicates that it is faulty and you need to replace the feeding funnel unit.
Step 4 - Check the motor
Re-plug the motor cable. If the motor remains not working, then the whole feeder needs to be replaced.

Step 5 - Put back the magnet and install the circuit board
Place the magnet back with round head down into the hole, followed by the spring. Then, install the circuit board.

Install the AMS feeder funnel unit
Step 1 - Install the AMS 2 Pro feeder funnel unit and the shaft
Install the AMS 2 Pro feeder funnel unit and the shaft, the shaft can be knocked into place with pliers.

Step 2 - Install the spring, and connect the cable
Install the spring to the feed funnel assy and connect the cable to the connector on the circuit board.
Step 3 - Assemble the upper cover and the bottom base
Adjust the position of the gear sets, and mount the upper cover and the bottom base. During the process, use tweezers to adjust the position of the spring and install its other end to the boss on the base.

4.Step 4 - Check the gear sets position
After mounting in place, double-check the position of the gear sets(should be as shown in the pictures below), if the positions are not correct, please adjust the positions of the gear sets and remount the upper cover.

Step 5 - Lock Screws
Lock in 4 screws to fix them, just lock the screws in place, and do not tighten them vigorously to prevent slipping.

Step 6 - Install the first stage feeder to AMS 2 Pro
Please refer to steps 8~14 of Replace AMS 2 Pro Feeder Unit to connect the PTFE tube and install the first stage feeder to the AMS 2 Pro, and then assemble the AMS 2 Pro.
How to verify completion/success
Pre-loading
When the AMS 2 Pro is idle, insert the filament into the feeder, AMS can perform automatically pre-loading (the feeder sends the filament to the AMS filament hub and then pulls it back).
Reading RFID
Set the Reading RFID function in the screen "Settings" - "AMS Options".
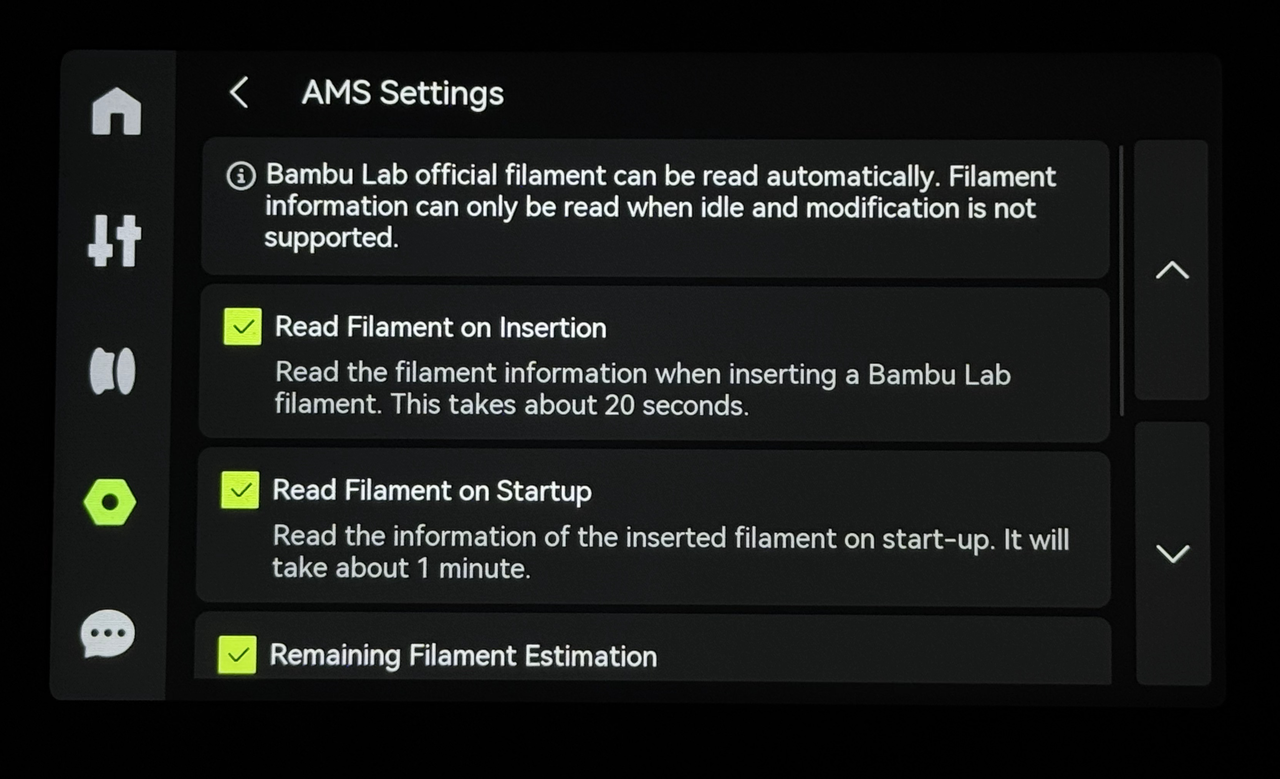
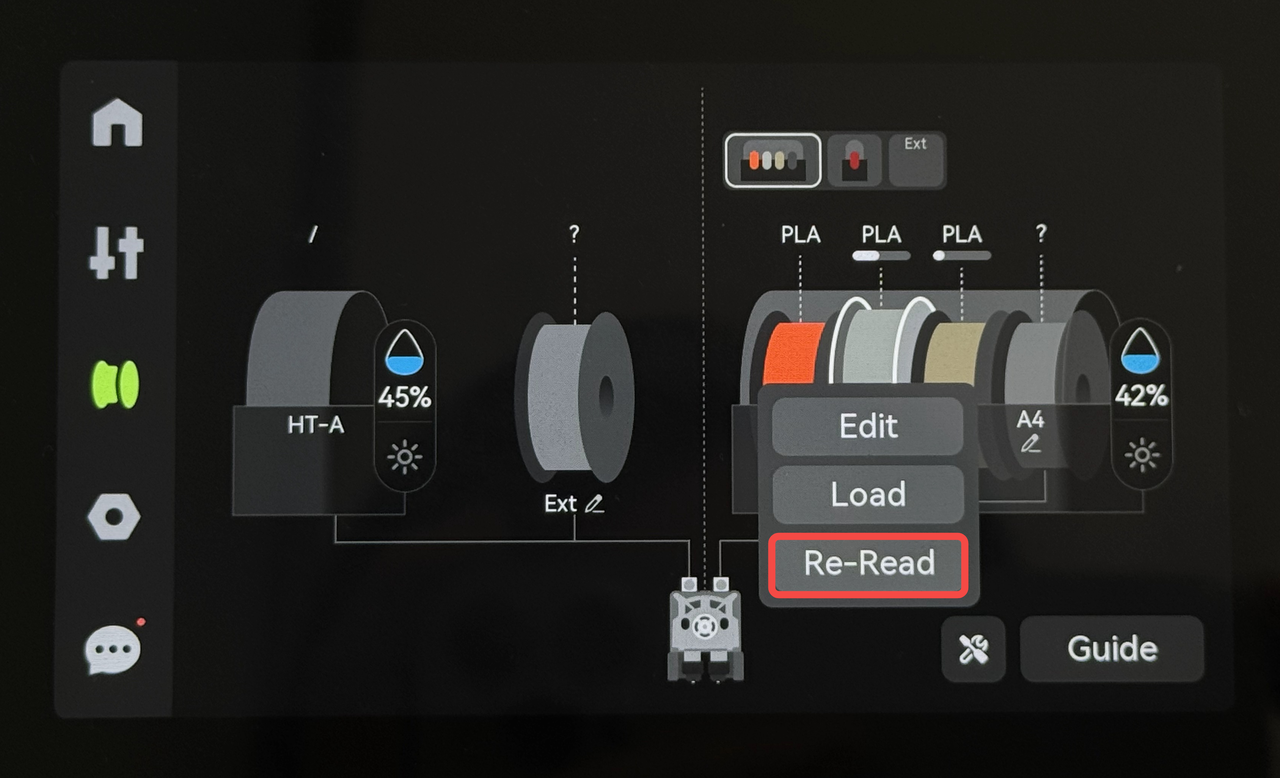
After configuration, the AMS 2 Pro can automatically read RFID after inserting the filament, or allow manual RFID reading by selecting the corresponding slot and clicking "Re-Read." Additionally, after restarting the AMS, it can automatically read the RFID information of the inserted filament.
If above functions are working, the replacement is complete and successful. Otherwise, check the connections of the cables and filament tubes, if no error is found and still malfunctions, contact the service team for solution advice.