

This bl touch guidebook is for Creality V1 mainboard. It includes but not only limited to Creality CR-10, and Creality Ender 3 3D printers.
① Packing List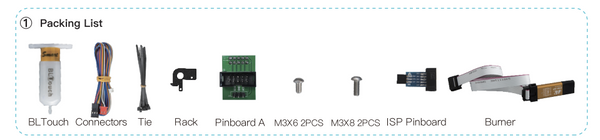
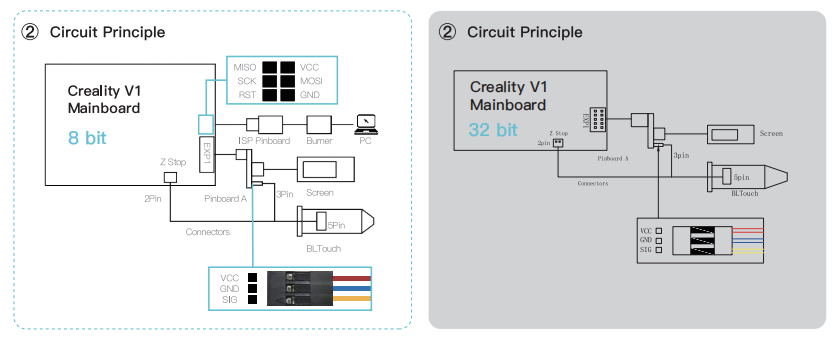
②Circuit Principle
③ Update Firmware 8 bit
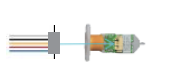
1. Connect ISP Pinboard and Burner.
2. Open the control box and find out the mainboard.
3. Insert ISP pinboard into the mainboard 2X3 pins as the sign shows.
4. Insert the burner into computer USB port.
2. Open the control box and find out the mainboard.
3. Insert ISP pinboard into the mainboard 2X3 pins as the sign shows.
4. Insert the burner into computer USB port.
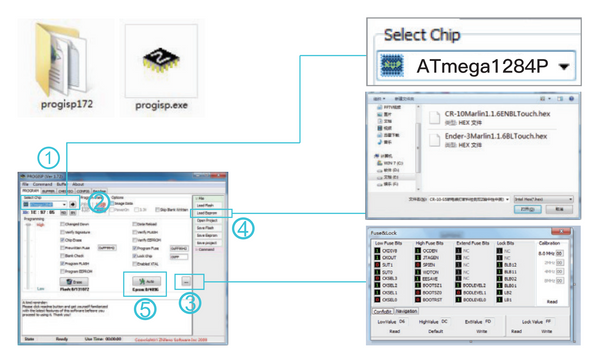
1. Open progisp.exe
2. Select Chip ATmega 1284p.
3. Click …→Sot Low Value-D6, HighValue=DC, ExtValue=FD→Click Write and close the window.
4. load Flash→Select .hex file.
5. Click Auto to update firmware, wait until it finishis, then close.
6. Unplug the lSP Pinboard from mainboard.
2. Select Chip ATmega 1284p.
3. Click …→Sot Low Value-D6, HighValue=DC, ExtValue=FD→Click Write and close the window.
4. load Flash→Select .hex file.
5. Click Auto to update firmware, wait until it finishis, then close.
6. Unplug the lSP Pinboard from mainboard.
③ Update Firmware 32 bit
1. Double-click to open computer-right-click to format SD card.
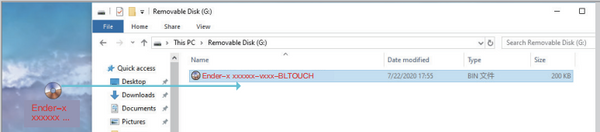
2. Copy the firmware to the SD card.
Note: the SD card only holds one firmware file. Every firmware files is different for every machine!
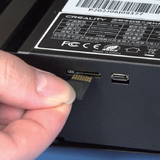
3. Insert SD card.
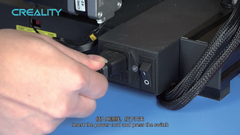
4. Insert the power cord and press the switch.

5. Wait for the brush firmware to complete (about 10 seconds).
④ Install BLTouch
1. Insert connectors into 5 Pin Port
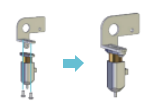
2. Install BLTocuh on the rack with2 M3X6 screws

3. Loosen all fan cower screws. Install the frame on the corresponding positian with 2 M3X8 screws.
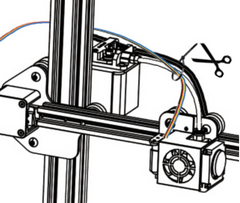
4. Secure the cable to the guide tube and fix with a cable tie and bypass the rear side of the gantry.
⑤ Circuit Wiring 8 bit

1. Unplug the screen cable, connect the pinboard A to the screen port (EXP1).
2. Insert the screen cable into 10 pins port.
3. Insert the connectors to the 3 pins port as the sign shows.
4. Unplug the Z limit switch(Z-stop port), and insert the connectors.
2. Insert the screen cable into 10 pins port.
3. Insert the connectors to the 3 pins port as the sign shows.
4. Unplug the Z limit switch(Z-stop port), and insert the connectors.
⑤ Circuit Wiring 32bit

1. Unplug the screen cable, connect the pinboard A to the screen port (EXP1).
2. Insert the screen cable into 10 pins port.
3. Insert the connectors to the 3 pins port as the sign shows.
4. Unplug the Z limit switch(Z-stop port), and insert the connectors.
2. Insert the screen cable into 10 pins port.
3. Insert the connectors to the 3 pins port as the sign shows.
4. Unplug the Z limit switch(Z-stop port), and insert the connectors.
⑥ Platform Adjustment 8 bit
Note: The actual sequence of operation depends on the machine model. 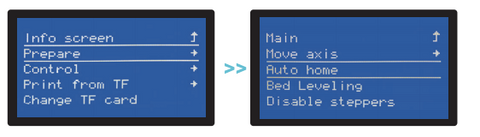
1.Prepare→Auto home, and wait untl it stops.
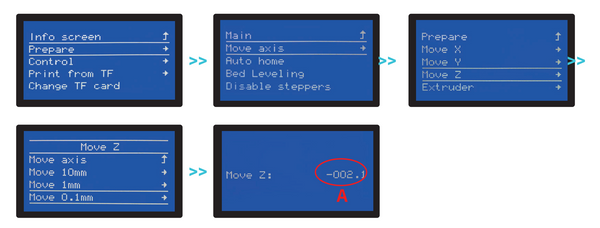
2. Prepare→Move axis→Move Z→Move 0.1mm→Rotate the knob unti the distance between them is about 0.2mm(as a sheet of A4 paper), write down the value of A.
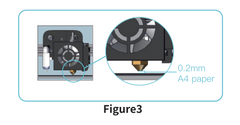
3. Rotate the knob until the distance between them is about 0.2mm(as a sheet of A4 paper),Write down the value of A(For example, figure 3)
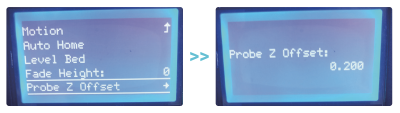
 4. Control→Motion→Z Offset→write down the value of B, then rotate the knob until it comes out as: C=B+A. Retum Control and Select Store settings.
⑥ Platform Adjustment 32 bit

1.Prepare→Auto home, and wait until it stops.
Rotate the knob until the distance between them is about 0.2mm(as a sheet of A4 paper).
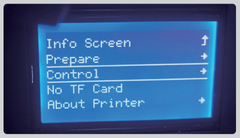
2. Select control.
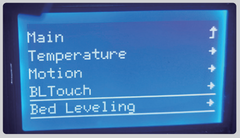
3. Select Bed leveling.
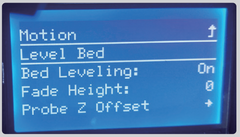
4. Select Level Bed
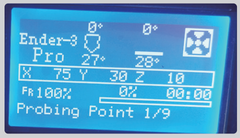
5. leveling 9 points
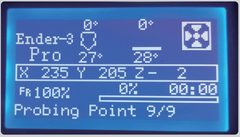
6. points leveling completed
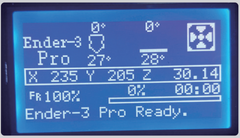
7. automatic leveling is completed, the machine is ready to be OK
Note: Every machine has its own operation interface.
⑦ Software Settings
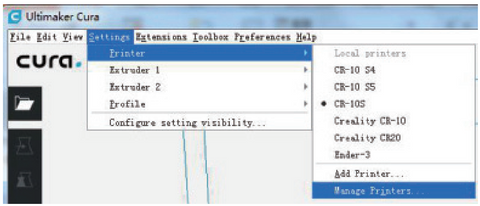
1.Open Cura
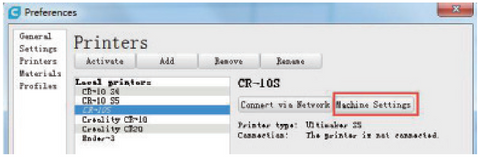
2.Settings→ Printer-Manage Printers
3.Machine Settings
4.Change“G28”to“G28 G29”